
Happy Friday! I’m super excited to have the talented Gilly from Colour Saturated Life with us today sharing a DIY Vintage Style Cake Stand. Oh the possibilities!
Hi Live Laugh Rowe Readers! I’m Gilly from Colour Saturated Life and I am so excited that Kelly asked me to come and share one of my DIY projects with you today. For those of you that aren’t familiar with me I am an Australian Blogger and when I am not blogging about my furniture makeovers I like to share DIY tutorials, easy art projects and interior design….with a little bit of insight into my little place in the world thrown in the mix. I am all about creating unique things for my home and today’s project is a perfect example of that!
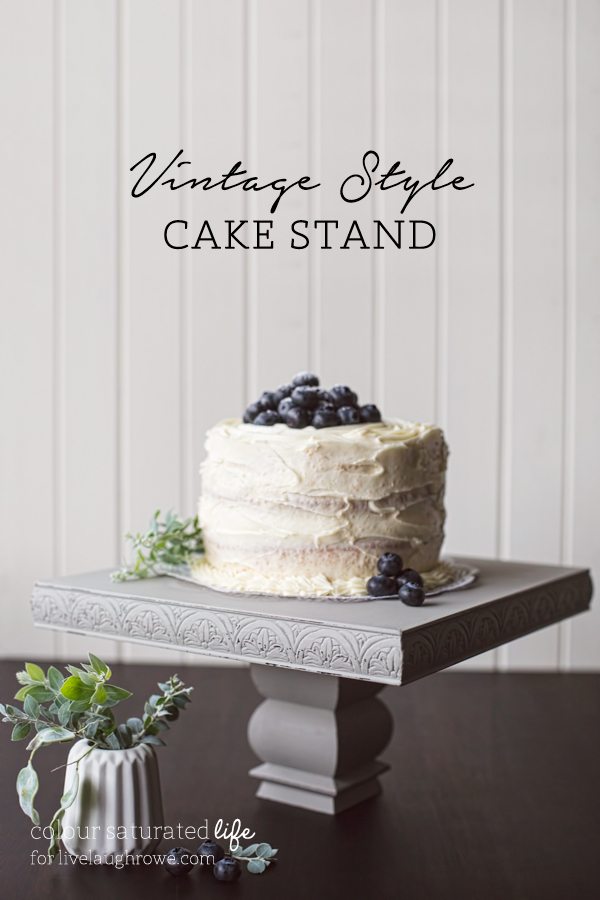 I am always frustrated because I can never find things that quite fit into my style….everything seems a little bit too generic…..anyone else have that problem? So I find myself just making things that are unique to me and fit my home perfectly. I love baking…..I don’t blog about food but one of my favourite past times is baking cakes with my daughter. I always like to make things pretty and the best way to finish off a cake is to place it onto a cake stand. Unfortunately I struggle to find cakes stands I like, so that brings me to today’s DIY…..a Vintage Style Cake Stand.
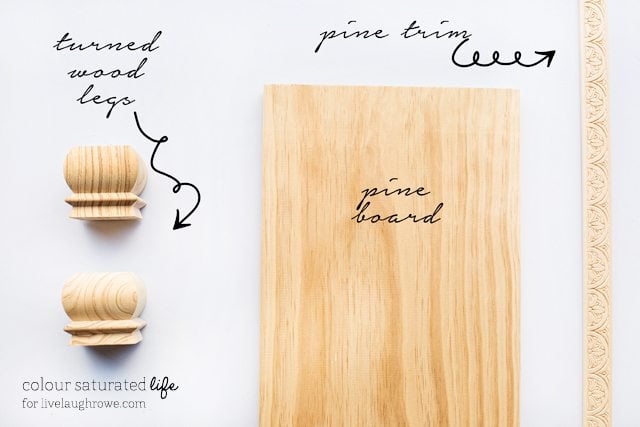
Here’s what you will need to create one of these yourself:
Pine Board
Decorative Pine Trim
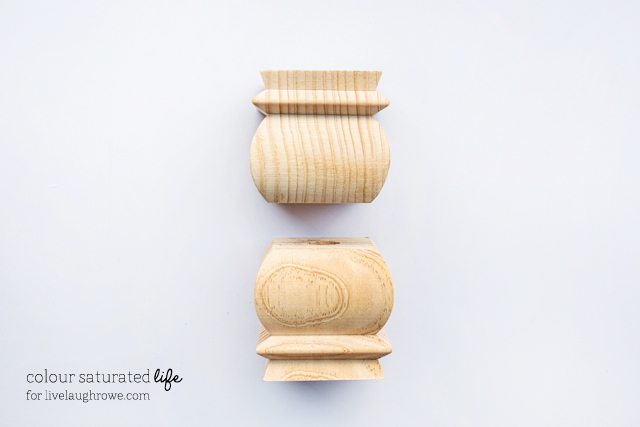
2 x Pine Turned Feet
Miter Box
Nail Gun
Masking Tape
Saw
Ruler
Drill & Drill Bits
Sander
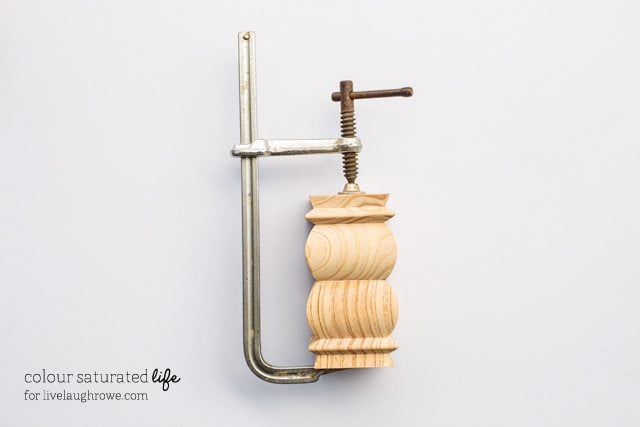
Clamp
Wood Glue
Wood Filler
Wood Dowel
Stain & Varnish
Paint
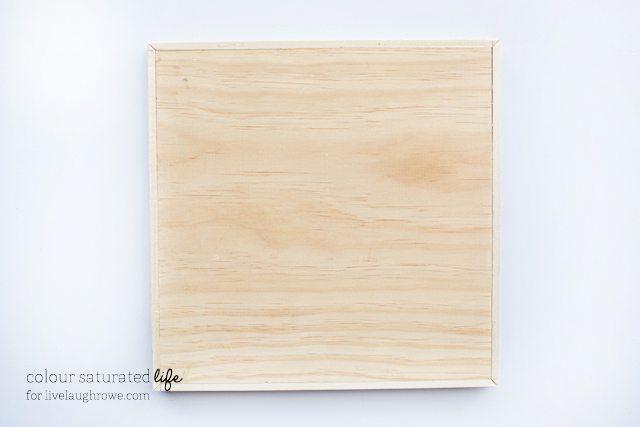
 Start by cutting your pine board to size (you want to make it square, mine was about 11 1/2 inches on each side, enough room for an average size cake). Here’s a tip: Use Masking tape along your cut to prevent splintering.
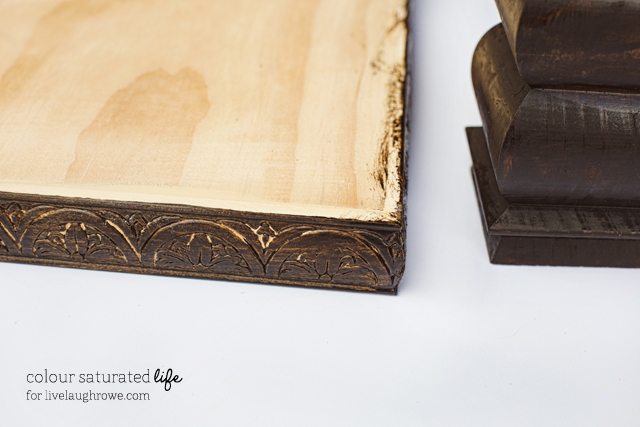
Now you need to cut four lengths of the decorative pine trim the same length of the pine board sides using your miter box to cut mitered corners on each end. Attach these to the edge of your pine board (like you are creating a frame) using wood glue and your nail gun.
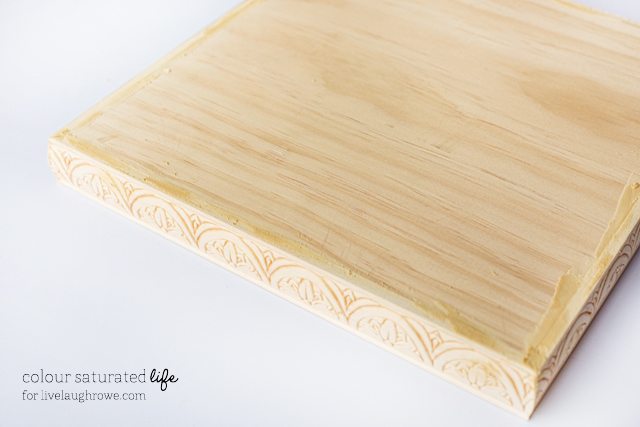
 Fill in any gaps with wood filler, let it dry, then sand.
Next take your two turned feet and glue the two tops together.
 Clamp these until the glue is set.
 Once the glue is dried use your stain and varnish to coat the edges of the top of the cake stand and the leg. This step is done so that when you distress the paint you will see dark wood underneath but if you prefer pale wood then you can skip this.
 Now you need to attach the top to the leg. Find the center of the top of the cake stand by drawing lines from corner to corner, making an “x”. Drill in the center point with a drill bit the same size or slightly smaller than the wood dowel, you want a tight fit.
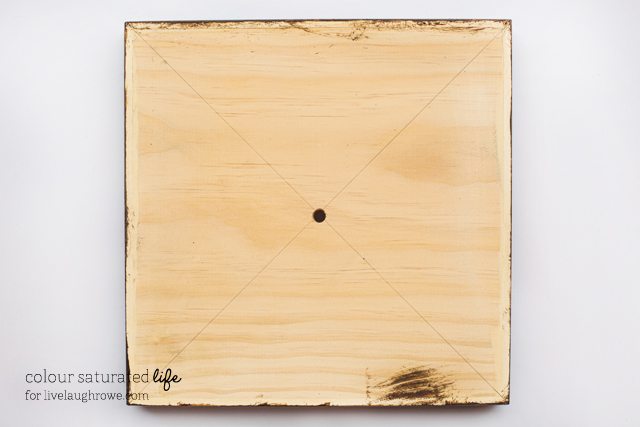 Drill through the middle of your cake stand leg (the turned feet I bought already had a small hole in the middle so I just drilled here)
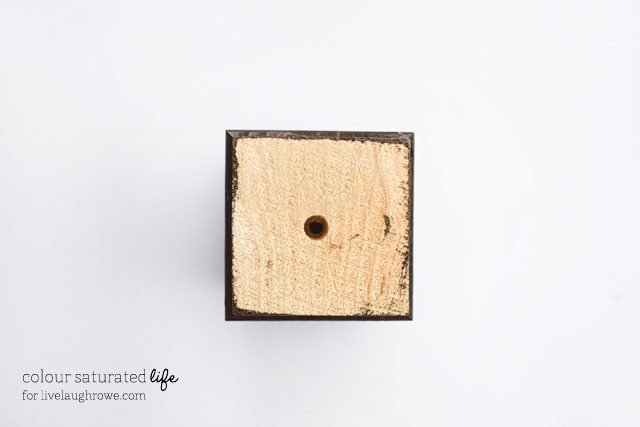 Place the top of your cake stand on the leg and squirt some wood glue in the holes before inserting your dowel, use a hammer to make sure it goes in far enough. Leave to dry.
Once it is dry sand over the dowel hole on the top of your cake stand to make sure you have a smooth finish. Paint your stand your desired colour. I used Miss Mustard Seed Milk Paint in Schloss which is a beige-grey colour. I paint furniture with this paint and happen to love working with it but you can use any paint. Once your paint is dry lightly distress your edges.
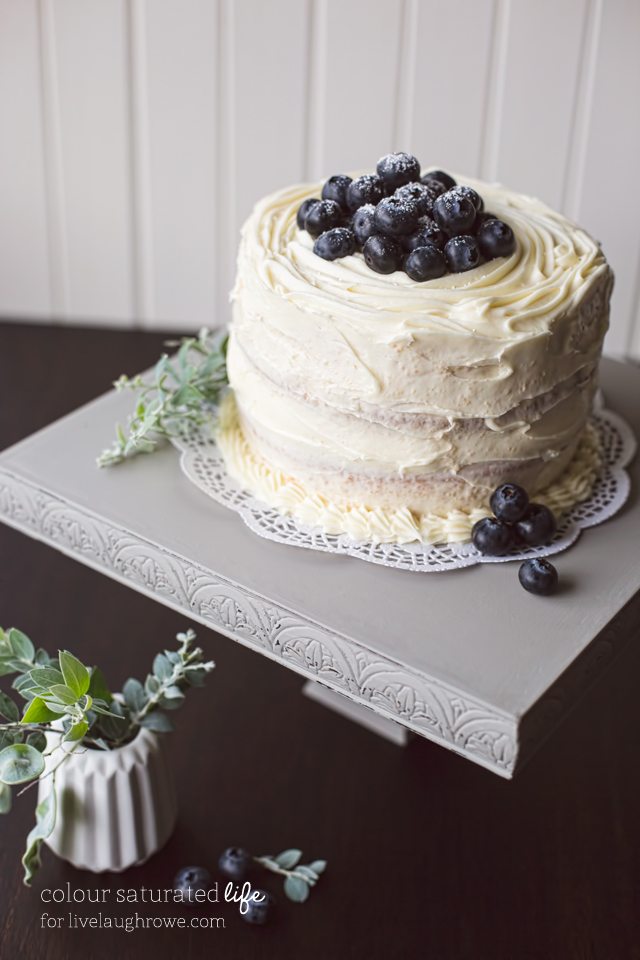
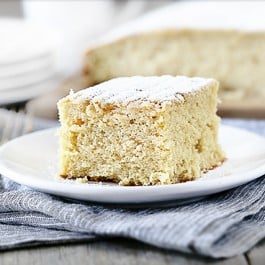
Finally you need to bake a cake to put on your cake stand………..or if you ran out of time buy a ready-made one and slap some icing and blueberries on it and pretend at being a cake decorator.
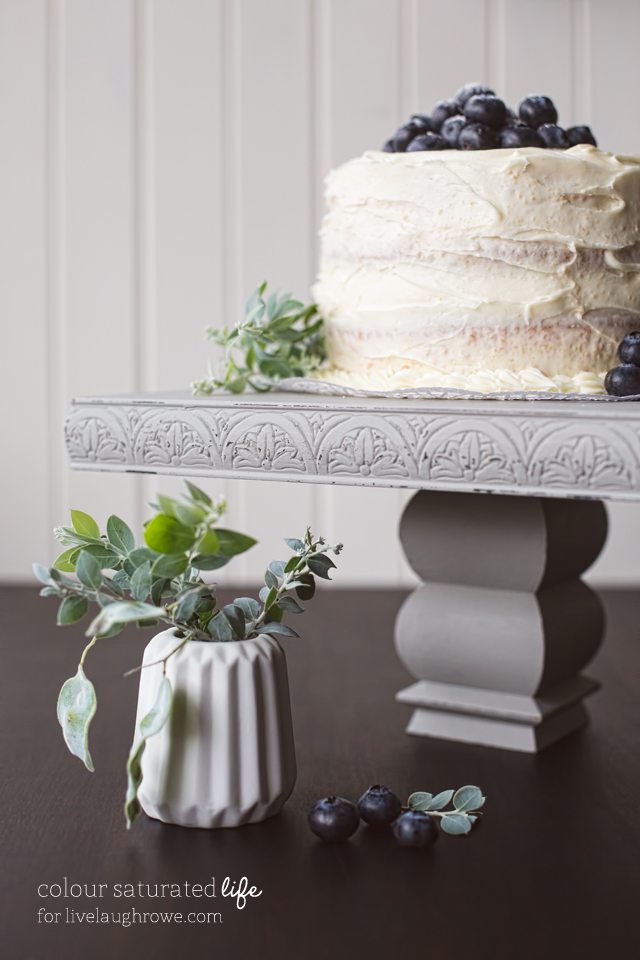
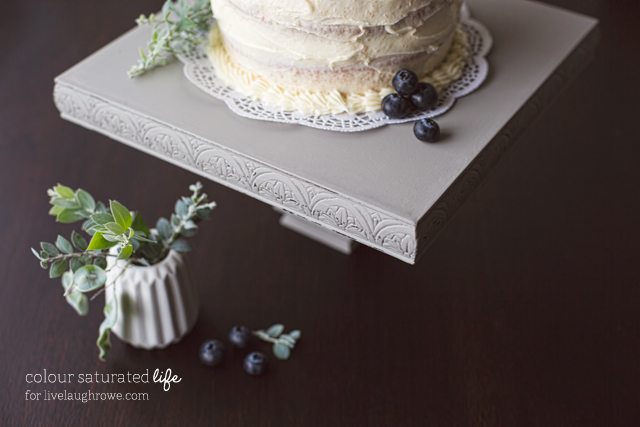
 Now I have a cake stand that is perfectly my style! I love using cake stands not just for displaying cakes but just as a decorative item in my kitchen and I think this would also look good with a glass cloche on top and something pretty inside, don’t you think?
Thank you Kelly for letting me share with your readers, it is a huge privilege to share on a blog I love to read myself.
If you want to follow along with me you can find me sharing here:
Blog | Instagram | Pinterest | Facebook | Twitter | Bloglovin
https://betweennapsontheporch.net/


Gilly @Colour Saturated Life says
Thanks for having me Kelly! xo
Pat says
Absolutely beautiful! The trim is just perfect and I love the color. I don’t have any woodworking tools (live in an apt) but I so admire your creativity! I love to have different, fun, funky in my home.
xo
Pat
Gilly @ Colour Saturated Life says
Thanks Pat, you are too sweet.
Mary-In the boondocks says
That is one lovely stand. The color is so modern and fresh in juxtaposition with the vintagy stand.
Mary says
Love this idea! Where did you get the small white planter pot in the back round? I saw this one in pink on someone else’s blog, but there was no link, but I would really like on. Thank’s!