Hello Live, Laugh, Rowe readers! My name is Jamie and I am visiting from my blog, anderson + grant. I am so excited that Kelly invited me to share a project with you today.
I can hardly believe that it is just about time to start planning for Christmas. As I’m sure many of you would agree, Christmas is my favorite time for decorating. I love adding greenery throughout the house, tucking some vintage ornaments in unexpected places, and decking out my Christmas tree. I love the holiday so much that last year I shared 25 whole days of Christmas inspiration on my blog!
 Another way I love to decorate is by adding pillows throughout my house during the holiday, and that is what I’m going to be making with you today. Decorative pillows are the final touch to any room, whether they are tossed on your living room couch, rest on a bench in your entryway, or placed on your bed. They can add a great pop of color, pattern, or texture to any area. I designed this pillow on a neutral fabric so that it can be added into almost any space for the holiday.

To make the pillow you’ll need some kind of neutral fabric that is heavy-duty enough for a pillow. I used osnaburg from the fabric store. You could also use linen or a home decor fabric. You’ll also need a pillow form and some craft paint. (I prefer Americana brand paint.) For this project, I used Tuscan Red for writing Merry Christmas and the holly berries and Light Avocado Green, Avocado Green, Celery Green, Camel, and Burnt Umber for the holly leaves.
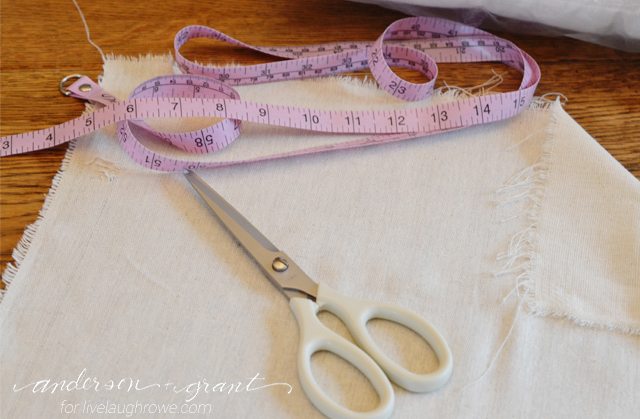
Cut the fabric into two squares that are an inch wider in both directions than the pillow form you are using. My pillow was 16 inches square, so I cut out two pieces of fabric 17 inches square.
Before beginning, layer waxed paper underneath the fabric you will be painting. Start painting by coating your leaves with light Avocado green. And then layer the other colors on top of it, slightly blending everything until it looks like you want. I use the Medium Avocado toward the middle and bottom of the leaves and the Celery Green around the outside. I focus the burnt umber on the areas where the veins of the holly leaves would be. The camel goes near the outside where you want to highlight the leaves.
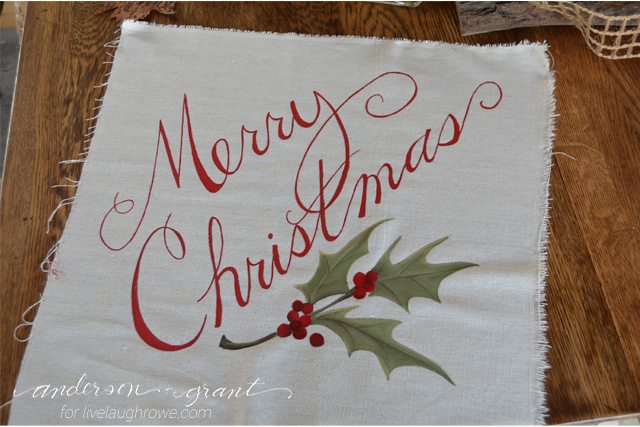
And your pillow is complete! What do you think?

If you’d like to make this pillow for your own home, you can download the PDF pattern or save the picture to your computer. To enlarge the picture, it can be added onto a Word document, and click on the corners to make it as big or small as you’d like. You may need to print it out on more than one piece of paper.
Thank you so much for allowing me to share a little bit of Christmas inspiration with you today. If you are interested in a few more projects, be sure to check out the links below!
Be sure to follow Jamie on her Blog | Pinterest | Facebook | Twitter | Shop
https://betweennapsontheporch.net/



Janelle @ Wholly Healthy says
That looks great! It never would have occurred to me to paint a pillow.
Jamie | anderson + grant says
Thanks Janelle! I will put paint on just about anything 🙂
Hannah Diane says
That is SO gorgeous!! I’m going to have to make one now!
Jamie+|+anderson+++grant says
Aw!!! That is so sweet, Hannah! I’m glad you enjoyed the idea!
Tanya says
Jamie this is SO pretty! Thanks for all of the wonderful DIY inspiration ladies 🙂
xoxo, Tanya
twelveOeight
Jamie+|+anderson+++grant says
I’m happy you like it Tanya! Have a great day!
JaneEllen says
Hi Kelly still not getting your posts, miss you bunches.
Ok now for this awesome pillow. Will be making couple of these at least for gifts Thanks for sharing, sure do appreciate your talents. Happy Thanksgiving to you and Kelly. Happy holidays season
Amy | Canary Street Crafts says
This is gorgeous! I never would have guessed this was handmade. Pinned and shared!!
Amanda @ Dwelling in Happiness says
Jamie, this is SO pretty!! It looks like it was bought from a store! 🙂 Thanks for the pattern – I seriously need to make one!!
Kendra @ www.joyinourhome.com says
So gorgeous Jamie! Thanks for the pattern!
Tyler says
Carbon paper is totally genius! Thanks so much for the tip 🙂
Mary says
I’ve tried several times to print this pattern, even reducing the size to 50% but can only get the left side of the pattern to print. I do have a Mac so I’m not sure if I have to do something different. Any suggestions?
Kelly Rowe says
Hi Mary! I’m sorry to hear you’re having problems. Are you saving it to your computer, then printing it?
Jamie | anderson + grant says
Hi Mary! Are your trying to print from the PDF link or the picture link? The PDF is sized to print on just one sheet of paper without changing the size. Let me know if this helps!
Jamie
mary says
Hi Jamie,
thanks for the info. After a couple of tries I was finally able to get it to print on one sheet of paper. Can’t wait to try it!
mary says
did you wash your fabric before painting?
Jamie| anderson+grant says
I didn’t wash the fabric before painting it. But if you intend to make a pillow cover that can be taken off and washed, the fabric should be washed before painting it so that it doesn’t shrink AFTER your hard work is done! In this case, you’d probably also need to use a paint that is for fabric as well.
At Rivercrest Cottage says
Love the look of your pillow. I am encouraged to try that leaf shading as you make it sound easy. thanks for the inspiration.
Emily says
This is gorgeous!! I want a set ;o) You are being featured today on Nap-Time Creations! Hop on over and check it out! Emily PS, do you by any chance have Hong Kong blocked on your FB? thats where I blog from and I can never tag you there… or even see your page when I click the link ;o)
Kelly Rowe says
Hi Emily! Thanks so much for the feature 🙂 I had no idea that a country could be blocked, so I went out and dug through my settings. Someway, somehow there were only like 5-6 countries that a visibility. WOWzer. Who knew?? Thank you for asking 🙂 If you don’t mind, let me know if it’s visible now? Thanks again, sweet friend!! xo
Jill Bay says
I cannot see the tutorial of how to actually paint the pillow. Has it been removed. Is there anyway I can get it?
Thanks,
I love the pillow. So darling.
Cee says
Where on this page is the link to the pillow pattern?
Kelly Rowe says
Hi Cee. Thanks so much for stopping by. I apologize for the confusion. I’m not exactly sure what happened to the pattern, but I’ve added it back to the post. Phew.
You’ll see some text that says, DOWNLOAD OR SAVE PDF PATTERN — click there and you’ll be all set to go. Let me know if you have any trouble with the download. Cheers!
Wynell says
Hi, lovlely pillow. I can’t seem to see a link for the pattern. Could you possibly send me the link?
Kelly Rowe says
Hi Wynell. Thanks so much for stopping by. The link for the template has been added (again). I’m not sure what happened, but the technical glitch has been updated and I’m happy to e-mail you a copy as well. Thanks again. Cheers.