
As the seasons transition and the days lengthen, it’s the perfect time to infuse your living space with a touch of whimsy and warmth. What better way to do so than with some handmade wooden flowers?
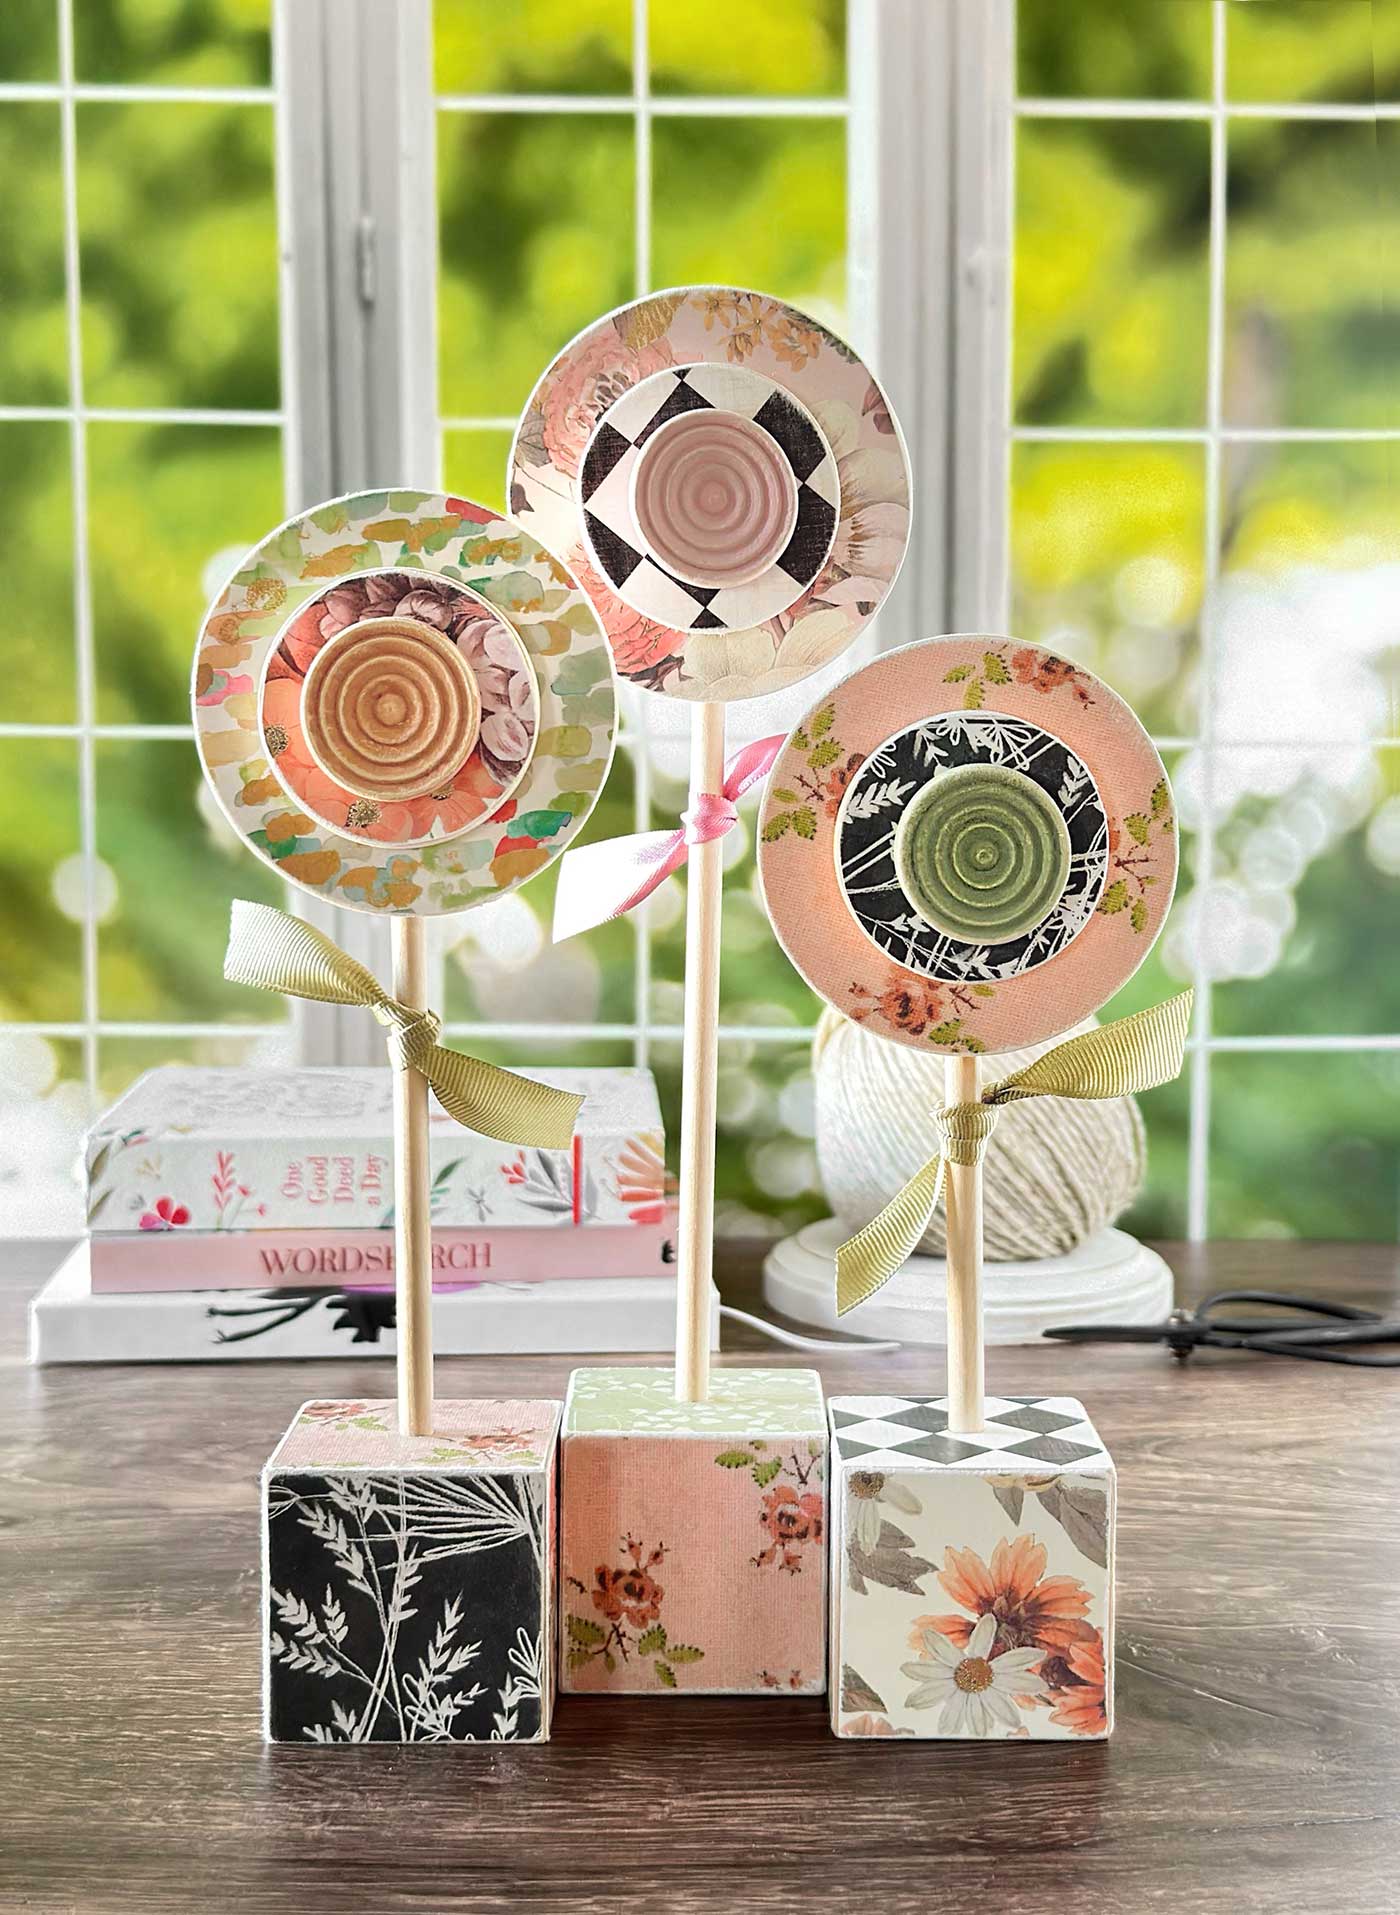
Spring brings with it a burst of colors, fragrances, and the promise of new beginnings. So, to celebrate the season of growth and rejuvenation, let’s add a touch of nature’s beauty to your home decor. These handmade wooden flowers offer a charming and timeless alternative to traditional blooms.
Before we begin, I wanted to remind you that today’s post is part of a fun collaboration.

The Hand Crafted Society is a group of talented bloggers who come together monthly to collectively craft creations using a shared medium or theme. You’ll get to see the varied perspectives and interpretations of each participant.
When you reach the end of the post, click on the image or blog name to view the full post.
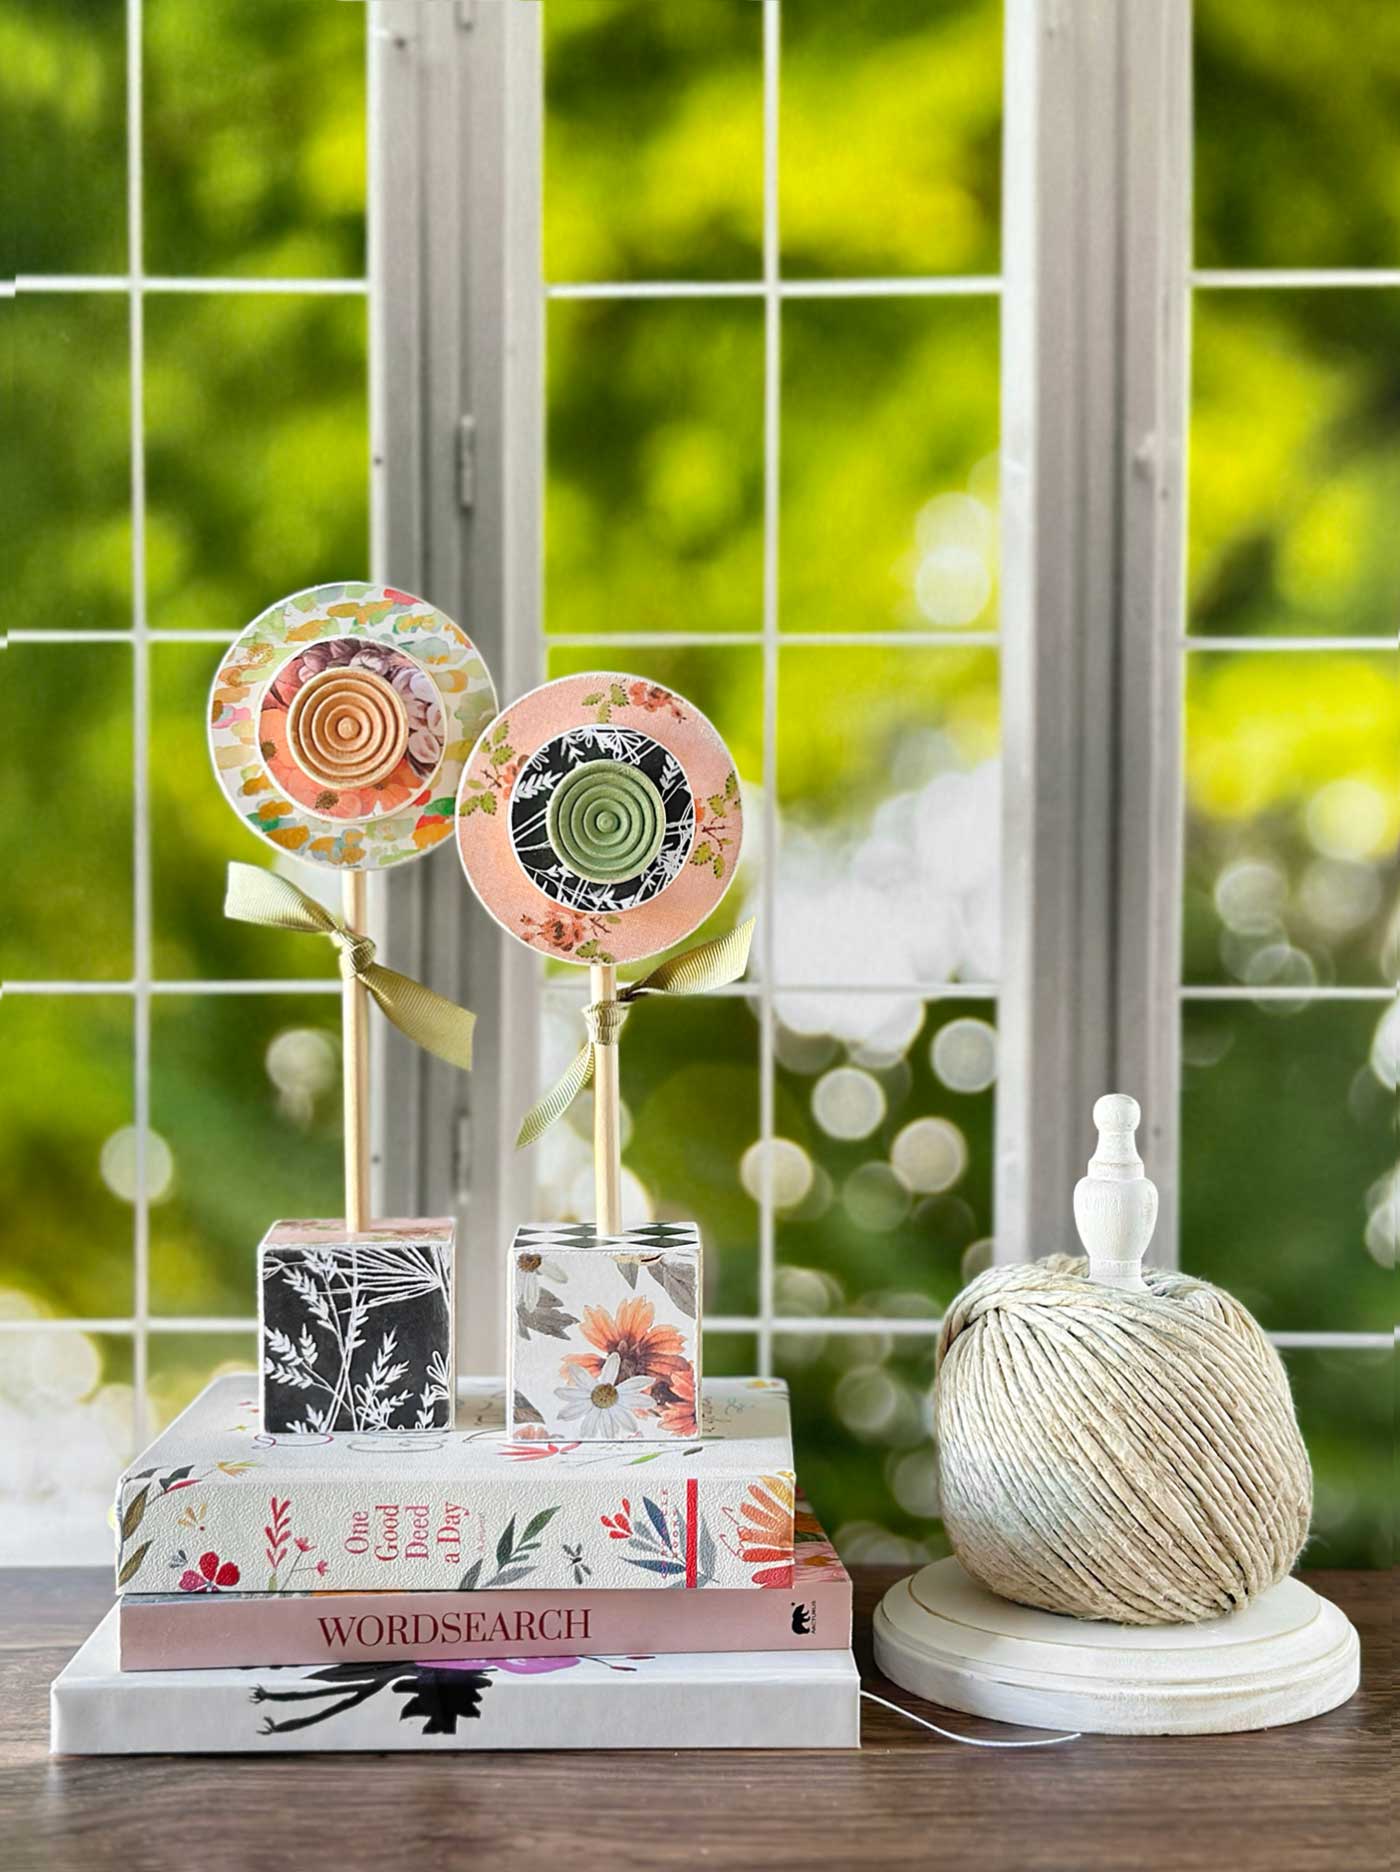
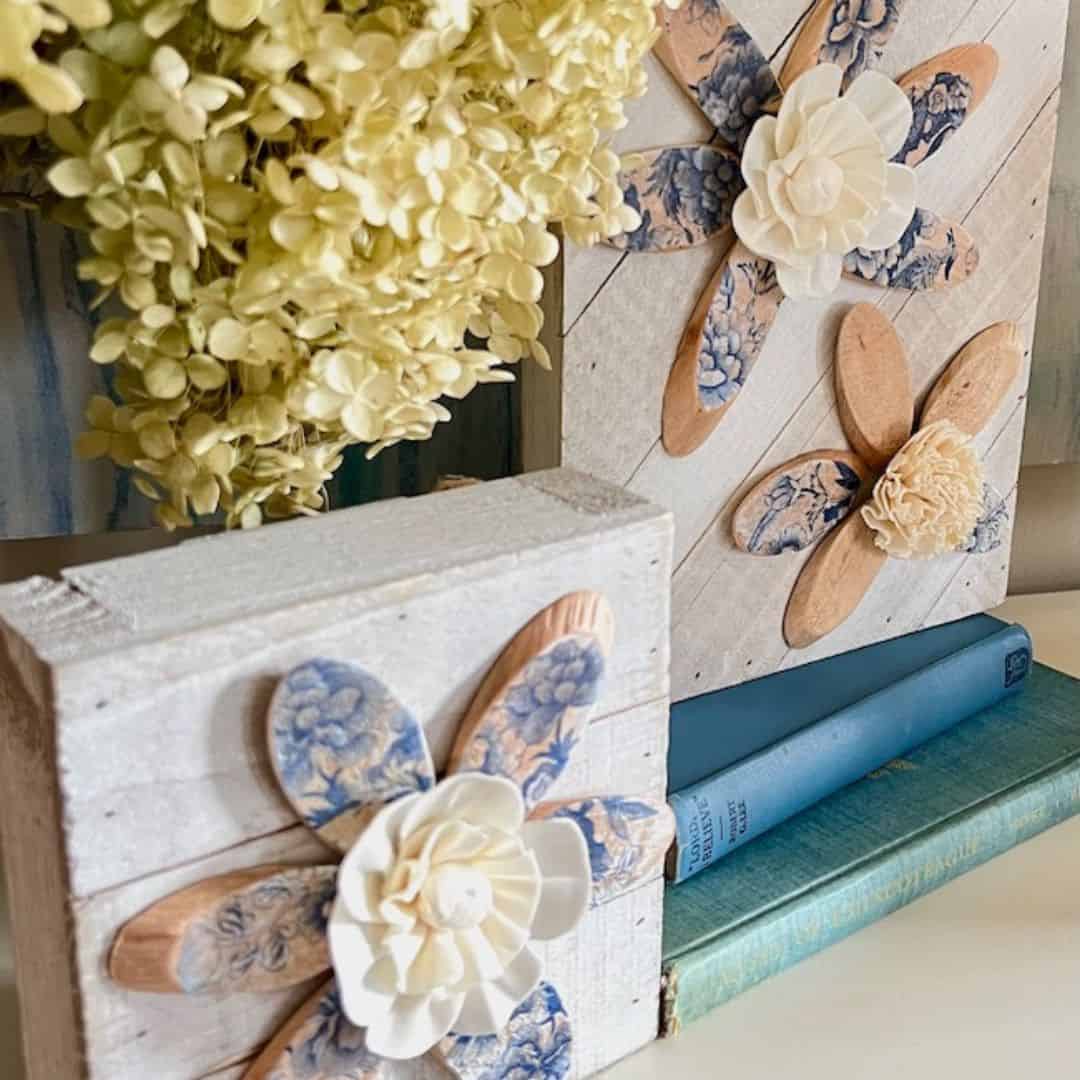
Of course, these delightful creations add a playful element to your decor and bring a sense of joy and brightness into any room. You can create a whimsical arrangement that will brighten any space with just a few simple wooden rounds, dowels, and scrapbook paper. Basically, this is a crazy easy and fun project to do with your gal pals.
Let’s explore how to make these wooden flowers and unleash your creativity for the spring season ahead.
How to Make Wooden Flowers for Spring
Materials Needed:
Wood Cubes (2×2)
3″ Wood Circles
Wood Stack Checkers (1.26×1.26×0.31)
Circle Wood Shapes (2.01×2.01×0.2)
Dowel (1/4″ x 36″)
Scrapbook Paper and Pencil
Scissors
Tacky Glue
Drill
Portable Drill Guide, optional
Sandpaper
Acrylic Paint
Pain Brush (or makeup wedges)
Instructions for Making Wooden Flowers:
Step One:
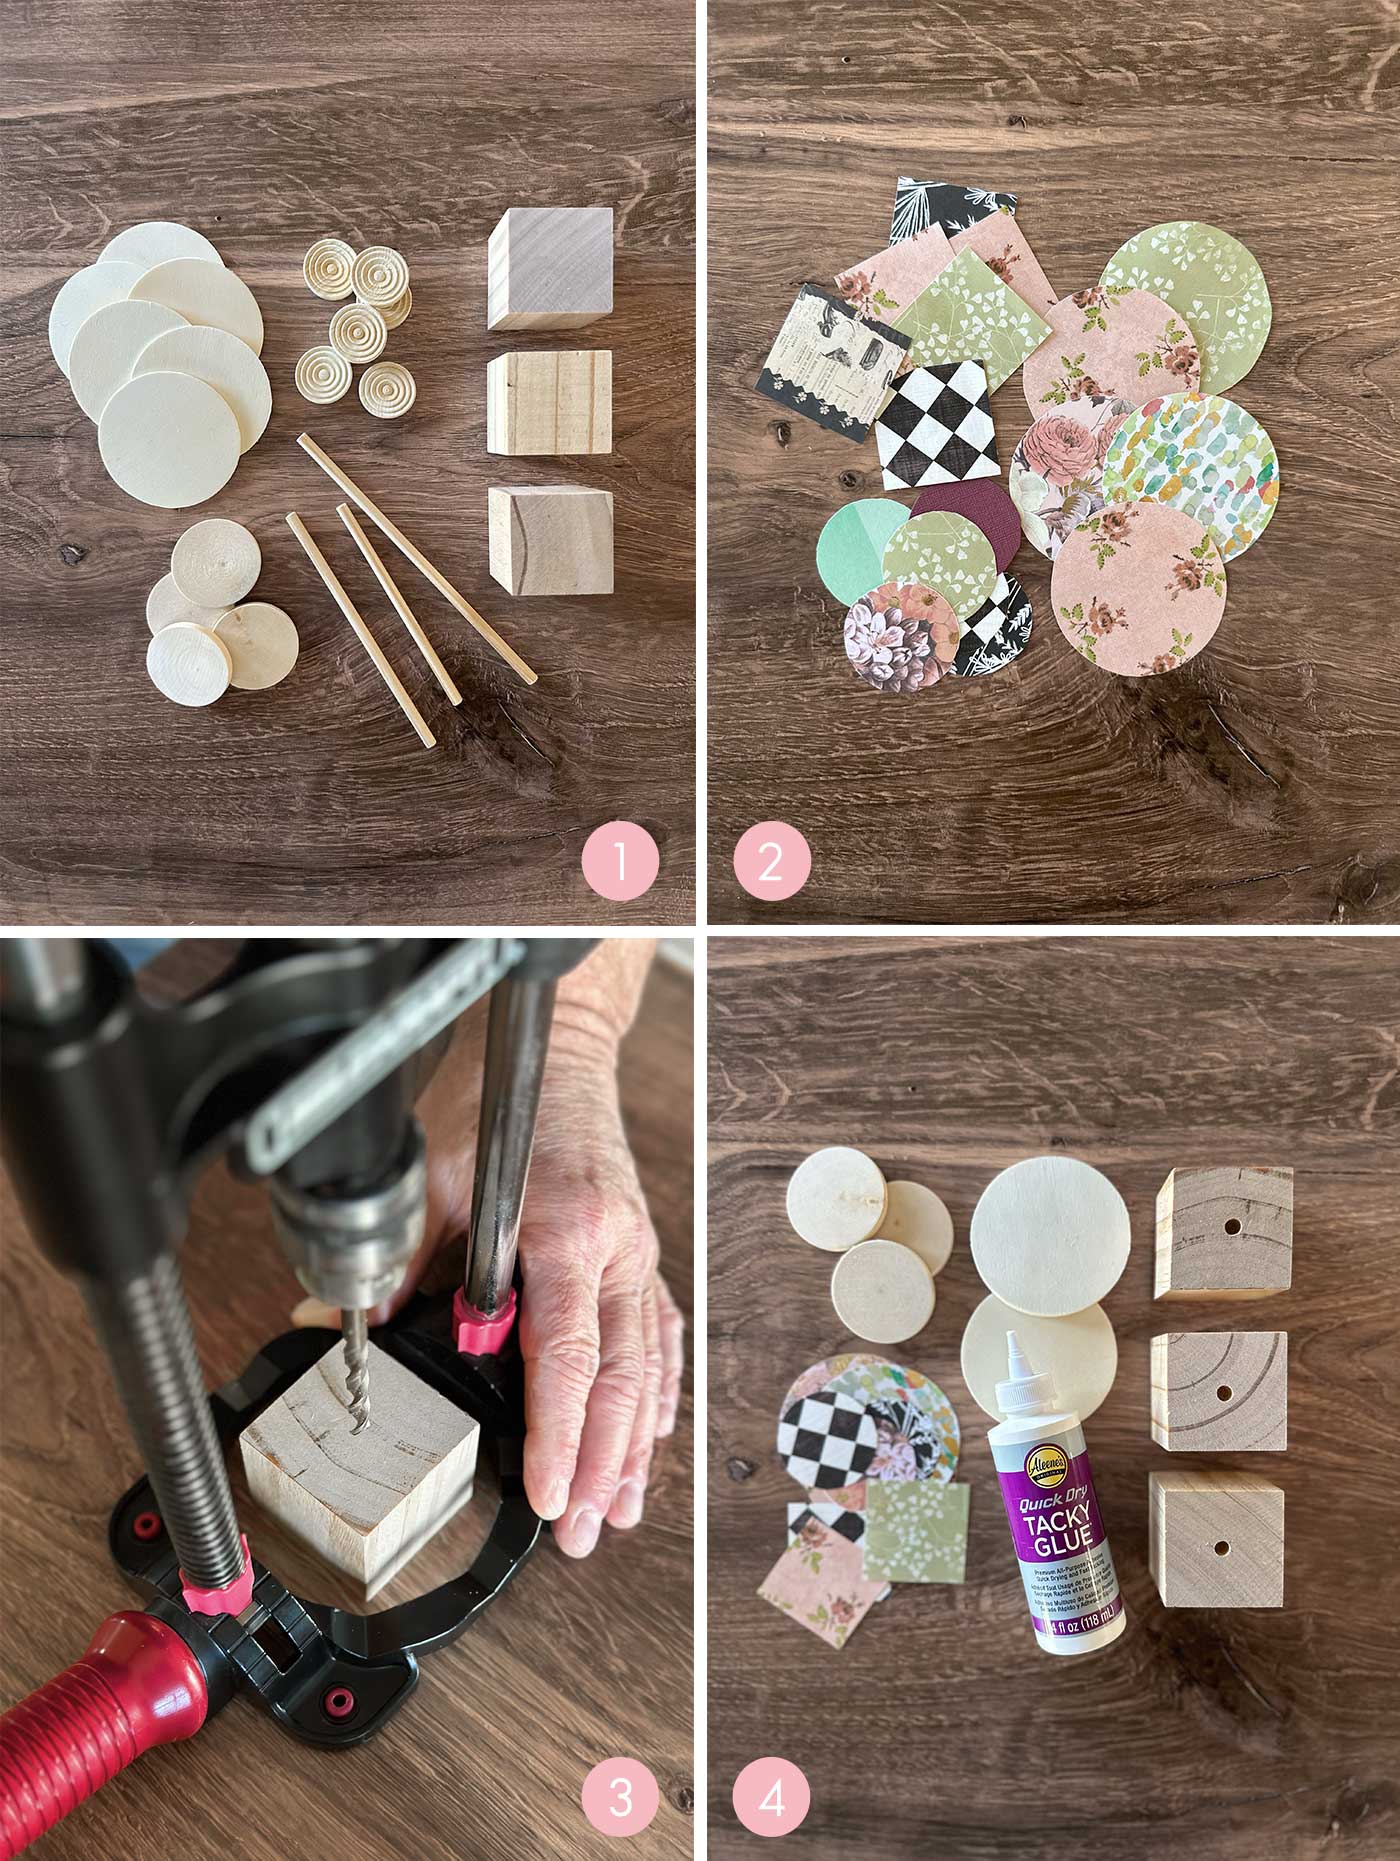
Gather all your supplies in a well-lit, spacious workspace. Lay out your dowels, wood rounds, square blocks, scrapbook paper, glue, and any additional paints or brushes you may need.
Secondly, cut the dowels to 5″, 6″, and 7-1/2″ (or your desired sizes) for the stems.
Step Two:
Using the 2 and 3″ wood circles and the 2×2 cubes, trace and cut out your circles and squares for your flowers. For mine, I decided to cover all four sides of the cubes and both the front and back of the 3″ circles. Feel free to customize your flowers to your liking.
Step Three:
Using a 1/4″ drill bit, drill 1/2″ into the wood cubes. We used a portable drill guide to help keep the drill hole straight up and down. When drilling into a smaller object, the drill guide is extremely helpful.
Step Four:
Grab wood rounds, cubes, scrapbooking paper, and tacky glue.
We’re halfway there!
Step Five:
Before we start attaching the scrapbook paper. Due to how thin my 3″ wood rounds were, I glued two together to add a little more thickness. At the bottom of the post, I shared a side view of the wooden flowers so you can visually see what I’m talking about.
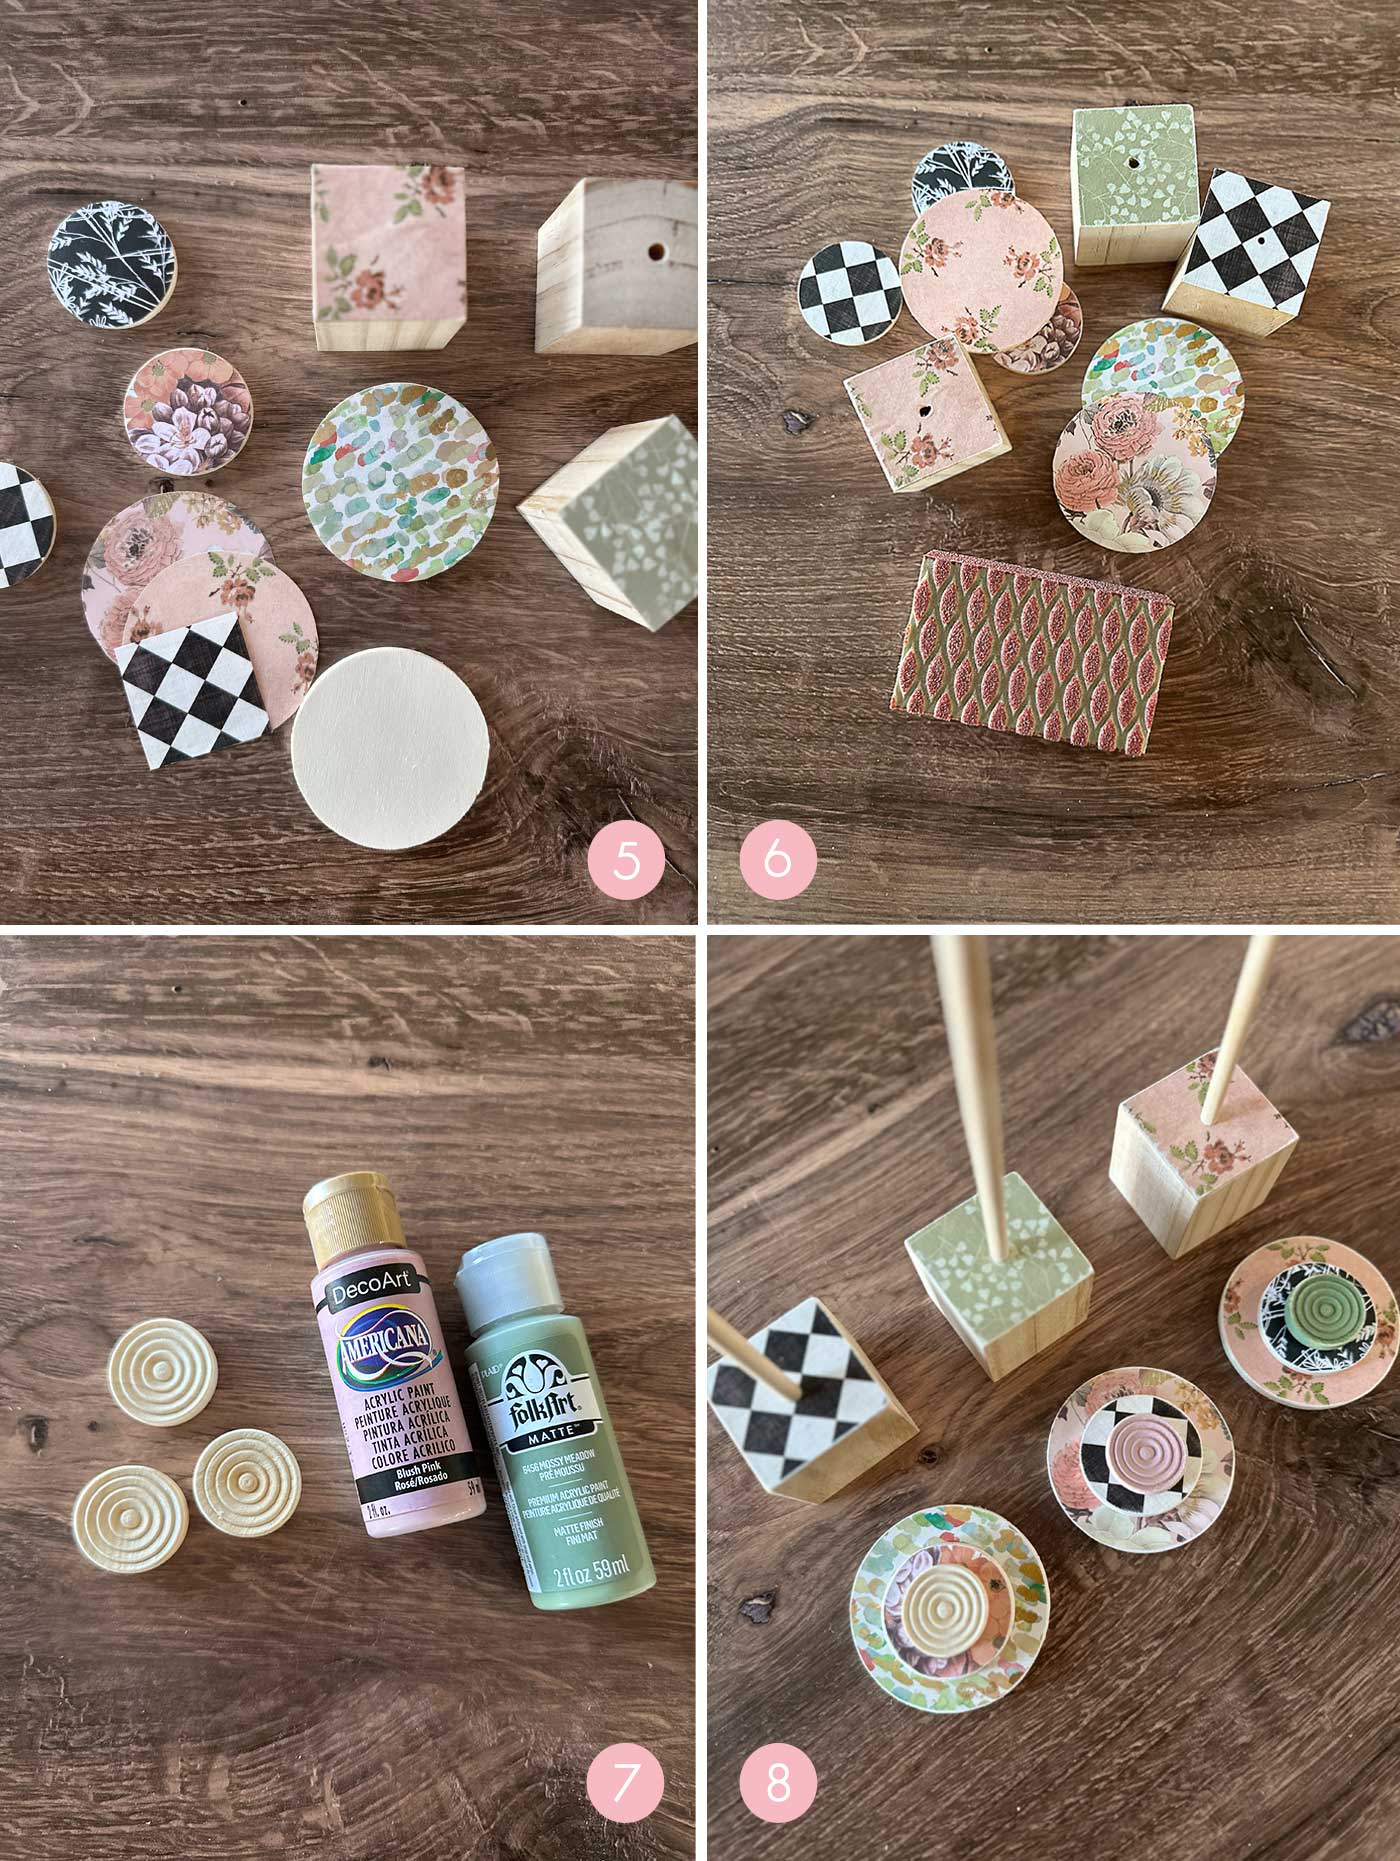
Obviously, now we’ll start using the tacky glue to attach all of the paper cut-outs to the appropriate rounds and cubes.
Additionally, trimming the paper edges will most likely be required once they’ve been glued into place.
*Note: I originally planned to only attach the paper to the top of the wood cubes. However, after the fact, I also decided to add paper to all four sides of the cube.
Step Six:
Allow for the tacky glue to dry. Grab some sandpaper or sanding block and sand all of the edges of the wood rounds and the cube.
Step Seven:
Paint the appropriate number of wood checkers with your colors of choice. I used Folk Art (6456) Mossy Meadow, Folk Art (7018) Pueblo, and DecoArt Americana Blush Pink.
Allow to dry, and add a little scruff using the sandpaper or sanding block.

Assembling the Wooden Flowers
Step Eight:
Glue the wood checker to the 2″ wood round. After that, we’ll glue the 2″ wood round (with the check on it) to the 3″ wood round. Allow to dry.
Place the dowels into the drill holes. Lay the flowers face down and attach the dowel using the tacky glue. Allow to dry.
Add ribbon (optional), and you’re done!
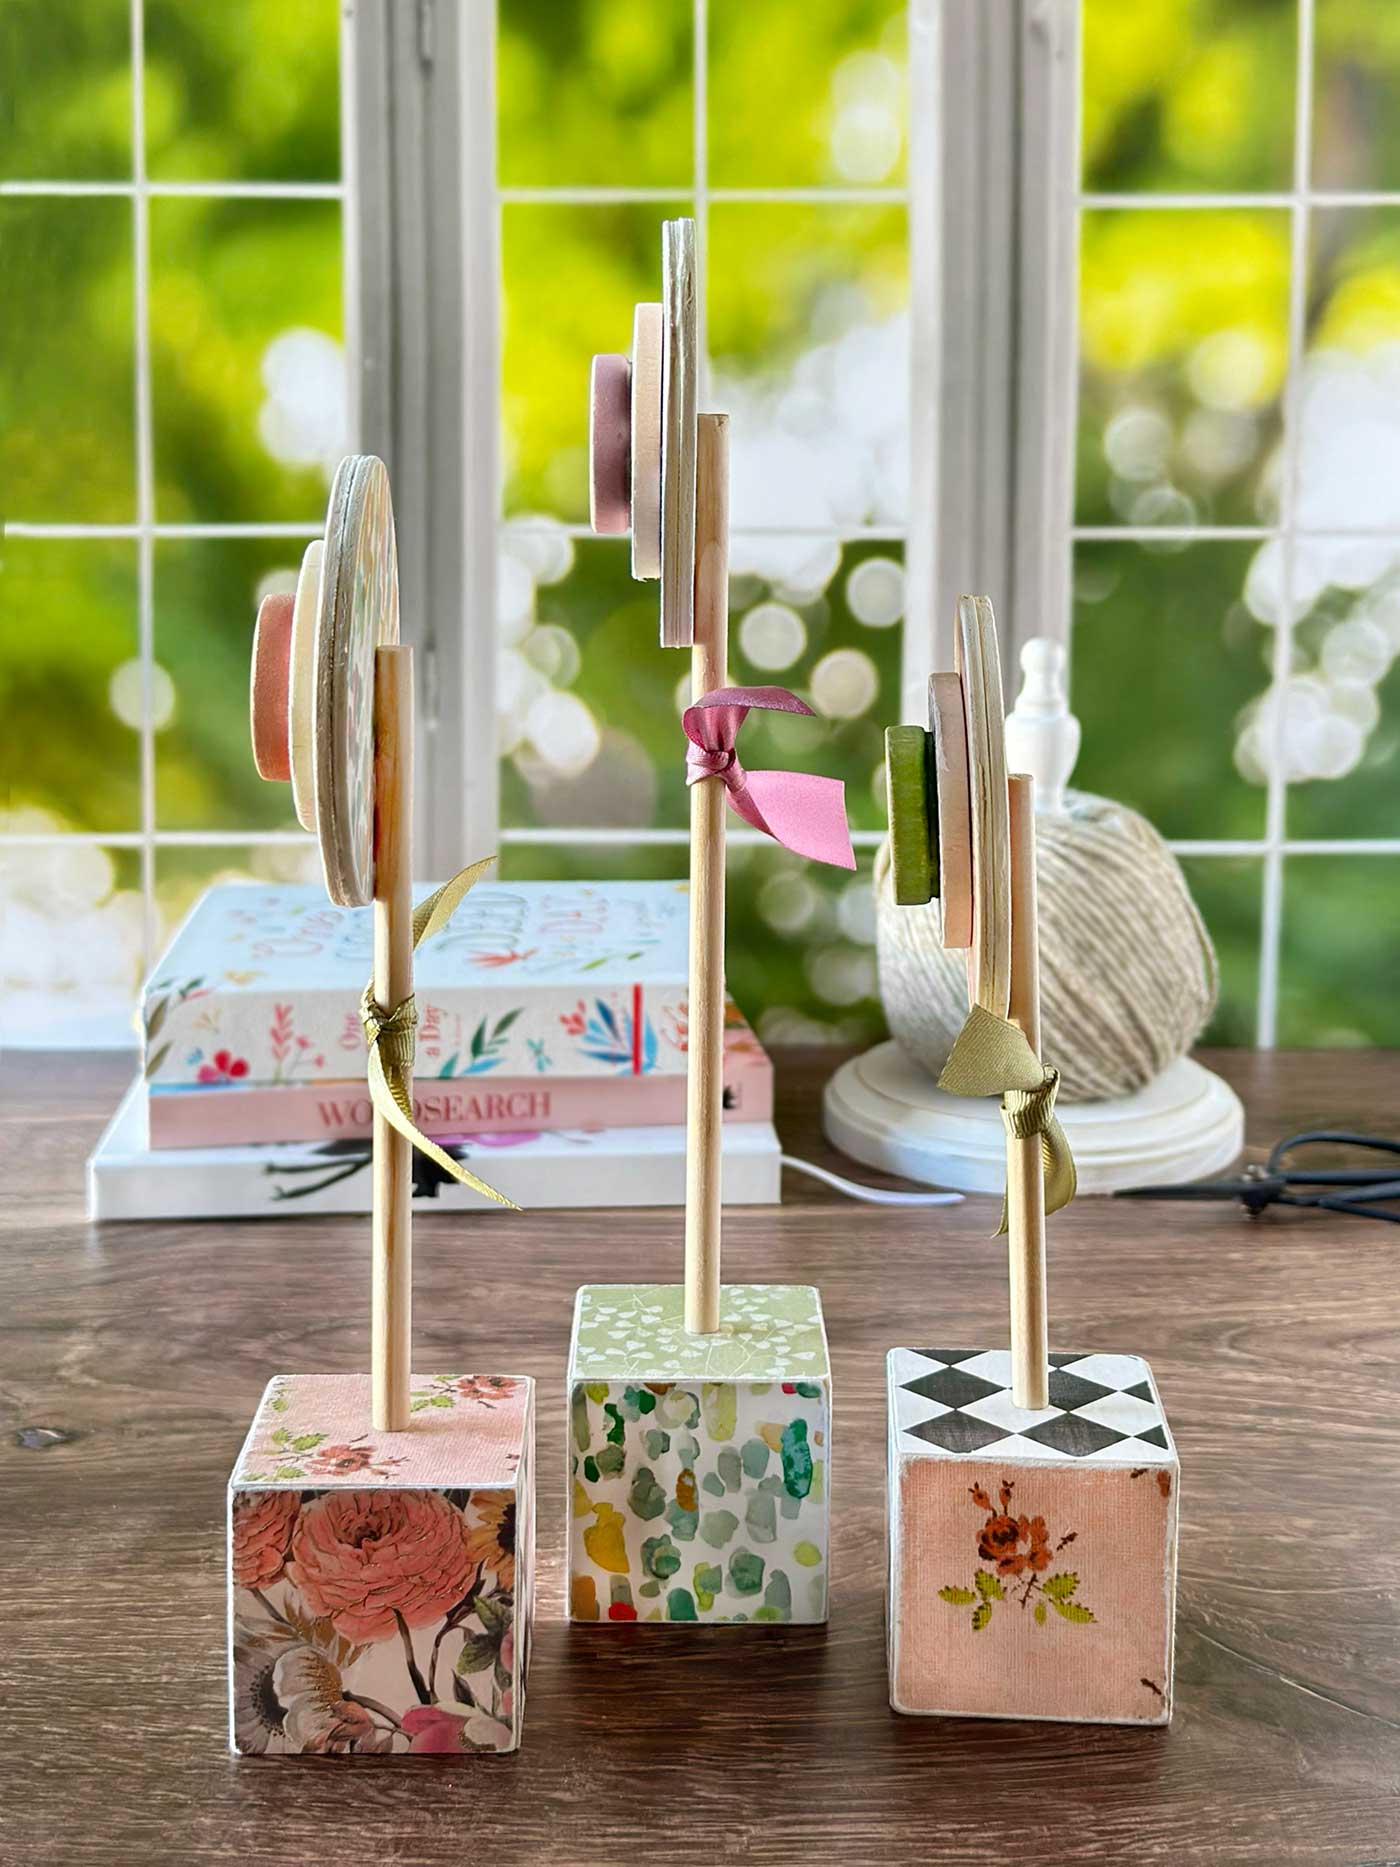
Since these are wooden flowers, they’re reusable, so you can enjoy them year after year without the need for constant replacement. In addition to being a delightful addition to your own home, wooden flower crafts also make wonderful gifts for friends and loved ones. Whether you’re celebrating a birthday, anniversary, or special occasion, a handmade bouquet of wooden flowers is sure to bring a smile to anyone’s face.
Other Wood Projects you might like:
Wooden House Tutorial
DIY Cutting Board
Vintage Inspired Wooden Spool
DIY Wooden Clipboard
Wood Slab Cake Stand
Whether you’re a seasoned crafter or not, creating your own wooden flowers is a fun and rewarding experience that will bring joy and beauty into your life. So why not pick up some supplies and let your creativity bloom?
Additional Projects from the Handcrafted Society:


Pssst. Enjoying the content? Buying me a coffee or two occasionally is a fabulous way to support all my hard work and the content I provide. Thank YOU!


CoCo says
What a fun way to get ready for the spring season, Kelly! I’m always looking for things to craft during the winter so I can’t wait to try this too. I love how you can change up the looks of the flowers and the stands just by choosing different prints of scrapbook paper. It makes customizing and gift giving so easy! Hugs, CoCo
Diane says
These are so cute Kelly! I love your choice of colors and papers — what a great way to use all the small scraps I’ve saved.
If you’re looking for me, I’m in the crafts room with my fingers covered in tacky glue 🤭.
Michelle | Thistle Key Lane says
Your wood flowers are so cute Kelly! You have such a talent for mixing patterns and colors. I can’t wait to give this a try for spring! Pinning!
Missy says
These are next level adorable! I love the interesting dimensions of the flowers and, of course, am in love with the different patterns that you used. I’m so glad you are a part of the Handcrafted Society! Pinned!
Anna says
Hi Kelly – These wooden flowers bring so much charm into a room! The patterns you selected for each of the pieces of paper are perfect. Thanks for sharing such a creative and inventive way to use wood.
Donna says
Hi Kelly! I can’t believe Spring is going to be here so soon! These wood flowers are so creative, and look so fun to make! I love the patterns and colors of the scrapbook paper you chose, they are perfect for the season! Pinning now!
Wendy McMonigle says
Kelly, these turned out so cute! I love your creativity and all of the fun patterns you used. It sure adds great color and whimsy to your decor. Thanks so much for sharing such a fun project.
Tammy says
Kelly, how cute! Love these sweet handmade wooden flowers.
Amy says
how cute are these? I love them!
Kim says
Your flowers are so cute and creative, Kelly! I love all of the colors and patterns you chose!
Creatively Beth says
So bright, fresh and full of SPRING!
Don’t forget to join us over at the Creatively Crafty Linky Party every Wednesday through Sunday
Followed and Pinned!
Creatively, Beth