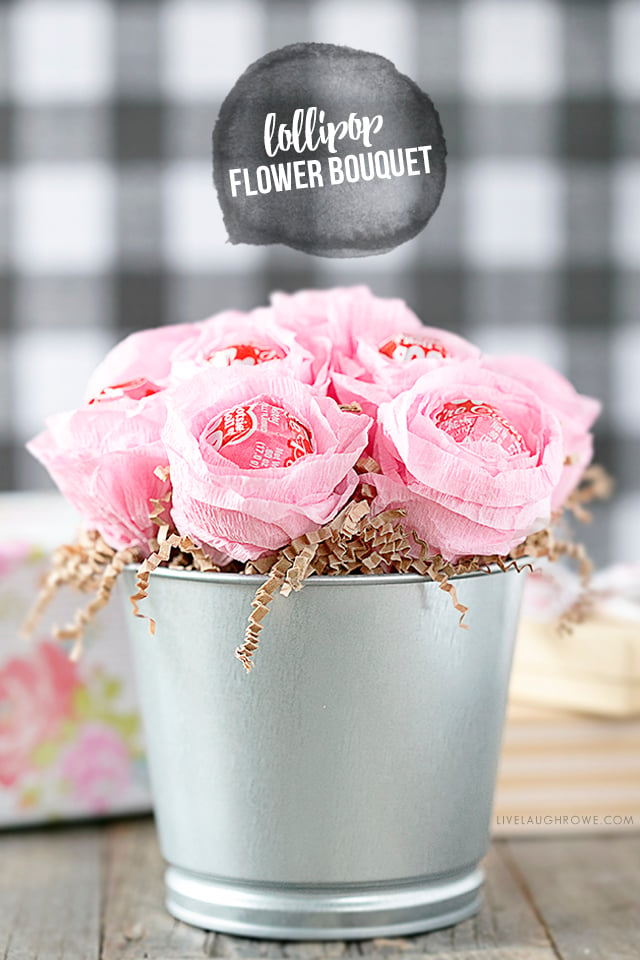
Do you love lollipops and flowers? How about a bouquet that you don’t have to water? This darling Lollipop Flower Bouquet is sure to be a hit for mom on Mother’s Day, your best friend’s Birthday or a simple Just Because. Therefore, you might want to add this craft to your to-do list (wink-wink).
My sister made this darling lollipop flower bouquet for a friend’s birthday a couple of months ago. I died at how cute it looked and asked her to work with me on a post to share this cuteness with all of you.
Her friend (Kailynn) loved her bouquet so much that she still hasn’t eaten any of the tootsie pops. Most importantly, her bouquet was made using her favorite lollipop! She loved and appreciated this thoughtful gift THAT much.
Do you know what else there is to love about this project? The cost! This is a gift that can come in well under $10 (depending on what supplies you have on hand and the supplies you would have to buy). In addition, this is quite a conversation piece too. Everyone is going to oooh and aw over this cute bouquet.
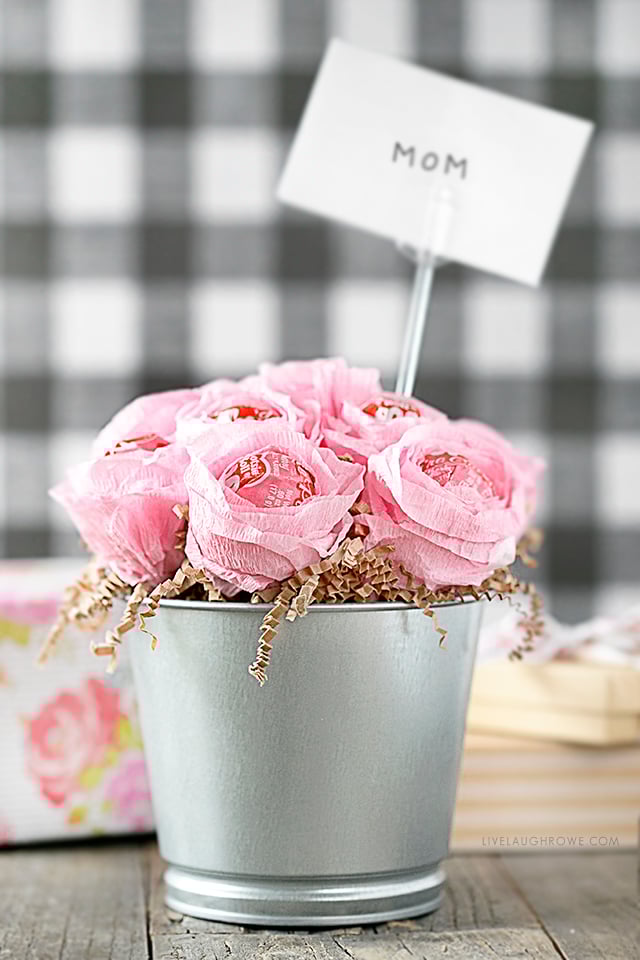
Did I mention these lollipop flowers would make a great Mother’s Day gift? Swing by the local florist and pick up a floral card pick holder to add this special touch (pictured below). You can purchase them on Amazon, too!
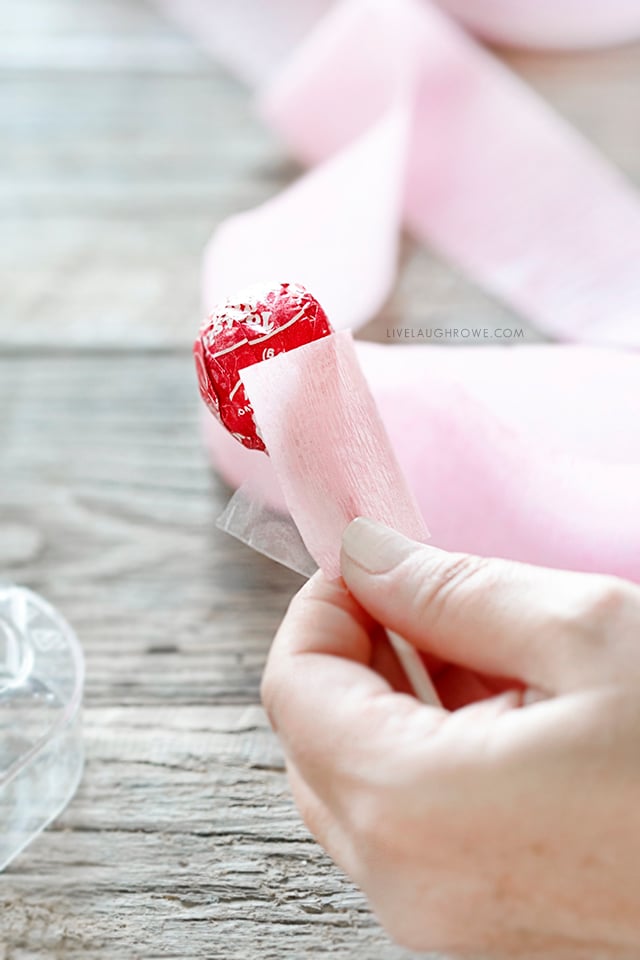
Start by attaching the end of your crepe paper to the bottom of the tootsie pop with tape.
Step Two:
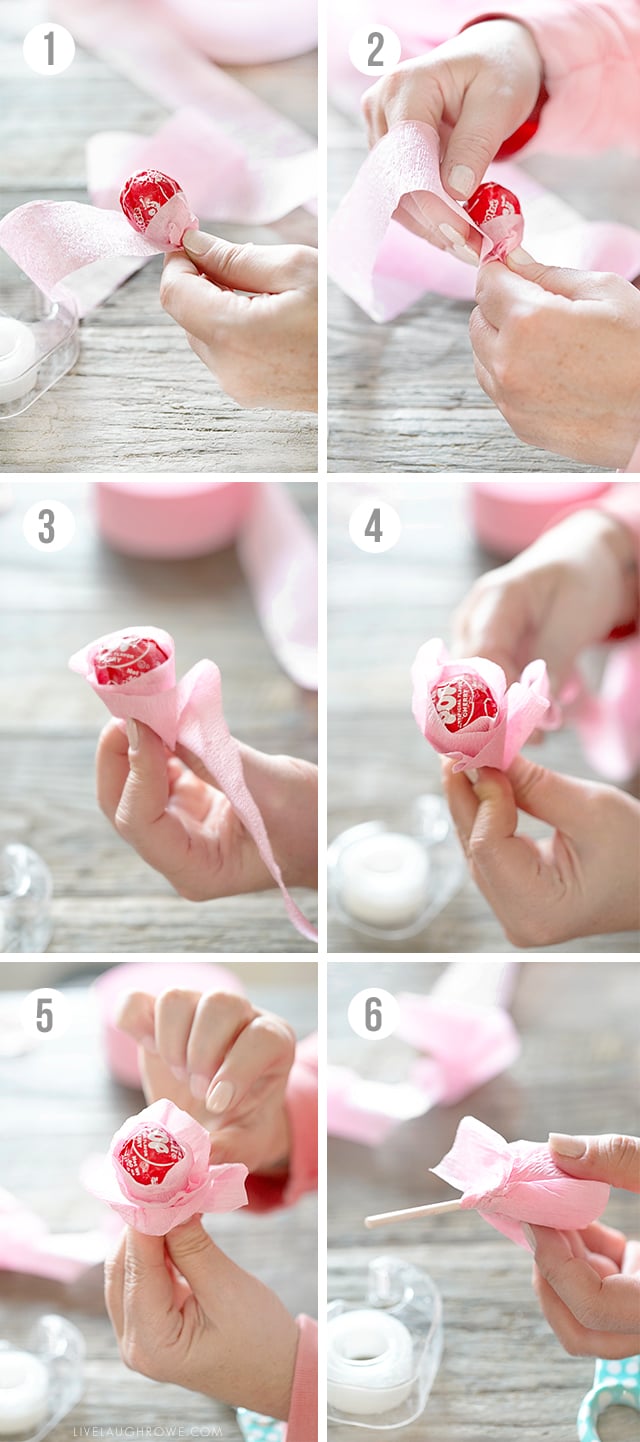
Begin by tightly wrapping the first wrap of the crepe paper around the tootsie pop. The second wrap (and so forth) will be looser. See images one and two.
Step Three:
Continue wrapping the crepe paper around the tootsie pop; approximately 5 or 6 layers will make for a full lollipop flower. However, you’ll want to be sure to fold or crimp the crepe paper along the bottom of the tootsie pop as you wrap each layer. See images three and four.
Along with crimping and folding the crepe paper along the bottom of the stick, you’ll want to create ruffles of the crepe paper at the top of the flower. As a result, the lollipop flower will look fuller, almost like it’s in full bloom (wink wink). This is illustrated in image five.
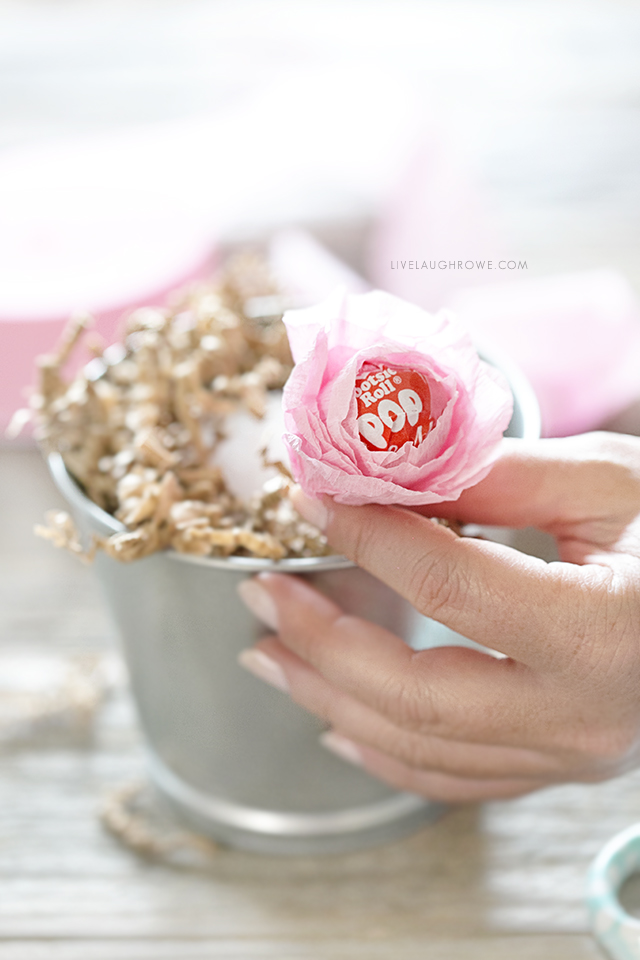
Step Four:
After that, cut the crepe paper, fold (crimp), and twist at the base of the lollipop. Use a piece of tape long enough to attach the crepe paper to the stick and ensure it all stays in place. See image six.
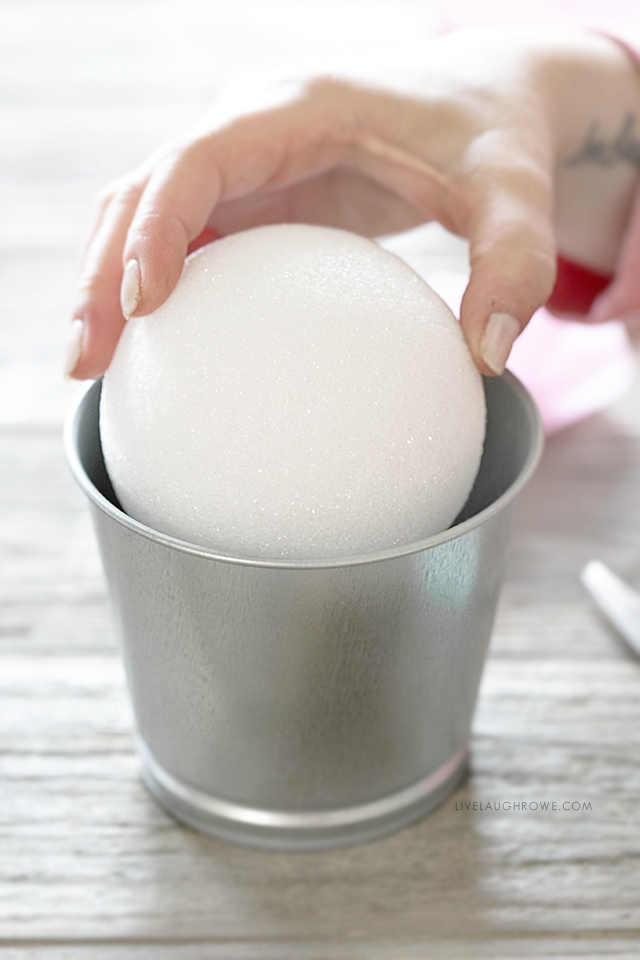
Step Five:
Place a styrofoam ball into the container.
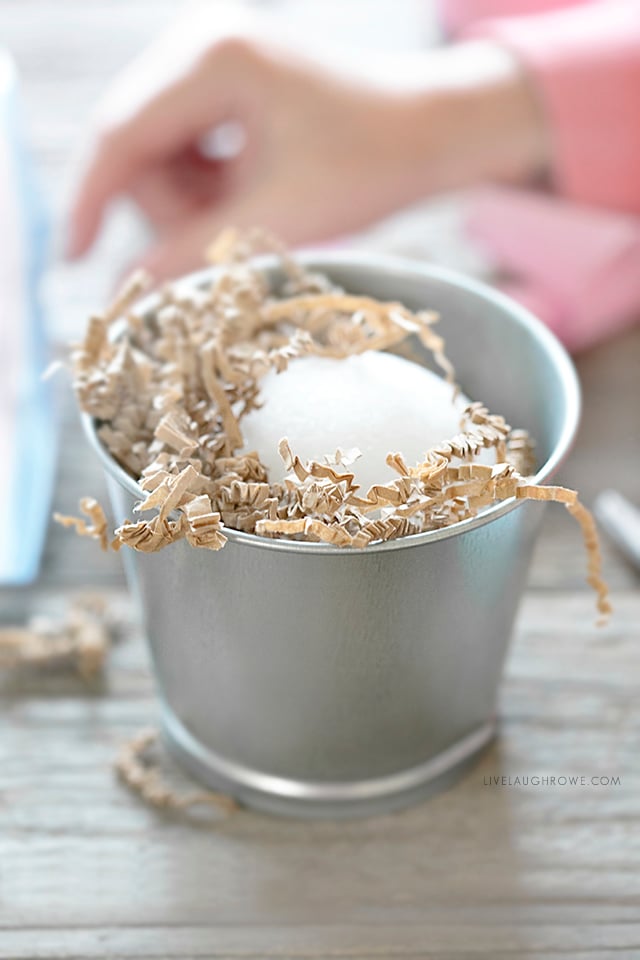
Step Six:
Add the kraft colored crinkle paper around the rim of the container.
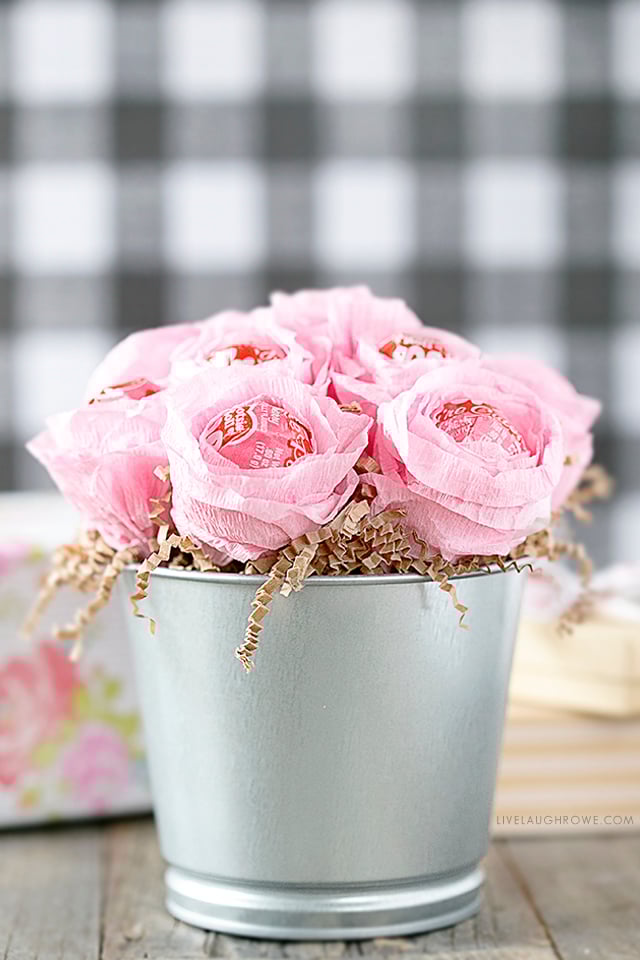
Step Seven:
Start arranging your lollipop flower bouquet! Keep adding flowers until you are happy. Similarly, add additional Kraft crinkle shred to fill in any gaps or holes.
And you’re done! The only question now is: who will you be making these for?
A DIY fanatic, Kelly shares her journey through her blog, Live Laugh Rowe, where she showcases her recipes, tutorials, crafts, home projects, and all things DIY. This East Coast Girl at heart believes family is number one as she finds the perfect balance of being a daughter, wife, sister, entrepreneur, writer and woman of God. Be sure to follow along as she shares her passion for life, love and family! Read more...


Karen says
Very Cute!
Kelly Rowe says
Thanks so much, Karen! Cute for the win (wink-wink). Have a great day! Hugs.