• Home
  • About
    • About Me
    • The Rowes
  • Shop
    • Etsy Shop
    • Amazon Storefront
  • Recipes
  • DIY/CRAFTS
  • PR & Advertise
    • In The Press
    • My Disclosure
    • Privacy Policy
  • Resources
  • Contact
    • Contact Me

Fun & Easy Felt Flowers | Daffodils

04/08/2013 by Kelly Rowe 24 Comments

This post may contain Amazon or other affiliate links. As an Amazon Associate I earn from qualifying purchases.

Pin
Share
Tweet
Share
Share
3.4KShares

How many of you know that I {love} felt projects?  I think there is some serious fun to be had with felt… and today I’m sharing a super fun and easy tutorial for Daffodil Felt Flowers.  Daffodils say Spring to me!  They are cheery, bright and ready to add a pop of color to your home!

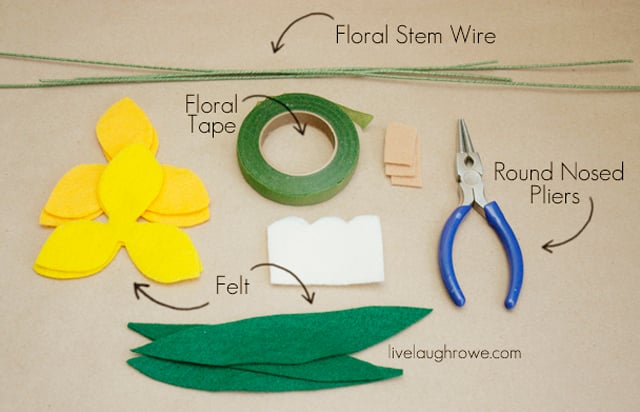
I originally found this tutorial over at While She Naps, where she makes these felt daffodils using the method of sewing.  I changed a couple of things and made mine using my handy dandy glue gun. So, what do you say — shall we get started?Felt FlowersAlrighty, let’s grab a few supplies:  Felt (Yellow, Ivory, Orange or Darker Yellow, Green and Camel),  floral stem wire, round nosed pliers, green floral tape and a glue gun (not pictured).
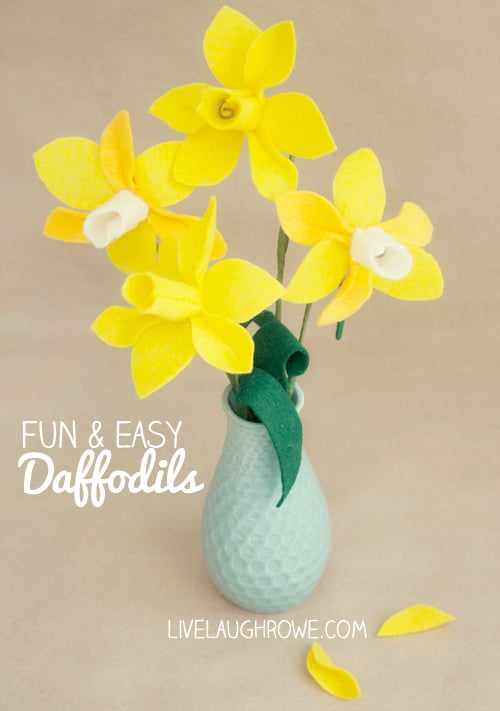
felt daffodilsFirst things first, you’ll want to trace out your petals and center piece, then cut them out.  You could also this daffodil template.  Once you’ve prepped the felt and warmed up your glue gun, we’re ready to get this party started!

For each daffodil, you’ll need two sets of the flower petals, one of the center piece, a small square of the camel colored felt and a long thing oval leaf (all pictured above).

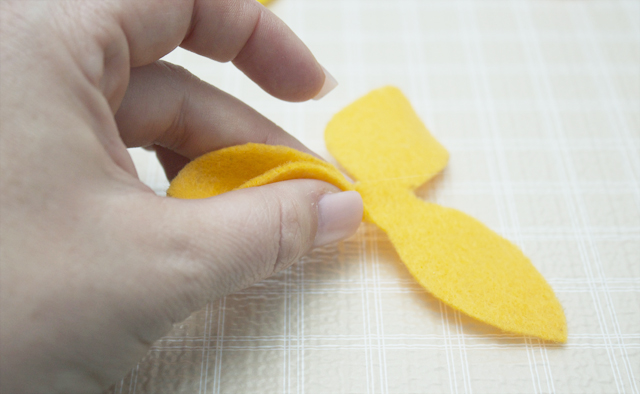
Place a strip of glue in the bottom center of each petal on one set of the petals.

felt flowersYou’ll then pinch the petal where the glue is.

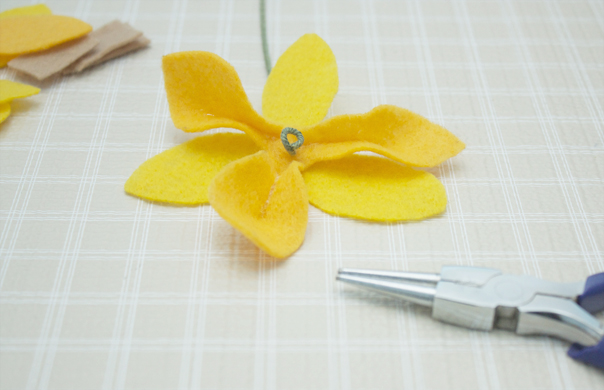
felt daffodilsNow place the pinched petal flower piece on top of the flat flower piece.  Poke a hole through the center of both pieces of felt.  I used my seam ripper to do this {giggle};however, use whatever works for you (such as a doll needle, etc).  Take one of your floral stem wires and place through the center of both flower pieces.  Using your round nose pliers, twist the wire into a loop as pictured below.  You may or may not want to glue the petals together — if you choose to do so, glue in moderation (that’s the perfectionist in me speaking, too much glue can start to make them look a little sloppy.  hee-hee).

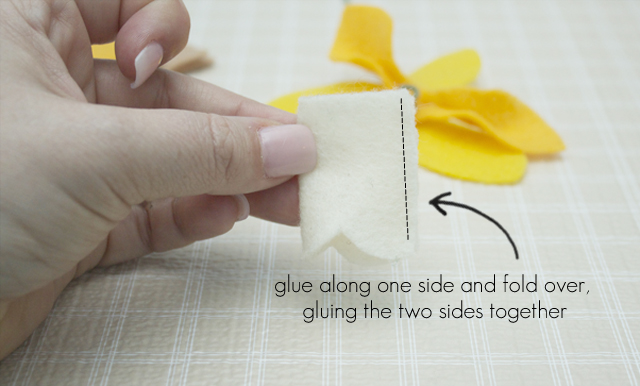
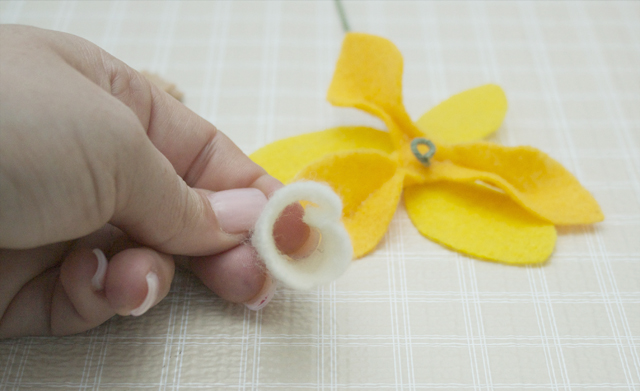
daffodilsWe’ll then move onto the center piece of the daffodil. Place a strip of glue along one side of the piece.   Fold in half, allowing the two ends to bond together.

diy felt flowersOnce the glue is dried and the felt has bonded to one another.  Turn the piece inside out.

DIY Felt DaffodilsEeeeeeks!  Isn’t this such fun?  I’m getting excited as we get closer to wrapping this felt flower up!

Okay, so now we’re going to slip the center piece/tube over the floral stem wire and glue to the flower piece.  The daffodil should still be able to slide up and down the floral stem at this point.  We’re gluing the pieces together, but nothing should be glued to the stem yet.
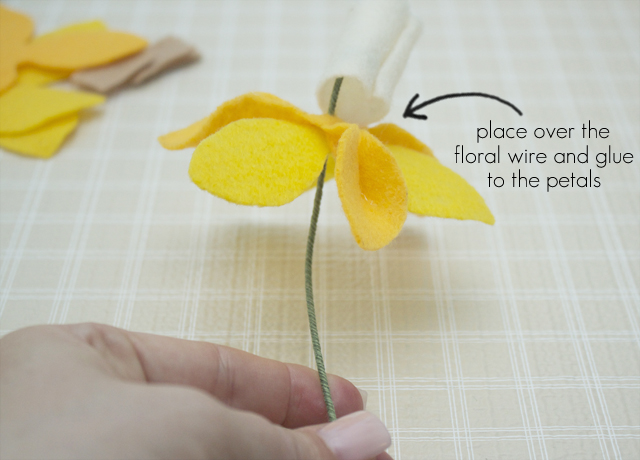
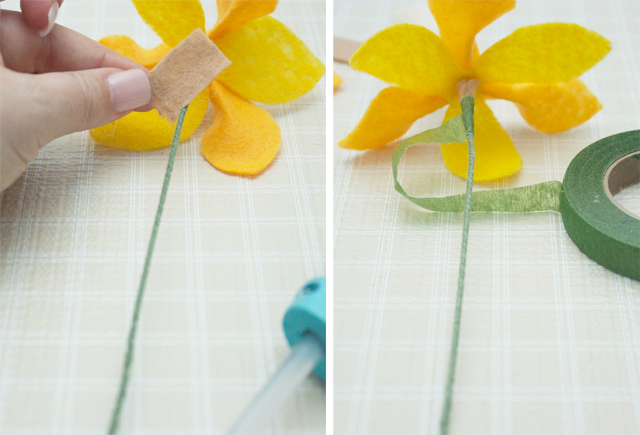
felt flowersOnce you’ve completed that, you’ll want to glue the camel color piece to the stem and the flower piece  (this represents where the bud was before the daffodil bloomed).  Using your green floral tape you’ll start to wrap the floral stem wire where the camel color piece was glued.

felt daffodilsYou’ll continue to do this, adding the green felt shaped as a leaf.  You’ll continue to wrap that into place using the floral tape as well.

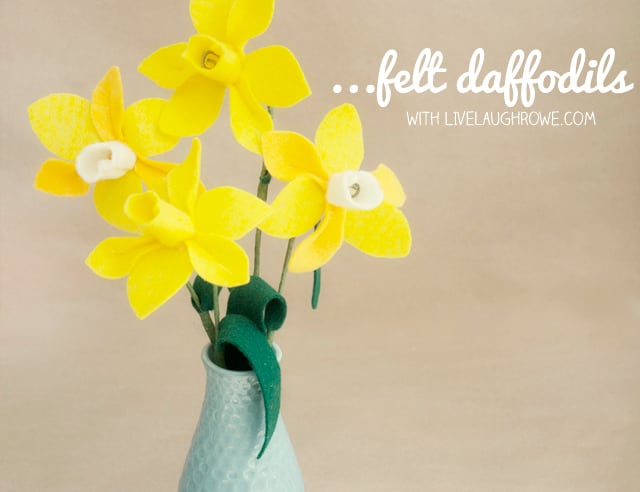
diy felt flowersContinue to wrapped the length of the stem, bend the flower head over like a daffodil does and trim the stem to your desired length (if necessary).  You’re ready to arrange these beauties in a jar or vase and show off your fabulous daffodil felt flowers to your friends and family.

felt flowers and daffodilsWhat do you think?  Don’t you just {love} them!
A few of these would make a lovely “just because” gift too!

Care to stay in the loop? I’d love to have you!
Catch me snapping + sharing pictures over on Instagram.
Subscribe to Updates | Like on Facebook | Follow on Pinterest

http://betweennapsontheporch.


Related Posts

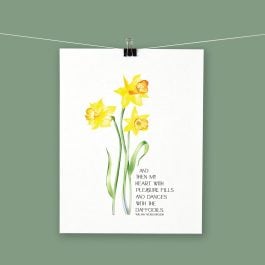
  • Daffodils Printable with Winter’s Tale QuoteDaffodils Printable with Winter’s Tale Quote
  • Tips for Planting Flowers in PotsTips for Planting Flowers in Pots
  • Gnome Wine ToppersGnome Wine Toppers
  • DIY Fabric FlowersDIY Fabric Flowers
Pin
Share
Tweet
Share
Share
3.4KShares

Filed Under: DIY Projects Tagged With: daffodil, daffodils, felt, felt flowers, flowers

About Kelly Rowe

A DIY fanatic, Kelly shares her journey through her blog, Live Laugh Rowe, where she showcases her recipes, tutorials, crafts, home projects, and all things DIY. This East Coast Girl at heart believes family is number one as she finds the perfect balance of being a daughter, wife, sister, entrepreneur, writer and woman of God. Be sure to follow along as she shares her passion for life, love and family! Google+

« Finding my Bliss | Blissdom 2013
Wholly Guacamole and the Hungry Channel »

Comments

  1. Eva Scott says

    04/08/2013 at 6:01 am

    Those are really cute. I think daffodils are so pretty.

    Reply
  2. Cindy Eikenberg says

    04/08/2013 at 4:52 pm

    These are great, Kelly! Never tried to make daffodils but want to give these a try. Pinning!

    Reply
  3. Jacy says

    04/08/2013 at 7:49 pm

    So cute Kelly! Awesome job 🙂

    Reply
  4. [email protected] says

    04/08/2013 at 11:00 pm

    We homeschool and are studying William Woordsworth’s poem Daffodils this week and I have been looking for a cute craft to go along with it. Thanks for the great tutorial. I can’t wait to see our dancing daffodils.

    Reply
  5. Jaimee @ Craft, Interrupted says

    04/09/2013 at 2:57 pm

    LOVE this! Pinned it : )

    Reply
  6. Cristina H. Cuadra says

    04/09/2013 at 4:36 pm

    It looks easy, i have to prove it!

    Kss Cristina

    Reply
  7. Sarah @ Alderberry Hill says

    04/10/2013 at 4:51 pm

    I love using a glue gun instead of sewing…I’m so lazy ha, ha! So pretty, and they’ll last forever!

    Reply
  8. Bonnie and Trish @ Uncommon says

    04/11/2013 at 7:47 am

    Adorable and these are in blom now around here..they just welcome spring in!

    Reply
  9. Johnnie says

    04/11/2013 at 7:51 am

    Awww! Love these, you two. Sharing on my fb page and pinning!

    Reply
  10. Johnnie says

    04/11/2013 at 7:53 am

    Oops. I don’t know why I said you two. I meant Kelly!

    Reply
  11. Brenda @ a farmgirl's dabbles says

    04/11/2013 at 9:52 am

    They look almost real – great job, Kelly!!

    Reply
  12. Randi - Dukes and Duchesses says

    04/13/2013 at 12:57 pm

    Those are so pretty and springlike … and they’ll never wilt!

    Reply
  13. Melissa B says

    04/16/2013 at 11:00 pm

    I love these! They are so pretty! =)

    Reply
  14. Claire @ Polkadot Pretties says

    04/20/2013 at 5:14 am

    Thank you for linking up @ Craft, Create & Inspire linky party last weekend ..

    Your awesome project is featured this week!

    I would love for you to come and join us again this weekend ( this weeks party is now live )

    Claire @ Polkadot pretties

    Reply
  15. Up UpnAway says

    08/22/2013 at 5:18 pm

    Gorgeous! Great way to get involved with daffodil day. We are going to share this on our tumblr!

    Reply
  16. Laura says

    06/20/2014 at 5:44 am

    I love this and we are doing a Daffodil Team for Relay For Life this year. Thought these would be great to make but the Template don’t work.

    Reply
    • Kelly Rowe says

      06/20/2014 at 11:09 pm

      Hi Laura! Thanks so much for stopping by and what a fabulous use for them. I found another template and linked to it for you. Hope that helps. HUGS!

      Reply
  17. Lillian says

    02/04/2015 at 10:00 pm

    Hi! Where can I get the pattern to make the daffodils.

    Reply
  18. Ruth says

    02/27/2015 at 10:07 am

    Thanks for this idea. I wanted a brooch for st Davids day here in Wales. I sewed the basic shapes together without the stem and then sewed a brooch fastening on the back. Very pleased with the result.

    Reply
    • Kelly Rowe says

      02/28/2015 at 9:19 am

      Appreciate it Ruth. 🙂 Thanks for stopping by. I’m glad to hear that your brooch was a success! Have a great weekend. xo.

      Reply

Leave a Reply Cancel reply

Your email address will not be published. Required fields are marked *

Recipe Rating


Recent Posts

Sweet Potato Dog Treats Recipe

sign-up-for-live-laugh-rowe-weekly-newsletter

About Me

Hey there! About Kelly
Copyright © Live Laugh Rowe • Privacy Policy • Log in
Hey there!
I've been waiting for YOU.
Let's stay connected, shall we?
Sign up for daily or weekly updates.
Decisions. Decisions. {wink}
By signing up, you agree to receive Live Laugh Rowe e-mails.
Although I'd hate to see you go, you may unsubscribe at any time.
Your information will *never* be shared or sold to a 3rd party. I promise!
Wait! Before you go...
Let's stay connected, shall we?
Sign up for daily or weekly updates.
Decisions. Decisions. {wink}
By signing up, you agree to receive Live Laugh Rowe e-mails.
Although I'd hate to see you go, you may unsubscribe at any time.
Your information will *never* be shared or sold to a 3rd party. I promise!