
While I am in limbo and looking to go back to work full-time, I can’t just sit around and twiddle my thumbs. So, I thought why not tackle a project or two. We have 9′ ceilings on our first floor, so our half bath ceiling seemed so high, making the walls feel so blah. I had seen an article in magazine quite some time ago about a stenciling project — done freehand and thought that stenciling might be a nice touch to the half bath. I kept a lookout for the right stencils when I was in our local craft stores, but nothing seemed to catch my eye.
However, one day I was strolling down the stencil aisle at JoAnn Fabrics and saw a set of three stencils on clearance for 99¢. I was pretty darn excited, they seemed to a perfect fit for this project — and cheap! The brush was on clearance for 49¢ as well. I picked up these items and procrastinated a week or two before picking up a few bottles of stencil paint and deciding to officially get this stencil project started. I thought it would be a fairly simple task; however, getting everything proportional and straight and, well, up to my standards took a little more time than I thought. All in all it was worth it. This whole project cost my less than $5.00. SCORE!
Supplies I used included: paper plate, stencils, stencil paints (acrylic paints), planning sheet, small piece of plywood.
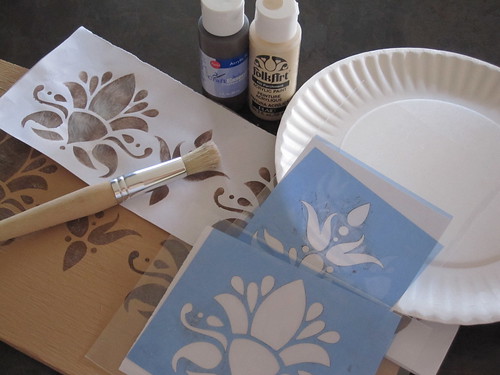 The paper plate was used to blot the paint off a bit as ‘less is more’ in a stenciling project. I used the plywood to paint a quick coat of the bathroom color on so that I could test my stencil paint to be sure the colors were going to work and what exactly I wanted to stencil. I didn’t want this project to end in having to repaint the bathroom {lol}. I ended up creating what I wanted out of all three stencils. I then prepared what I call a planning sheet. This allowed (helped) me to be figure out the placement on each wall. I had my pencil and eraser handy too.
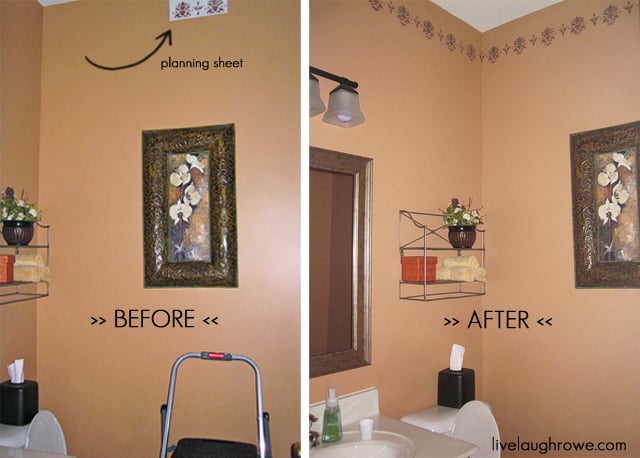
Thankfully, it all worked out perfectly for me (corners and all). I did two coats of brown, then went back with a light beige/cream to give it a worn look. The worst part was all the reaching, my neck took a beating over the course of this project, but the labor was free {smile} — so I couldn’t complain. Below are before and after pics. I apologize for the inconsistency of the color, but it gives you a pretty good idea. Not bad for $5, right?
 There you have it! A simple stencil project that filled some of the empty space in our half bath. Happy Stenciling!
Subscribe to Updates | Like on Facebook | Follow on Pinterest


janey says
WOW… that is so pretty… I love it… keep up the good work and you will get a few more projects done before going back full time …