Winter appears to have made a departure and spring is rolling in. We’ve been getting lots of rain, but the grass is green and I keep spotting daffodil and forsythia with their beautiful pops of yellow. Be still my heart. So, how about a tutorial for a simple spring hoop wreath? Nothing says, “Welcome Spring” like a spring wreath, right?
 It appears that spring wreaths have been an oversight here on the blog over the years. However, Easter wreaths have made a couple of appearances. For example, this simple Easter wreath is always popular due to its simplicity. Have some pastel fabrics laying around? Make this sweet scrap fabric Easter wreath.
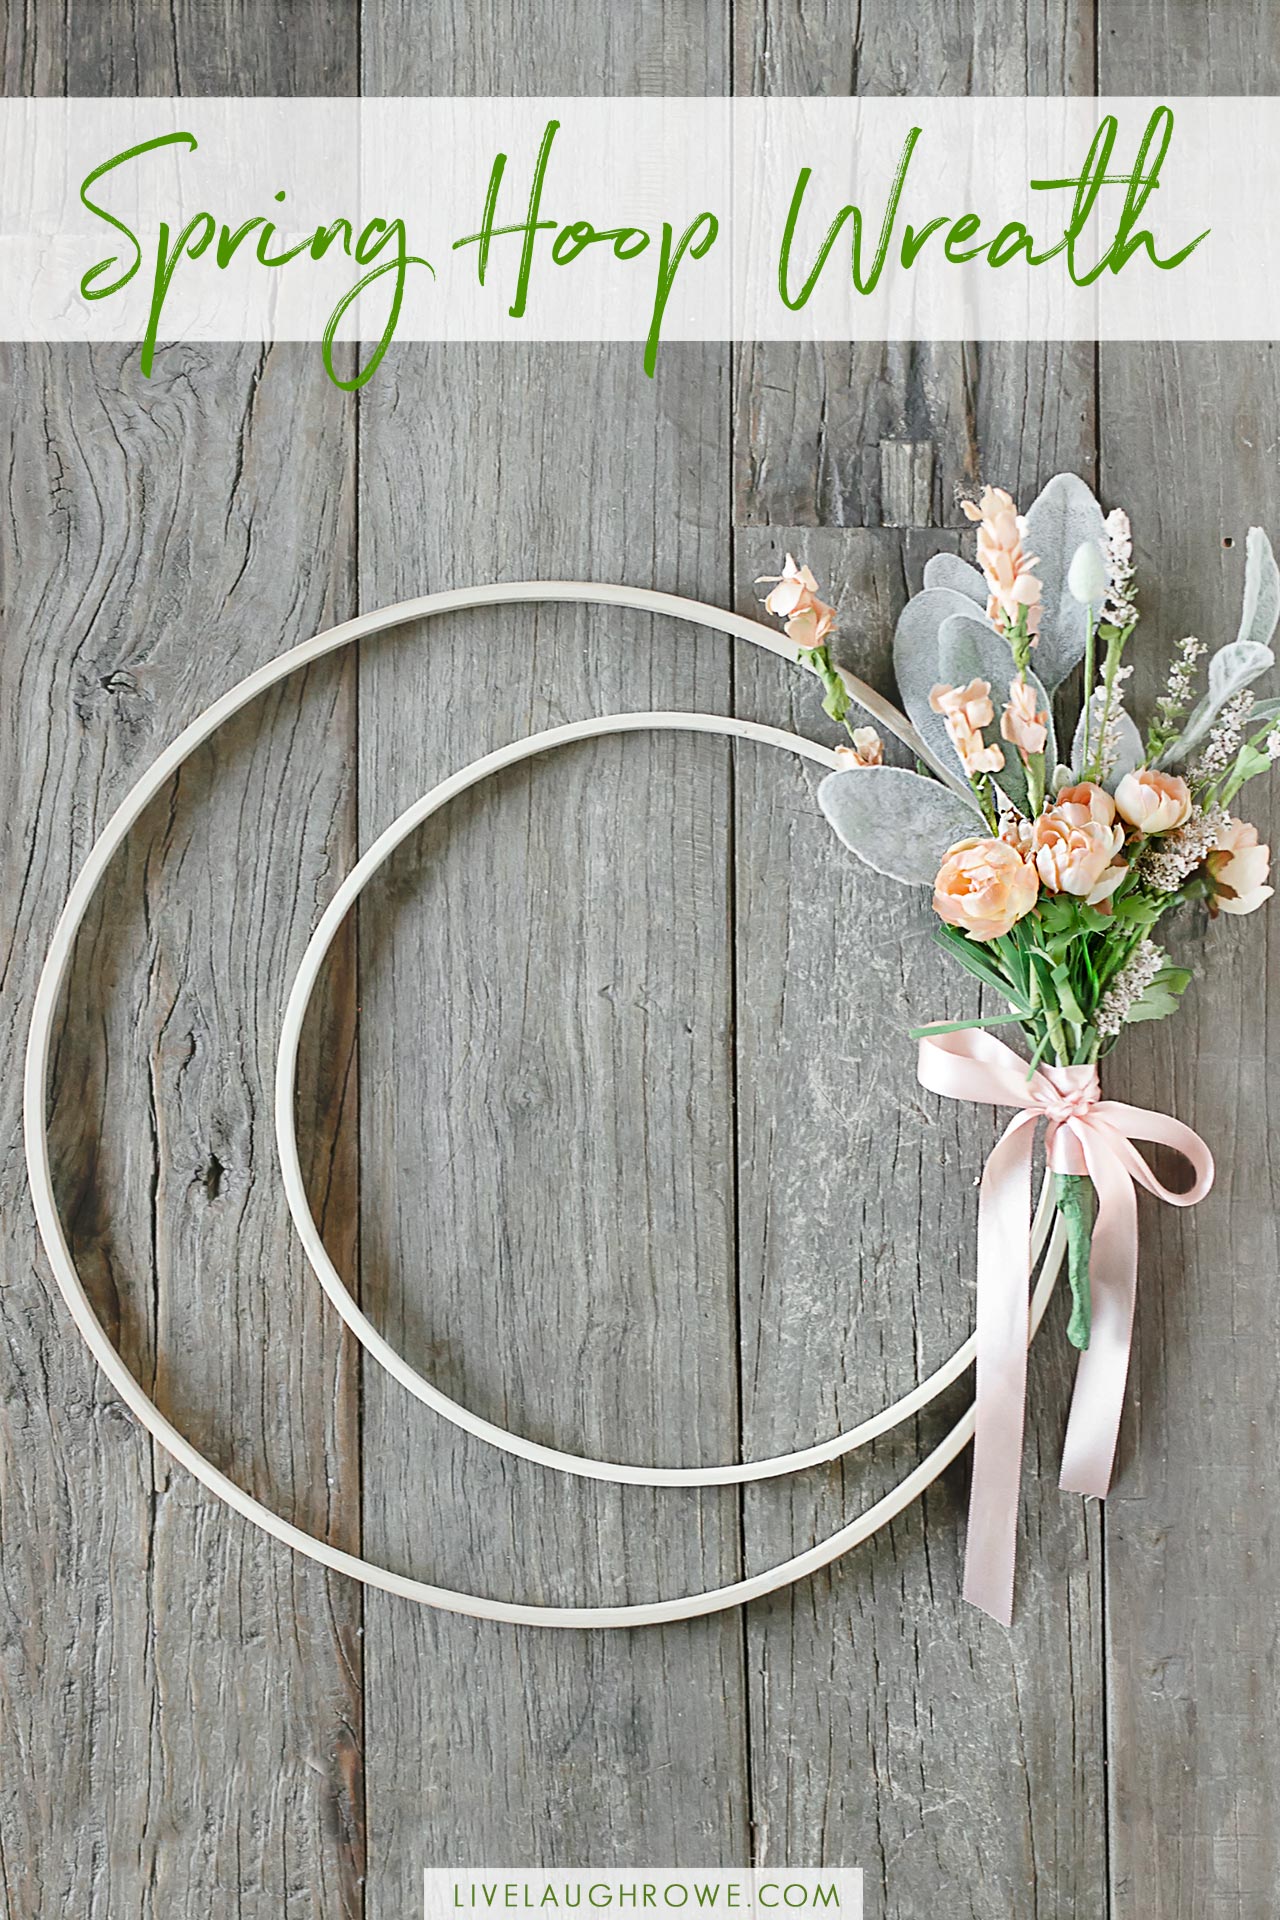
Spring Wreath
This year I thought I’d tackle sharing two or three different spring wreaths with y’all. And the crowds go wild.
Recently I was browsing through a magazine and saw a spring wreath made with embroidery hoops. It really caught my eye. And while hoop wreaths have been around for quite some time, they’re new to the blog and I’ve never made one.
As a result, here we are. Plus, last year I bought a bag of embroidery hoops to use for my needle punching; however, a couple came in handy for this project. Winning.
Would you believe that this sweet and simple spring wreath only requires about 15-20 minutes? Yep, you’ll have this spring hoop wreath done in no time.
The best part about hoop wreaths is that you usually only decorate a part of the hoop. In addition, you can make it unique to your style, decor, and/or preferences.
The only question left to answer is this — are. you. ready?
Alrighty, let’s grab our supplies and get this crafting party started.
Supplies:
14″ Embroidery Hoop, using the inside hoop
10″ Embroidery Hoop, using the inside hoop
Floral Wire (I used 26 gauge floral wire)
Wire Cutters (or scissors)
Floral Stems (mine are from Hobby Lobby)
Green Floral Tape
Ribbon
Instructions for Spring Hoop Wreath:
Step One: Connecting Hoops
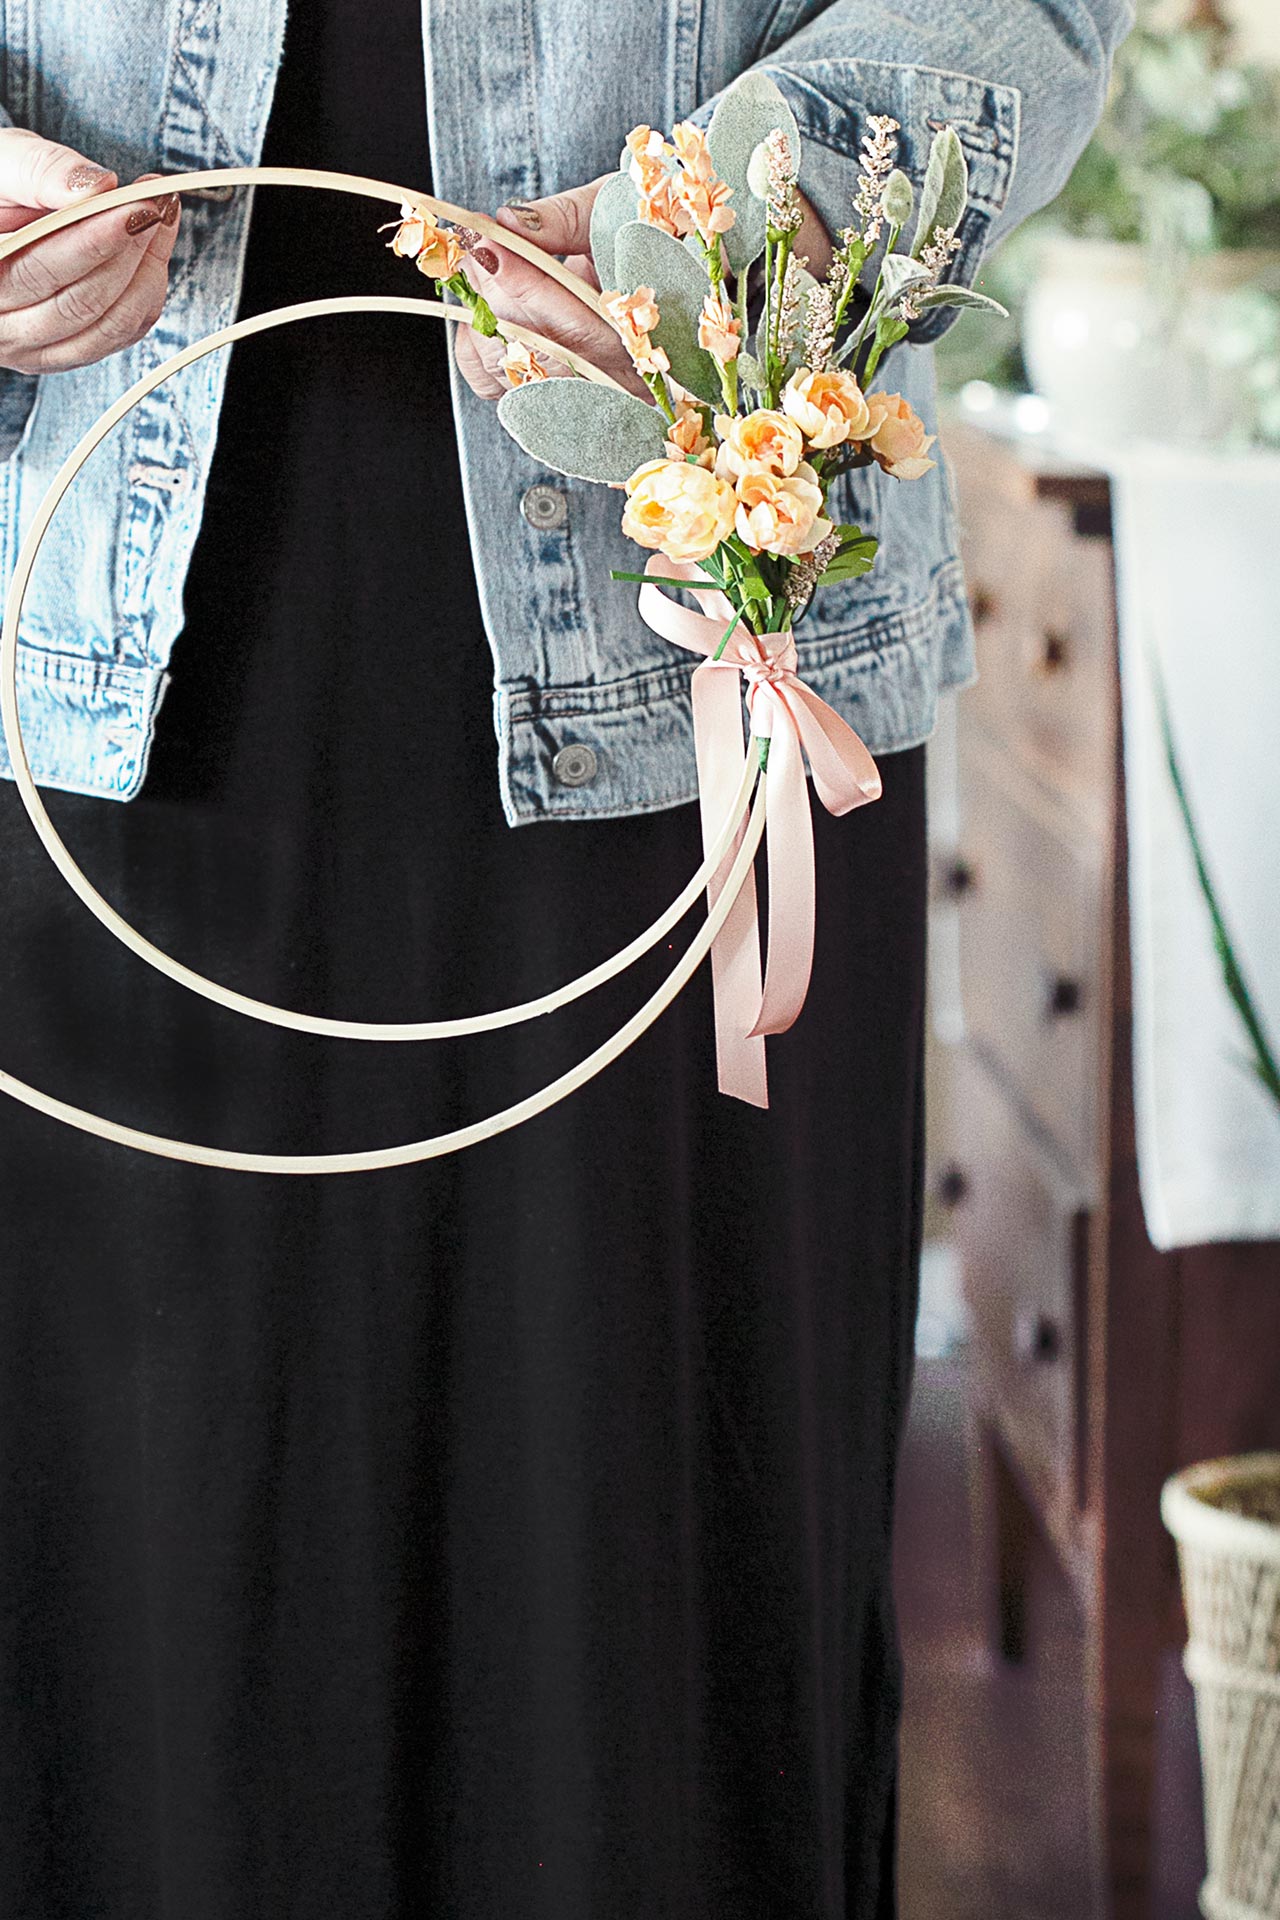
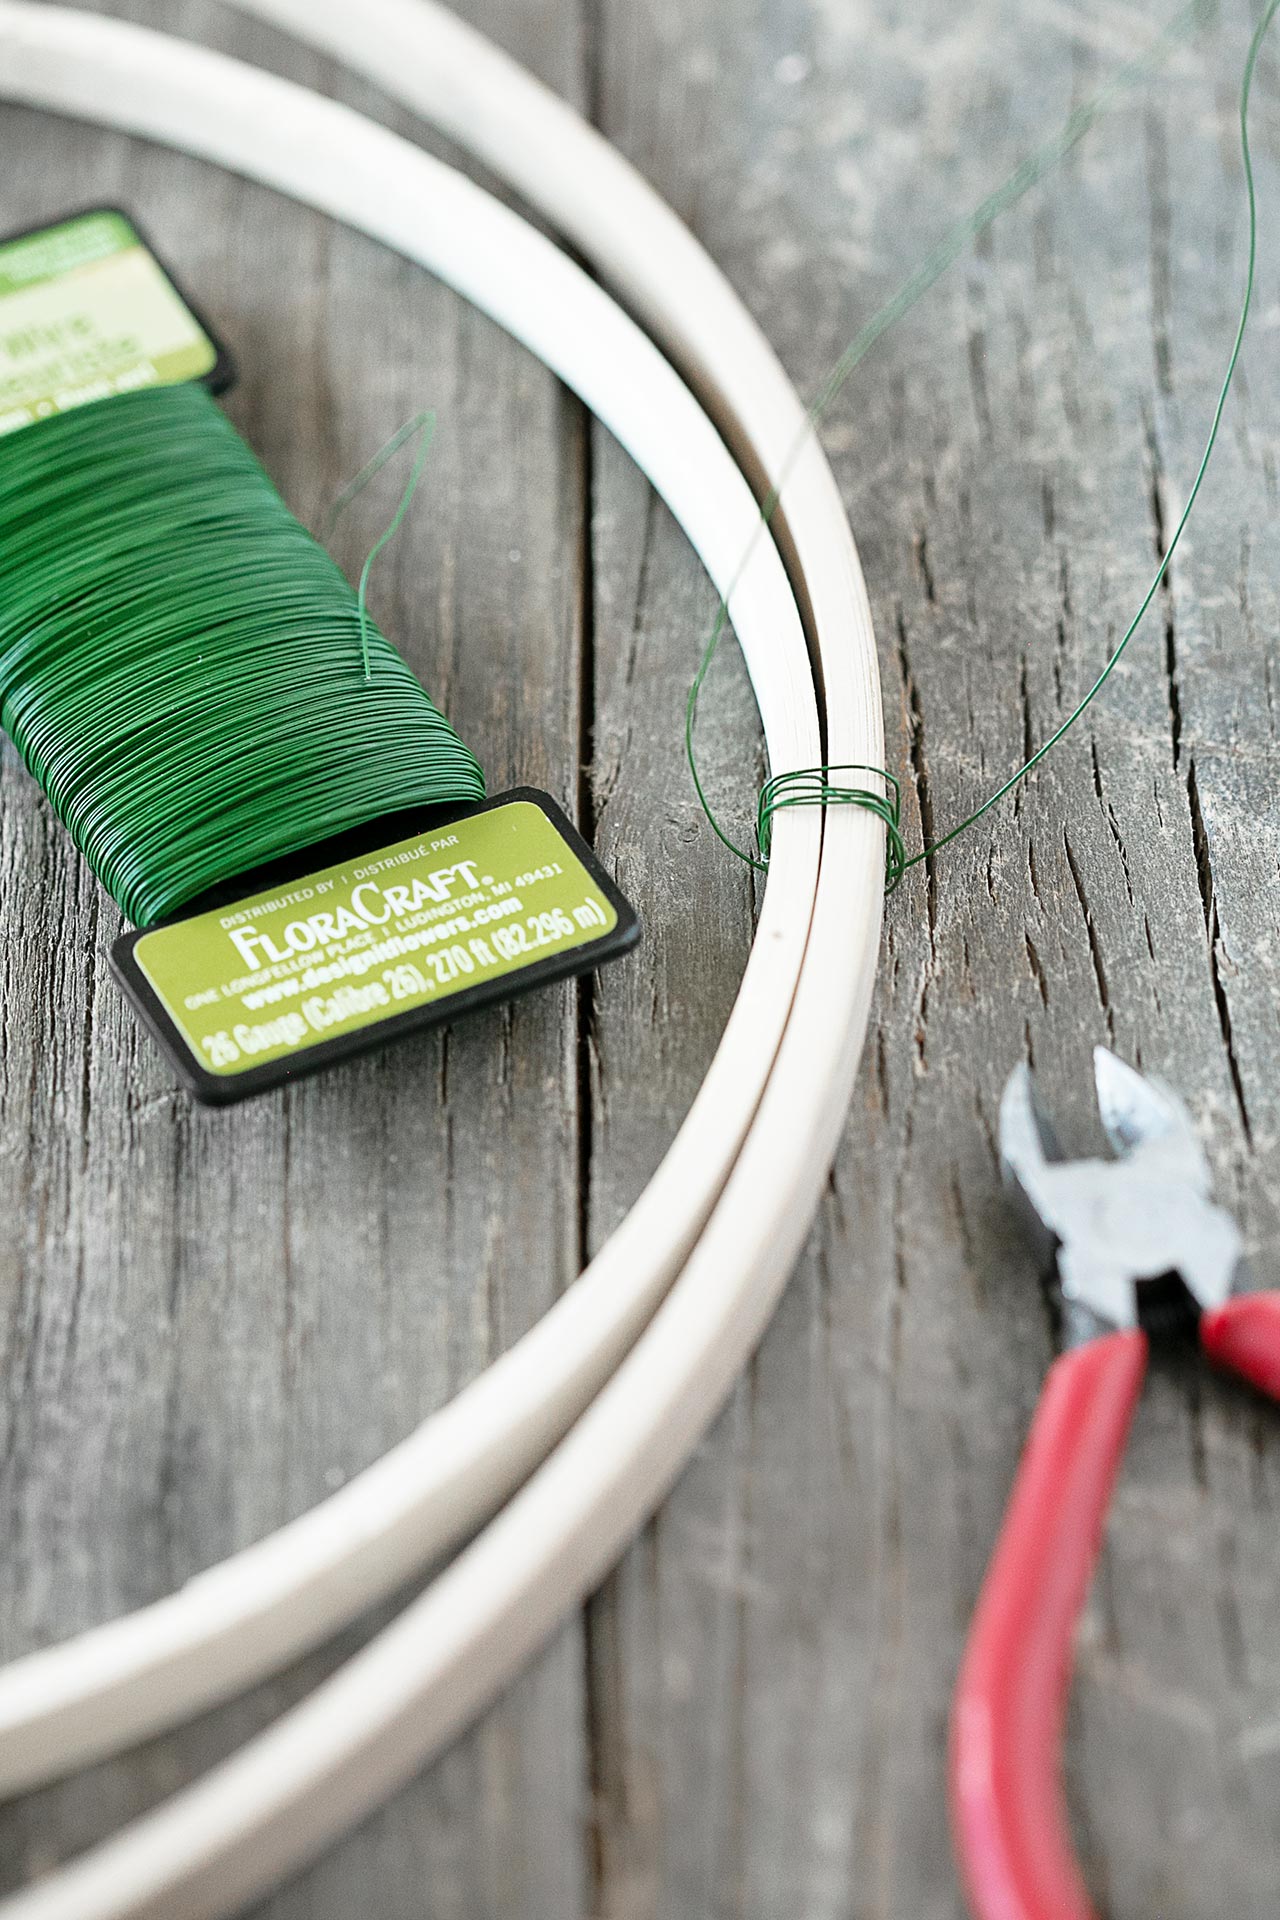 Start by connecting the two hoops using your floral wire. Be sure to wrap it around (and possibly in between) both hoops to ensure they are tightly connected to one another. Use wire cutters to cut the wire. Be careful not to poke yourself, I did.
Step Two: Floral Stems
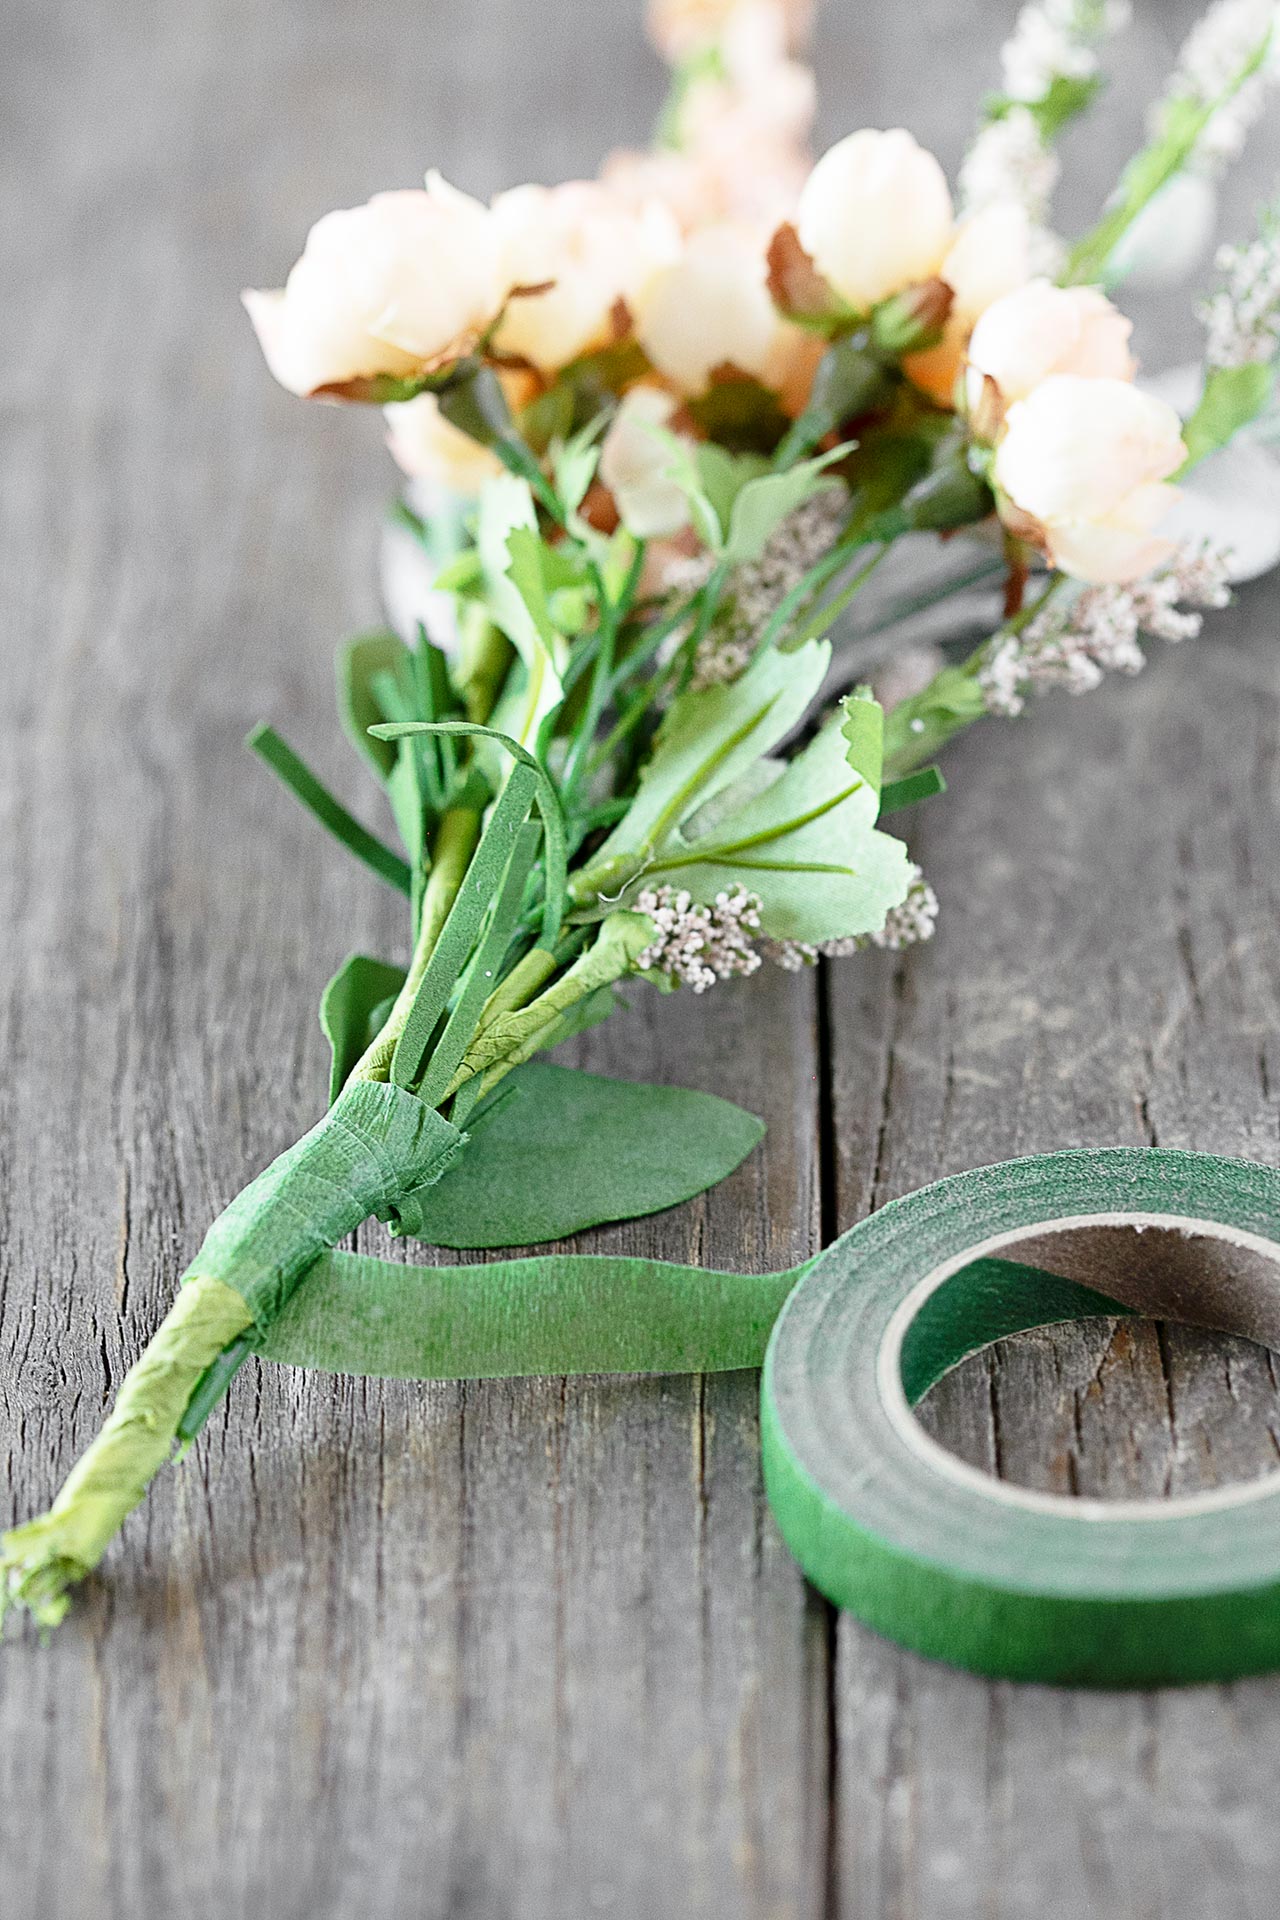 Grab your floral stems. I used three different single stems that complemented one another and looked springy.
So next, you’ll wrap the floral stems together using floral tape. This step is technically optional if you don’t mind the faux stems showing. I had to trim a couple of my floral stems, so wrapping them together with the green floral tape seemed like a great solution, adding a more finished touch.
Step Three: Attaching Florals to Hoops
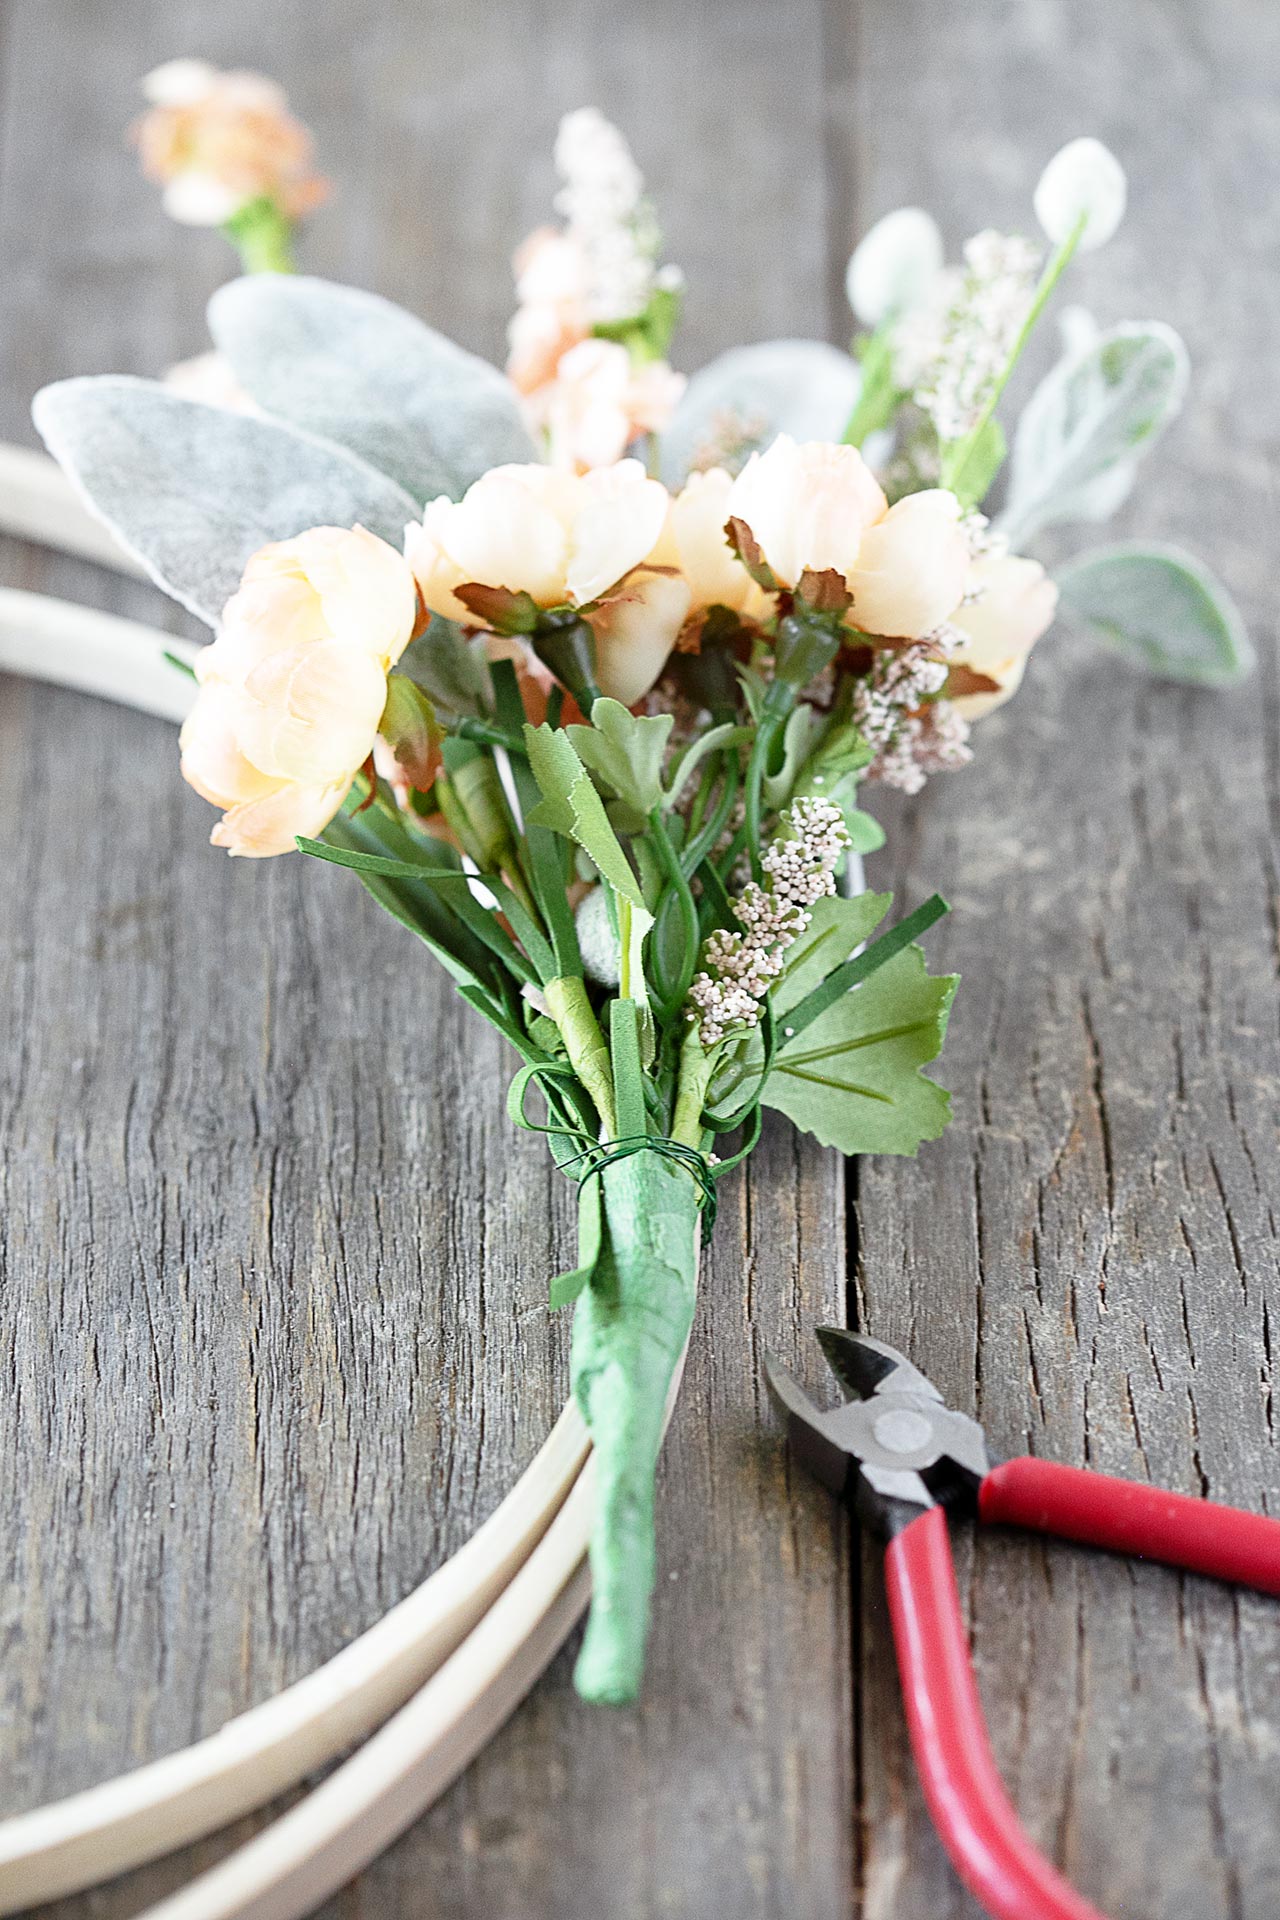 Grab those wire cutters again, it’s time to attach your floral bouquet to the hoops. Be sure to attach the flowers tightly. Flopping flowers are not springy, nor fun (ha). Carefully cut the floral wire using wire cutters.
Step Four: Adding Ribbon
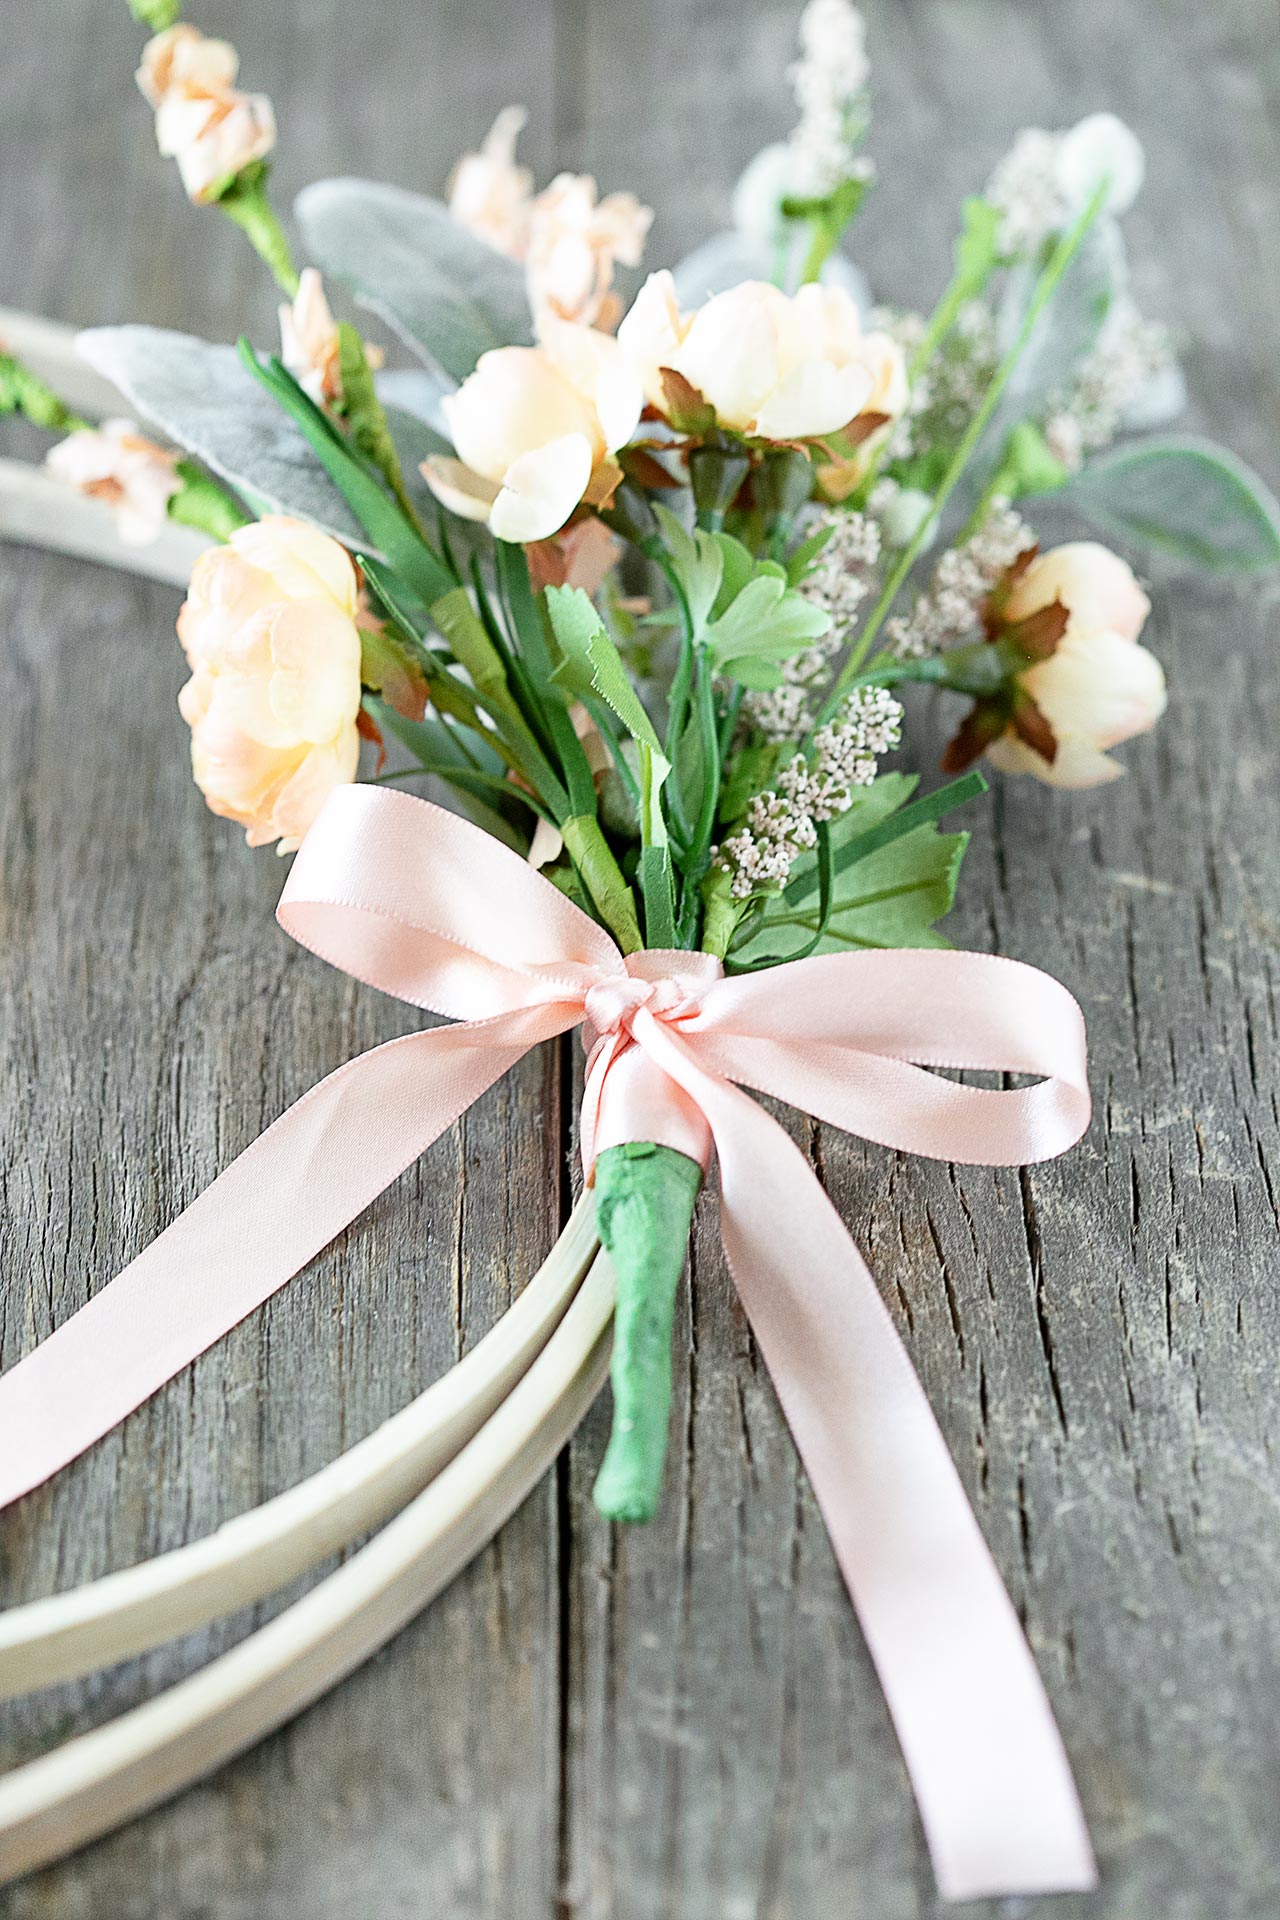 Last, but not least, we’re going to attach the ribbon and finish it off with a bow. Wrap the ribbon around the floral stems and hoops a couple of times and complete this step with a bow. Subsequently, I did place the ribbon over the floral wire, hiding that mild eyesore.
And that’s it. In short, your spring hoop wreath is done. What do you think?
Additional Notes:
Keep in mind that this spring hoop wreath will be a little heavier to the right side when hanging. Placing a couple of clear 3m hooks will help keep it centered. If hanging somewhere in the home, like an old shutter or window, I used a couple of strands of fish line on each side and slid it up and down so that the wreath hung properly.
That’s a wrap, friends. I think this would make a great girls’ night craft, don’t you? Enjoy.
Hugs and Blessings!


Leave a Reply