
Remember my DIY Photo Clipboard? They were a big hit last year! Well, this past fall my sister was making plans for her photography store. She usually sells calendars each year with some of her photographs, but this past year she wanted to sell something that could display them. We were talking about the photo clipboards and then it dawned on me that she could make them into smaller desktop frames by adding a wood peg to it! So, that’s exactly what we did… and they were a hit. Today I’m sharing this fabulous and simple DIY Wooden Clipboard Frame (with peg to create frame stand).
 DIY Wooden Clipboard

Supplies for DIY Clipboard:
Wood
Wooden Dowel, 1/4″ diameter
Sandpaper
Minwax Stain in Provincial
Staining Rags
#2 Bull Dog Clips
Small Wood Screws
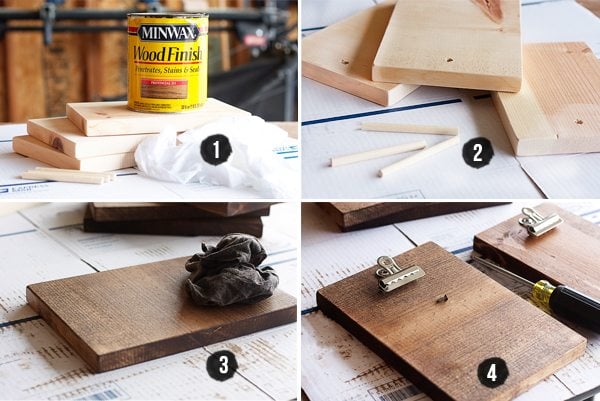 Step One: Cut wood to the desired size of the wooden clipboard frame you’re wanting. We made two sizes (see below). Once all your wood is cut, be sure to smooth edges using sandpaper.
-Frame to fit 4×6 photo or print: approx. 8.5″ h x 5.5″ w
-Frame to fit 5×7 photo or print: approx. 9″ h x 6.5″ w
-Dowel for wood peg: 4″
Step Two: Drill holes into the back of each wooden clipboard to fit your wood peg (dowel). We measured approximately 1-1/4″ up from the bottom of the board and used a 5/16″ drill bit.
Step Three: Stain each of your boards and wooden dowels with your stain of choice.
Step Four: Attach bulldog clips with screw.
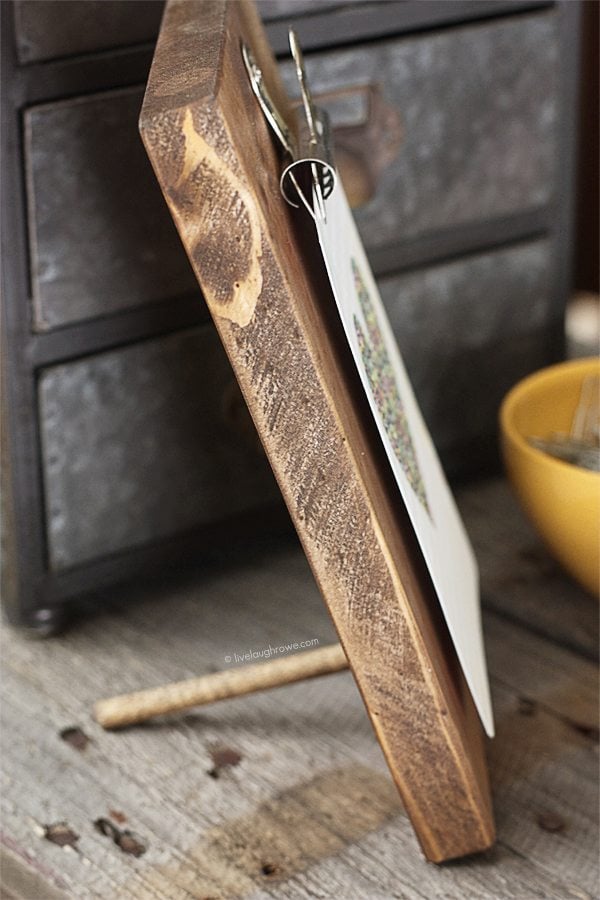
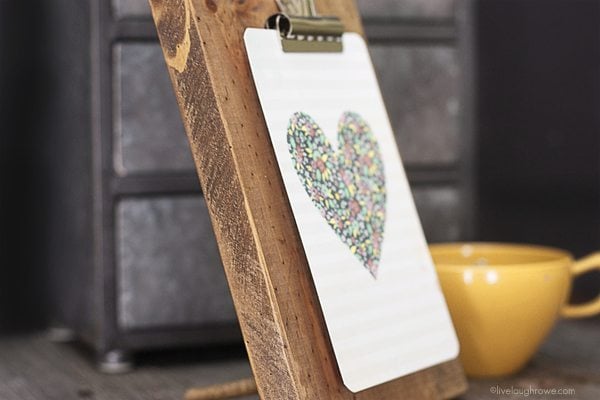
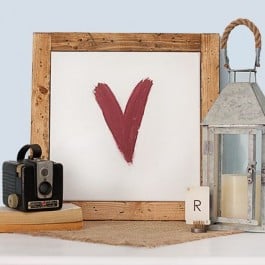
And that’s it! You’ll simply place your wood dowel into the hole, add your photo or artwork — and voila! Here’s a side view of the wooden clipboard frame. It’s pretty fabulous, don’t you agree?
 Be sure to visit with me here too:
Facebook | Instagram | Pinterest | Twitter | Google+


shonee says
Lovely idea!! I think giant clip boards are awesome! I really like the added touch of the dowel stand!
-Shonee
http://www.hawthorneandmain.com
Kelly Rowe says
Thanks Shonee! Enjoy the rest of your weekend. xo.
thecasualcraftlete says
Yes, it’s fabulous. This is seriously the cutest thing ever! I am definitely making one for my desk. Thanks for the tutorial, Kelly. xo
Kelly Rowe says
I’m sure one will make a lovely additional to your desk. 🙂 Enjoy the rest of your weekend. HUGS.
Gilly @ Colour Saturated Life says
I absolutely love this! Will be making one myself! Thanks!
Kelly Rowe says
Thanks Gilly! They are pretty great. 🙂 Enjoy the rest of your weekend. xo.
Lana | Never Enough Thyme says
Love this, Kelly! I’d like one for holding a printed recipe while I cook.
Kelly Rowe says
Thanks Lana! That is a great idea to have one to hold a recipe card. 🙂 Hope you’ll give one a try. Enjoy the rest of your day. HUGS.
Hannah Diane says
I adore this!! So cute!
Kelly Rowe says
Thanks so much! Appreciate you stopping by. Enjoy the rest of your weekend. xo.
Jane Maynard says
I know you have all these great DIY projects…but I want them to be KDIFM (kelly do it for me) projects 😉 SO cute!
Kelly Rowe says
Thanks for the smile Jane! 🙂 You are too funny. Hope you are having a wonderful weekend. HUGS.
Jen @ Noting Grace says
What an amazing tutorial! I have tons of scrap wood around and will be trying this soon! Thanks for rockin’ the inspiration!
Kelly Rowe says
Aw…thanks Jen! I appreciate it. Once you make one, you will want to make more. Trust me. 🙂 Happy Clipboarding! HUGS.
Cheyenne Bell says
May I ask, how did you cut the dowels and get a clean cut? My miter saw will rip them to shreds. Suggestions?
Thank you!
Kelly Rowe says
Hi Cheyenne. We used our Dremel Scroll (http://amzn.to/1XqScns, affiliate link). That worked perfectly! I think my husband did a couple on our chop saw and they survived 🙂 Regardless, we followed up with a little sanding to smooth out any rough edges. Hope that helps!
Barbara J Collins says
How much were you selling these. Would make a nice addition to my booth at the Christmas bazaar. Enjoy your “LiveLaughRowe”.
Juliette Ocon says
These are awesome! I want to make them for my engagement party. What type of wood did you use?
Kelly Rowe says
Hi Juliette. You can just use common boards for this project 🙂 Happy creating!
Mary Ann Cecola says
How long do you cut the dowel for each?
Kelly Rowe says
Hi Mary Ann. Under “Step One” it mentions the dowel should be about four inches. I hope that helps. Happy creating.
Mary Ann Cecola says
thanks, I missed that section!
Joani says
Seriously adorable! Thank you for sharing! I’m thinking Christmas gifts for my sisters and friends! I love that stain color, too! Thanks for mentioning what you used. I’m using dark walnut on a project right now and it’s a little dark, but I wanted brown with no red tones. Have a wonderful rest of your week!
Leah says
I love this idea. I want to make this for a gift. How did you screw the wood screw in? Is t the other part of the clip in the way?
Kelly Rowe says
Hi Leah. Great question. The best way to attach the screw is to put the screwdriver in the top clip hole and pushing it down to place it in the head of the screw that is between the top and bottom holes. And screw into the wood — the screws are usually much shorter so it won’t take too long. Does that make sense?