
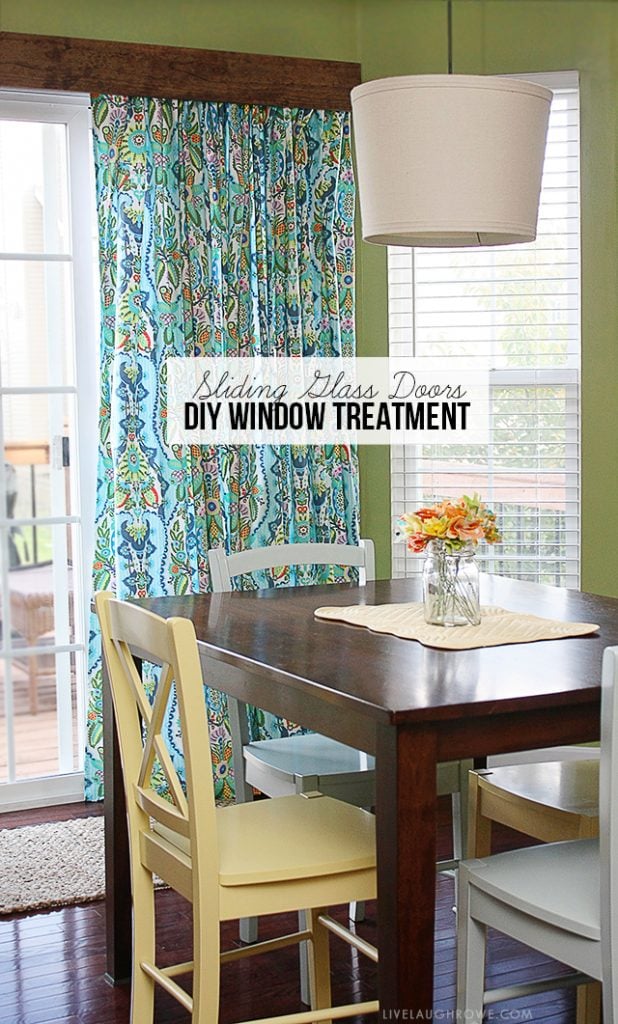
With new construction homes, you often have to consider some quick fixes when you need to cover doors and windows! We bought our house six years ago and felt like we were living in a glass house because of all the uncovered windows. The first week we hung sheets and then quickly bought shades for all the windows. For our sliding glass door, we bought the white plastic sliders. Perfectly functional, but not very decorative. It only took me six years (and my husband accidentally breaking them) to finally decide it was time to ditch the the white sliders and tackle a DIY Window Treatment for Sliding Glass Doors.
![]()
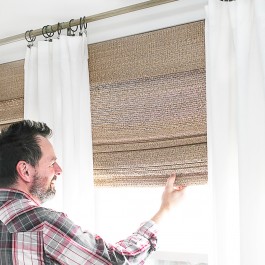
Today I’m going to share the curtain portion of this DIY Window Treatment as the post was getting a wee-bit long and a little heavy on the pictures. Tomorrow we’ll chat about the awesome sauce cornice with attached curtain rod for less than $25.
Supplies:
Measuring Tape
Fabric
Scissors
Pins
Sewing Machine
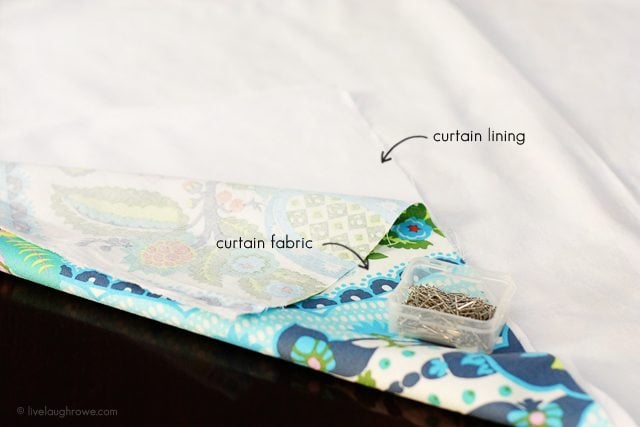
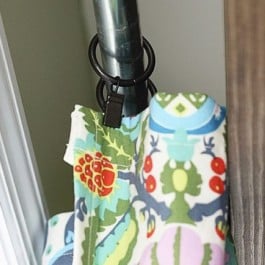
As with any curtains you need to measure your windows and be sure to add extra fabric to your yardage for your hems. My sliding door and window measured 64″ wide x 82″ high. So, I went with 9 yards of fabric and lining. I found this awesome sauce fabric by Amy Butler from Online Fabric Store and fell in love! It’s called Harriet’s Kitchen Sugar too, which I found to be no coincidence being my kitchen is within this space. I thought it would work perfectly in our space and add some pops of color. For the lining, I went with Roclon Rain No Stain White Drapery Lining because of them being by a sliding glass door and, well, my two little furry friends {smile}. OnlineFabricStore.net has some AWESOME fabrics — be sure to check them out!
Here is the space before it’s transformation.
 A wee bit motivating, right?! Hee-hee. So I went to work. Lots of cutting, lining up the fabrics and pinning. I decided to go with four panels sized at 40-1/2″ wide by 82″ high.
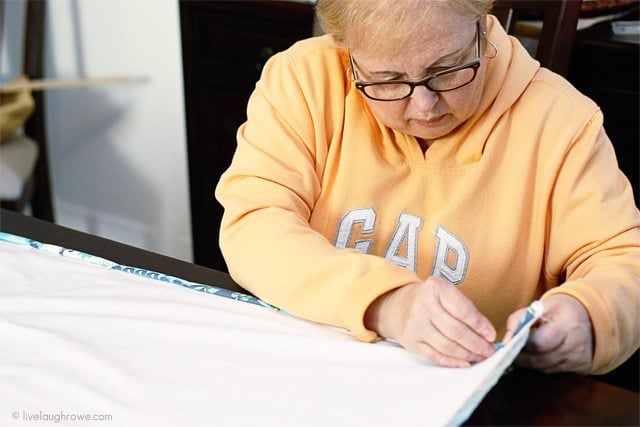
 Thankfully my mom was here for a visit when this project was underway, so she was a HUGE blessing in helping me pin. She passed on any of the sewing, so I tackled that after they left. Pinning is the most time consuming part of the process. Ensuring all your panels are the same size (with hems) is the most stressful part of the process {hee-hee}.
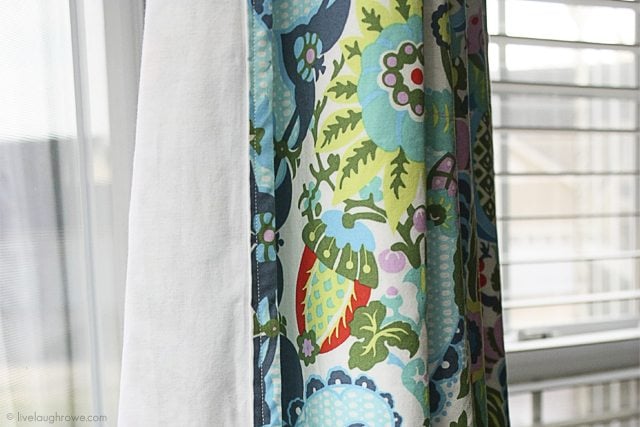
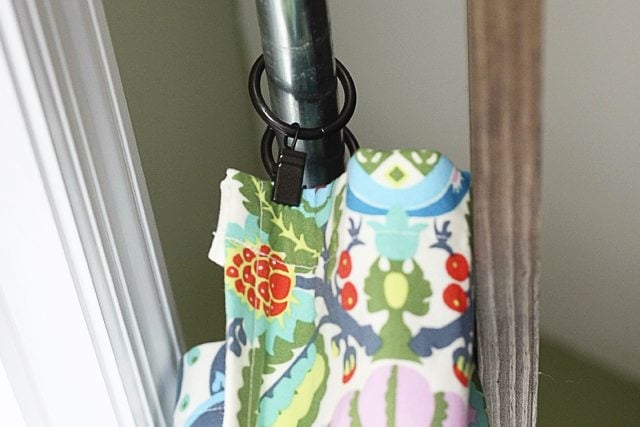
 I did a 1/4″ hem on both sides of each panel, along with 1-1/4″ hem on the top and 2-1/4″ hem on the bottom. I knew from the start that I was going to be using curtain clips to hang them, so the top hem really had no rhyme or reason — you could do that to fit your curtain needs. Here is a snapshot of the side hem.
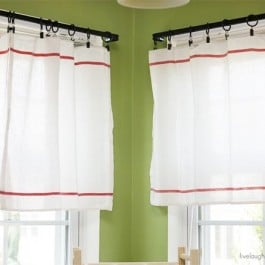
 And here they are hanging on the curtain clips.
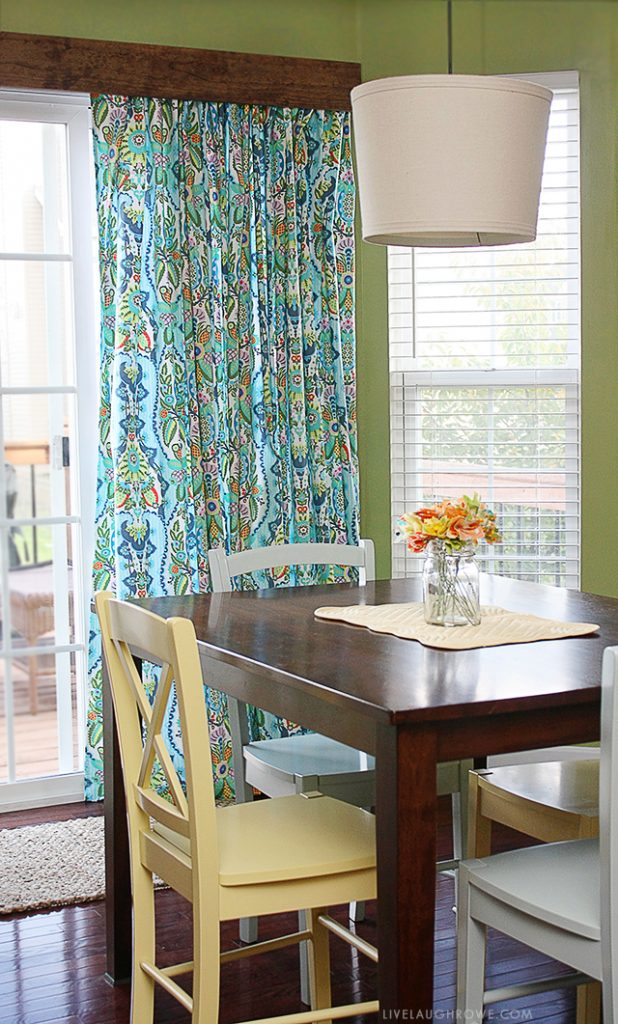
 Tomorrow I’ll share how we built the cornice box with attached curtain rod! Friends, I couldn’t be happier with how this project turned out. It was time consuming, but worth it! I couldn’t find these curtains anywhere and panels can be very pricey, adding up fast.
Here we have the before and after.
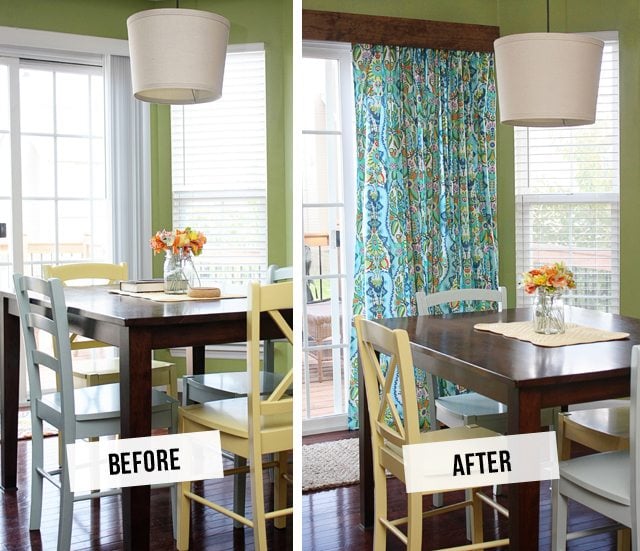
What do you think? I absolutely adore them!
I hope you’re feeling inspired too.
 psst. Be sure to check out this DIY Window Treatment using hand towels — and this tutorial for no-sew burlap curtains!
 Be sure to visit with me here too:
Facebook | Instagram | Pinterest | Twitter | Google+


Alyson says
Kelly, they are gorgeous!!! I absolutely love the print & the hems are so nice! Nice hems make a HUGE difference when you’re talking something like curtains. Great job. 😉 What fabric is that?! I’m in love. And, I love the idea of 4 panels, so that you can pick & choose if you have sun coming in from one spot but not another. Lovely!
Kelly Rowe says
Hi Alyson! Thanks so much for your sweet words. I think I surprised myself as to how well they turned out (hee-hee). The fabric is by Amy Butler. The name of the fabric and link are in the post 🙂 HUGS!
Annette says
They are just beautiful and I think the perfect solution to my sliding door! Do they open and shut easily? My fear was they would get stuck along the way similar to a shower curtain.
Kelly Rowe says
Hi Annette! Thanks so much for loving on my curtains. I think they open and shut very well — I found the white plastic sliders to be a more of a hassle (hee-hee). Have a fabulous week.
Jenn says
You know I love them!!!
Kelly Rowe says
Thanks, friend!! Love you. xo
mithra says
Curtain color and folds gives more attention. And i love most is the wooden curtain rod frame which gives complete look of the curtains and really goes well with the furniture.
mithra says
I love most is the wooden curtain rod frame which gives complete look of the colorful curtains and really goes well with the furniture. May I know where can i buy one.
Thank you.
Lora says
Hi, I didn’t see the instructions for the box it attached to. Can you send me the link? Thank you,
Kelly Rowe says
Hi Lora. Here is the link for the cornice box DIY: https://livelaughrowe.com/build-wood-cornice-box-attached-curtain-rod/
Al says
49″ high?
Kelly Rowe says
Yes, 49″ high or long 🙂
Al says
But the door is 82″ high. I’m so confused. How did you cover that. Sew two together ?
Kelly Rowe says
Oh my goodness — I didn’t read through the post carefully and see what you’re saying. That is a typo and you’re the first person to bring that to my attention, so thank you so much! Each panel would have to be 82″ high as well. I’ve corrected the post to reflect this as well. Thanks again.
Tammy says
HI can you please tell me color of the green paint? Thanks
John says
Nice guide, people seem to really like it :).
I am pretty bad at DIY so I buy blinds from Dako.