This post is brought to you in collaboration with The Home Depot.
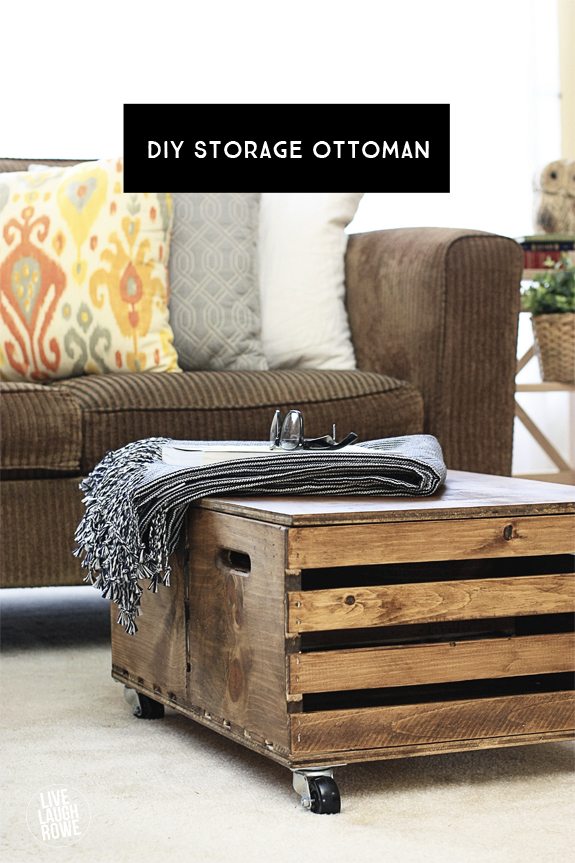
Storage. Can you ever really get enough storage space? For me, NO! I can always use more storage. How about you? Well, this DIY Storage Ottoman might just fit the bill. It’s easy to pull together and can add functionality to your space. For me, that’s a win-win!
Supplies:
(2) 18″ x 12½” x 9½” wood crates
(2) 25″ x 18″ pieces of plywood will be the base and the top, respectively.
(4) 2″ casters – locking or non-locking
½ Pint Varathane Wood Stain
Paint brush and/or Rags
Drill & Bits
(2-pack) 1½ inch Satin Brass Non-Removable Pin Narrow Utility Hinge
(2) 4-packs #6 ½ inch Screws Silver/Chrome Finish
12-pack #8 ¾ inch screws
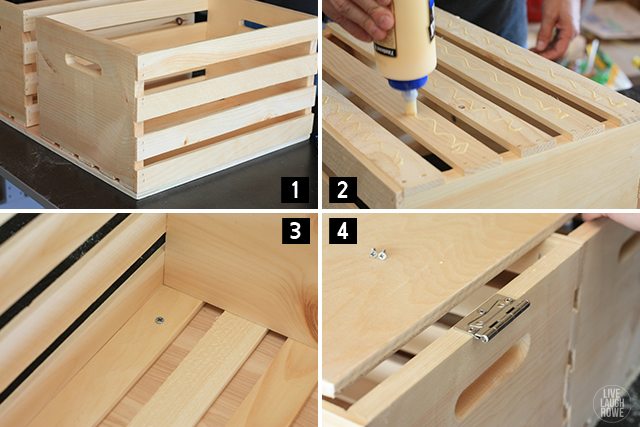
Step 1
The first step is to attach your wood crates to one of the two pieces of plywood. Line them up next to each other, apply some wood glue and secure with #8 ¾ inch screws in the corners. (See photos 1-3)
Step 2
Next, measure and mark where to attach the hinged top. To make the hinges align with the handles in the wood crate, simply measure to find the middle of each crate, above the handle.
Having a second pair of hands would be helpful here — one to hold the top piece, and one to help align the hinges and hold them in place. Use shorter #6 ½ in. screws. (See photo 4)
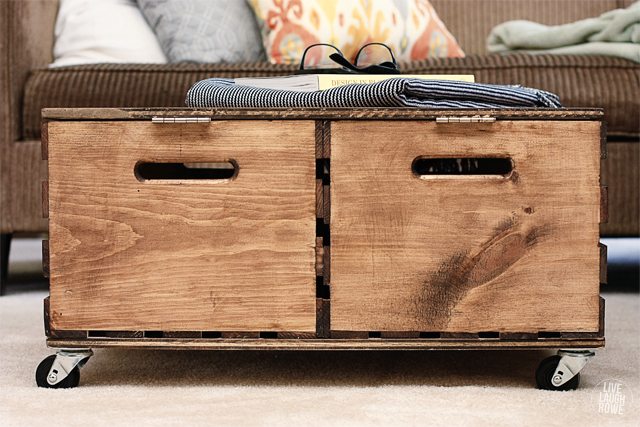
Step 3
Next, attach the casters with #8 ¾ in. screws.
Be sure to align the caster where the screws will go into a plank on the base of the wood crate. If you miss it, the screw might show through. Plus, it’s an extra layer of strength to screw through the plywood and into the wood crate.
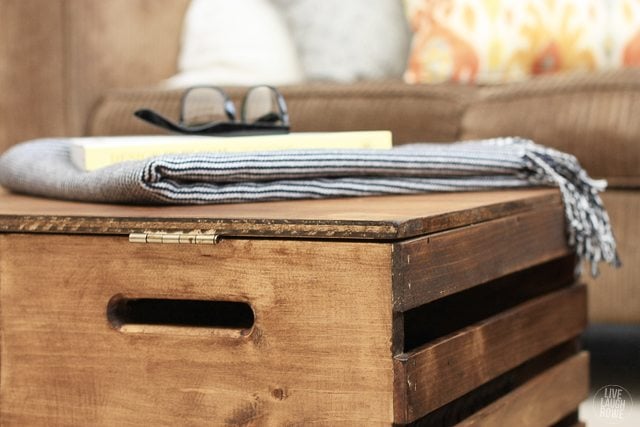
Step 4
Last but not least — stain using a brush or rags. Of course you can stain your storage ottoman at any time throughout the process, that is completely up to you. I prefer waiting until the piece is assembled so that I don’t damage it.
*Looking for more tutorial photos? Feel free to visit the Home Depot blog.
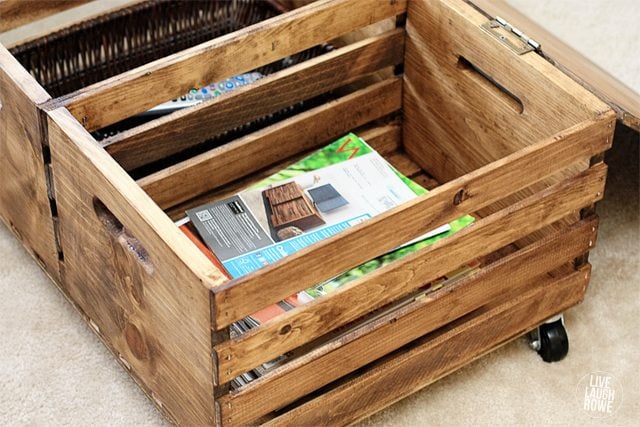
 And you’re done! This is a great weekend project that will provide you with storage for magazines, books, remotes, smaller blankets and more! Don’t forget that with the caster wheels if can easily be moved from room to room. Boom!
Guess what? You can build one of these at the July 16th DIH Workshop! Be sure to register on-line and don’t forget to bring a friend! Happy creating, friends! xo
Care to stay in the loop? I’d love to have you!
Catch me snapping + sharing pictures over on Instagram.
Subscribe to Updates | Like on Facebook | Follow on Pinterest
Linking up at Between Naps on the Porch


nancy says
This is a redo of a weekend workshop project held at Home Depot back in January or February…I’m doing something on a smaller scale for the Rohnert Park, CA DIY workshop in July. One crate…I nail-gunned four 2″ feet (2×2’s) to the bottom of the crate and 1-1/2″ “stops to the bottom of the lid to keep it from sliding off. I applied 2” of foam to the plywood top and covered that in fabric, stapling to the underside of the lid. A little less bulky and as the ladies will be building these in class and taking them home, they’ll fit in everyone’s car. The crates are only $11.97 and my local Beverly’s Fabrics is giving the ladies 25% off the purchase of foam and fabric. Turned out really cute…wish I could attach a picture of my finished project for you to see (I stenciled the sides of the crates just for fun).
Kelly Rowe says
Sounds like a GREAT project, Nancy 🙂 Thanks so much for sharing that and I hope your event is a HUGE success. Have a Happy 4th. xo
Liz says
I love this idea. Thank you Kelly and Happy 4th to you and your family!
Kelly Rowe says
Thanks so much Liz! Appreciate it. Have a wonderful day. xo.
Sharon aka Mom says
Wow! Kel, this is totally is totally awesome! Definitely will keep this in mind for Springfield. Great idea! Thank you!
Jelli says
You are so stinkin’ crafty, Kelly! I wish you could fly south and teach me (and my husband) how to use power tools. Right now we have access to all kinds of wood scraps at our ministry site, but neither of us in handy at all. Love this DIY! It would be super handy.
Kelly Rowe says
You are too kind Jelli! I appreciate it…and bet those wood scraps would love some attention. 🙂 Enjoy the rest of your week. HUGS.
Ashley says
This is adorable Kelly!! : ) I love how it turned out!
Kelly Rowe says
Thanks so much Ashley! Appreciate it. Have a wonderful day. HUGS.
Erlene says
We’re in a small home with 4 kids and we can always use extra storage. Love this idea.
Kelly Rowe says
Thanks so much Erlene! Appreciate you stopping by. Extra storage can always be useful…that is for sure. xo.
Jane Maynard says
LOVE this! beautiful work!
Kelly Rowe says
Appreciate it Jane! Have a wonderful day. HUGS.
Jen says
This looks lovely and easy enough – although I think that my sweet husband will be contemplating bodily injury if I give him yet another project to do lol (we just moved and I have lots and lots of things for him to do).
Stopping by from Sharefest!
Kelly Rowe says
Thanks for stopping by Jen! Maybe after you are little more settled, you can have your husband make one of these for you. 🙂 Have a wonderful week. xo.
Sam @ DIY Just Cuz says
Hi Kelly, this is great! I love that it can be made using the foundation of the crates! Thanks for sharing, pinning.
Georgia @ Silver Spiral Studio says
I LOVE this!! thanks for the inspiration 🙂
Marisa says
Love this! What color stain did you use?