• Skip to primary navigation
  • Skip to main content
  • Skip to primary sidebar
  • Skip to footer
Live Laugh Rowe
  • About
    • About Me
    • Contact Me
    • The Rowes
    • In The Press
    • PR & Advertise
    • Privacy Policy
    • Resources
  • Recipes
    • Appetizers/Snacks
    • Beverages
    • Breakfast
    • Desserts
    • Main Dish
    • Side Dishes
    • Sandwiches
    • Skinny Dishes
    • Slow Cooker
    • Soups/Chilis
    • Weight Watchers
  • Crafts & DIY
    • Crafts
    • Decor
    • DIY Projects
    • Fall Projects
    • Holidays
    • Home Projects
  • Printables
  • Shop My Home
  • Facebook
  • Instagram
  • Pinterest
  • Twitter
Subscribe
Live Laugh Rowe

Live Laugh Rowe

A lifestyle blog that shares crafts, recipes, tutorials and life's moments.

  • About
    • About Me
    • Contact Me
    • The Rowes
    • In The Press
    • PR & Advertise
    • Privacy Policy
    • Resources
  • Recipes
    • Appetizers/Snacks
    • Beverages
    • Breakfast
    • Desserts
    • Main Dish
    • Side Dishes
    • Sandwiches
    • Skinny Dishes
    • Slow Cooker
    • Soups/Chilis
    • Weight Watchers
  • Crafts & DIY
    • Crafts
    • Decor
    • DIY Projects
    • Fall Projects
    • Holidays
    • Home Projects
  • Printables
  • Shop My Home
  • Facebook
  • Instagram
  • Pinterest
  • Twitter
Subscribe

DIY iPhone Case | Brand Yourself

04/01/2013 · Kelly Rowe · 27 Comments

This post may contain Amazon or other affiliate links. As an Amazon Associate I earn from qualifying purchases.

Pin
Share
Tweet
Share

It’s here!  A couple of weeks ago I shared my DIY iPhone case that I customized to brand my blog on Facebook and Instagram.  A lot of you asked for the tutorial, so here we go.  YAY!  Now, let me first say that this tutorial is for an iPhone case; however, with the right supplies, this could be done for any phone if you can find a case that has a clear back.
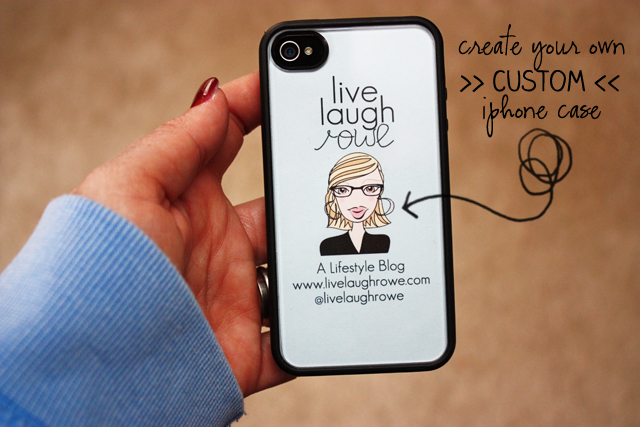
create your own custom phone caseBlissdom was the first time I used my new case and it was a hit!  Thee perfect conversation starter, so imagine how much attention you could get carrying that with you wherever you go!  Just be sure to have your business cards on-hand too {wink}

So, without further ado — let’s personalize an iPhone case and brand your blog or shop!

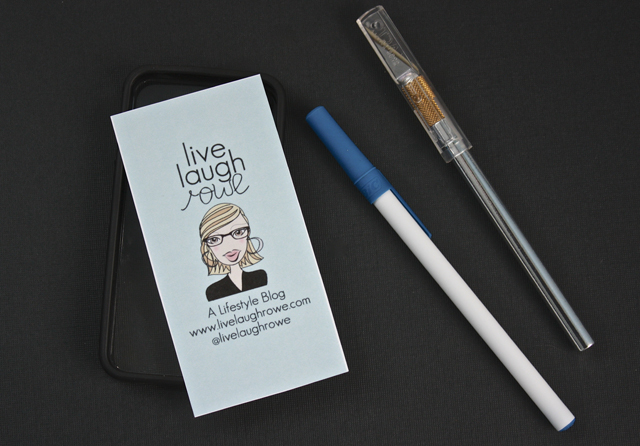
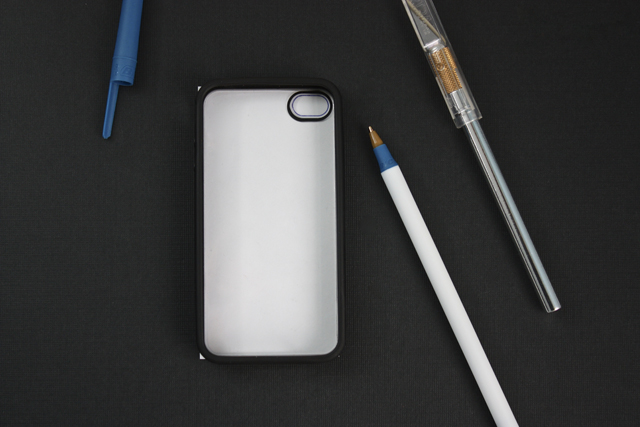
Supplies needed:  computer program to design your insert (I used Adobe Photoshop), clear back phone case (mine is the Reveal by Griffin – pictured below), printer, card stock/paper, scissors, and an X-ACTO knife.
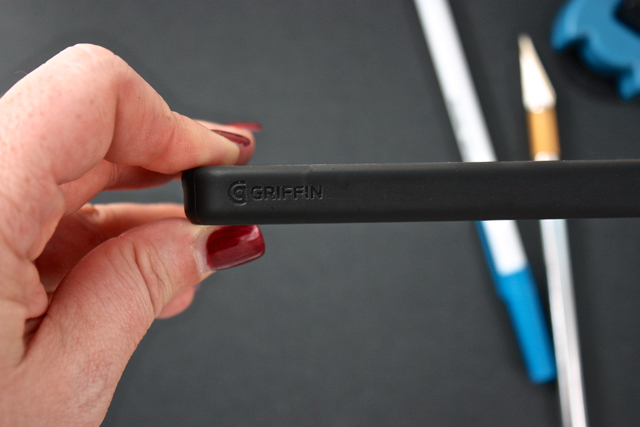
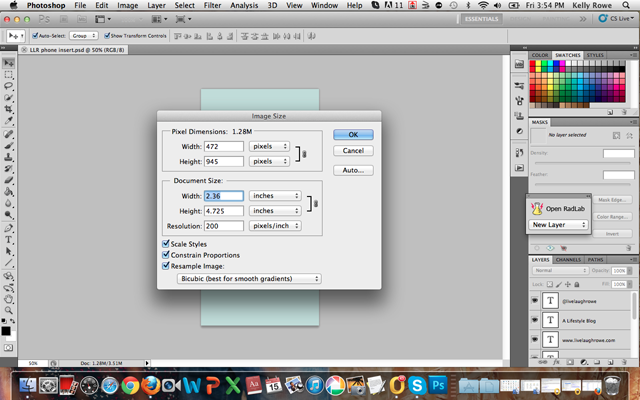
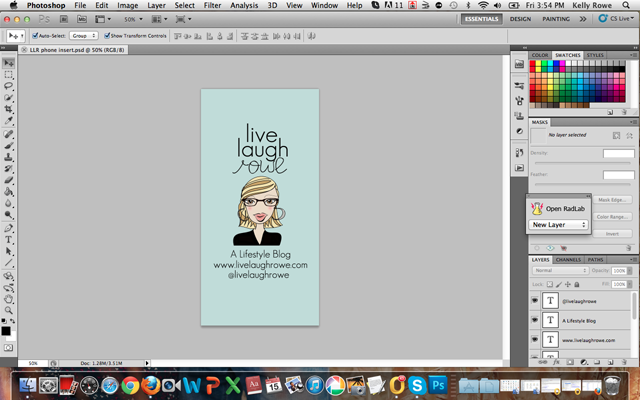
griffin iphone caseWe’ll start by designing our insert.  Measure you case.  Mine case is for the 4S, so mine is sized at 2.36″ x 4.725.”  Be sure your sizing it in inches and that the resolution is high enough for clarity.

personalized iphone caseThe you’ll design your artwork.  I started with the rectangle tool and matched the color to my blog.  I then added the layers of texts and my avatar.  Of course you’ll continue tweaking it until you feel you’ve created your masterpiece!

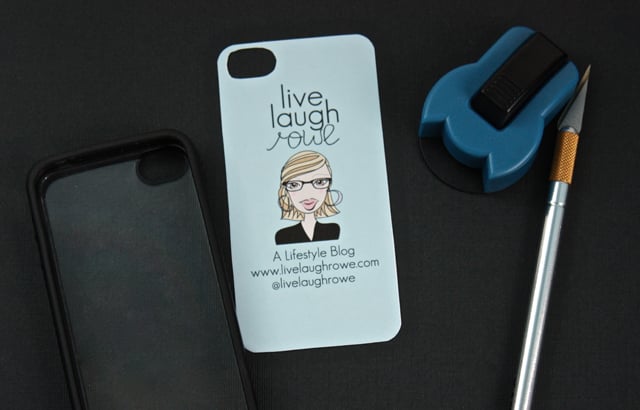
DIY iphone caseOnce you’ve completed the artwork for your insert, you’re done!  Now you’ll print and cut…  then we move onto fitting it into the case.  Grab your insert, phone case, a pen and X-ACTO knife.

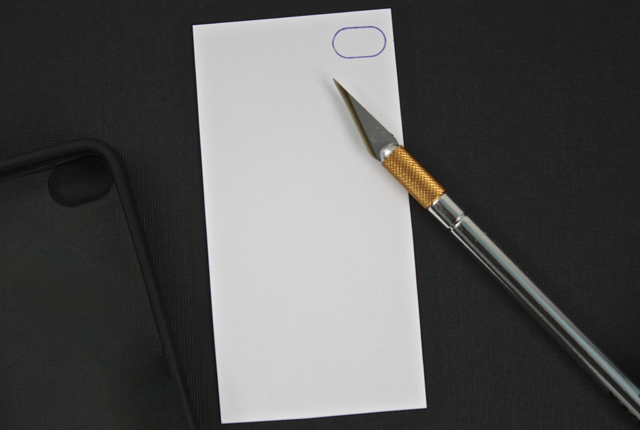
interchangeable iphone caseYou’ll then lay your insert down facing your surface and place the back of your phone case on top of it to trace the camera slot onto your insert.

DIY iphone caseUse your X-ACTO to cut out the camera slot.  It doesn’t have to be perfect either… I learned that the hard way {giggle}.  The imperfections of the cut will be hidden (the camera slot on my phone case has a black ring that hides the imperfect cut).

personalized iphone caseBe sure to do you cutting on a self healing mat or cutting board!  We wouldn’t want any damage to a table, desk or counter-top.

DIY Personalized iPhone CaseOnce your camera slot is cut out, round your corners.  I had a hole punch that I used; however, you could easily round them off with scissors as well.  Now we’re ready to place the insert into the case!  YAY!

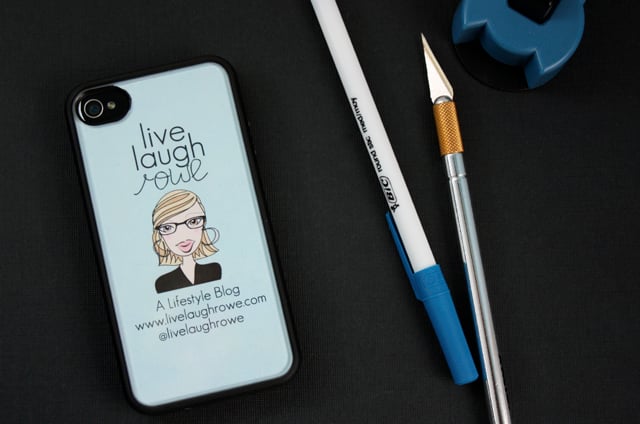
DIY iphone caseNow you’re ready to sport you brand, blog or business!  I {love} it.
What’s even better is that it’s interchangeable!  Fabulousness.
Now it’s your turn to create your own DIY iPhone case
Happy Crafting and marketing yourself!  xo

I’ll be partying {here and here}.
Subscribe
 to Updates | Like on Facebook | Follow on Pinterest
Kelly140

Pin
Share
Tweet
Share

Related Posts

Wall Paneling Pictures

DIY Wall Paneling Ideas

25+ DIY Pineapple Projects and Printables for you to enjoy!

25+ Pineapple Projects and Printables

Outdoor Serving Stations to Build this Weekend

25 Fabulous Handmade Gift Ideas

25+ Doily Craft Ideas. From wreaths to chandeliers, these paper doily crafts are truly inspirational. livelaughrowe.com

25+ Doily Craft Ideas

Over 19 fabulous DIY Photo Holders to inspire you! Great for displaying pictures, love notes, ticket stubs and more! livelaughrowe.com

19+ DIY Photo Holders

DIY Projects

Previous Post: « Perfectly Imperfect & Coming Unglued
Next Post: Spring Cleaning Tips | Air Purification »
about kelly

ABOUT KELLY

A DIY fanatic, Kelly shares her journey through her blog, Live Laugh Rowe, where she showcases her recipes, tutorials, crafts, home projects, and all things DIY. This East Coast Girl at heart believes family is number one as she finds the perfect balance of being a daughter, wife, sister, entrepreneur, writer and woman of God. Be sure to follow along as she shares her passion for life, love and family! Read more...

Reader Interactions

Leave a Reply Cancel reply

Your email address will not be published. Required fields are marked *

Recipe Rating


Comments

  1. Jenn says

    04/01/2013 at 2:58 am

    That is awesome Kelly! I love it!

    Reply
  2. Melissa B says

    04/01/2013 at 9:40 am

    Love it, thanks!

    Reply
  3. nest of posies says

    04/01/2013 at 10:30 am

    clever girl!!!

    Reply
  4. Jeannine @ The Concrete Cottage says

    04/01/2013 at 1:20 pm

    This is so freakin’ cute!! Love the idea. Thanks!

    Reply
  5. Cheryl @ That's What Che Said... says

    04/01/2013 at 1:22 pm

    I love it!!! Super, super cute!!

    Reply
  6. Cindy Eikenberg says

    04/01/2013 at 3:24 pm

    Thanks, Kelly, this is awesome! This is a wonderful idea and thanks for sharing the step-by-step. Have a great week!

    Reply
  7. Claire @ A Little Claireification says

    04/01/2013 at 3:33 pm

    You know I love this!! (and it looks amazing in person too!) πŸ™‚ Thanks for the tutorial!
    xo, Claire

    Reply
  8. Mary Beth|Cupcakes and Crinoline says

    04/01/2013 at 3:39 pm

    What an awesome idea, Kelly! I need to work on branding myself and this would be a nice start.

    Have a lovely week.

    Hugs, Mary Beth

    Reply
  9. Debbie says

    04/01/2013 at 3:43 pm

    What a great idea, Kelly! πŸ™‚

    Reply
  10. Angelina says

    04/01/2013 at 3:55 pm

    So So COOOL!!! love this πŸ˜‰
    xo
    Angelina

    Reply
  11. Lisa | With Style and Grace says

    04/01/2013 at 4:38 pm

    this is so awesome! love the idea of putting your logo on the back of the iphone.

    Reply
  12. Jen Goode says

    04/01/2013 at 4:57 pm

    What a fabulous idea, thank you for sharing!

    Reply
  13. Sarah @ Alderberry Hill says

    04/01/2013 at 7:05 pm

    Wow! How chic – this rocks!
    Thanks for sharing!

    Reply
  14. Leslie says

    04/01/2013 at 10:21 pm

    Such a unique idea! I love my case too much to do this right now, but it’s definitely on the radar for when I’m ready for an upgrade. Thanks for the tutorial!

    Reply
  15. Shannah @ Just Us Four says

    04/02/2013 at 7:45 am

    This is awesome! Now I have to locate a clear case for my Android phone πŸ™‚

    Reply
  16. TidyMom says

    04/02/2013 at 9:20 am

    Such a fun idea Kelly!! I’ve seen tons of people do this with scrapbook papers, I love the idea of customizing one!!

    Reply
  17. melanie says

    04/02/2013 at 9:35 pm

    Newest follower here! I found you through the blog hop. You have a super cute blog, I can’t wait to read more. You can find me at meandmr.com

    -Melanie @meandmr.com

    Reply
  18. Michelle Houde says

    04/03/2013 at 9:18 am

    I LOVE this idea!
    Hmm…now all I need is an I-Phone! Lol!! πŸ˜€
    Have a great day!

    Reply
  19. Wade says

    04/03/2013 at 10:30 am

    Pretty cool…I’ll have to try this!

    Reply
  20. Emily says

    04/04/2013 at 1:17 pm

    Love it!! You’re so clever πŸ™‚

    Reply
  21. Rachel (Lines Across) says

    04/05/2013 at 8:15 am

    So cute and fun! I’m sure it was a hit at Blissdom!

    Reply
  22. Randi - Dukes and Duchesses says

    04/05/2013 at 4:26 pm

    That’s just brilliant … I love that you’re marketing your blog every time you hop on the phone!

    Reply
  23. Gloria says

    04/05/2013 at 8:38 pm

    Amazing! I’ll have to get a case like that for my iPhone! Cuteness!
    Gloria @ resourcefulgals.blogspot.com

    Reply
  24. TidyMom says

    04/06/2013 at 12:26 pm

    Thanks for linking up Kelly! I featured your post in my wrap up http://tidymom.net/2013/top-14-diy-projects-to-make/

    Have a fabulous weekend in NJ!

    Reply
  25. Neath says

    04/30/2013 at 5:19 am

    Love it πŸ™‚

    Reply
    • Kelly Rowe says

      04/30/2013 at 12:29 pm

      Thanks so much!! xo

  26. Andi Saputra Siahaan says

    04/05/2018 at 11:38 am

    Its amazing idea, i want to make it

    Reply

Primary Sidebar

Looking for something?

Hey there! I’m Kelly.

I’m the author, creator, cook, and photographer behind the blog. I am so glad you’re here!Β  I’m passionate about life, family, and my faith. If there’s one thing I’ve learned in my journey, life is hard, but God is good. Β Read More

Popular on Pinterest

Valentine Favors with cones and candy.

Footer

  • Facebook
  • Instagram
  • Pinterest
  • Twitter
  • YouTube

Looking for something?

Copyright Β© Live Laugh Rowe, LLC β€’ Privacy Policy β€’ Log in