I’ve challenged myself to do 90-95% of my Christmas gift wrapping with kraft paper this year. Soooo, I’ve been busy trying to whip up some ‘homemade’ embellishments. I knew one thing I wanted to try was the burlap bow. Anywho, I did a little research, made a trip to JoAnn Fabrics — and here we are. I’m super excited to share this tutorial with all of you. Overall, this is super easy (maybe a little messy, but that’s burlap for ya. wink).
For your supplies, you’ll need burlap, pinking scissors, glue gun and stapler.
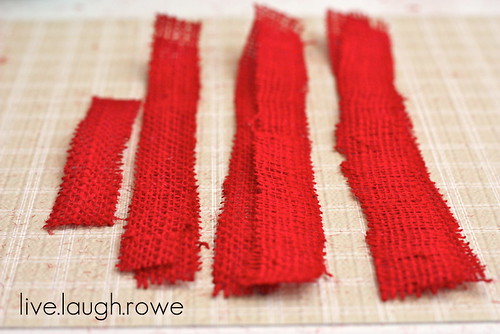
Try to keep the sets of two together… it will help a bit for the next step {smile}.
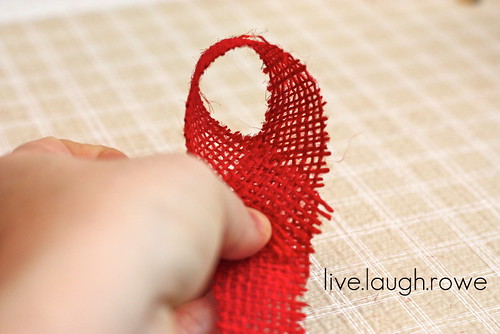
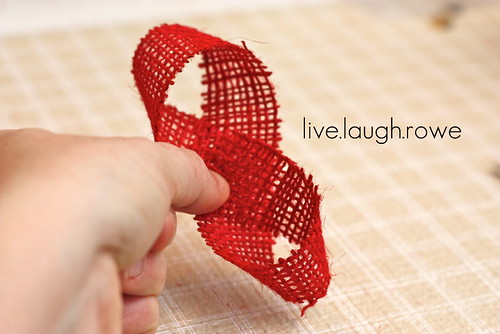
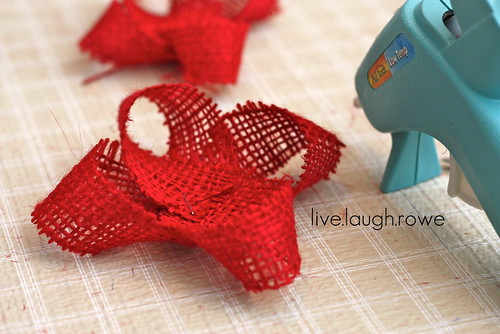
You’ll want to start with the two 10″ loops. Create an ‘x’ with them as displayed below. Using your handy dandy glue gun to hold them in place. You’ll then want to place the two 9″ loops in the similiar ‘x’ shape on top of the other two. Continue this until all six of the strips/loops have been used.
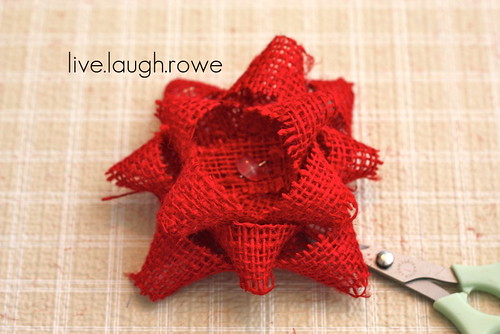
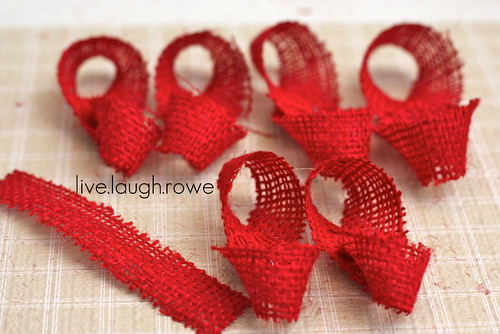
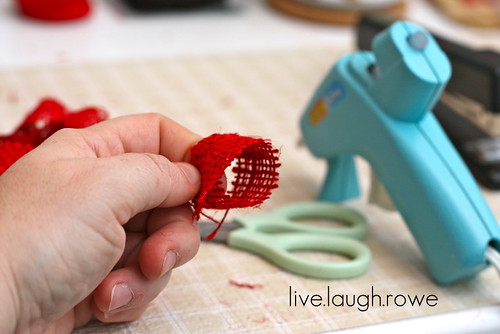
{Squeal}! It’s looking good. Isn’t this exciting? Well, we’re officially ready to complete your bow. You’ll now take the 4″ strip and loop it into a circle and glue into the center of your bow.
 And there you have your burlap bows!


Chelsea says
This is a fabulous tutorial- I will defintiely be spicing up our Christmas presents with these cute little bows this year 🙂 Thank you!
c.w.frosting says
Cute and simple! Thanks for sharing!
-caroline @ c.w.frosting
Trish@MomOnTimeout says
These are so awesome and will fantastic with your kraft paper. Great job! I'd love for you to share with my readers if you get a chance: http://www.momontimeout.com/2011/12/taking-timeout-thursday-no-8.html
Kara at Petals to Picots says
I am over visiting from the Mom on Timeout link party. I love these bows! I always love the idea of burlap!
~Kara (your newest follower 🙂
http://www.petalstopicots.com
Kristine says
What a neat idea!! Thanks for a GREAT tutorial!
Stephen Rowe says
Excellent job on the bows, Kel. They look great.
I am LOVD says
Very cool! Thanks for showing me how to do those crazy bows. After my last DIY project (link below) I think I'm in love with my glue gun.
http://feellovdeveryday.blogspot.com/2011/12/what-i-made-wednesday-nature-inspired.html
Emily says
These are just AMAZING!! I love burlap, so decorating gifts with them is just perfect! 🙂 Would love for you to link up @ Find Your Craft Friday over on my blog… Have a great Friday!
Emily @ BabyBerry
http://weinzapfelbabyberry.blogspot.com/
Allison {A Glimpse Inside} says
Oh my! I LOVE these!! They are so perfect! Too bad I already have all my gifts wrapped and mailed out to family!
Thanks so much for linking up to this week's Catch a Glimpse party! I have included this in today's features!
Katie says
Love these!
juliemadtx says
So cute, and simple, too! (visiting from TT&J)
Screaming Sardine says
Wow, these are awesome! So creative to make bows out of burlap.
Pinning on pinterest. 🙂
Cheers,
Tracy Screaming Sardine
Kristina says
I've seen this idea before, but not with burlap. Those are adorable!
ReMadeSimple Kristina says
Love your projects how cute are these 🙂
Diane Krause says
I love these bows, but I just can't get the right way to fold them??? Maybe I am over thinking it??
milliemorganmedia says
Wow, these are so beautiful. Thank you for sharing. I am your newest follower and I look forward to reading more of your posts! I would appreciate it if you took a moment to stop over at my blog and followed me back. Thank you! http://milliemorganmedia.blogspot.com
Luvin' the Hubs says
Oh Mah Word! Absolutely love these! Thanks for sharing!
Karah @ thespacebetweenblog says
These came out perfect! I love the homemade embellishments with kraft paper combo for your wrapping. Happy Holidays!
Nikki@EverythingUndertheMoon says
I featured your bows as a favorite from last week's Bedazzle Me Monday!! Feel free to stop by and grab a featured button 🙂 http://everything-underthemoon.blogspot.com/2011/12/you-dazzled_18.html
Thanks so much for linking up! Hope to see you again this week.
Have a great week!!
AnJayla says
These are great! I love burlap! Thank you for sharing.
ReMadeSimple Kristina says
So pretty and rustic! Love them and would love to try some 🙂
SassAFrass says
Such a great tutorial! Thanks for sharing. I love the burlap.
SassaFrass
Rusty Hinge says
Love this! I am also linking with Space 46 and I found your blog! This is a great idea and I am going to make these fab burlap bows!
Thanks so much for sharing!
Maria
http://www.rustyhinge.blogspot.com
Kara at Petals to Picots says
I love these bows! I would love for you to share this post at my "Best of 2011" link party, along with any other posts you are most proud of from this year. http://www.petalstopicots.com
~Kara
cathy@my1929charmer says
It never ceases to amaze me what someone can do with burlap. I LOVE IT. the bows are beautiful and the tutorial is great. Thanks for sharing at Sunday's Best and wishing you Happy Holiday's.
Mrs Frizz says
g.o.r.g.e.o.u.s. … thank you for sharing.
Christina at I Gotta Create! says
WHOA!!! Those are much easier than I would have imagined! Thanks for the tutorial. These are really fabulous <3 I'm PINNING it!!
Kara at Petals to Picots says
Hi Kelly! Your bows were one of the top voted projects at my "Best of 2011" link party. Make sure to drop by my site tomorrow to see it featured. Congrats!!
Camille says
How CUTE!!!! I love it! Thank you for sharing!
Kelly says
Thanks so much, Camille 🙂 I think they’re kinda cute myself. Have a fabulous week!