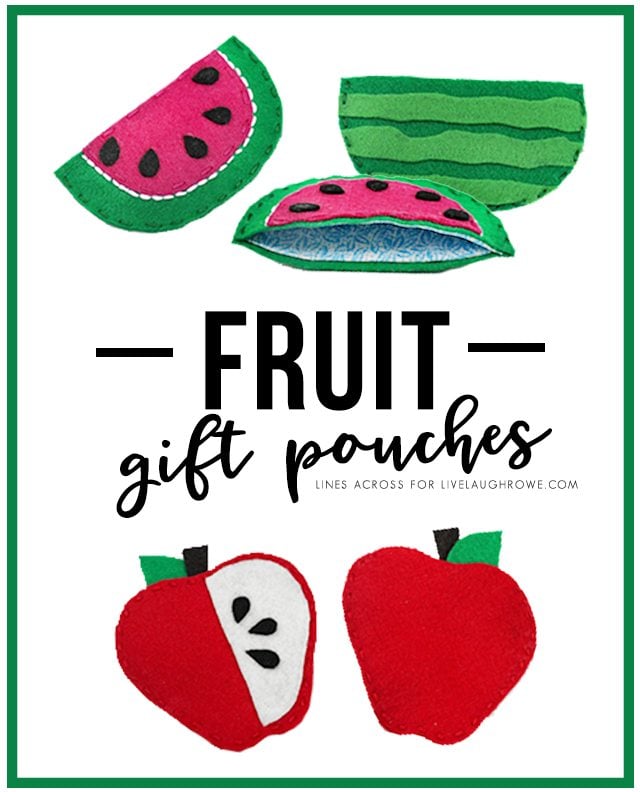
These fruit inspired gift pouches are the perfect size for gift cards or cash; however, they would also be great for small presents like earrings too.
Hello lovely Live Laugh Rowe readers. I’m Rachel from Lines Across, and I’m thrilled Kelly asked me to guest post here today. Lines Across is a craft blog where I share lots of tutorials and inspiration. Most of my projects take less than an hour and can usually be made with materials you already have lying around the house. I’m also a mom to a toddler girl and 3 year old boy, and I often share ideas and activities to do with your kids.
I love making things with felt (like all of these felt flower tutorials), and I love making different kinds of gift boxes. So I thought that today I would share with you all how to make little felt apple and watermelon gift pouches.
 Fruit Inspired Gift Pouches

Supplies for Watermelon Gift Pouches:
Felt (Green, Light Green, Pink, and Black)
Embroidery Floss (White, green, and Pink)
Fabric Lining (optional)
Scissors
Fabric Glue

1. Cut out all of your shapes from the felt.
2. Glue all of the pieces together using liquid stitch.
3. Sew on the pink piece using embroidery thread and a simple stitch.
4. Using white thread and a back stitch, sew around the outside of the pink felt.
5. Cut out fabric lining. Fold over the top piece and glue to the inside of both watermelon pieces.
6. Glue together the outside edges of the front and back watermelon pieces. Then sew around the outside with green embroidery thread using a simple stitch.
(These apples were inspired by these adorable felt coasters from The Purl Bee)
Supplies for Apple Gift Pouches:
Felt (Red, Brown, Black, Green, and Ivory)
Embroidery Floss (Red)
Fabric Lining (optional)
Scissors
Fabric Glue

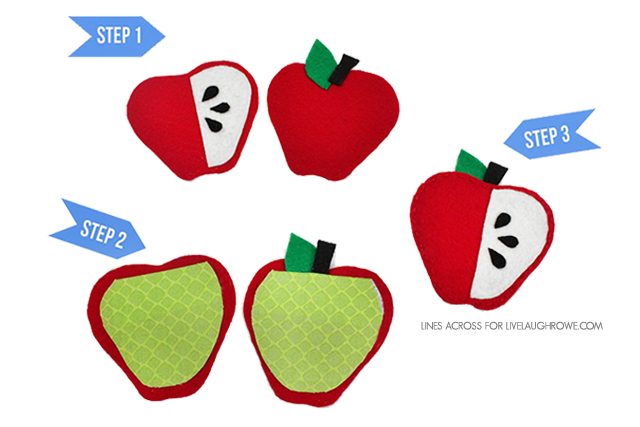
1. Cut out your felt shapes. Glue the pieces in place.
2. Glue the fabric lining (fold the top over). Make sure to cover the bottom of the leaf and stem.
3. Glue the outside edges of the apple together. Make sure to leave an opening larger than a gift card at the top.
4. Sew the edges together with red thread. Make sure to only sew through the front piece at the top opening of the pouch.
Be sure to stop by Lines Across and check out some of my tutorials! Thanks again Kelly for having me here today.
Follow along with me:
Facebook, Twitter, or Pinterest.
-Rachel-
 Fruit Inspired Gift Pouches




Jill @ Create.Craft.Love. says
Seriously adorable! Great idea!
Kelly says
Thanks so much for loving on Rachels project, Jill! Hugs.
Smart! School {House} says
OMG! This is so stinking adorable! I’m a HUGE FAN of anything involving felt fabulousness, so this is making me feel very inspired at the moment! What a neat craft….
Kelly says
Isn’t it fabulous? Thanks so much for loving on Rachels project. xo
Gina says
How adorable those are.
Kelly says
Thanks so much for loving on Rachels project, Gina! Hugs!
Ashley says
These are too cute Rachel! My kids would love these… they are all about the “pockets” : )
Kelly says
Thanks so much for loving on Rachels project, Ashley!
Bonnie and Trish @ Uncommon says
Adorable!
Kelly says
Thanks so much for loving on Rachels project, ladies! xo
Jelli says
Love the watermelon pouch. It reminds me of a picnic on a warm summer day. Thanks for sharing the how-to, Rachel.
Kelly says
Thanks so much for loving on Rachels project, Jelli! Hugs!