This post is sponsored by The Home Depot. See full disclosure below regarding DIH Workshop.*
Guess what time it is, friends? It’s time for another fabulous #DIHWorkshop project! Yahooooo! With the holidays just around the corner — let the decorating begin. Sooo, today I’m sharing the tutorial for this Rustic Santa Door Hanger, a great Christmas door decoration (inside or outside).
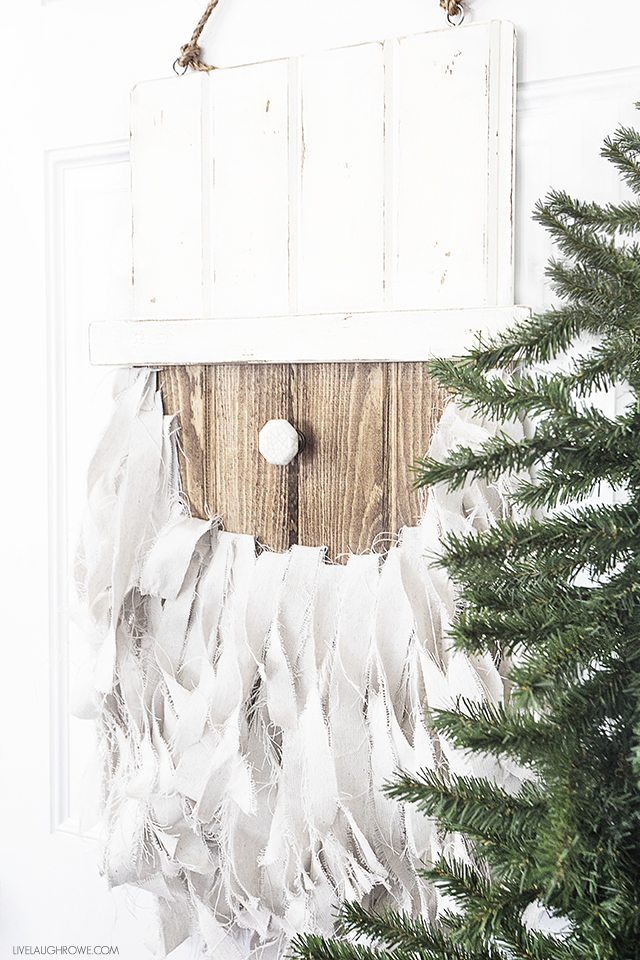
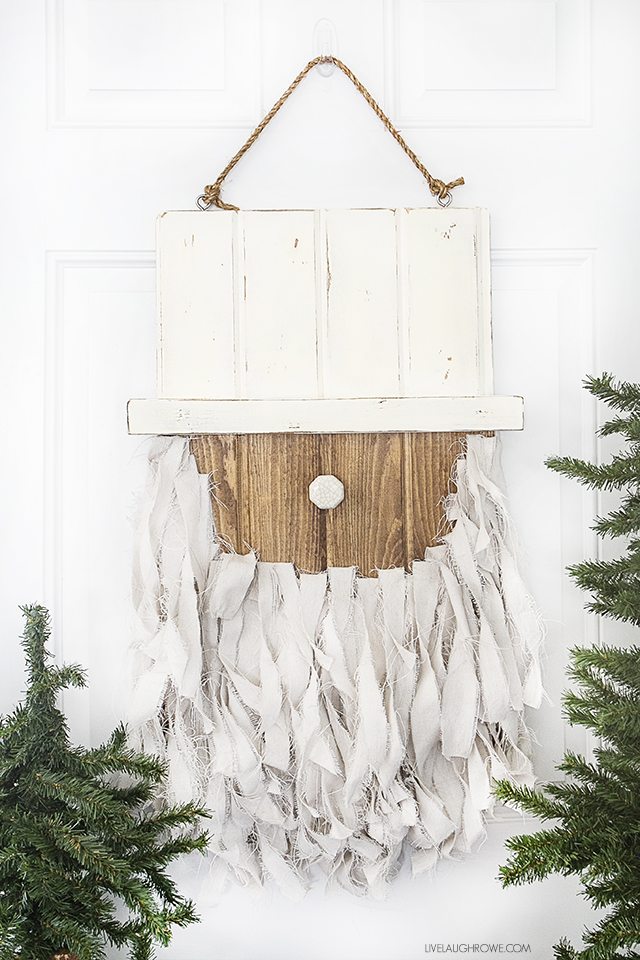 Rustic Santa Door Hanger

Supplies for Christmas Door Decoration:
1 – 1x6x8 Tongue and Groove Pattern Stock Board
1 – 1x2x4 Common or Pine Board
One Pack #10 Stainless Screw Eyes
1 – 1/4″ x 50′ Manila Rope
Wood Glue
Drop Cloth
Minwax Stain in Provincial
Behr Marquee Sample in Sweet Coconut Milk
Sand Paper or Sand Paper Block
Staple Gun
Knob for Nose
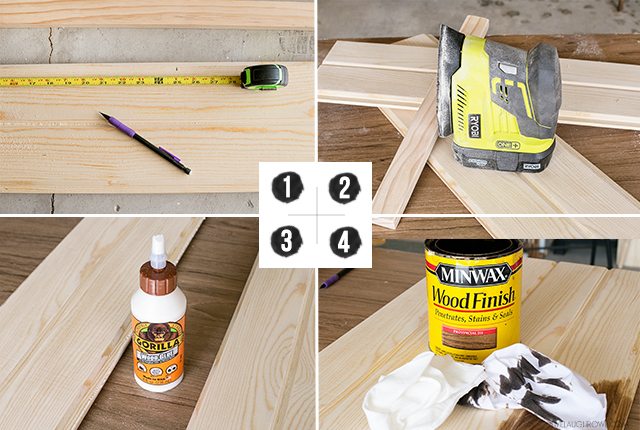 One: Measure, Mark and Cut.
Measure and mark two 25″ sections from the Tongue and Groove Pattern Stock Board and one 16″ piece from the common (or pine) board.
Two: Sand and Wipe.
Give each piece a good sanding to avoid any rough edges. Wipe down with a damp cloth.
Three: Assemble the Base.
Lay the two 25″ sections of your tongue and groove board sided by side and run a bead of glue in the grooves. Be sure to secure the boards to keep them level across the top and bottom.
Four: Stain.
Using rags or a brush, apply stain to the two 25″ sections and the one 16″ piece. Allow to dry.
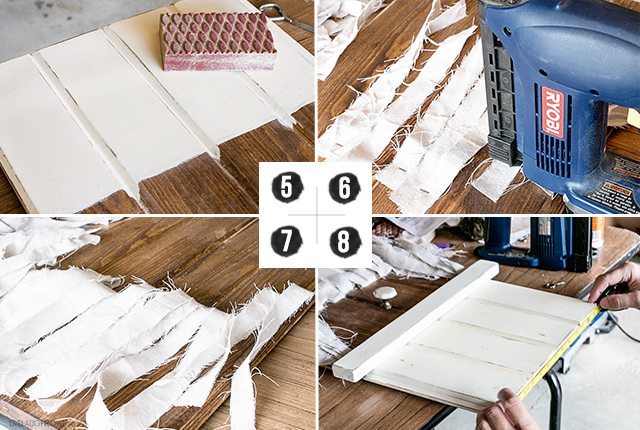 Five: Paint Hat.
Mark approximately where you’ll place the 16″ piece of board for the hat brim. Fill above that with paint color of choice. Allow to dry and sand.
Six and Seven: Cut and Attach Drop Cloth
Cut LOTS and LOTS of strips using rotary cutter for beard. Attach by placing the drop cloth strips facing towards the top of the hat, using a staple gun.
After attaching the strips, you’ll fold the strips back over the staple towards the bottom (so that the staples won’t show). Continue to do this until the beard is full.
Eight: Finishing Touches
-Add the hat brim with glue gun and a couple of nails (through the back of the sign).
-Add knob for nose.
-Attach eye hooks using drill. Pre-drill two holes 2″ in from each side.
Add rope and hang! You’re officially done — and it looks pretty fabulous, right?
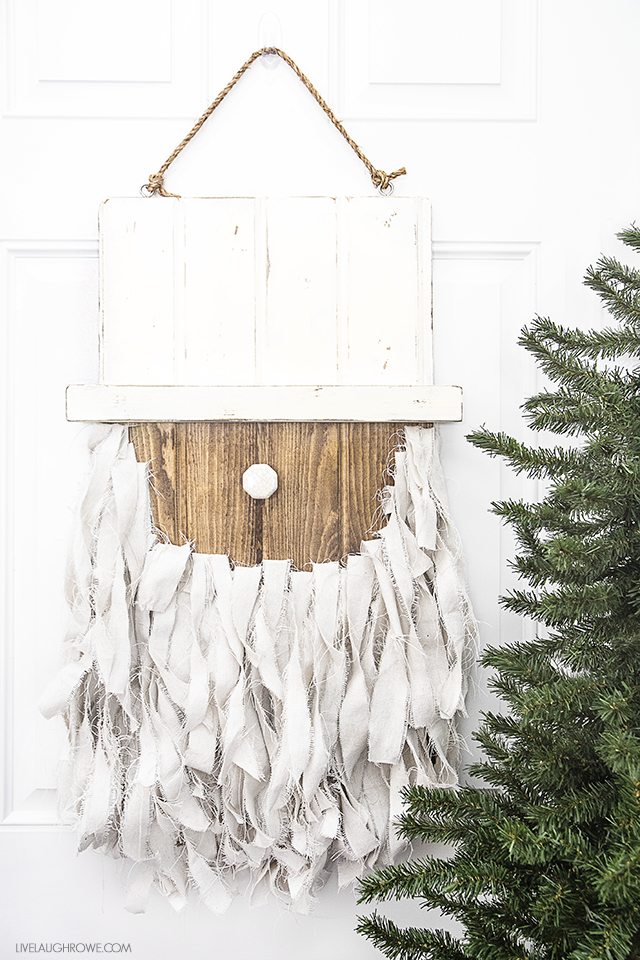
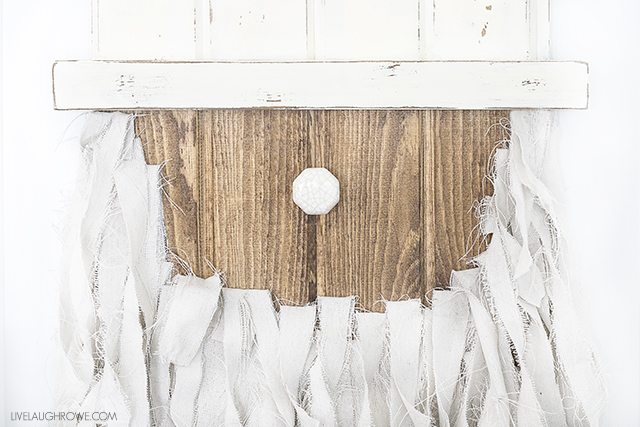 I just love the drop cloth for the beard. You might have to groom it a bit, once you’ve hung it up (aka trim the beard. Hee-hee).
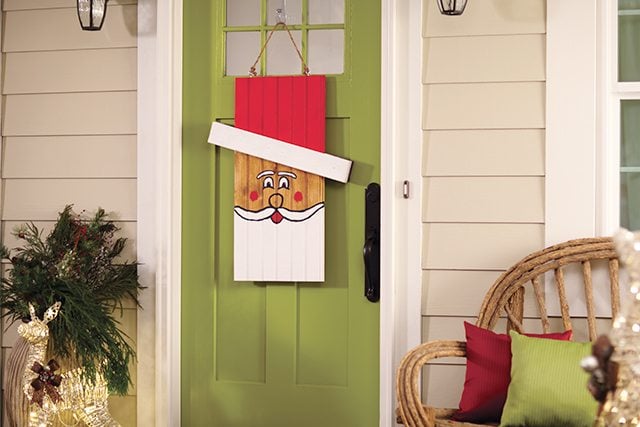
 Here’s a reminder of the original project, a fun and colorful Santa Door Hanger.
 Feeling inspired to make your own Rustic Santa Door Hanger? If you do make one, please be sure to tag me or e-mail me. I’d love to see your version!
Just a quick reminder, The Home Depot’s Workshops are designed to provide a mix of associate-led instruction, demonstration, and some hands-on learning. The workshops are also for do-it-yourselfers of all ages and experience levels! Materials can be purchased to make your own project too. For more information, contact your local Home Depot store. Register today!
 Be sure to visit with me here too:
Facebook | Instagram | Pinterest | Twitter | Google+


Rebecca Lopez says
So cute Kelly!
Natalie Dalpias says
This is darling! I love how unique it is!
Vanessa Barker says
This is so cute! I love the idea of the fabric on it!
Summer says
Ok, standing ovation!! This is just adorable and soooo creative! Great job, Kelly!
Laura says
This one turned out so great! I love it!
Debbie says
It looks great, that beard!! Love it!
Nat & Holly says
Love your Santa, Kelly! The beard is so great!
Lisa says
How wide did you cut your beard strips? I love the shape of the nose, what section did you find it in?
Erin says
Your little Santa is adorable! That beard! I love it!!!
Laura says
I LOVE this neutral Santa face! The Beard-so cute!
Heidi says
This is the cutest door hanging Santa I’ve seen!
mary says
What a fun take on this project. I am going to try to make it to our workshop tonight! I want to make a snowman.
Hope says
This is adorable!
Angela says
So adorable and creative! Found my way here by House of Hipsters. Looking forward to exploring your site!