
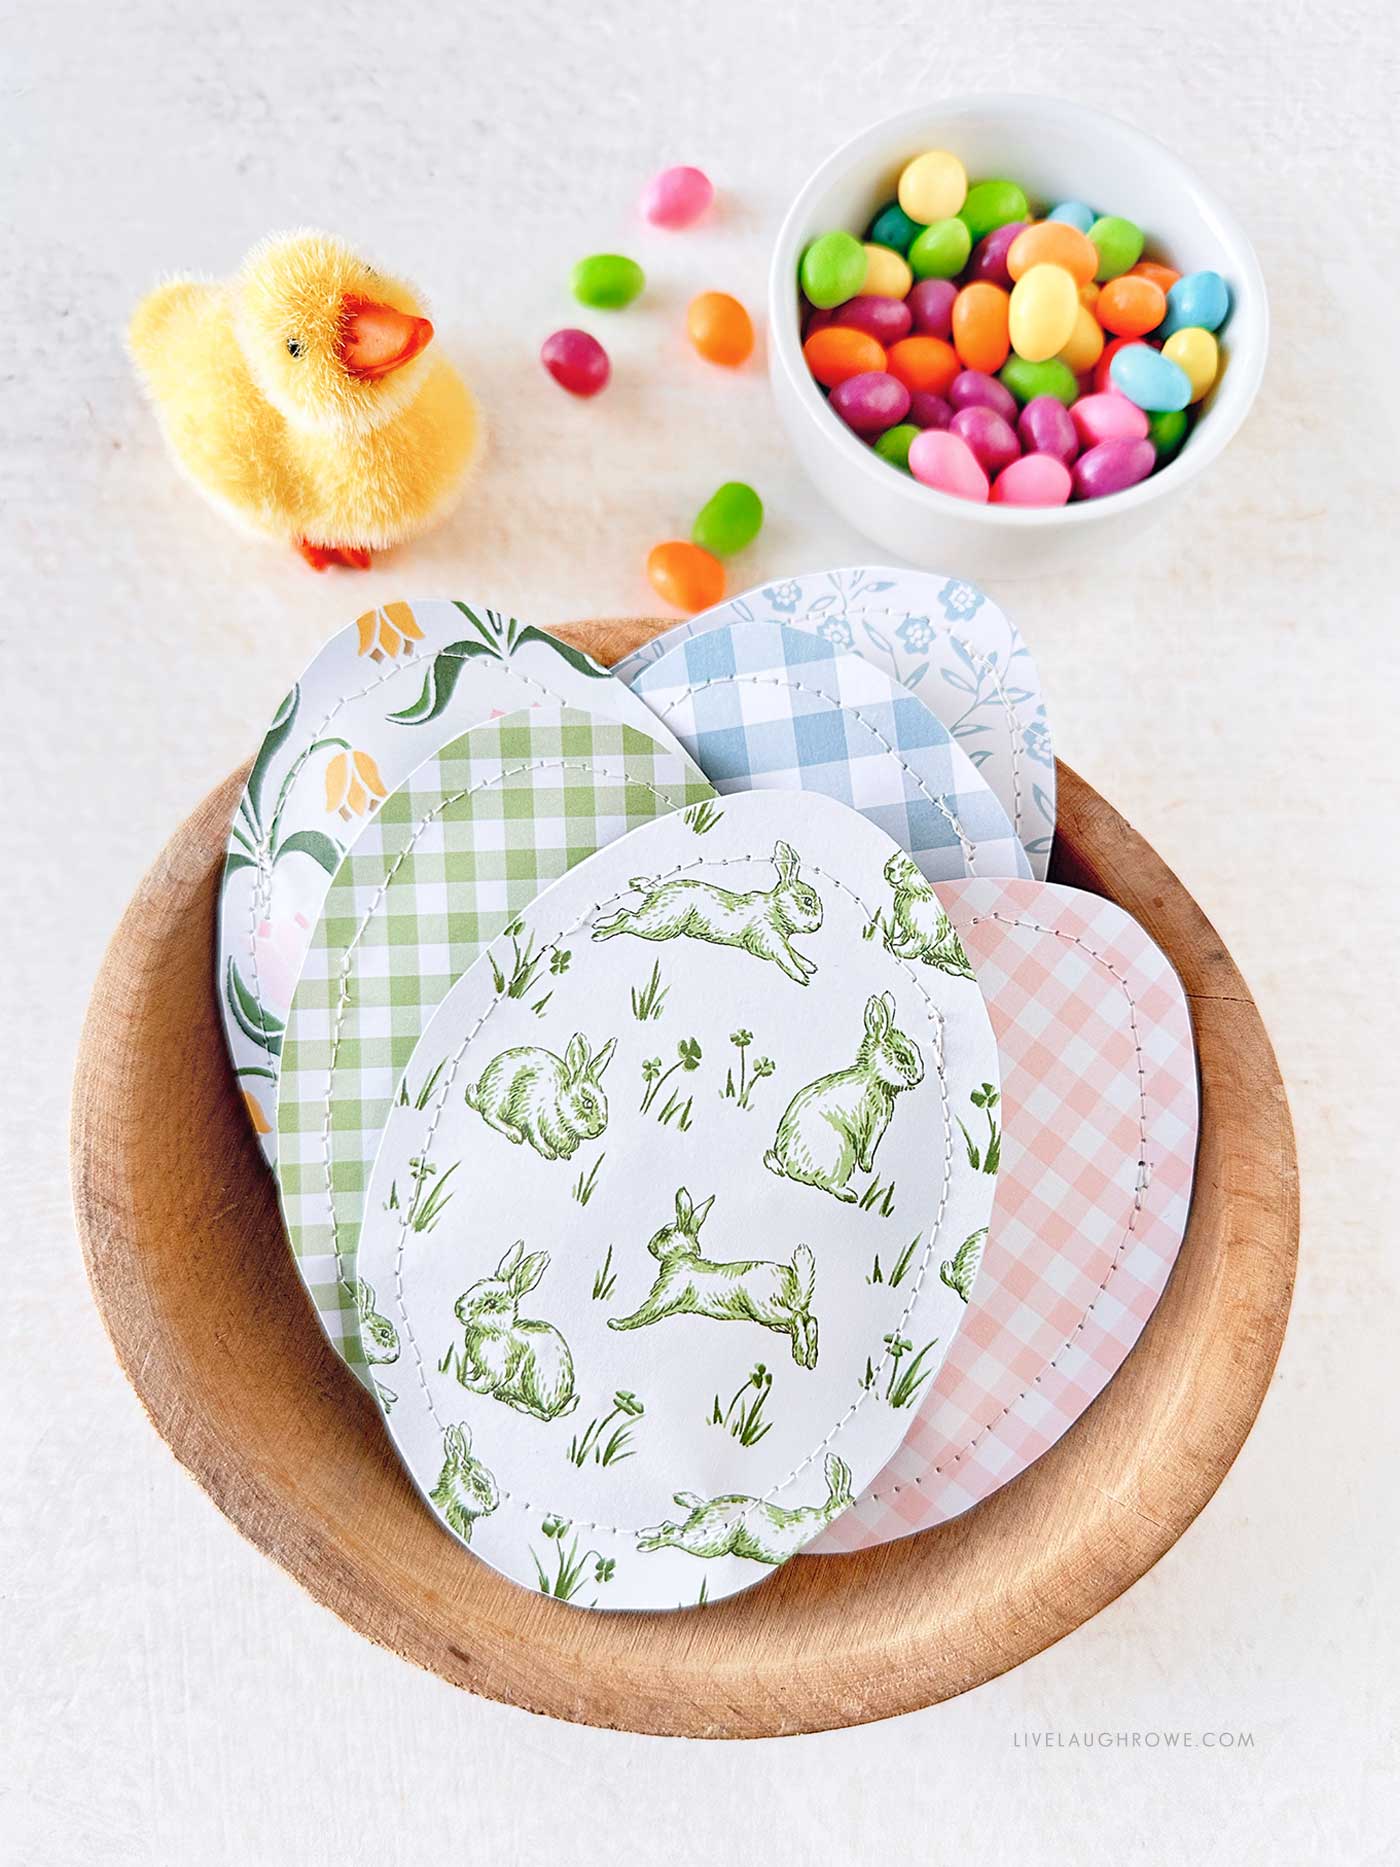
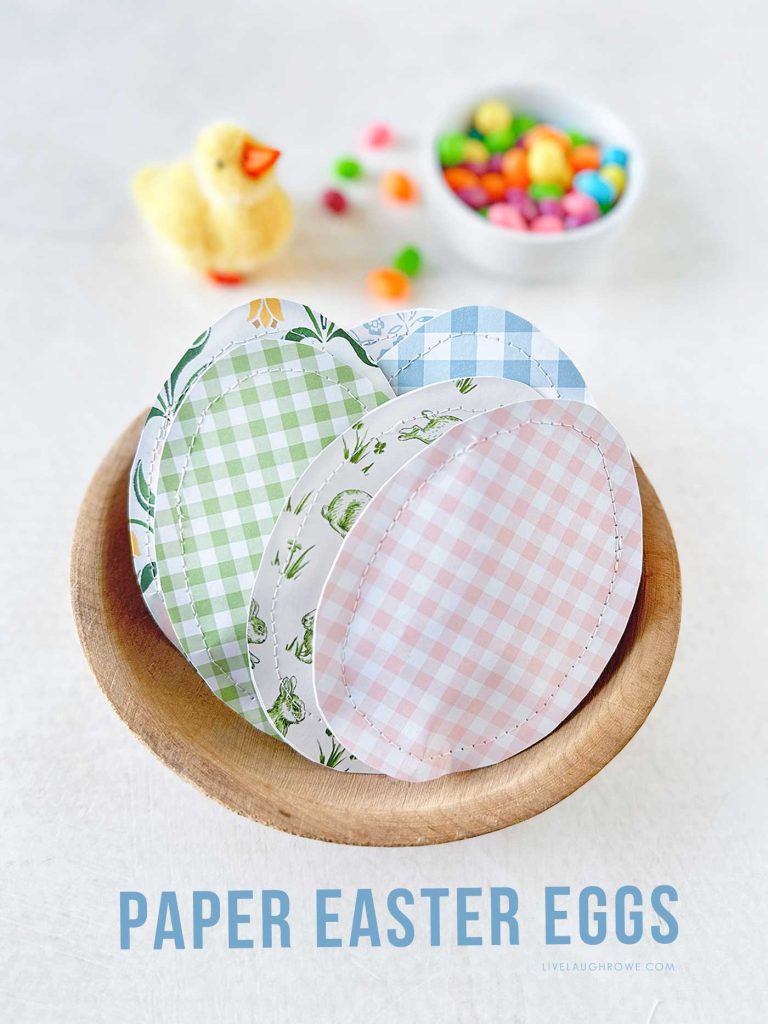
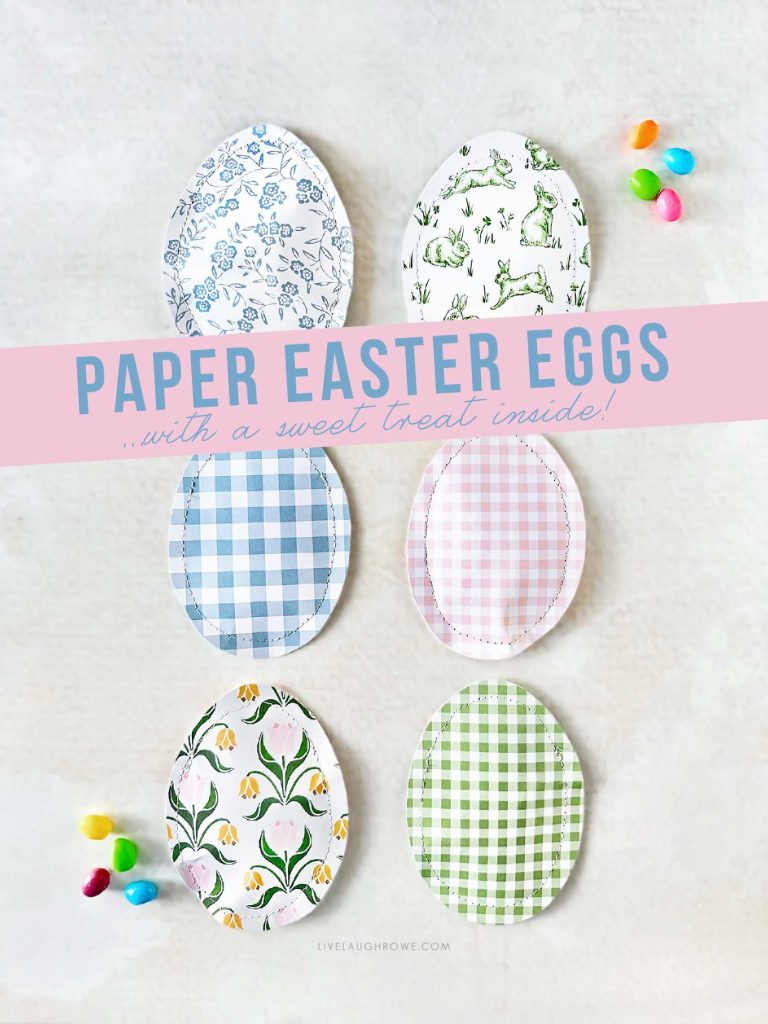
Spring is in the air, and Easter is just around the corner! If you’re looking for a simple yet charming craft to add a handmade touch to your Easter baskets or dinner table, these DIY Paper Easter Eggs are the perfect project. They hide a delightful sweet treat inside, made from scrapbook paper and stitched together like a little paper pocket! Whether you use a sewing machine or hand-stitch them with embroidery floss, this craft is as fun as it is adorable.
Why You’ll Love These Paper Easter Eggs:
- Quick and easy to make (great for last-minute Easter prep!)
- A creative alternative to plastic eggs
- Adds a handmade touch to Easter baskets or table settings
- Perfect for kids and adults alike
- Fully customizable with different paper patterns and decorations
- A great way to use up leftover crafting supplies
- A unique party favor for Easter gatherings
- A fun craft activity to enjoy with kids or friends
Ready to hop into the fun? Let’s get crafting! 🐰✨
Supplies:
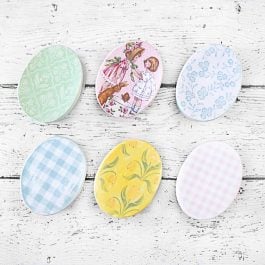
- Scrapbook paper (pastel colors, florals, polka dots—whatever fits your Easter vibe!)
- Craft Scissors
- Sewing machine (or embroidery floss and a needle for hand-sewing)
- Egg-shaped template
- Flat Easter candies
Optional Supplies:
- Hole punch and ribbon for extra embellishment
- Washi tape or stickers for added decoration
- Metallic or gel pens for writing personalized messages
- Glitter glue or decorative punches for extra detailing
- Fabric scraps or felt (for a layered mixed-media look)
- Dymo Embossing Label Maker to create name tags
Step 1: Cut Out Your Easter Eggs
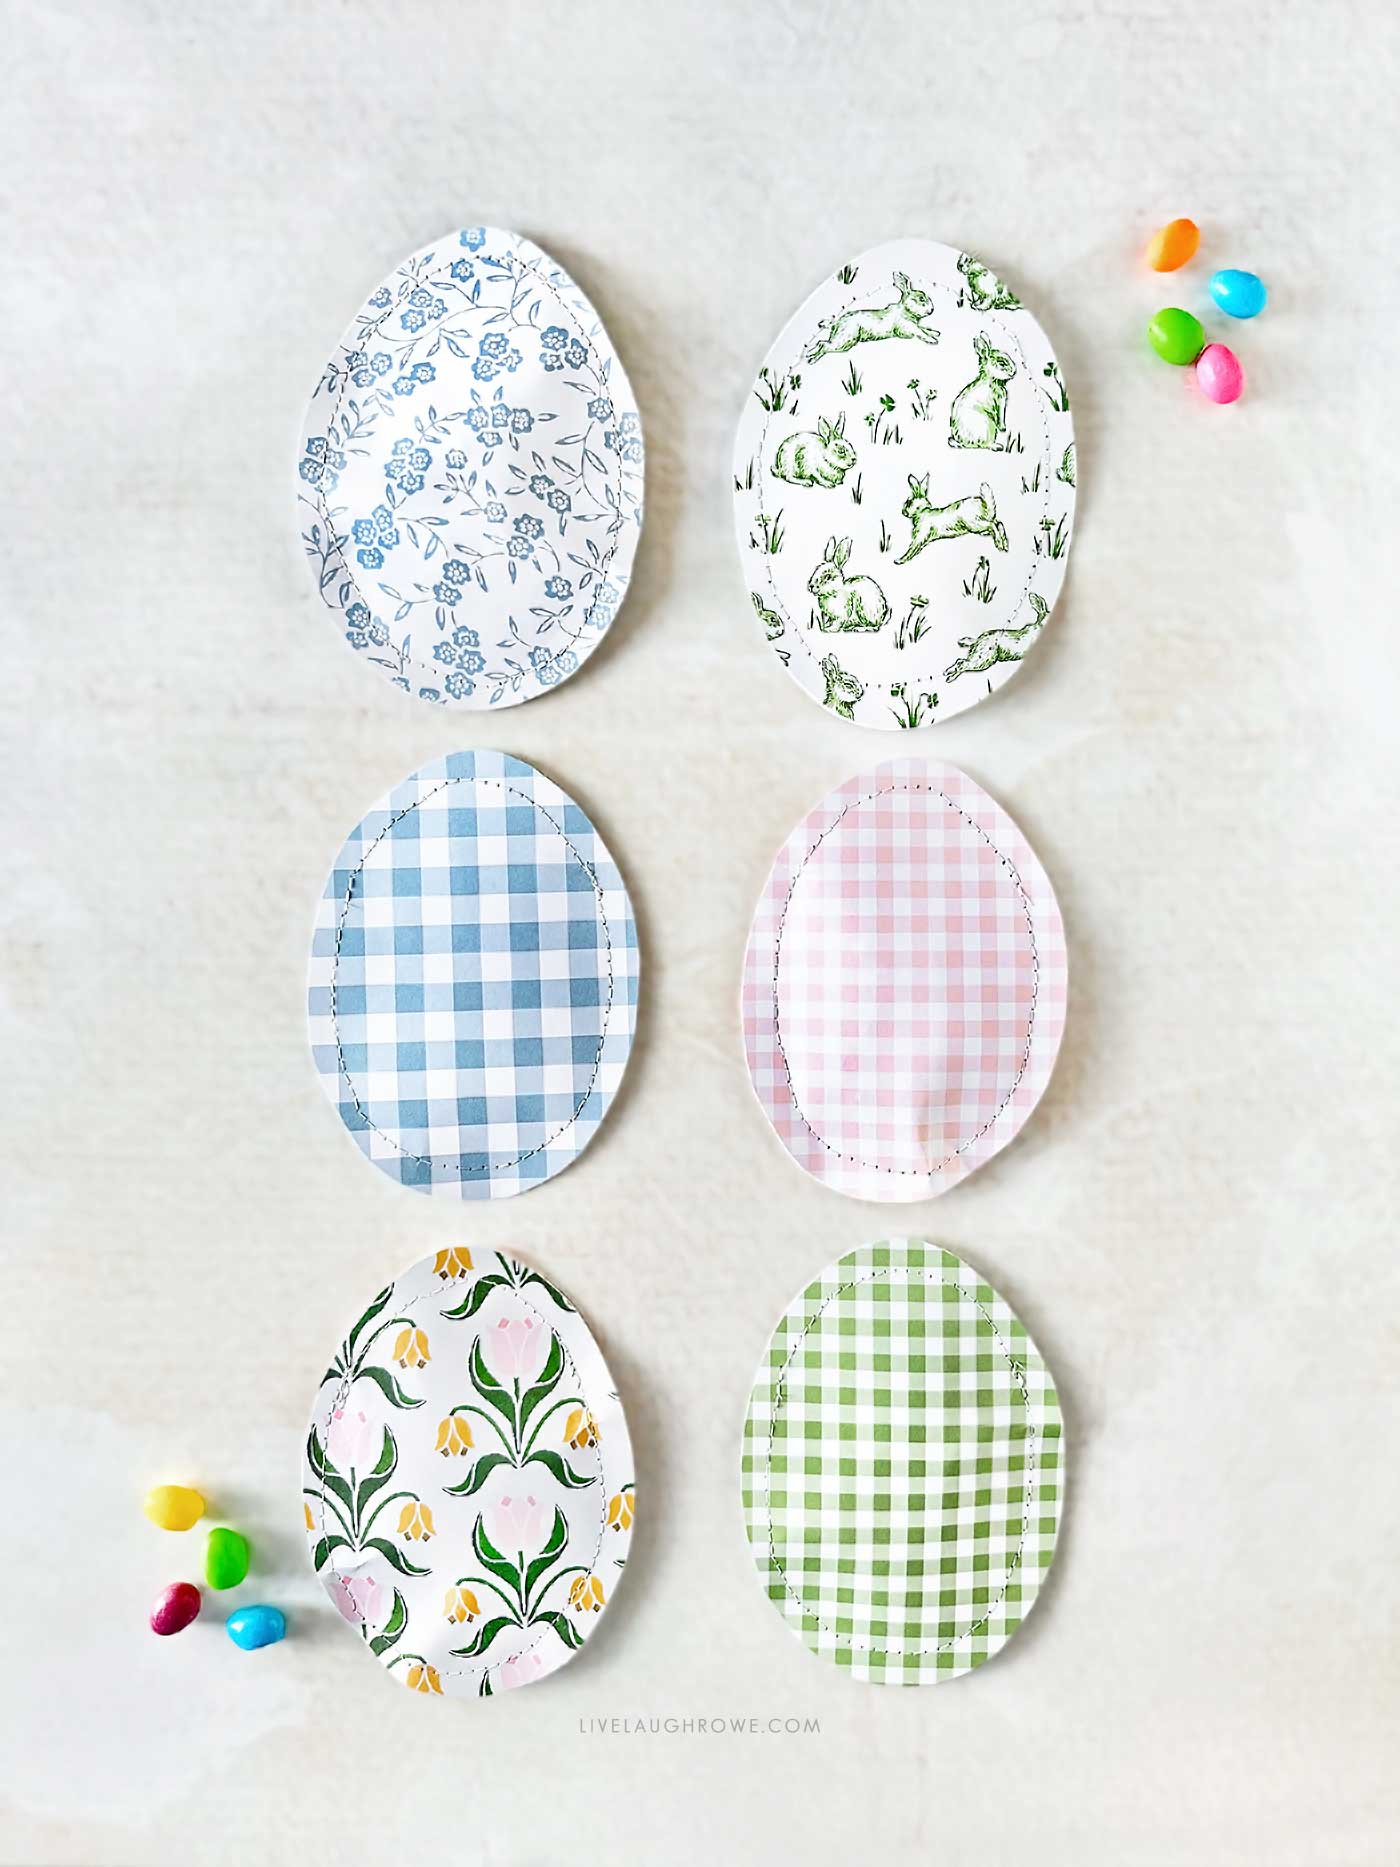
First, grab your scrapbook paper and draw or trace an egg shape onto the back. If freehand drawing isn’t your thing, no worries! Here’s an egg-shaped template to print and use. You’ll need two egg shapes per treat holder—one for the front and one for the back.
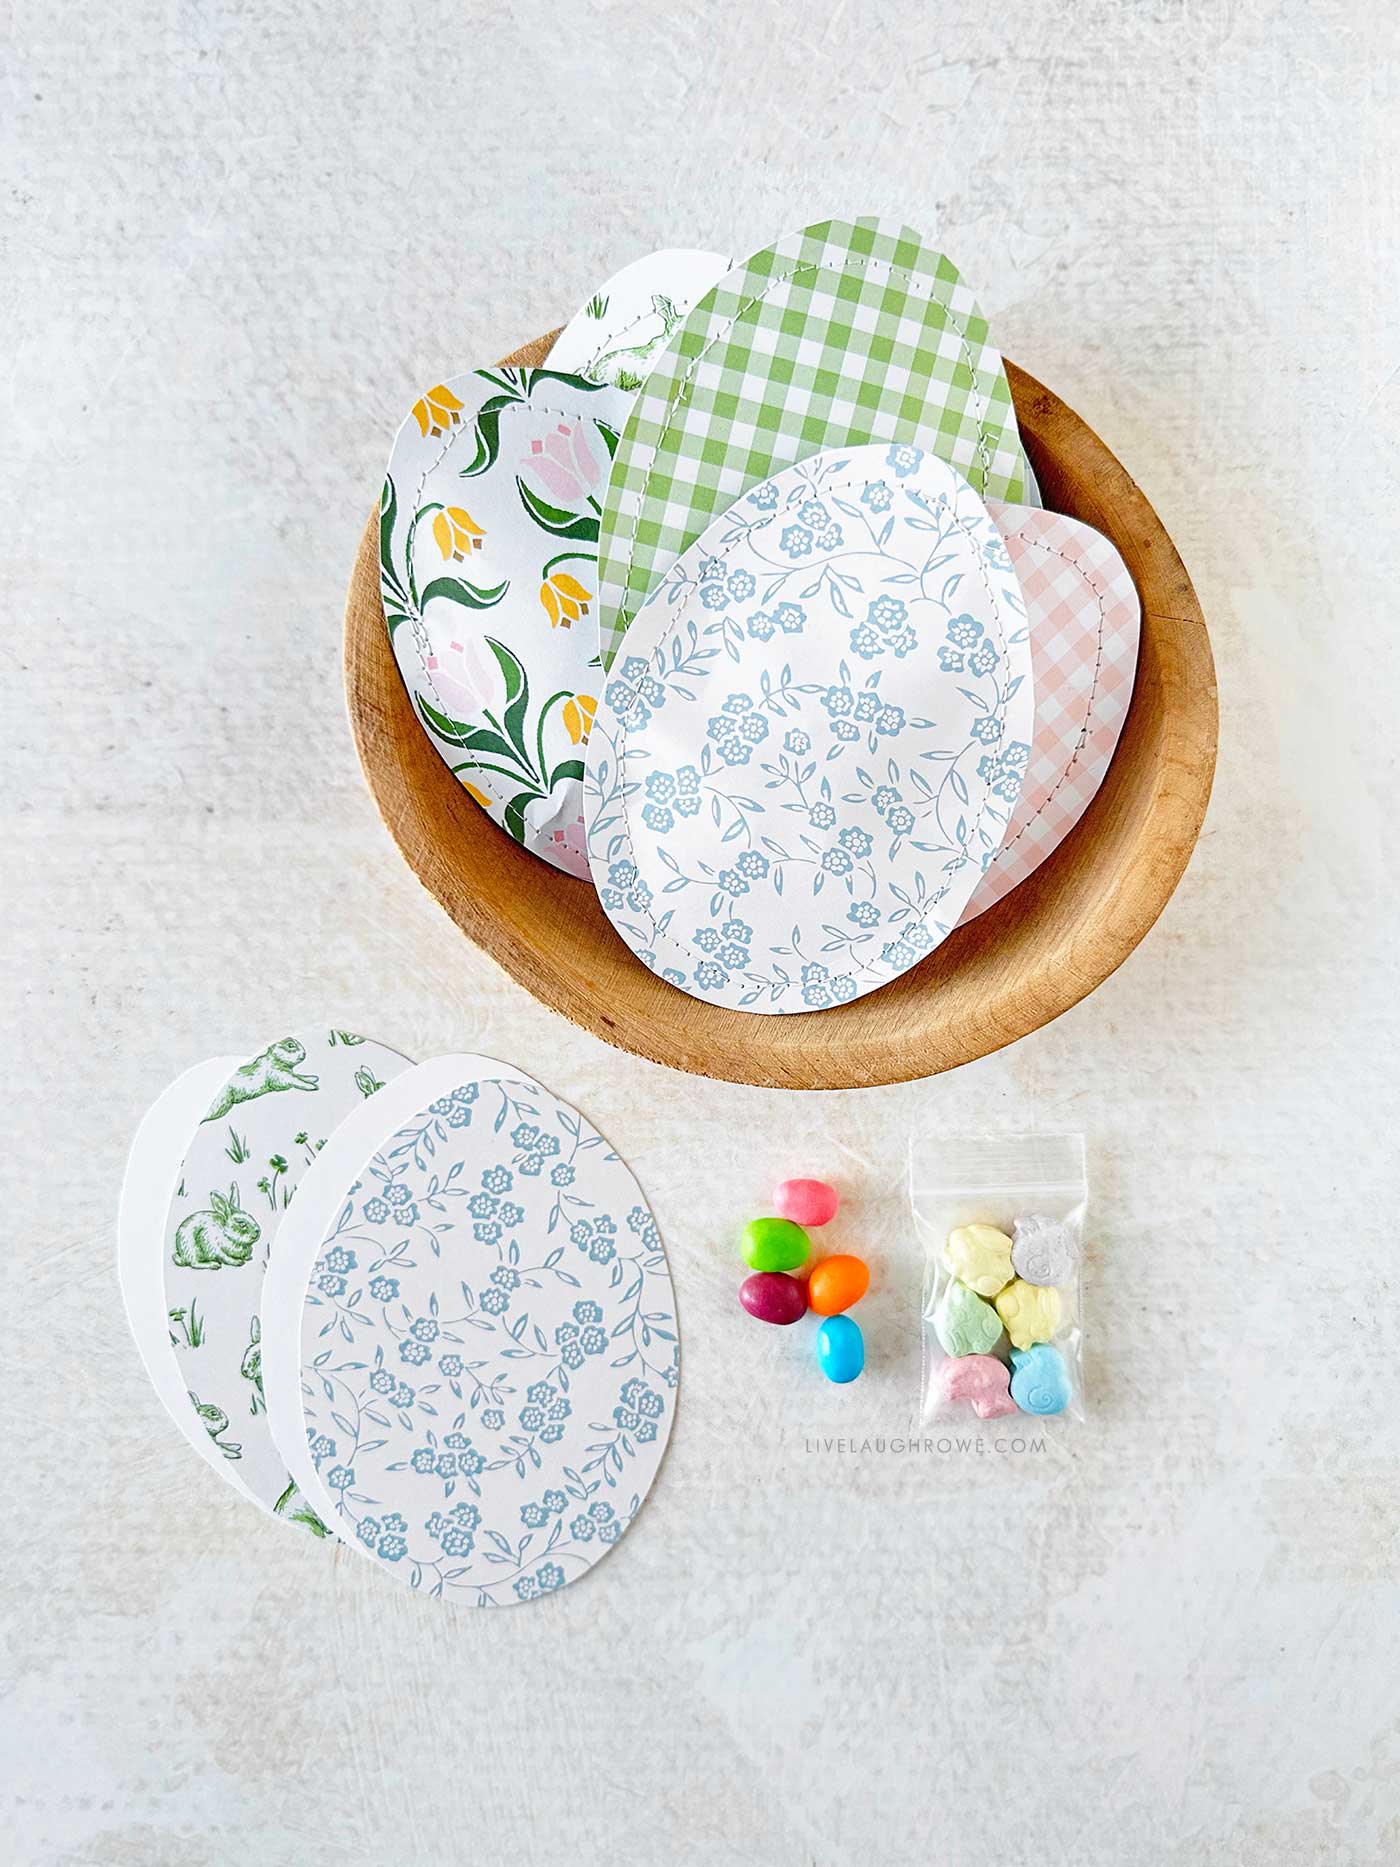
Cut them out with scissors. If you’re making multiple, stack a few sheets and cut at once to save time! You can also mix and match different papers to create a fun contrast between the front and back of your egg. If you want extra texture, consider layering a smaller cut-out egg shape on top before sewing.
Step 2: Sew the Egg Together
Now comes the fun part—stitching the eggs together! Place the two cut-out egg shapes together with the patterned sides facing outward.
Option 1: Sewing Machine Method
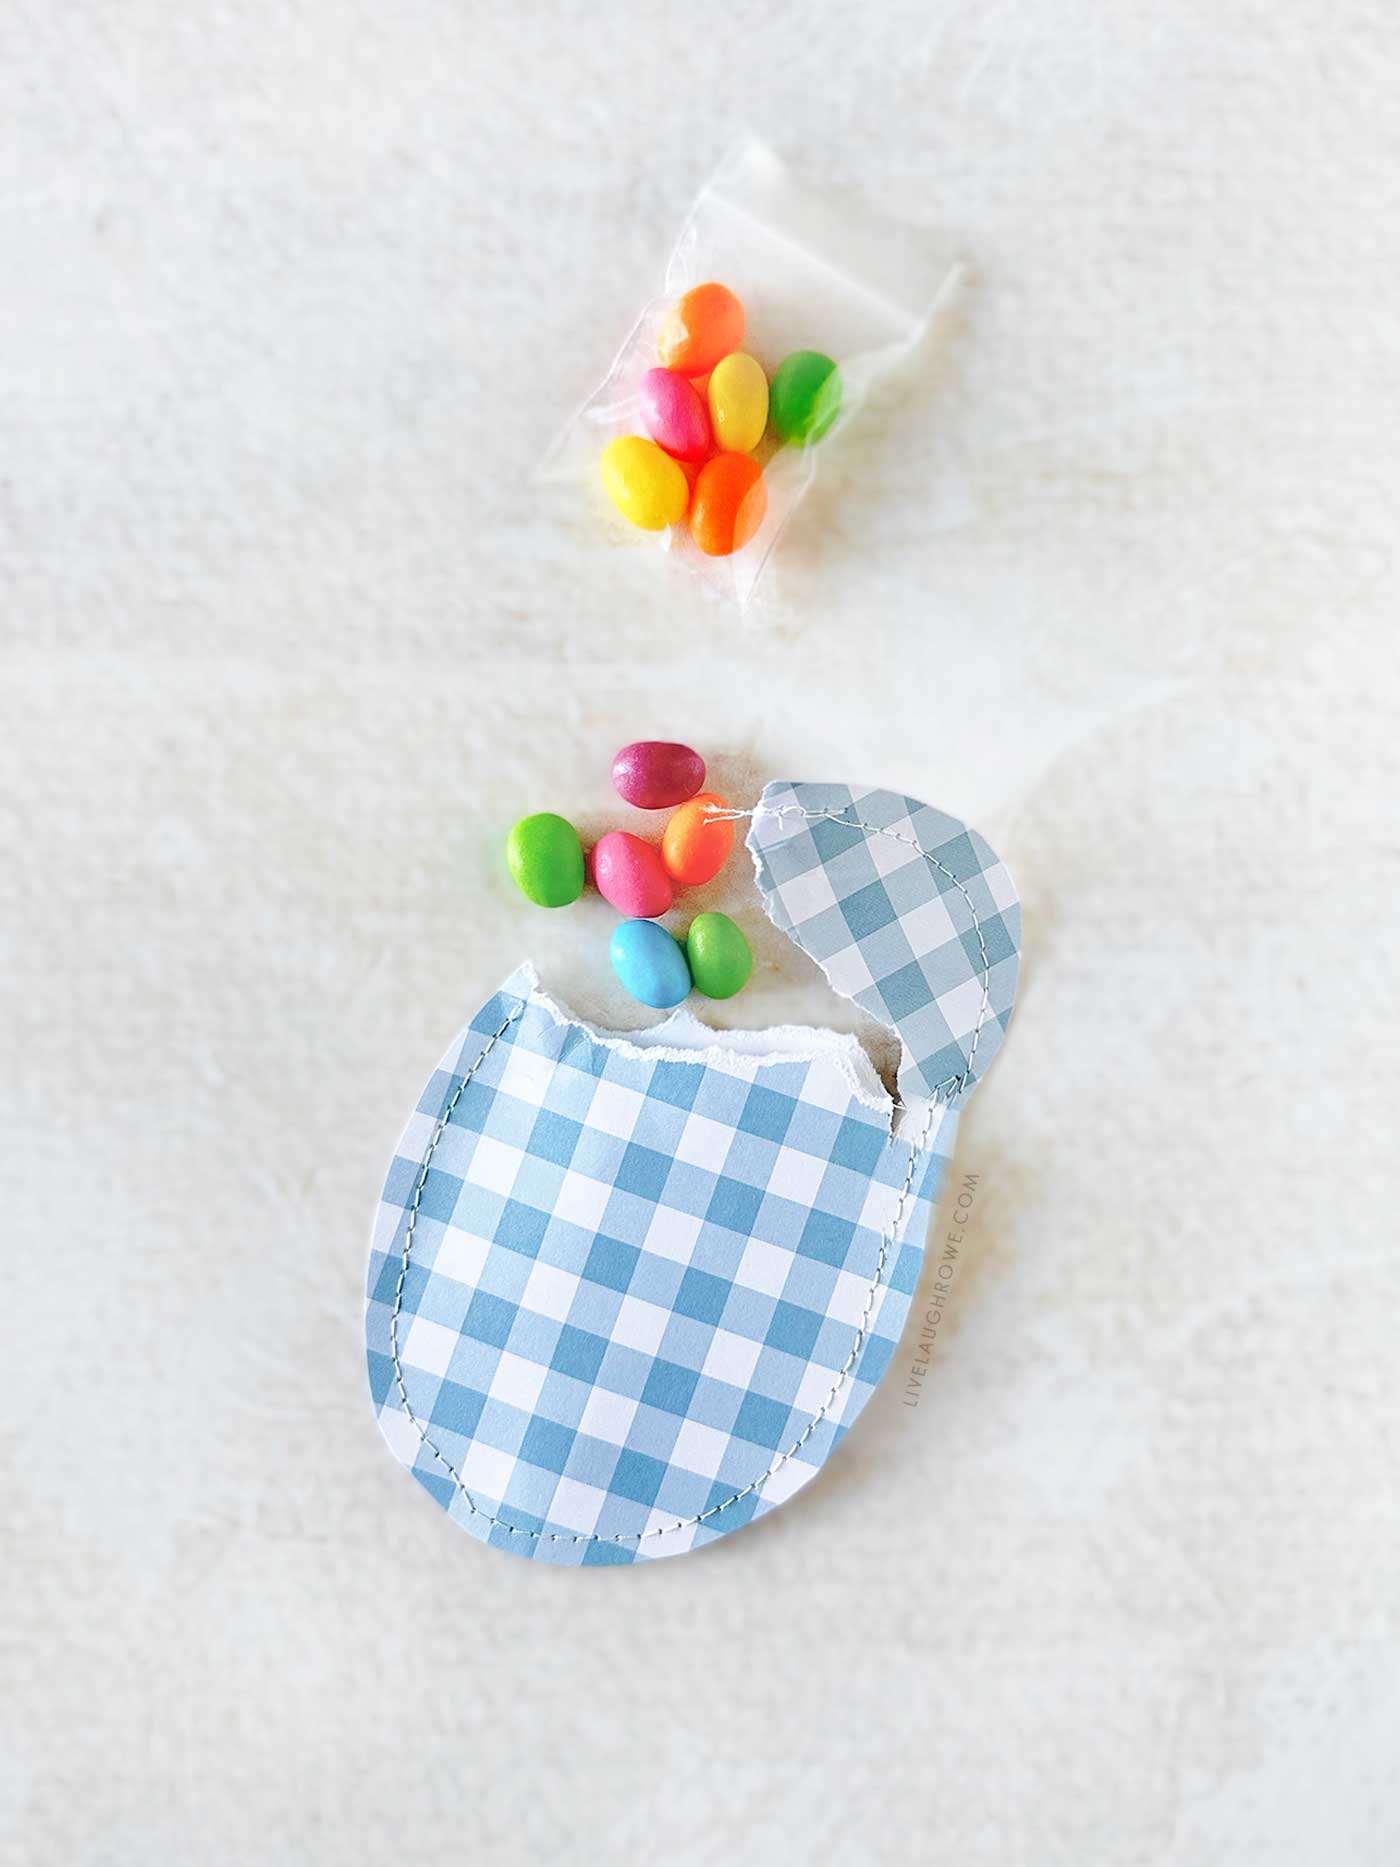
Using a straight stitch, carefully sew around the edge of the egg, leaving about a 1/4-inch seam allowance. Be sure to leave a small opening at the top or side where you can slide in the candy!
Once you’ve inserted the treat, finish stitching up the opening. Trim any loose threads, and you’re done! Using a sewing machine gives a crisp, professional look and is ideal if you’re making a large batch of these Easter eggs.
Tip: I had little plastic resealable bags on hand (pictured above) and liked the idea of using them to hold the candy. Plus, if a kid excitedly rips open the egg, candy won’t go flying everywhere. Haha.
Option 2: Hand-Sewn Method
If you prefer a handmade look, grab a needle and embroidery floss. Use a simple running stitch or blanket stitch around the edge, leaving a small opening. Once you’ve placed the candy inside, stitch it closed.
Let’s be honest, hand-sewing adds an extra bit of charm and makes each egg feel extra special!
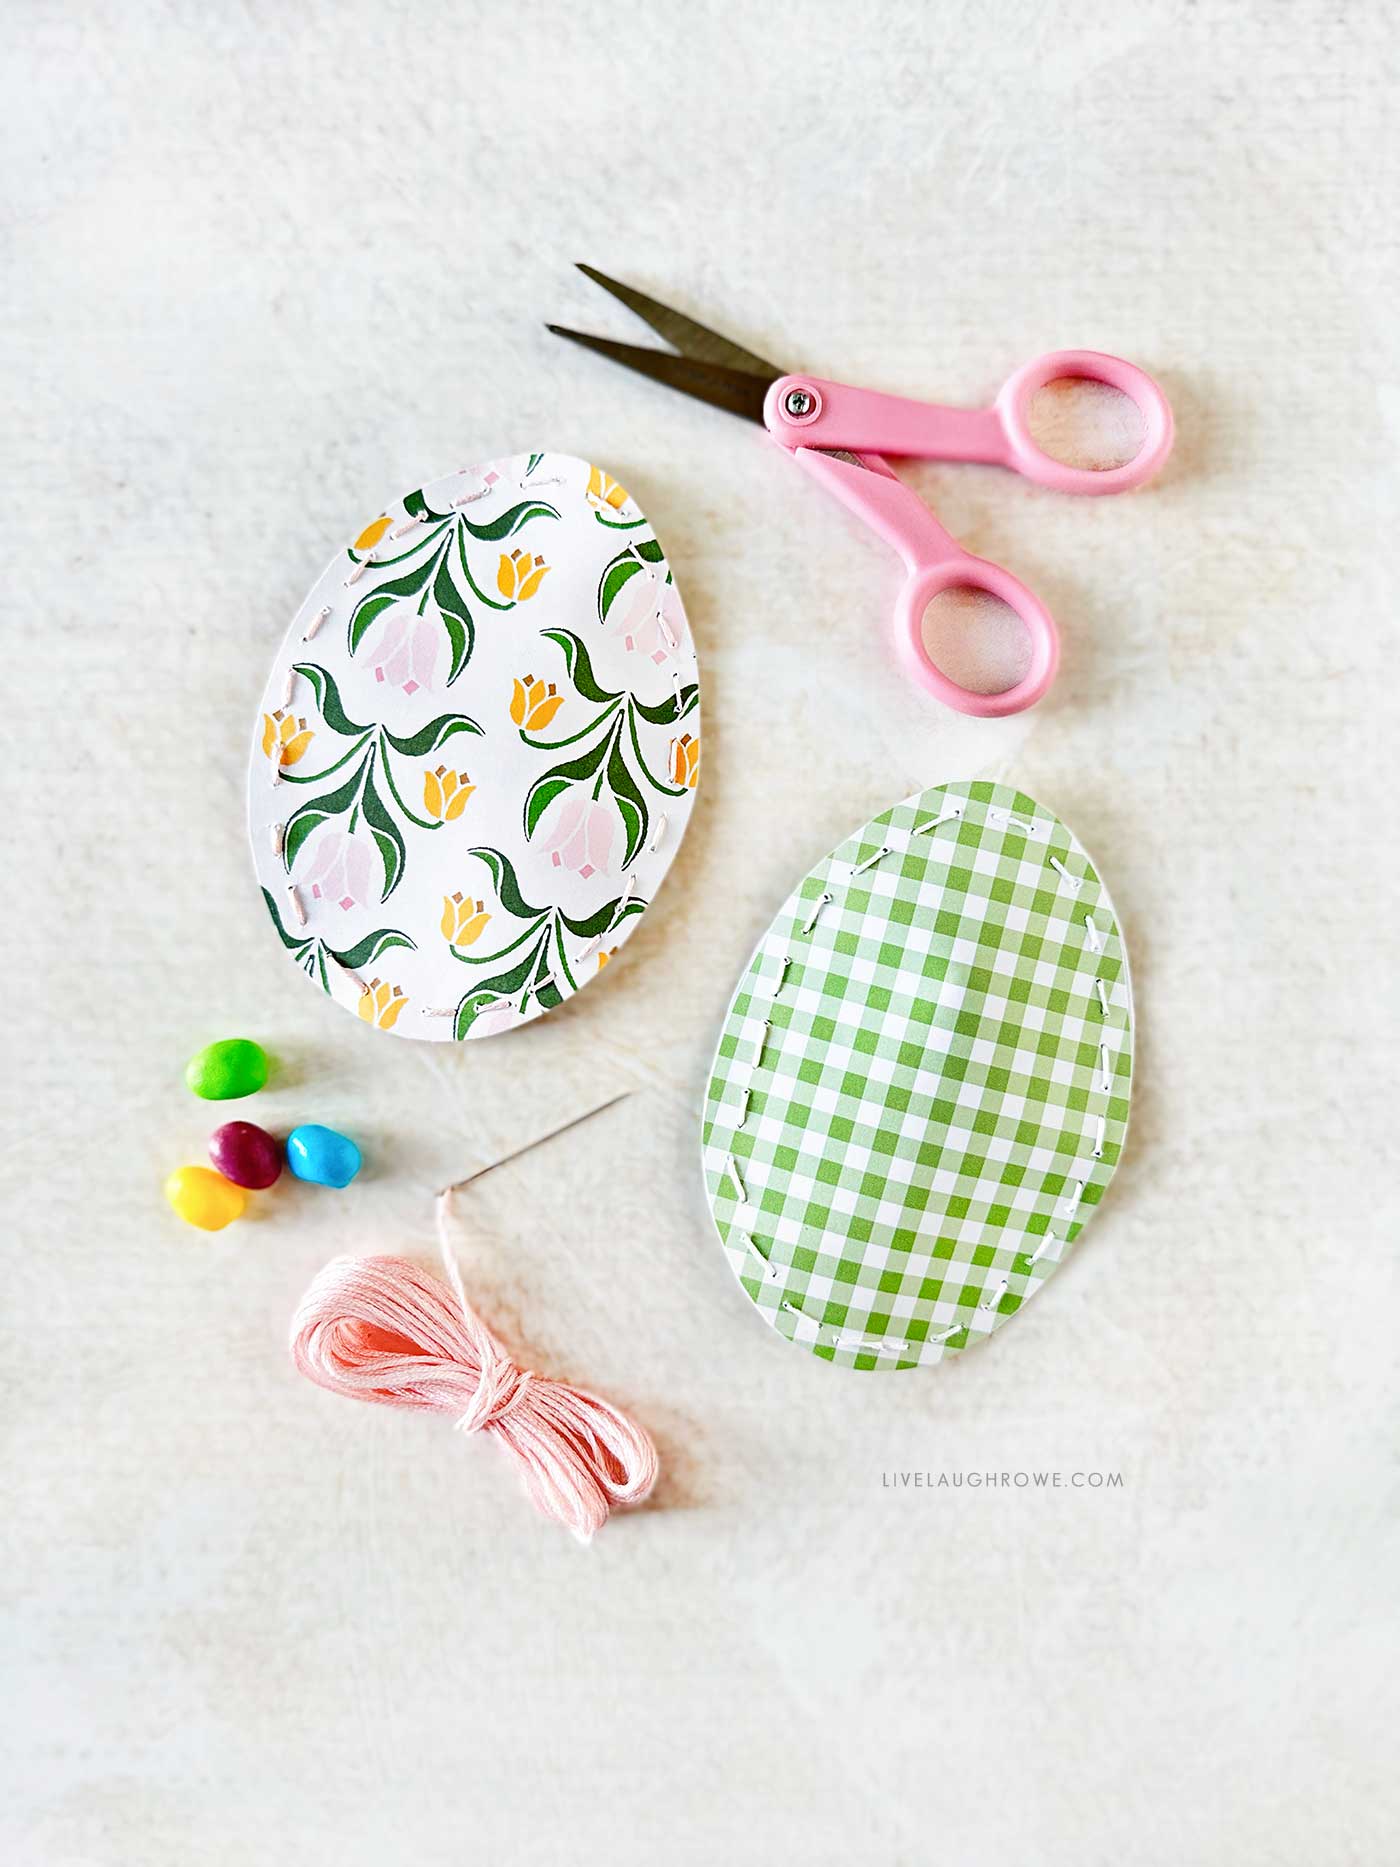
To make the hand-stitched eggs even more unique, experiment with different colored embroidery floss or use a decorative stitch pattern. You can also add small beads or sequins for a little extra sparkle. If you’re using felt or fabric scraps, try layering them for a textured, multi-dimensional effect.
Step 3: Add the Finishing Touches
You can leave your eggs as-is or add a little extra flair:
- Punch a hole at the top and thread some ribbon to make a hanging decoration.
- Stamp or write names on them for personalized place settings at Easter dinner.
- Decorate them with stickers, washi tape, or paper flowers for extra fun.
- Use gold or silver gel pens to add elegant designs or Easter-themed doodles.
- Add a tiny tag with a sweet message for an extra special touch.
- Try different paper textures! Vellum, glitter paper, or handmade paper can add extra personality.
Ways to Use Your Paper Easter Eggs:
- Easter Basket Fillers: Tuck them into baskets for a unique handmade surprise!
- Table Decor: Place one at each plate for a charming Easter dinner favor.
- Egg Hunt Alternative: Hide them around the house for a low-mess, creative egg hunt.
- Gift Tags: Write a name or message on the front and attach them to Easter gifts.
- Surprise Notes: Instead of candy, slip a tiny handwritten note or fun Easter joke inside for a sweet, non-candy surprise!
- Classroom or Party Favors: These are perfect little giveaways for kids’ parties or classroom celebrations.
- DIY Garland: String them together and hang them up as Easter decor.
- Mini Game or Puzzle Holder: Slip a small paper puzzle piece inside and let kids collect them to complete an Easter-themed picture!
Tips & Tricks:
- Choose sturdy scrapbook paper to help your eggs hold their shape.
- Don’t overfill! Keep the candy selection flat so the egg stays fairly smooth and easy to sew. I think a few wrinkles are inevitable.
- Experiment with different shapes! Try making bunny or chick versions using the same technique.
- For an extra touch of magic, lightly brush the edges of the eggs with glitter glue.
- Make it interactive! If you’re using these for an egg hunt, add a tiny clue inside each one that leads to the next egg.
- Use eco-friendly paper to make a more sustainable craft.

Other Easter Fun:
Easter Table Setting Ideas
Polymer Clay Ornament for Easter
Scrap Fabric Easter Wreath
Muslin Easter Treat Bags
Printable Gift Card Holder for Easter
DIY Spring Wreath
This easy Easter craft is a fun way to add a handmade, personal touch to your holiday. Whether you make a whole batch for Easter baskets or just a few for special dinner guests, these DIY paper eggs will bring smiles. The simple materials, fun stitching, and hidden treats make this a craft worth repeating year after year.
If you’re making these with kids, let them choose their paper patterns and decorations for a fun, interactive Easter craft session. You can even make it a family tradition! Mix the shapes, colors, and fillings to keep things fresh each year.
Will you be trying this craft? I’d love to hear how yours turn out! Happy crafting and Happy Easter! 🐣✨


KK says
Adorbs! Super cute and great for lots of things. Thanks for sharing. 🙂
Kelly Rowe says
Thank you! I’m so glad you like them, KK. Happy Easter.