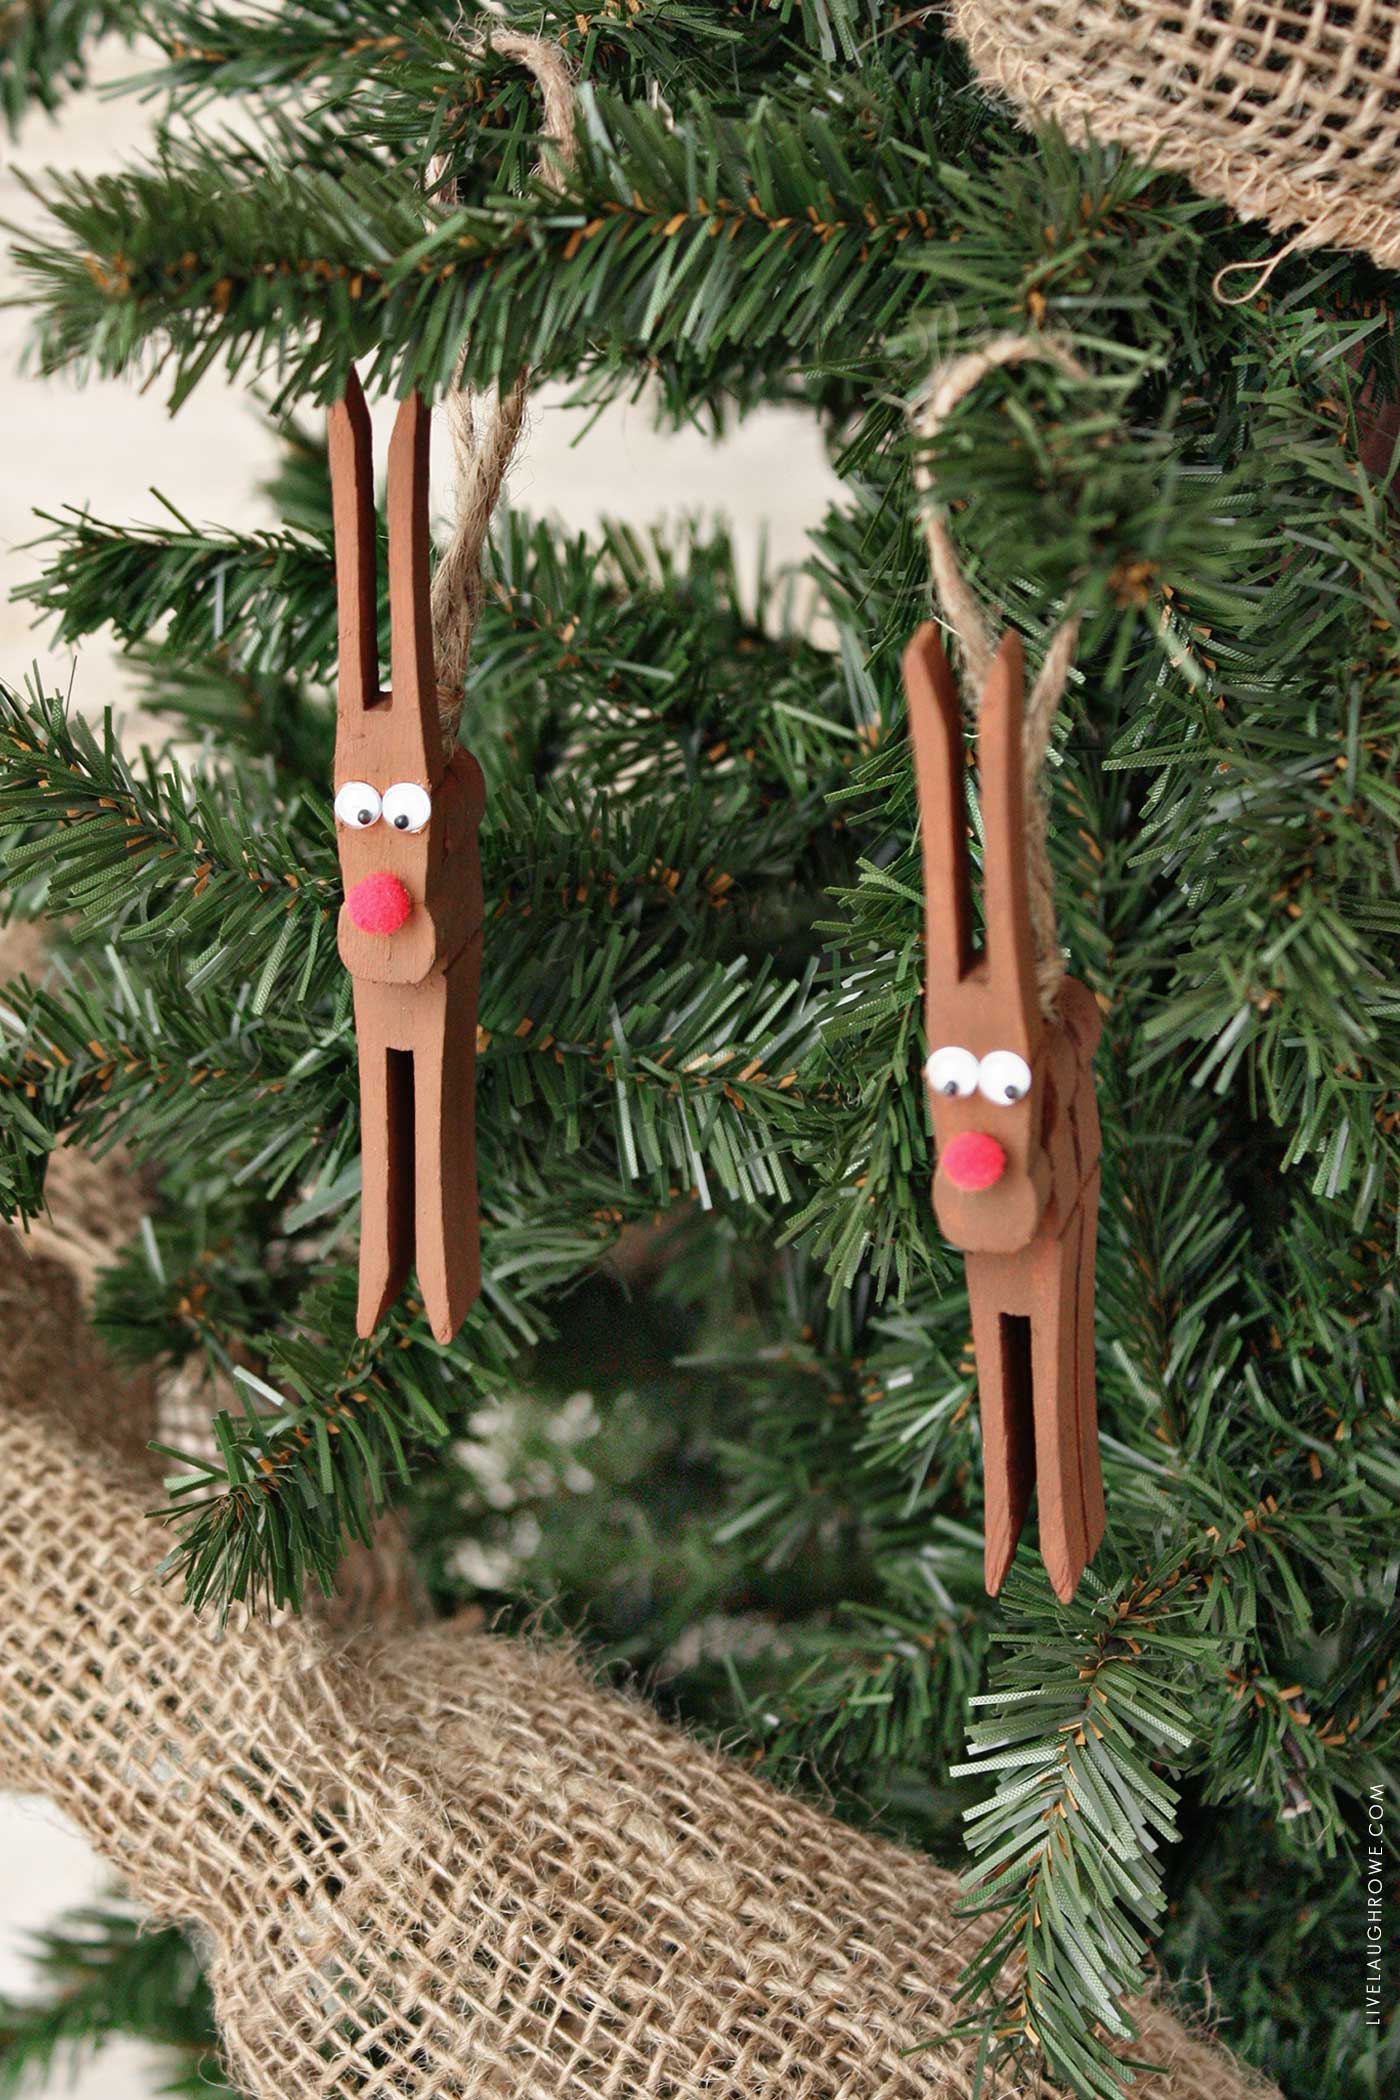
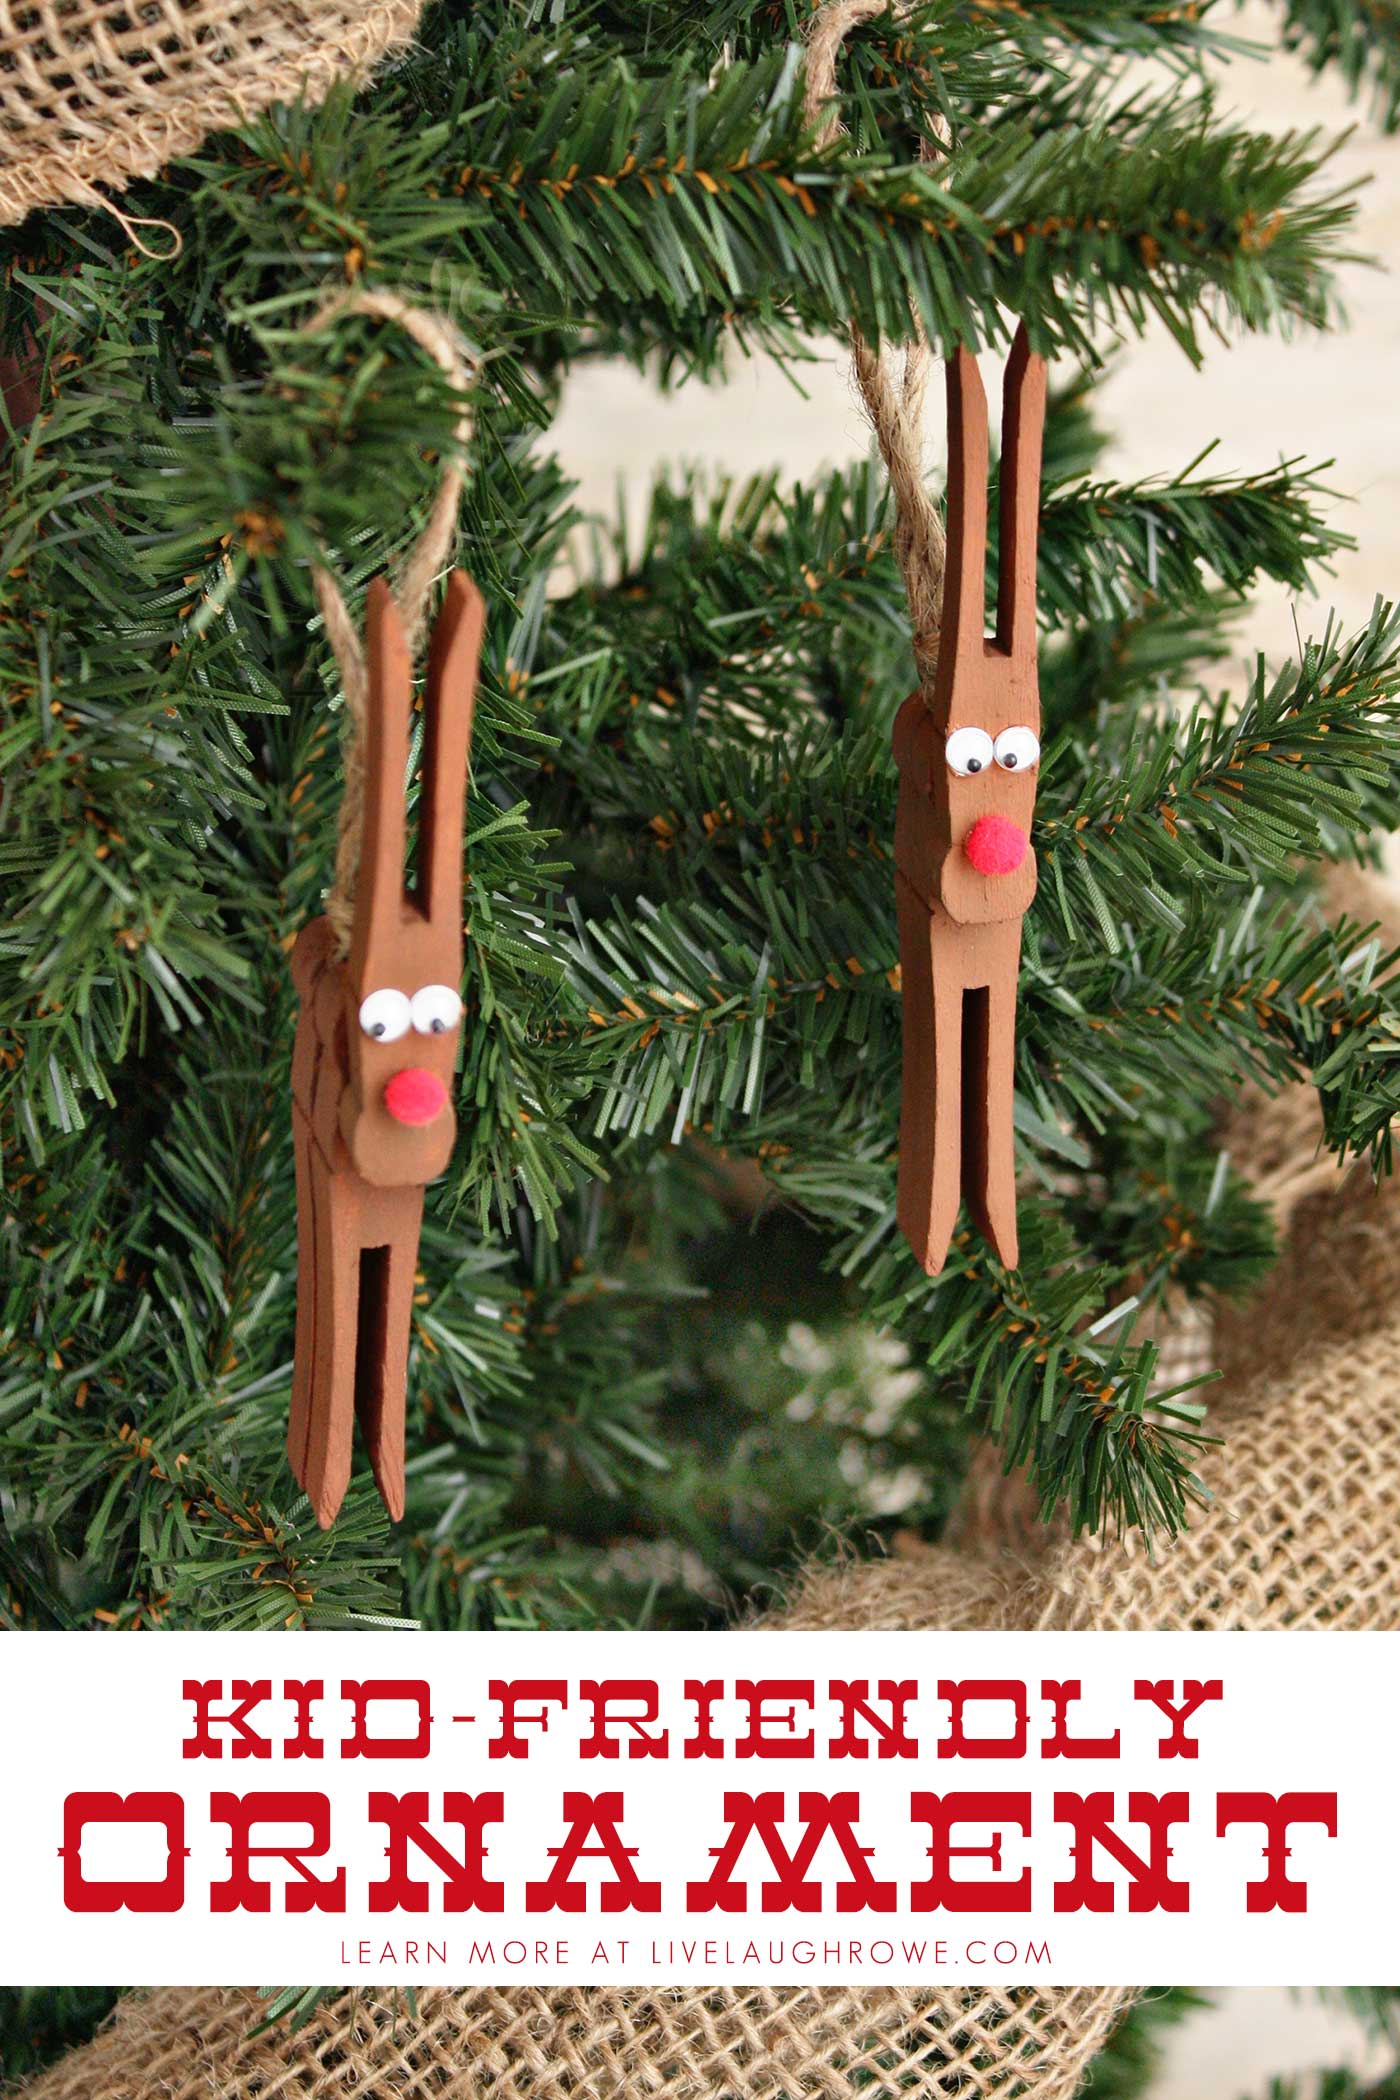
Ah, the holidays! This Kid-Friendly Ornament (Rudolph the Red-Nosed Reindeer clothespin ornament)is adorable and a great way to get into the holiday spirit together.
There’s something so magical about this time of year—twinkling lights, the smell of pine, and the sound of festive music filling the air. One of the best parts of the season is the chance to create special memories with your little ones. If you’re looking for a fun and easy craft to keep your kiddos entertained, look no further!
I have fond memories of watching Rudolph the Red-Nosed Reindeer and Frosty the Snowman on TV while stringing popcorn and helping to decorate the Christmas tree. Those simple moments are some of my favorite holiday memories, and now I hope you can share similar experiences with your children. This reindeer ornament is a perfect craft to combine creativity with a touch of holiday nostalgia!


Let’s jump into the tutorial and see how you and your little elves can make this festive, kid-friendly ornament!
Supplies for Kid-Friendly Ornament:
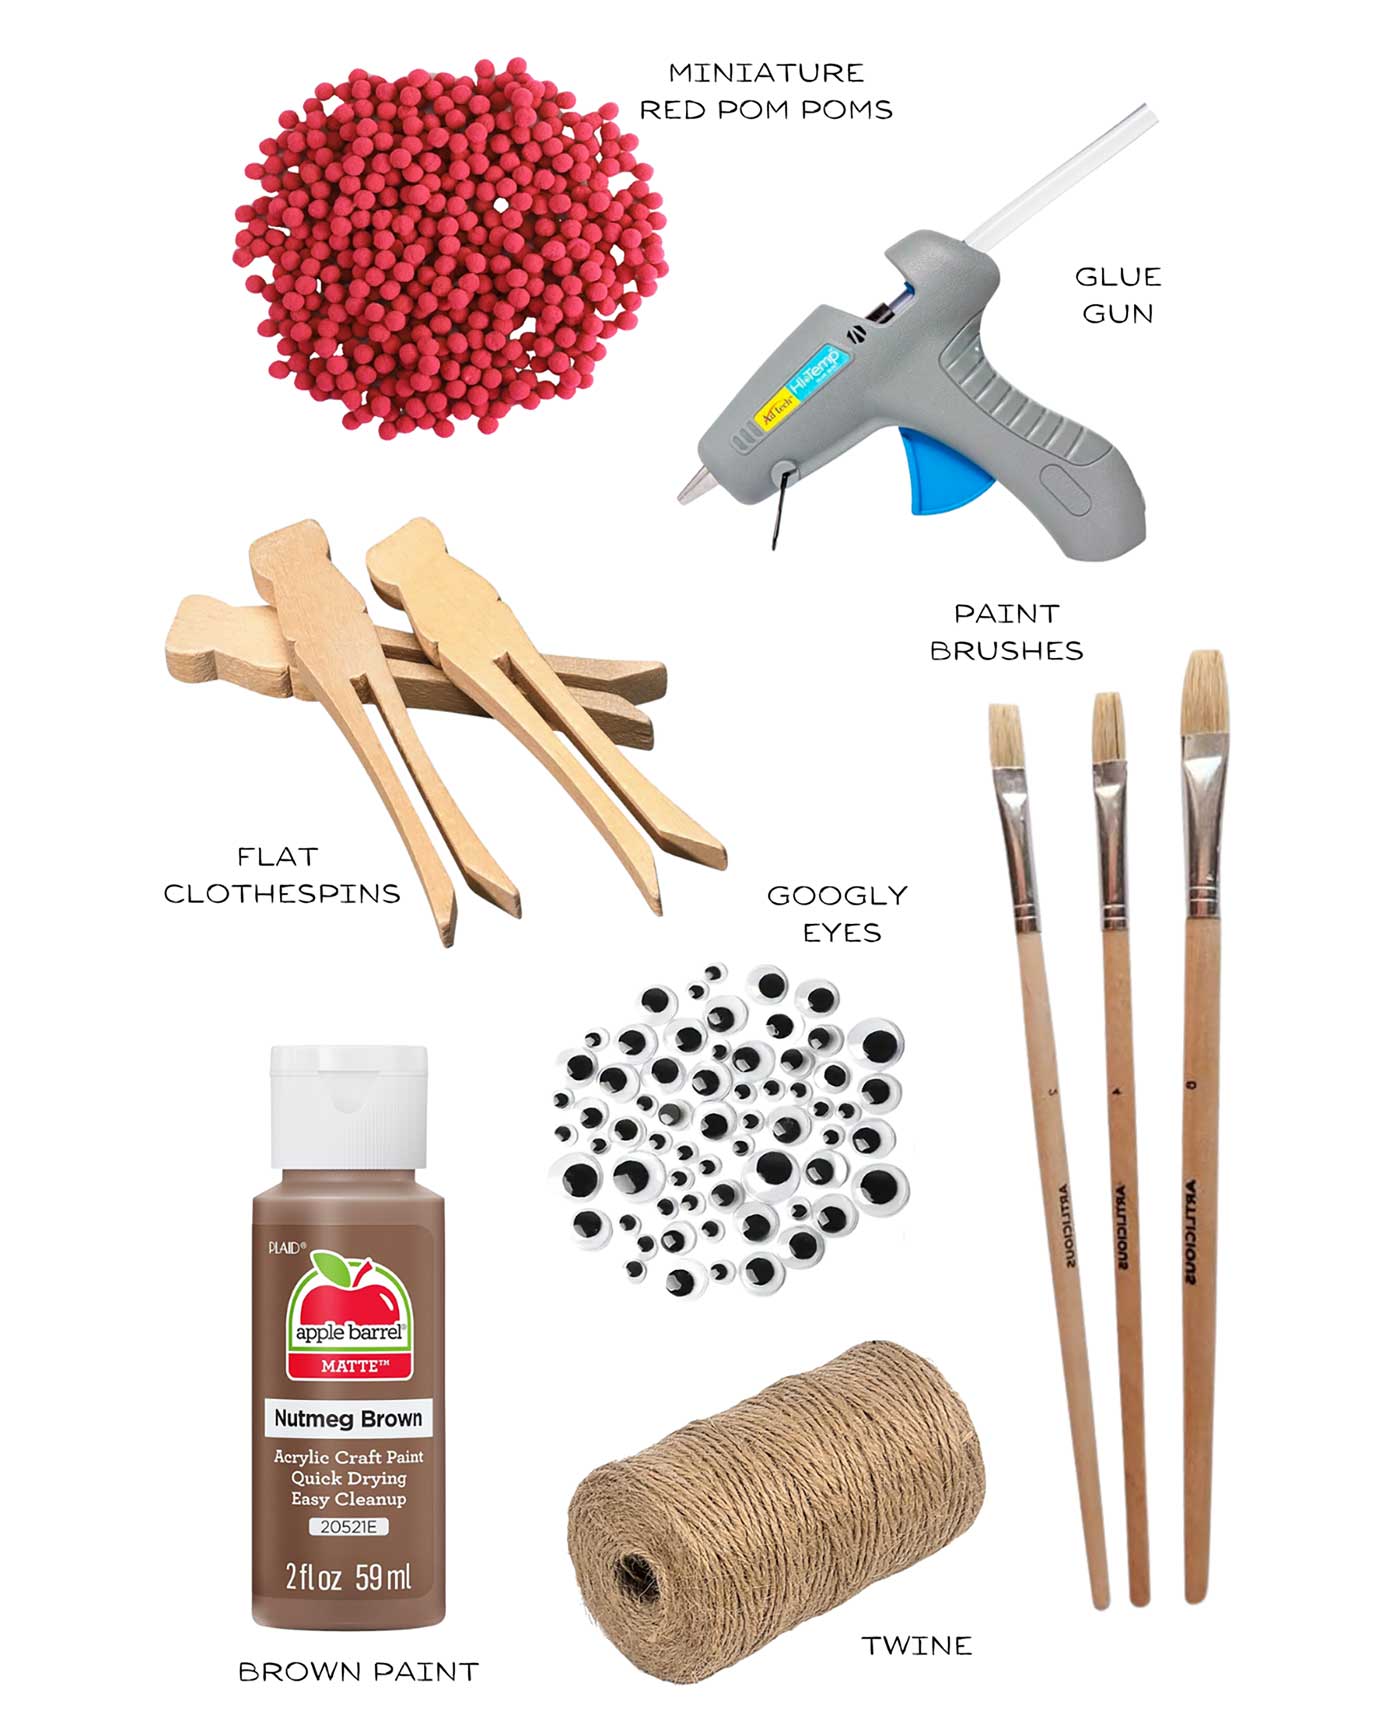
Paint Brushes
Flat Clothe Spins
Mini Red Pom Poms
Brown Paint
Twine
Glue Gun
Wiggly Eyes
With these supplies, you’re ready to create a team of Rudolphs to help Santa guide his sleigh this Christmas Eve!
Making the Children’s Ornament
Step 1: Painting the Clothespins
The first step in bringing your reindeer to life is painting the clothespins. This is where your kids can get involved and have some fun!
Grab your paintbrushes and brown paint, and start painting the clothespins. You’ll need to paint three clothespins per reindeer—two for the body and one for the head and antlers. Feel free to apply as many coats as you prefer.

I found that two coats provide even coverage. Let the paint dry completely before moving on to the next step. While waiting, why not play Christmas music and hum along to Rudolph’s theme song? It adds to the festive fun—and you might find yourself smiling and tapping your toes along the way!
Step 2: Assembling the Reindeer Ornament
Once your clothespins are dry, it’s time to start assembling the reindeer. You could glue the clothespins together first before painting. However, I find painting them separately easier and assembling everything afterward.
We’ll start by taking one of the painted clothespins and attaching a twine loop to it. This loop will allow you to hang your reindeer on the tree later.
Cut an 8-9 inch piece of twine and knot it at one end. Apply a small dot of glue to the top of the clothespin, just below the knot. Press the twine firmly onto the clothespin. Please ensure a tiny bit of twine is hanging below the knot, as this is where you’ll glue it to the clothespin. The knot should rest above the top of the clothespin, creating a neat little loop.

Next, apply more glue along the twine below the knot and press the second clothespin on top. This forms the reindeer’s body, with the two clothespins sandwiched together. Press firmly to make sure everything sticks.

Once you’ve attached the loop to the clothespin, apply more glue along the twine below the knot and down. Place the second clothespin on top and press firmly. We now have the body of our reindeer.
Step 3: Creating the Reindeer’s Head and Antlers
Now it’s time to give your reindeer a face! Take the third clothespin and glue it upside down onto the reindeer’s body. This clothespin will serve as the reindeer’s head and antlers. Position it so that the flat side of the clothespin faces forward, creating a base for the wiggly eyes and red nose.

Once the head is securely glued in place, take a moment to admire your creation. Your reindeer is starting to take shape, and you’re just a few steps away from adding those final festive touches.

Step 4: Embellishing the Reindeer Ornament
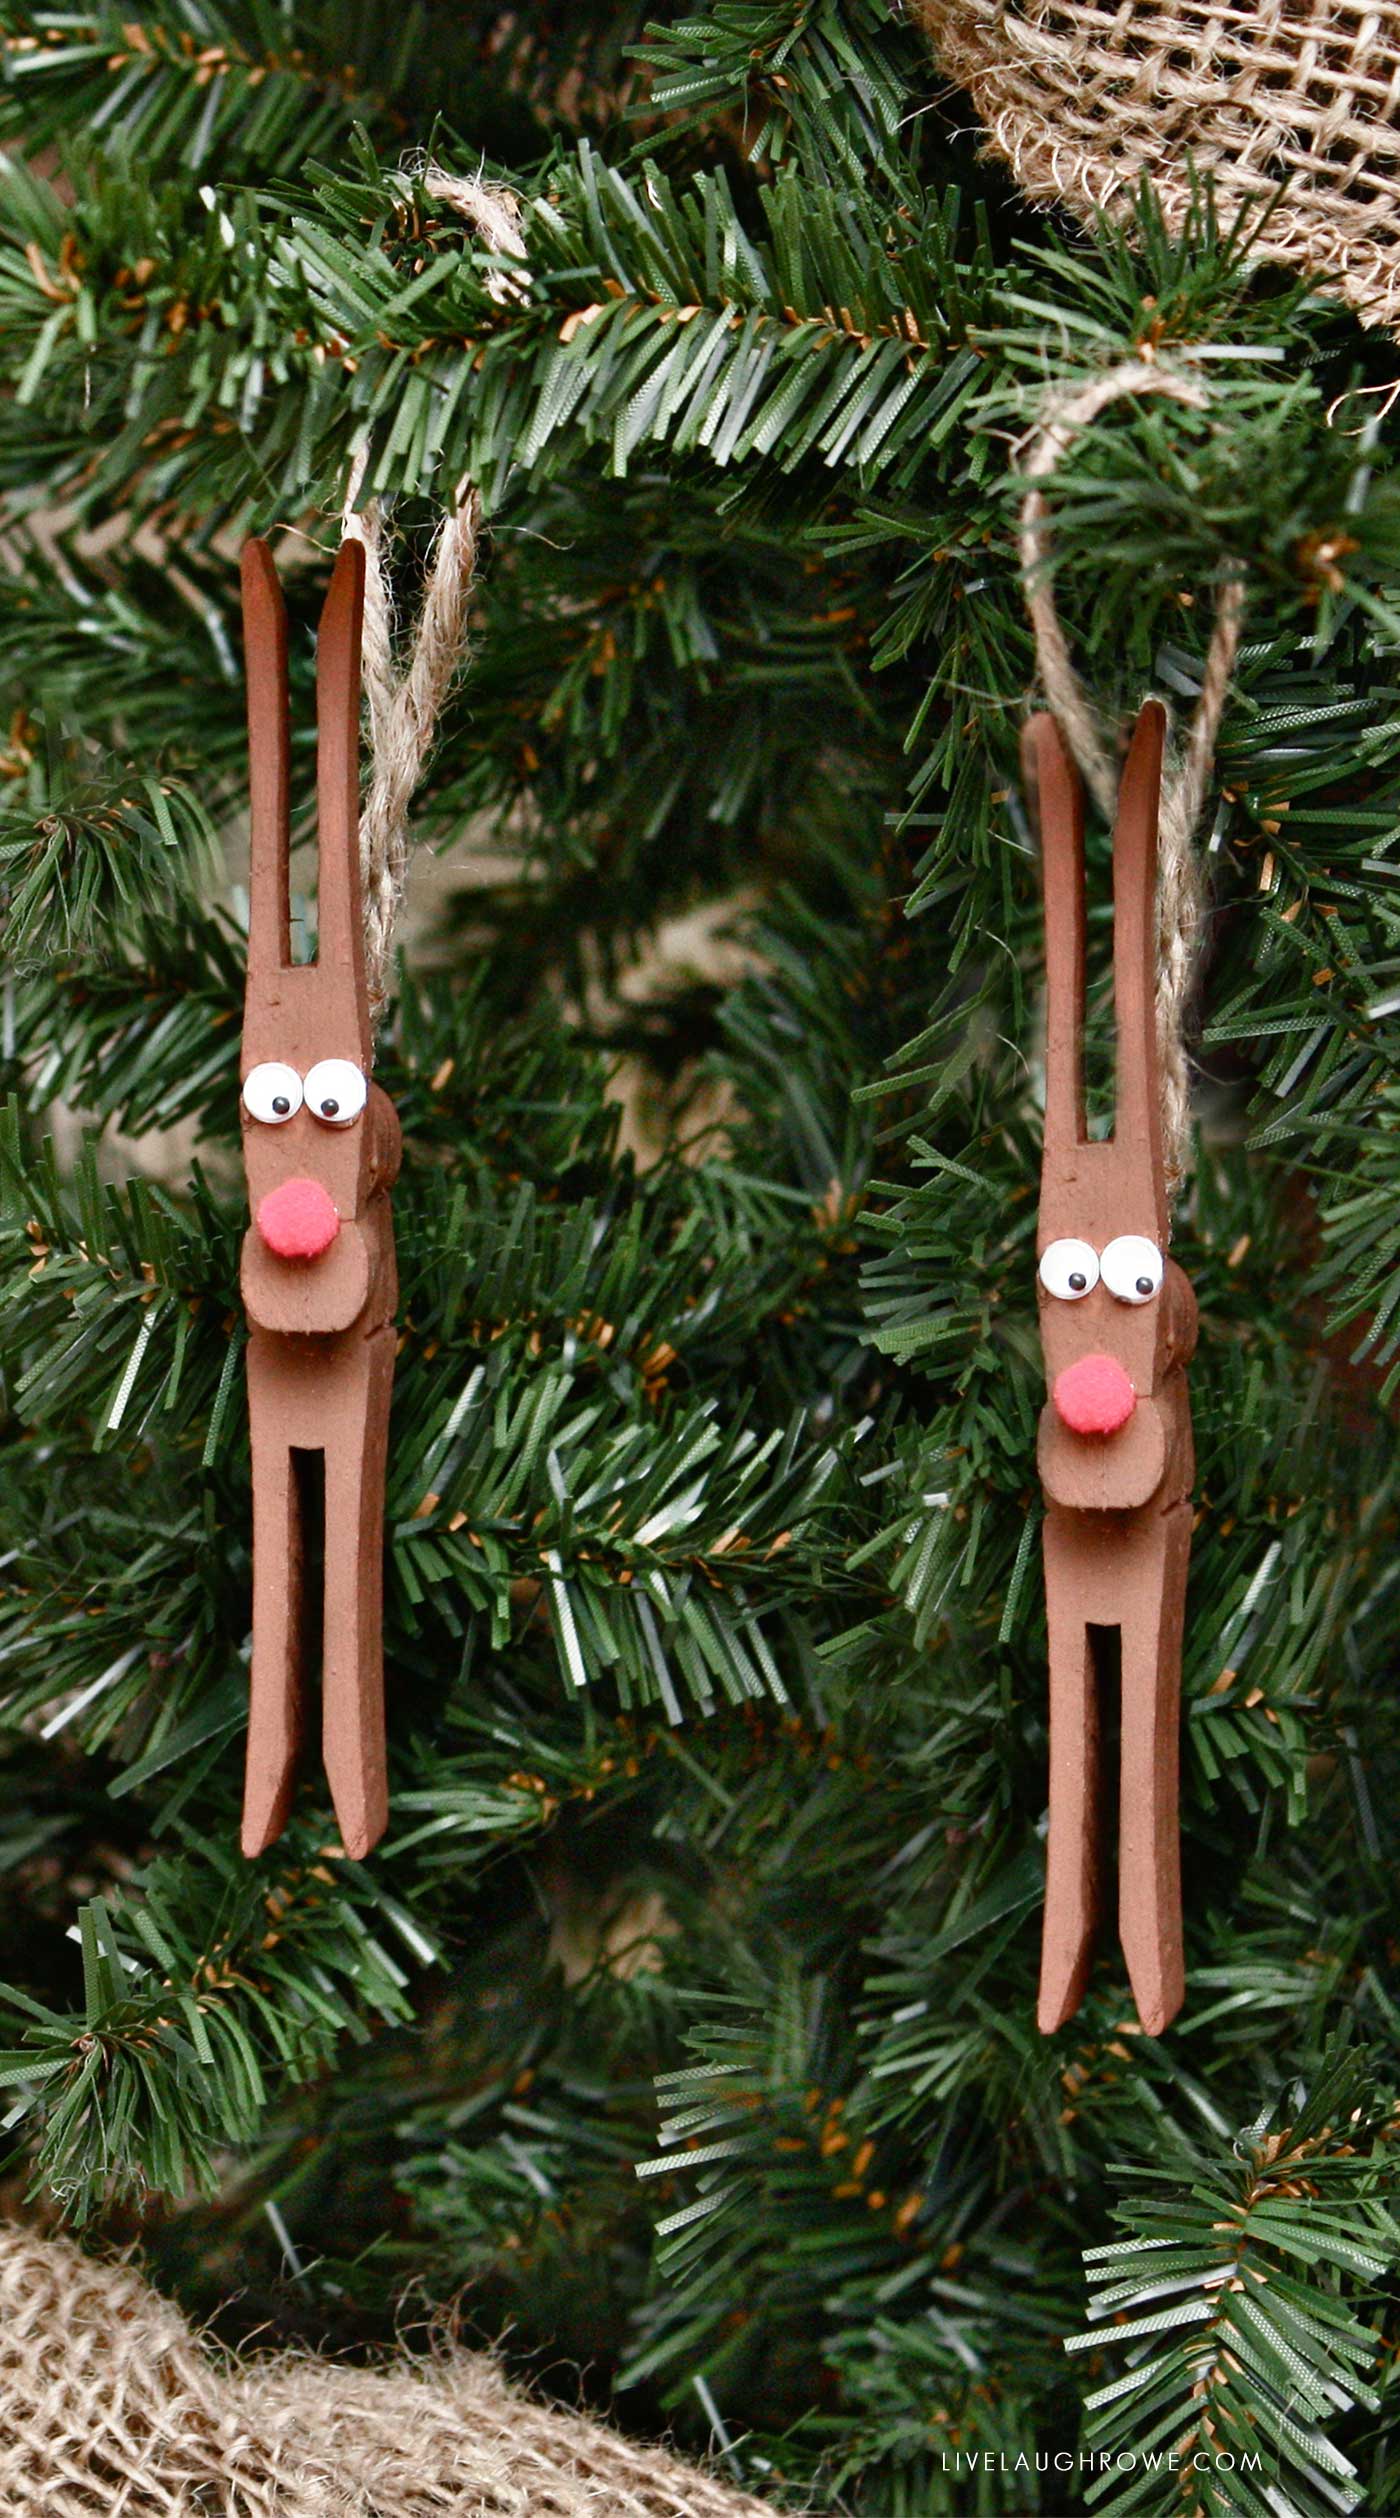
This is the step that brings your reindeer to life! Grab a mini red pom pom and glue it to the front of the top clothespin, right where a reindeer’s nose would be. The bright red pom poms transform your ordinary clothespin into the one and only Rudolph the Red-Nosed Reindeer.
Next, take two wiggly eyes and glue them just above the nose. These eyes give your reindeer a playful, lively expression that’s sure to bring a smile to anyone who sees it. And there you have it—your very own Rudolph, ready to join your holiday decorations!

A Few Creative Twists for Family Friendly Craft
While this craft is fun and straightforward, there’s always room to add your creative twist. For example, if you prefer a more rustic look, you can use a chestnut stain instead of brown paint. After staining the clothespins, give them a light sanding to add character.
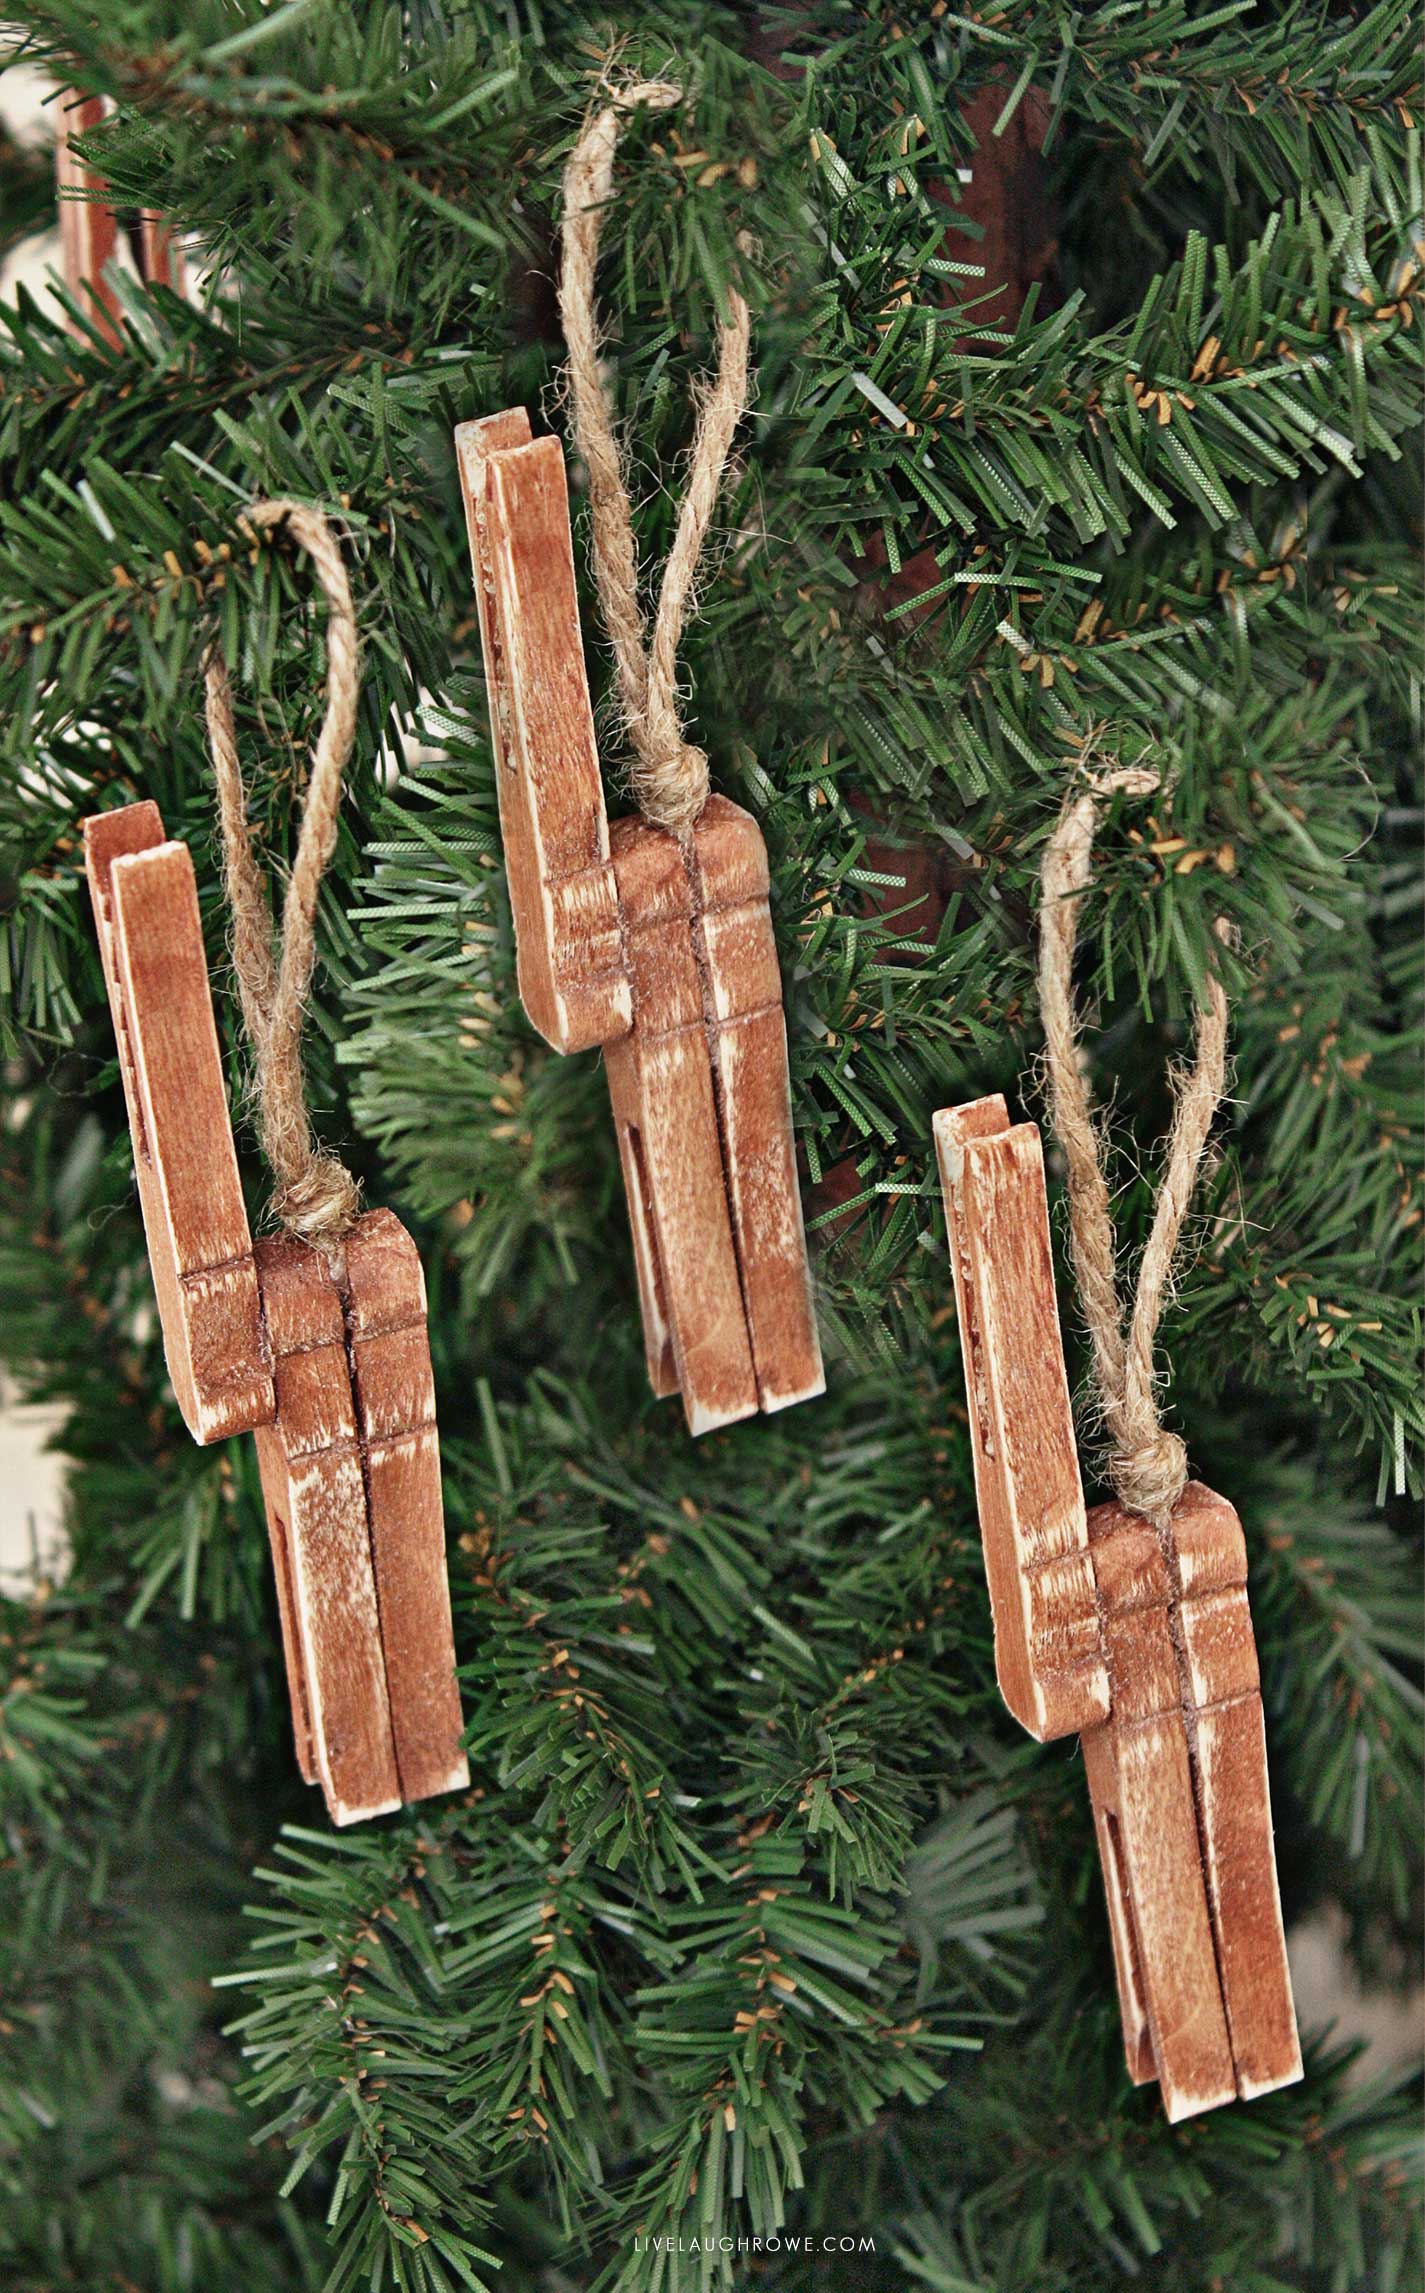
This version of the reindeer ornament has a more natural woodland feel, making it a perfect addition to a rustic-themed tree. You can even leave off the wiggly eyes and red nose for a more minimalist, faceless reindeer that still looks charming and festive.
Safe Crafting Tips with Children
If you’re crafting with young children, you may want to use a different type of glue instead of a hot glue gun. While hot glue is excellent for quick assembly, it can be dangerous for little hands. Regular craft glue works just as well, though it does require a bit more drying time. You can use the extra time to enjoy a cup of hot cocoa with your little ones while you wait!
Displaying Your Kid-Friendly Rudolph Ornament
Once your Rudolph the Red-Nosed Reindeer ornament is complete, it’s time to find the perfect spot for it on your tree. The twine loop makes it easy to hang, and you can place it wherever it will shine the brightest. Whether these ornaments are front and center or tucked in among the branches, your handmade reindeer will bring extra holiday cheer to your home.
If you’re feeling extra festive, why not make a whole set of reindeer ornaments? You can create one for each of Santa’s reindeer—Dasher, Dancer, Prancer, Vixen, Comet, Cupid, Donner, Blitzen, and Rudolph.
Each reindeer can have its own unique look, with different colored noses or even little scarves made from bits of ribbon. This could become a fun tradition you and your kids do together each year, adding a new reindeer to the collection every Christmas.
Other Ornament Tutorials:
Wood Slice Christmas Ornaments
DIY Rusty Metal Ornaments
Simple + Rustic Ornaments
Yarn Wrapped Stars
Vintage Map Ornament
Sharing the Joy
One of the best things about making homemade ornaments is that they also make lovely gifts. If you have friends or family members who love Christmas as much as you do, why not make a few extra Rudolph ornaments to give as gifts? Wrap them up in tissue paper, tie them with a festive ribbon, and you have a heartfelt, handmade gift that’s sure to be treasured for years to come.
Crafting Memories with the Kids
It’s not just about the ornament itself but the memories you create while making it. Crafting with your kids is a beautiful way to spend quality time together; these moments will stick with them as they grow older.
Whether it’s the laughter over a glue mishap, the joy of seeing their finished ornament on the tree, or simply the fun of working together on a project, these moments make the holiday season so special.
Rudolph the Red-Nosed Reindeer is a beloved holiday character, and with this simple kid-friendly ornament tutorial, you can bring a little bit of his magic into your home. This craft is easy, inexpensive, and perfect for getting into the holiday spirit.
So, gather your supplies, put on some holiday music, and enjoy a fun-filled afternoon of crafting with your kids. Who knows? This might just become one of your favorite holiday traditions!
Happy Holiday Crafting! Ho-Ho-Ho!


Danni Baird says
How cute Kelly! I love ornaments that kids can touch and play with at Christmas time!
Kelly says
Hi Danni! Thanks so much for loving on my project. Have a fabulous week, friend. Hugs.
Brian says
I remember making these when I was a kid. I think my mom still has one on their Christmas tree from when I made it in kindergarden. Very easy, cheap, kid-friendly way to make ornaments.
Kelly says
Thanks, Brian! I have one on my tree that was given to me when I was a kiddo… Memories in the making! Cheers!
Jill @ Create.Craft.Love. says
Those are absolutely adorable! Pinning!
Kelly says
Thanks, Jill 🙂 Appreciate the sharing too! You’re the bestest. Hugs.
shoprubyjean says
Oh My Goodness!!! Is Mr. Rudolph just not the cutest thing ever!!!! He is beyond adorable hanging out there in the tree with his little GOOGLY EYES!! 🙂 Thanks for sharing him with us 🙂
Have a great weekend!
Angelina
Kelly says
You are the bestest, Angelina! Thanks so much for loving on this project. Rudolph is as handsome as ever, right? {giggle} xo
megan says
Kelly, I love your little reindeer! My son and I might have to try making these! I’m loving all of your Christmas ideas!! Question – where did you get the burlap ribbon on your tree? Or is it just burlap fabric you cut? I have searched our local craft stores for burlap ribbon and can’t find any :(.
Kelly says
Hi Megan! Thanks so much for loving on my project 🙂 I got the burlap ribbon/garland at Michael’s. I believe it was with the floral tapes, etc. I hope you find some — it’s pretty fabulous! Hugs.
Emily says
Adorable! Love this project 🙂
Kelly says
Thanks a million, Emily! Hoping we’ll connect in the New Year… HUGS!
Crystal says
Kelly, these are SO cute! I want to make them with my oldest, he’ll love them. Thanks for the tutorial! 🙂
Kelly says
YAY! So glad you like this fun project 😉 Trust you’re feeling better and all ready to go for the big day next week… MERRY CHRISTMAS!