• Skip to primary navigation
  • Skip to main content
  • Skip to primary sidebar
  • Skip to footer
Live Laugh Rowe
  • About
    • About Me
    • Contact Me
    • The Rowes
    • In The Press
    • PR & Advertise
    • Privacy Policy
    • Resources
  • Recipes
    • Appetizers/Snacks
    • Beverages
    • Breakfast
    • Desserts
    • Main Dish
    • Side Dishes
    • Sandwiches
    • Skinny Dishes
    • Slow Cooker
    • Soups/Chilis
    • Weight Watchers
  • Crafts & DIY
    • Crafts
    • Decor
    • DIY Projects
    • Fall Projects
    • Holidays
    • Home Projects
  • Printables
  • Shop My Home
  • Facebook
  • Instagram
  • Pinterest
  • Twitter
Subscribe
Live Laugh Rowe

Live Laugh Rowe

A lifestyle blog that shares crafts, recipes, tutorials and life's moments.

  • About
    • About Me
    • Contact Me
    • The Rowes
    • In The Press
    • PR & Advertise
    • Privacy Policy
    • Resources
  • Recipes
    • Appetizers/Snacks
    • Beverages
    • Breakfast
    • Desserts
    • Main Dish
    • Side Dishes
    • Sandwiches
    • Skinny Dishes
    • Slow Cooker
    • Soups/Chilis
    • Weight Watchers
  • Crafts & DIY
    • Crafts
    • Decor
    • DIY Projects
    • Fall Projects
    • Holidays
    • Home Projects
  • Printables
  • Shop My Home
  • Facebook
  • Instagram
  • Pinterest
  • Twitter
Subscribe

Halloween Garland | Rustic and Ghostly

10/22/2012 · Kelly Rowe · 24 Comments

This post may contain Amazon or other affiliate links. As an Amazon Associate I earn from qualifying purchases.

Pin
Share
Tweet
Share

As many of you know, my {love} for felt project runs deep — hee-hee!  My inspiration for this one came from Wild Olive and her Ghostie Garland.  It’s adorable!  However, I like a little less cute and a little more rustic, so I came up with this super fun and easy halloween garland, that is perfectly rustic and ghostly.
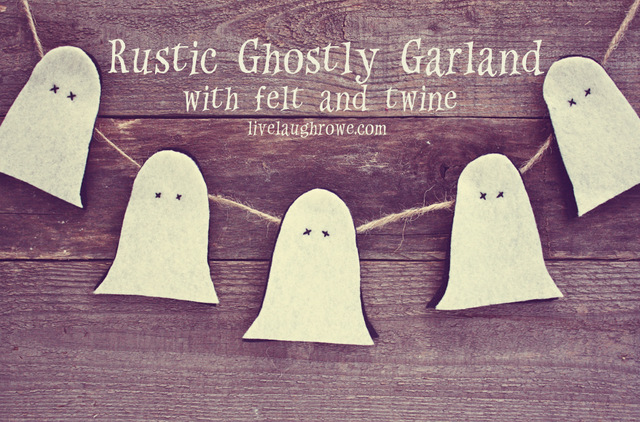
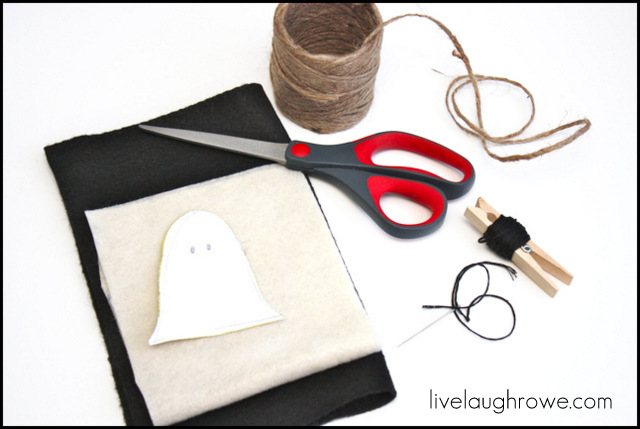
Rustic Ghostly GarlandLet’s grab a few supplies!
Ivory and Black Felt
Black Embroidery Floss
Needle and Scissors
Hot Glue Gun
Twine
Rustic Ghostly GarlandFirst things first… draw your ghost template.
Cut out your template, then trace and cut.
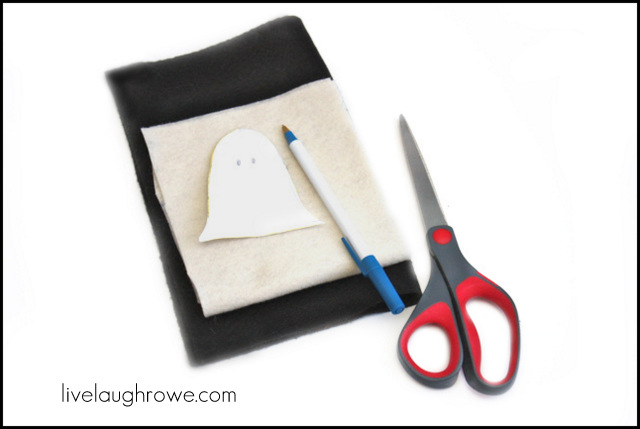
You’ll want to do the same number of ivory ghosts as black.  I did five of each.
You’ll then place the ivory ghost cut out on top of the black ghost cut out.
Thread your embroidery floss and stich x’s for eyes through both pieces of felt.
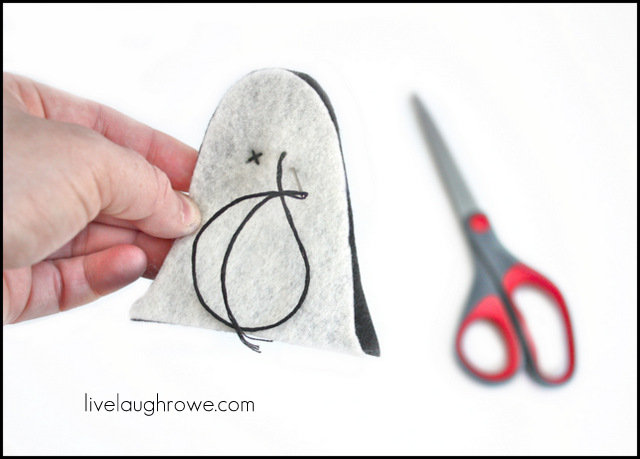
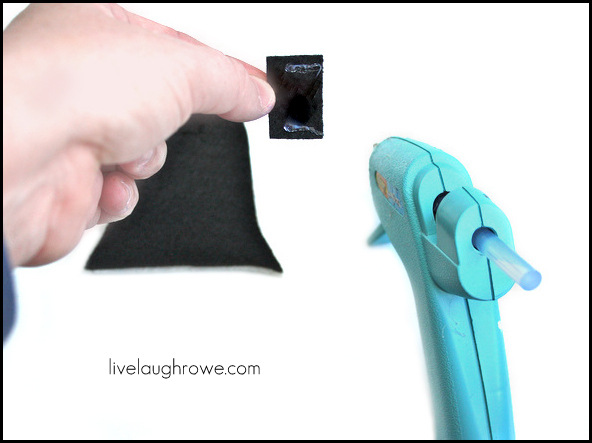
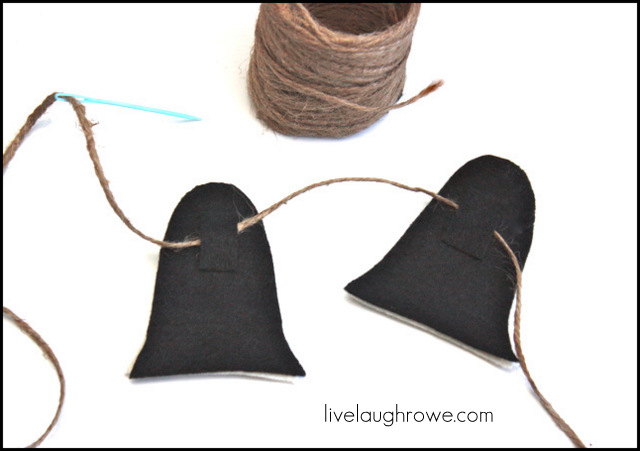
 You’ll then want to cut five small pieces of black felt to glue to the back.
This will be placed over where the eyes were stitched.
Place as pictured below, as this will also be used to string the ghosts with twine.
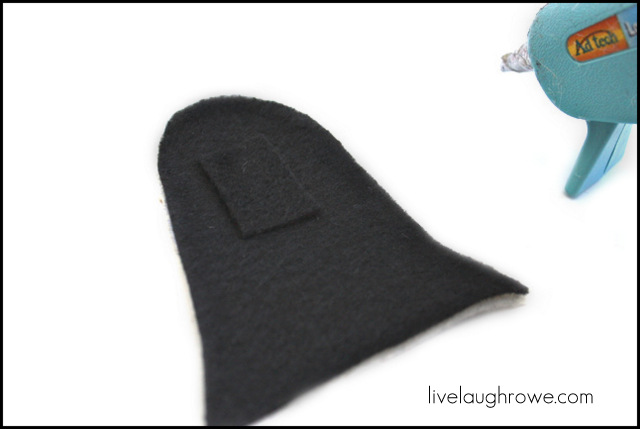
Of course you can modify as this tutorial as you’d like.  You might be asking yourself, why did she use an ivory and a black ghost?  I like things to look super clean.  And I didn’t like that I could see the black thread through the ivory, especially if hung in a bright light or well lit room.  So, it’s not see-through and we can hide the stitching.  That makes this uber picky crafter very happy {smile}.

Last, but not least, we’ll string the ghosts on the twine, using a yarn needle.
Aaaaand, you’re done!  Hooray!
 I had five ghosts and strung them on a 3-4′ strand of twine.
Of course, you can make your Rustic and Ghostly Halloween Garland shorter or longer.
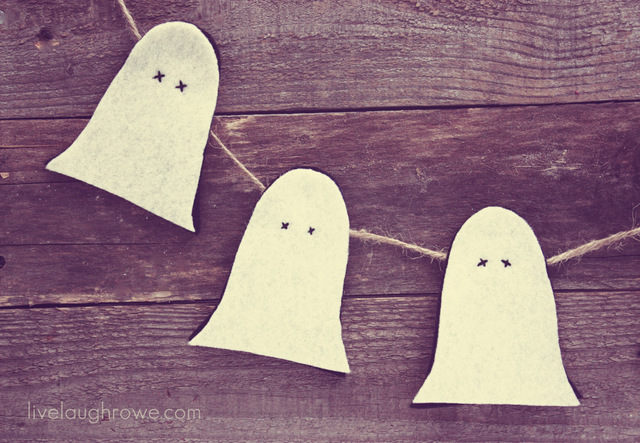
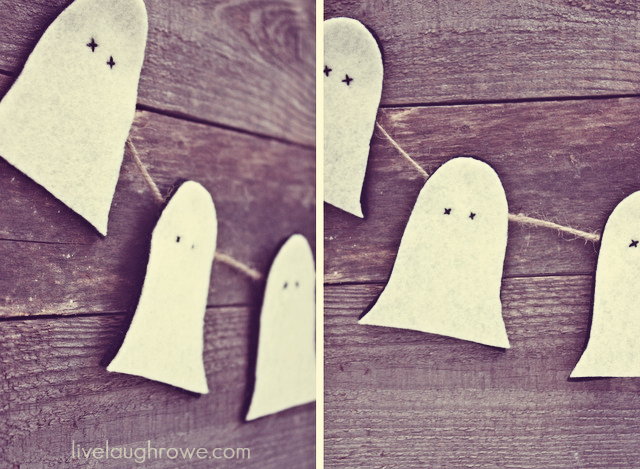
What do you think?  No ‘boos’ please {hee-hee}.  Happy Crafting!

I’ll be partying {here, here, here and here}.
Home Stories A to Z, Craft-O-Mania and The Shabby Creek Cottage.
Subscribe to Updates | Like on Facebook | Follow on Pinterest
Pin
Share
Tweet
Share

Related Posts

Halloween Word Search

Halloween Word Search Printable

Styled Halloween Place Setting with Printable

Free Halloween Printable | Vintage Inspired Card

Darling vintage inspired Halloween greetings printable postcard. Send to a friend, display in your office or home -- oh the possibilities! livelaughrowe.com

Vintage Inspired Halloween Greetings Postcard

Young Girl Trick or Treating

Spooky Season Bucket List

Wreath with Nest and Eggs

Garland Wreath for Spring | How-To Wreath

Vintage Inspired Halloween Party Favors using Peat Pots! Aren't they adorable? I love these and they would make great little gifts too. Tutorial at livelaughrowe.com

Halloween Party Favors using Peat Pots

Crafts, Halloween, Holidays

Previous Post: « Thee Networking Blog Hop {October Edition}
Next Post: Homemade Vanilla Printable Labels »
about kelly

ABOUT KELLY

A DIY fanatic, Kelly shares her journey through her blog, Live Laugh Rowe, where she showcases her recipes, tutorials, crafts, home projects, and all things DIY. This East Coast Girl at heart believes family is number one as she finds the perfect balance of being a daughter, wife, sister, entrepreneur, writer and woman of God. Be sure to follow along as she shares her passion for life, love and family! Read more...

Reader Interactions

Leave a Reply Cancel reply

Your email address will not be published. Required fields are marked *

Recipe Rating


Comments

  1. Claire @ Polkadot Pretties says

    10/22/2012 at 5:54 am

    What a great idea !!!

    Simple yet really effective, great job

    Happy Monday

    Claire x

    Reply
  2. Danni Baird says

    10/22/2012 at 7:14 am

    Inexpensive and easy! My kind of craft Kellly! Fun one!

    Reply
  3. Laura @FoodSnobSTL says

    10/22/2012 at 7:21 am

    Simple and cute – my kind of decor! Do you think there is a way to use black twine and somehow make it the eyes + use it to string them together?

    Reply
    • Kelly says

      10/22/2012 at 11:51 am

      Hey Laura! I love the idea of the black twine for stringing. I don’t think twine for the eyes would work unless you made a knot and glued it on. Does that make sense? You wouldn’t (easily) be able to sew the twine through the felt.

  4. TheGirls@WhimsicallyHomemade says

    10/22/2012 at 8:48 am

    Simple and spooky. Um….YES PLEASE! And I already have most of the stuff on hand. I love it when projects are this easy! I’d love for you stop by Whimsically Homemade and link your project up at our Mixer Monday Link Party. I hope to see you there! http://whimsicallyhomemade.blogspot.com/2012/10/mixer-monday-link-up-6.html

    Reply
  5. Tara @ Mommy Head Adventures says

    10/22/2012 at 11:22 am

    What a super cute craft! We don’t celebrate Halloween but it would be cute to make pumpkins with orange felt for fall! Thanks!

    Reply
    • Kelly says

      10/22/2012 at 11:49 am

      I don’t celebrate halloween either 🙂 I just thought this was a super fun idea to share with my readers… great idea on pumpkins or owls too! Thanks so much for stopping by, Tara. Hugs.

  6. Shannah @ Just Us Four says

    10/22/2012 at 11:30 am

    So cute! I love them. I hope you’ll consider linking your super cute ghosts up at the Pinworthy Projects Party? I hope to see you there!

    Reply
  7. Courtney says

    10/22/2012 at 11:35 am

    I LOVE this! I have nightmares about cutting felt though. I feel like I was always using felt for some art project in grade school and it was so hard to cut!

    Reply
  8. Hanan says

    10/22/2012 at 11:59 am

    Super easy and cute, love it!

    Reply
  9. Marie says

    10/22/2012 at 12:07 pm

    Darling! I love those x eyes!

    Reply
  10. Jenn says

    10/22/2012 at 3:03 pm

    Very cute! I love those eyes too! 🙂

    Reply
  11. Holly and Nat @ My Sister's Suitcase says

    10/22/2012 at 3:04 pm

    these little ghosts are SO cute Kelly! I love felt projects, must pin this one for next year 🙂

    Reply
  12. Trinity B. says

    10/22/2012 at 4:37 pm

    Got to pin this! I think this is even something I could get the kids involved with. Would make for a great family night activity. Thanks for sharing.

    Reply
  13. nest of posies says

    10/22/2012 at 9:50 pm

    how cute are those little ghosts! darling!

    Reply
  14. Debra says

    10/23/2012 at 2:54 am

    cute

    Reply
  15. Kimberly @ A Night Owl says

    10/23/2012 at 12:48 pm

    Sooooooooooo SUPER cute! Really just LOVE this Kelly! xo, Kimberly

    Reply
  16. Eliza says

    10/23/2012 at 7:53 pm

    These are great! I love the rustic look:)

    I found you at the Time to Shine Blog Hop. I’m your newest follower:) Come say hi!

    http://elizakprints.blogspot.com/

    Reply
  17. Lolo says

    10/24/2012 at 1:30 am

    Those are so super cute!!

    Reply
  18. Gina says

    10/24/2012 at 7:54 am

    Too cute!!!!!!!!!!!! and you just reminded me that I am out of hot glue sticks 🙂

    Reply
  19. Brenda @ a farmgirl's dabbles says

    10/24/2012 at 9:37 pm

    Super cute! My girls would have so much fun making this!

    Reply
  20. mollie says

    10/27/2012 at 7:28 pm

    Really cute! And I like your backing…perfect for hanging near windows!

    Reply
  21. Megan says

    10/29/2012 at 11:18 pm

    Cute! Such a simple and clever idea.

    Reply
  22. Ali says

    11/04/2012 at 6:26 am

    Those ghosts are seriously cute – love their little cross stitched eyes. Thank you for sharing your tutorial!

    Reply

Primary Sidebar

Looking for something?

Hey there! I’m Kelly.

I’m the author, creator, cook, and photographer behind the blog. I am so glad you’re here!  I’m passionate about life, family, and my faith. If there’s one thing I’ve learned in my journey, life is hard, but God is good.  Read More

Popular on Pinterest

Valentine Favors with cones and candy.

Footer

  • Facebook
  • Instagram
  • Pinterest
  • Twitter
  • YouTube

Looking for something?

Copyright © Live Laugh Rowe, LLC • Privacy Policy • Log in