
Oh happy day! As many of you know, I’m not a big Halloween person, but I do like to challenge myself with a project or two that I can share with all of you! Recently, my sister sent me a link to a website called Jane, where they were selling some Fall and Halloween Burlap Banners that she knew would inspire me! And that they did… Today, I’m sharing my Ghostly Halloween Burlap Banner with YOU!
 Supplies needed to make your own Halloween burlap banner:
Burlap
Scissors
Acrylic Paint
Stencils
Sponge Brush or Daubers
Sewing Machine (optional)
Yarn Needle
Twine (for hanging)
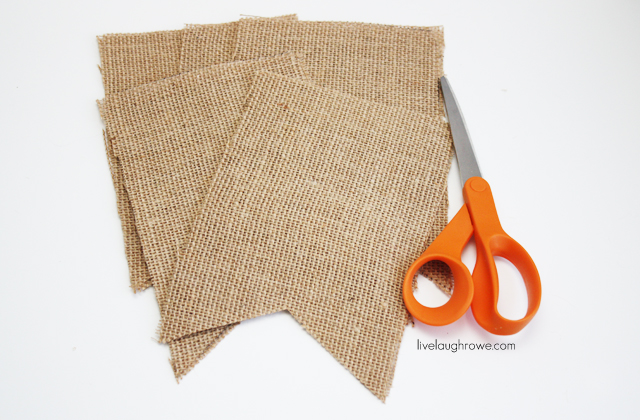
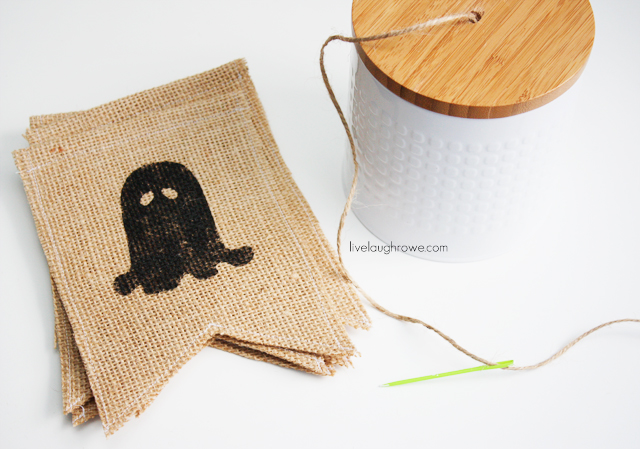
Alrighty! Are you excited? I am {yee-haw}. First things first, let’s cut the burlap pennants. I made a template by cutting a piece of 8-1/2″ x 11″ cardstock in half (to measure 8.5″ x 5.5″) and cut a triangle into the bottom. Personally, I like to double up my pennants. So, for this banner, I cut out ten total burlap pennants. Each of the five pennants will have two sewn together.
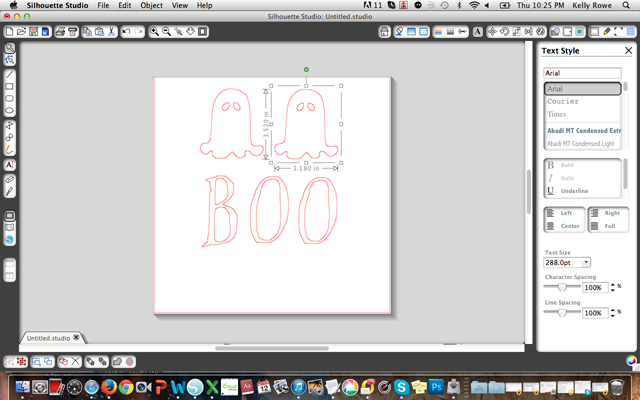
 Then we’ll prepare the stencils. I cut mine out using my Silhouette; however, you can easily make these stencils by printing or drawing them on cardstock and cutting them out with an x-acto knife too. My ghost was purchased from the Silhouette store and sized at 3.520″ high by 3.180″ wide. The letters BOO are from the free font, Witches Magic. They were sized at 266.9 pt.
 Once you’ve got your stencils ready, let’s move onto the stenciling.
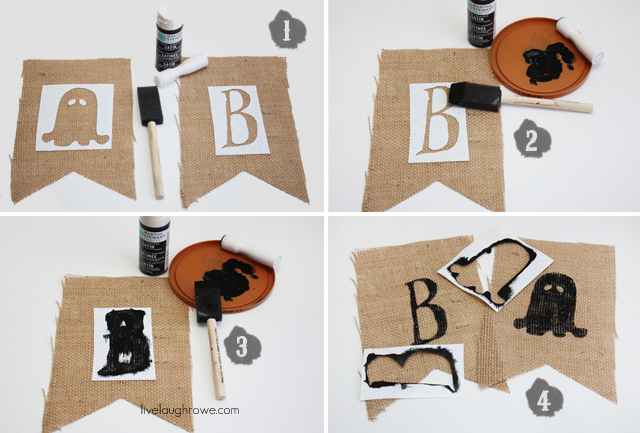 one: Place the stencils on top of a single pennant.
two: Prepare paint and grab your brush or dauber.
three: Start dabbing until you’ve completely covered the area inside the stencil.
four: Carefully remove the stencil and allow to dry.
Now let’s move on to the sewing.
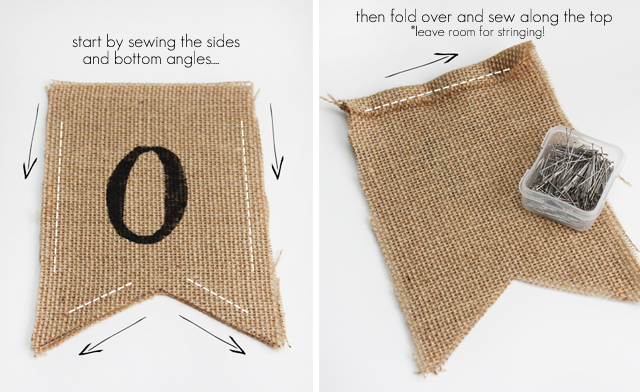 If you’re going to double up the pennants like I do, you’ll want to pair your stenciled pennant with a non-stenciled one. Sew both sides and the bottom cuts FIRST. Then you’ll fold the top over, creating about a 1/4″ hem and sew. Be sure to leave enough space to string the twine through the pennants for hanging. Go ahead and trim all the loose pieces of burlap and thread. Below you can see how clean and fabulous they look {wink}.
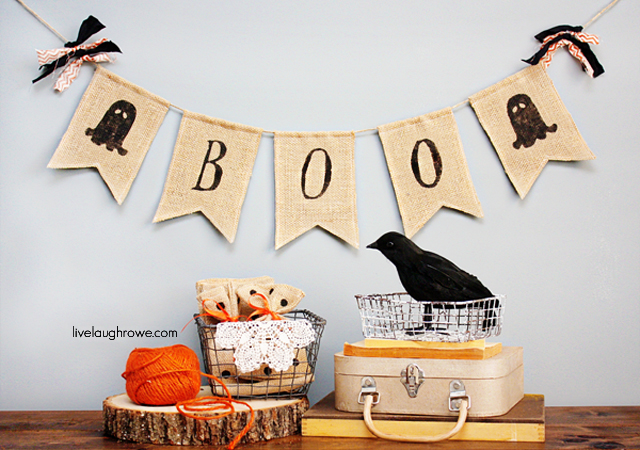
 Grab your twine and a yarn needle to string the pennants. And guess what? You’re done! I added a final touch to mine with a few pieces of scrap fabric on either side. Woo-Hoo! I love it. I sent a pic to my sister and she responded with, “Ummm, super cute!” Score!
 BTW: I’m over at Eighteen25 today, sharing the tutorial for these super cute Bottle Cap Spiders! I’d love for you to swing by.
 Happy Halloween Crafting, sweet friends!
What spooktacular things are you up to?

Care to stay in the loop? I’d love to have you!
Catch me snapping + sharing pictures over on Instagram
Subscribe to Updates | Like on Facebook | Follow on Pinterest
https://betweennapsontheporch.net/


keri @ shaken together says
Adorable! Definitely pinning 🙂
Maria says
Love this and it looks easy too! Thanks for sharing!
Katie @ Made to be a Momma says
I’m not a huge fan of Halloween either, but this is too adorable! 🙂 Pinned!
Mique says
This is so fun Kelly! In years past I haven’t been into Halloween so much either. I don’t love the scary stuff. But this is so cute!
nest of posies says
such a fun project! i am always smitten by a burlap bunting. looks great.
Lana @ Never Enough Thyme says
Cute! I’m not much of a Halloween person, either, but a cute, easy little project like this I could do!
cynthia @ A Button Tufted Life... says
it’s BOOtiful! 🙂
Inspire Me Heather says
What a sweet banner, love the ghosts on either end!!
Claire @ A Little Claireification says
So cute, Kelly! I love decorating for each holiday but I am not doing too well so far this year. I love the inspiration! Pinning! xoxo
JaneEllen says
Love your cute banner and great tutorial, very helpful. I don’t do any Halloween decos, no young grandkids any more or trick or treaters around our neighborhood. This one might get made though just for the fun of it.
I’ve been making Fall decos for inside home since my Fall box seems to be lost in our shed.
Gee wonder how that happened. Happy week
Leslie Stewart @ House on the Way says
Too cute! I love it! Thanks for the inspiration!
Leslie
Kristine says
love this! too cute!! i’m not even big into halloween and i want one. 🙂 great job!
Eva Scott says
super cute! for some reason, these ghosts remind me of the pacman ghosts. 🙂 thanks for sharing!
kelly thompson says
that turned out super cute- i mean scary!!
Kelly @ Eclectically Vintage says
Adorbs – Boo to you!
Kelly
Amanda says
Sooo cute! So apparently Facebook no longer notifies you when someone tags your FB page, so I thought I would let you know that I shared this with my FB fans 🙂 https://www.facebook.com/photo.php?fbid=10153272474305217&set=a.353593675216.349539.323548680216&type=1
Susan @SugarBeans says
So adorable!! Such a fun burlap treatment.
thanks for the tutorial!
Have a glorious week!!
xo
Alexis @ Persia Lou says
Man I need a Silhouette… 😉 Love it!
Julie says
Love it Kelly! The spiders are spooky too!!
Cass at That Old House says
Really cute — but how about cutting just one double-length piece instead of sewing two pieces together? The fold where they “join” would be an automatic, no-sew casing for the string. In other words, a double length piece of burlap, same width, and with the notches cut into each short end.
I’m always looking for the easier way out!
Love this banner — especially the cute little ghosties.
Cass
Kayla @ Home Coming blog says
This looks so great! Don’t forget to link up to The DIY’ers. http://homecomingmn.blogspot.com/2013/09/the-diyers-30.html
Nici ~ Posed Perfection says
I love this sweet banner! The way you put it together with the little vignette underneath is adorable…using the ball of orange yarn…genius. I’d love for you link this up to our All Things Thursday Blog Hop this week. It goes live on Wednesday night at 8pm Central. Hope to see you there!
Blessings,
Nici
Bonnie & Trish (@UncommonDesigns) says
Love this sweet banner Kelly and those bottle cap spiders are way cute!
Ann says
sooo cute!!
Deidre says
This is so cute! Great tutorial as well I bet the kids love this:)
Julie @ This Gal Cooks says
I love this project, Kelly! It’s so simple yet it looks so great! Thanks so much for sharing at Marvelous Mondays. Pinning and sharing this on social media today. Have a great Sunday!
Jessi @ Practically Functional says
Oh I love it, so cute! Pinning this, and thanks for sharing at my link party!
Lyuba@willcookforsmiles says
That is such a simple and cute idea for a Halloween banner! I love it, Kelly!
Gloria Phillips (@simplygloria1) says
Super cute! I love how you created this banner! Already pinned!
Emily says
This is the tutorial I’ve been hunting for. Thanks for all the great details like font and size. This is the best.
A Little Claireification says
Featuring this cuteness tonight at our “Best Of The Weekend” Party at 8PM EST! Love it and thanks again for linking up! xo
Ricarda says
thats cute ! just awesome , love it !