I’ve been seeing the Scrap Fabric Banners a lot lately on Pinterest and Etsy. Some are longer, some are shorter — but they’re all so stinkin’ cute! So, I thought I’d share how to make a fabric banner with scrap fabric.
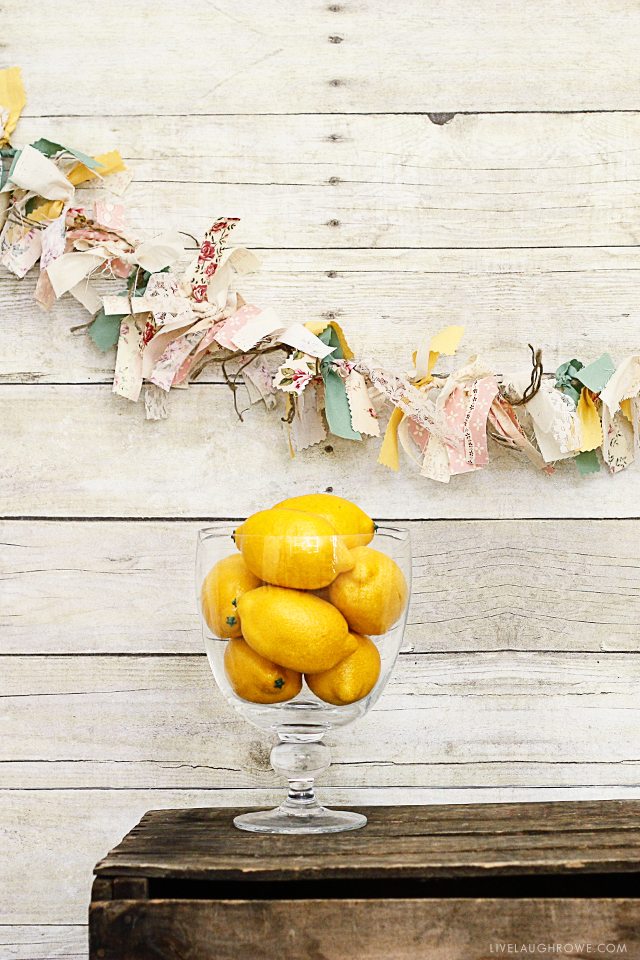
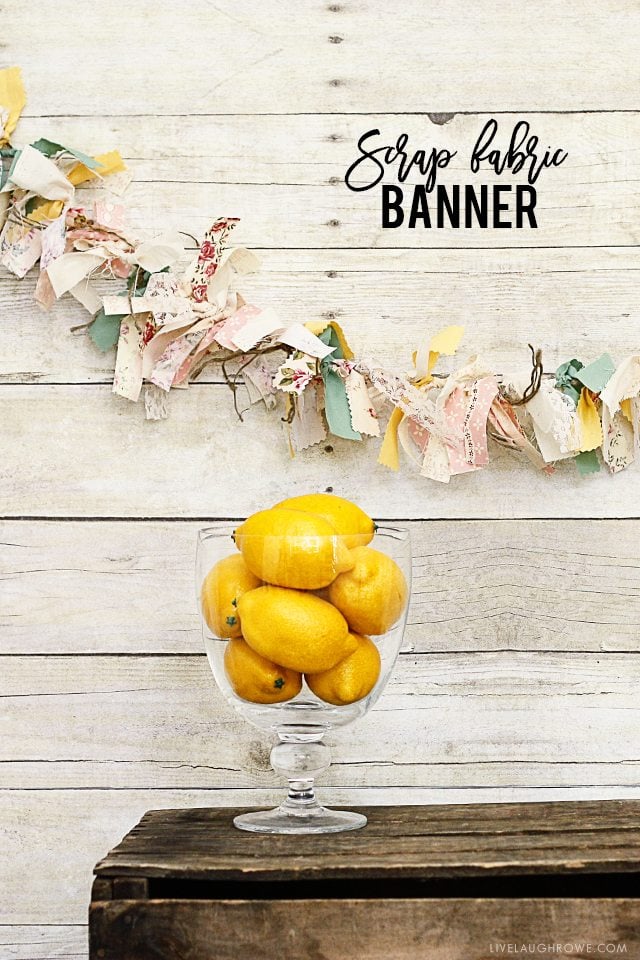 How to Make a Fabric Banner using Scrap Fabric
I am absolutely love with these sweet floral fabrics, they remind me of Laura Ashley designs. Aren’t they sweet, with a vintage twist?
Anywho, here is my latest and greatest DIY project — aka a Photo Prop. My sister used to do photography and would challenge me to make some cute photo props for her that I, in turn, will add to my shop, House 129. If I had a little princess, a few of these would be hanging in her sweet pink room {smile}.
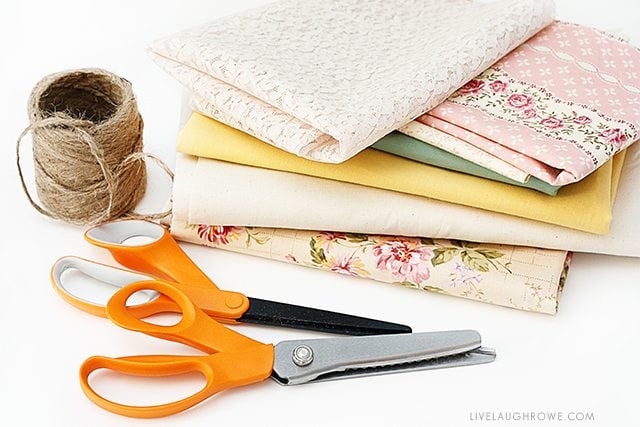
Let’s gather a few Supplies:
Fabrics of Choice
Lace or Ribbon
Jute Twine
Fabric Scissors
Pinking Shears
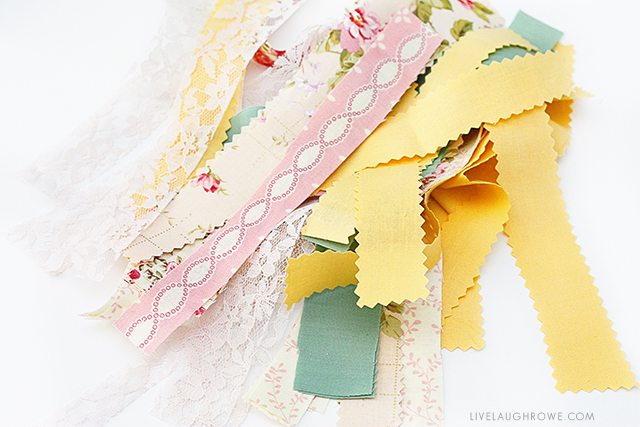
 Decide on the length of your banner. I chose a shorter length than most, so I cut several strips of fabric/lace at 7″to 8″ in length and about 1/2″ in width.
For a three foot banner, you’ll use approximately 75-80 strips of fabric/lace/etc. Cut some of the fabrics with the basic fabric scissors and others with the pinking shears to offer some variation and cuteness.
You’ll also cut 6-8 strands of twine that I wanted to add to the banner as well. I like to roll the fabric around in my hand a little so that it’s wrinkled and frayed. It adds the vintage touch.
 Use the twine for stringing the banner. If making a three foot banner, be sure to add an extra foot of twine to either side of the banner for hanging and flexibility, a total of 5 feet.
Measure one foot in from either end and tie a loose knot and use those as stop point –You’ll attach the ribbon, fabric and lace within those two stop points. I then tacked the twine to a wall (my work room closet since a couple of tac holes won’t matter). I then started to tie my strands in no particular order to the twine. It’s not necessary to knot or loop the fabric, I just tied it around the twine. Within no time, I had created this beauty.
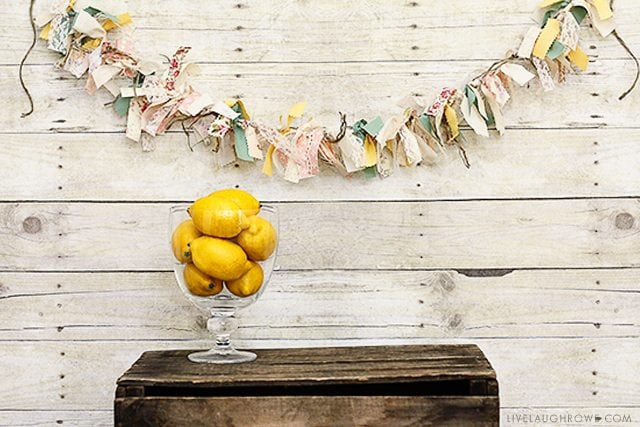 Where would you hang this cutie?


amy & lisa says
So pretty! Love the vintage look to it. I did one of these with ribbons a while back and they sure are fun to see hanging around. 🙂
amy & lisa says
So pretty! Love the vintage look to it. I did one of these with ribbons a while back and they sure are fun to see hanging around. 🙂
amy & lisa says
So pretty! Love the vintage look to it. I did one of these with ribbons a while back and they sure are fun to see hanging around. 🙂
amy & lisa says
So pretty! Love the vintage look to it. I did one of these with ribbons a while back and they sure are fun to see hanging around. 🙂
momto8 says
so pretty..and i love the floral designs too!
Kristine Lynn Photography says
I love it! I'll be making a purchase soon!
Cap Creations says
Very cute Kelly great job!
Bonnie says
love how this turned out! what a great way to incorporate beautiful fabrics! thanks so much for sharing!
Bonnie @ Uncommon
Tamika Rybinski says
Looks great Kelly! I am excited about the next blog hop. Congrats on reaching your goal of 500 followers! Have a great week!
I am LOVD says
So cute, so shabby! Congrats on over 500 followers – you worked hard for it, you deserve it!
June@I will craft says
Very cute. I wonder where I can hang one of my own?
Earl-Leigh says
I LOVE this! I want one for my sewing area. Congrats on reaching your goal! =)
How to Nest for Less says
LOVE this. and the photography is just AMAZING!!
Heather Painchaud says
Super cute!! Love this for parties etc.!!!! TFS ~ following you now :p
xo
Heather
Bettina says
This is the perfect idea for my baby shower decorations. Thanks for sharing!
SweetWahine says
Super cute!! Thanks
Just stopping by to send some blog lovin your way! Always checking our your adds and sponsors!
swBeautifulLife.BlogSpot.com
Emily @ 52 Mantels says
This just got so totally pinned!! Love! I'm so making one soon! 🙂
Leah Koenig says
Shabby chic at its finest! Super cute! I'm pretty sure this doesn't really go with the style of my house but I'm going to make one fit in. It will do a fine job replacing my expired Christmas garland!
Thanks for sharing!
Found you on Alderberry Hill
Visiting from Well Rounded, leahkoenig.blogspot.com
Grecia Tafur Castillo says
how cute!!
http://fullsentence.blogspot.com/
x
JHOUSETAWK says
This is ADORABLE! .. I did this same similar project at Christmas time for my mantel.. but used all the same fabric.. You got something going here… lol Love it.
Coordinately Yours says
beautiful
Kelly says
Just popped over from Our Delightful Home link party to say how cute this is – great work! I'm your newest Linky Follower.
Kelly @ herringbone lane
DebbieDoesCreations says
I love that! Im going to be making one for Alec's camping party. Thanks for linking up!
Leslie says
So many fantastic ways to use twine to make garland! Love your rag garlands!
Sharon says
The Bannners…awesome! How unique! I'm going to have to do one or get one!
LOL!
Q @ JAQS says
This is so pretty. I didn't think fabric scraps could make something so nice 🙂 Thank you so much for the inspiration and idea.
Love for you to share this at my Wednesday's "Made by ME" linky party here:
http://www.jaqsstudio.com/2012/02/made-by-me-20-linky-party.html
Debbie {Visual Eye Candy} says
This is so cute and such a great idea! I love it being used as a photo prop. I'm pinning for future reference!
Kendra says
This is adorable! Such a good idea!
{Adventuresindinner} says
So pretty and so very beautifully shot!
Taryn @ Design, Dining + Diapers says
I love your take on the fabric banner! You did a beautiful job, great fabric choices.
Angela says
It's beautiful! I want to make one of these for my daughter's room. I found you on 52 Mantels.
Jenny@daysofchalkandchocolate says
So gorgeous! And your photo styling is awesome. I love the background! Your fabrics are lovely and vintagey too. I'm so glad you linked up this week! FB this!
Gumdrop Pass says
Hi Kelly – I LOVE this so much I featured it at my Favorite Finds Friday 🙂
Cherished Bliss says
Thanks so much for linking up to Craft and Tell! You will be featured this Sunday! : )
Meg says
SO pretty!! I'm your newest follower and I'd love it if you followed back. I would love it if you linked up to my little party: http://www.nutmegplace.com/2012/03/showoff-saturday-4.html
Hope to see you there!
Jen Bowles says
Fun project, looks great!
(visiting from Southern Lovely)
angie @ the cellar door stories says
super, super cute! love it!
Kim @ Too Much Time says
This is just SOOOO cute! My daughter's birthday is in a few weeks and this may need to be one of our decorations! I would be thrilled if you stopped by linky party going on all weekend!
http://too-much-time.com/2012/03/get-schooled-saturday-12.html
Kim@ Too Much Time On My Hands
Trish - Mom On Timeout says
What beautiful fabric! This turned out so lovely! Thanks so much for sharing at Mom On Timeout!
OnePerfectDay says
Sooooo pretty!
Lauryn Clemmer says
oh goodness!!! i love this!! i would love for you to add this to my new link party… spreading the love. please go check it out if you are interested! there’s a great scarf giveaway going on there as well!
http://lovenotesbylauryn.blogspot.com/search/label/spread%20the%20love%20link%20party
{love} lauryn @ love notes by lauryn
Kate @ A Creative Cookie says
This is so adorable! I love it – can you make one for me? 😛 haha. Pinning this!
Jennifer @ Town and Country Living says
Looks great! Love it – such a great way to use fabric scraps.
fiona anderson says
Pinning this too – it's so cute, the colours look great !
Mindy Harris says
i love this…i would've never thought to use pinking shears. duh!
so cute.
Rachel {Lines Across} says
I love it. The pictures are also so beautiful. Thanks for sharing. You are being featured this week at Lines Across. http://linesacrossmyface.blogspot.com/2012/03/cure-for-common-monday-30.html
Lindsay says
Aw, this is so beautiful! Just wanted to let you know that I featured this today. Thanks for sharing @ Show & Share.
http://southernlovely.blogspot.com/2012/03/show-share-29-features.html
Jenn @ myfabulesslife says
I LOVE this. I just made one this weekend, but now I think I need to go cut some more fabric with some pinking shears. New follower!
jenn@ myfabulesslife.blogspot.com
DebbieDoesCreations says
I absolutely loved this! Thanks so much for linking up to Toot Your Horn Tuesday. I will be featuring you tomorrow 🙂
Audra @ The Kurtz Corner says
Just stopping by to let you know you've been featured and pinned!! 🙂 Thanks for linking up at Tuesday Tutorials, can't wait to see what you link up this week!
http://pinterest.com/TheKurtzCorner/the-kurtz-corner-link-party-features/
http://www.thekurtzcorner.com/2012/03/tuesday-tutorials-link-party-no-26.html
Cameron Meerdink says
Beautiful – and what a fun way to use up fabric! I pinned it for future reference!
Rebecca @ My Girlish Whims says
Thanks so much for linking up to Your Whims Wednesday, I featured this on my blog tonight! Come stop by and grab a button 🙂 http://www.mygirlishwhims.com/2012/03/your-whims-wednesday-49-and-features.html
Emily @ 52 Mantels says
I'm featuring this tomorrow!! You rock, girly! 🙂
Marilyn says
Sooo amazingly awesome.. I featured YOU today via Pin'Inspirational Thursday.. THANKS SOOO MUCH for sharing these last week.. :)) Hope you can stop in and snag a fun button.. Wishing you an amazing day.. xo~Marilyn…
Ginger says
Featuring YOU today! Thank you so much for sharing at last week's {wow} me wednesday party. 🙂
Ginger @ gingersnapcrafts.com
http://www.gingersnapcrafts.com/2012/03/take-look-at-you-my-favorites_08.html
Val in the Rose Garden says
That is so fun! I am sure I have enough to make one and revamp my mantle with it. Thanks!
Blessings,
Val
Jenny@daysofchalkandchocolate says
I love this! You're a feature this week! Stop by!
http://livelaughrowe.blogspot.com/2012/02/diy-vintage-scrap-fabric-and-twine.html
Polkadot-pretties says
Thank you for linking up a fabulous project…
I have featured you in this weeks you inspire crafty linky party…
hope you will stop by and link up another great project..
http://polkadot-pretties.blogspot.com/2012/03/you-inspire-linky-party_10.html
Claire xoxo
April says
Love this! I featured you on my blog yesterday-www.cupofdelight.blogspot.com
Danielle says
I love this. I seriously need one!
Hilani-Handmade by H says
Oh my! Right up my alley! Love it!
Pam says
LOVE IT!!! Thanks for the instructions. Can’t wait to make one..
Kelly says
Glad to offer the tutorial. They’re such fun banners to have and make 🙂 Have fun! xo, Kelly
left over fabric from corsets says
Came across your blog from searching vintage fabrics. You have given me ideas to use from left over fabric from my corsets. Thanks so much.
I have added you to my favorites. Love your posts!