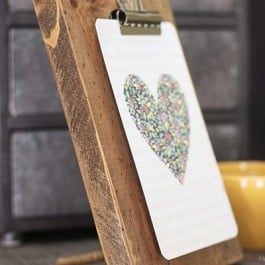
I am so super excited about todays project! Guess what? And I think you’re going to like it! DIY Photo Clipboard — a simple and versatile DIY that will make a great weekend project!
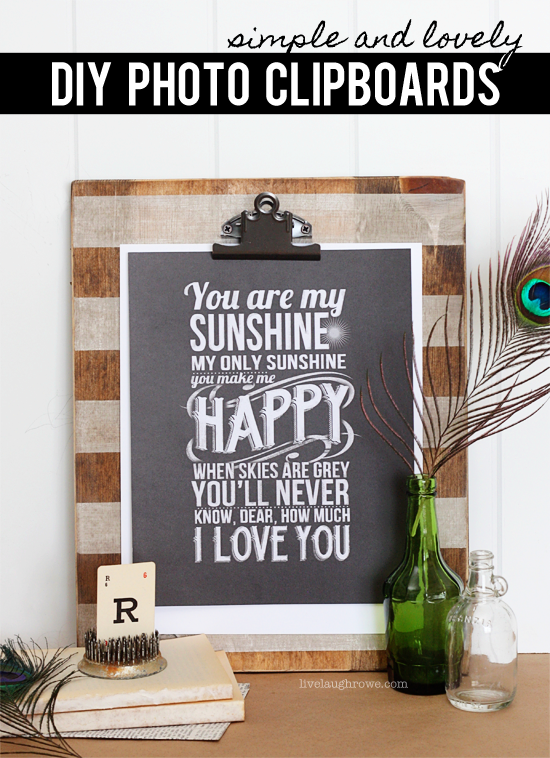 DIY Photo Clipboards
Lately, I’ve been seeing so many fabulous photo holders or wall art using stain. I decided it was my time {hee-hee}. A few weeks I ago I scored some Jim Holtz clipboard clips at JoAnn’s and set them aside for when the inspiration hit me. The time finally arrived and I was ready to give this DIY Photo Clipboard a try. YAY!

Let’s grab a few supplies and get this party started, shall we?
 DIY Photo Clipboard
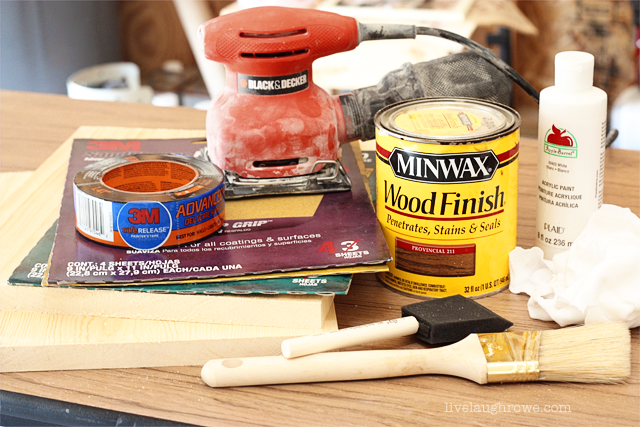
Supplies:
3M™ Safety Products (i.e. eye wear)
4 foot 1 x 12 board
3M™ Advanced Abrasives (3M Sandblaster Pro sandpaper sheets, Medium and Fine)
Power Sander
3M™ Safe Release™ Painter’s Tape
Minwax ® Stain in Provincial
Foam Brush (for paint)
Staining Brush (and rags)
White Acrylic Paint
Clipboard Clips
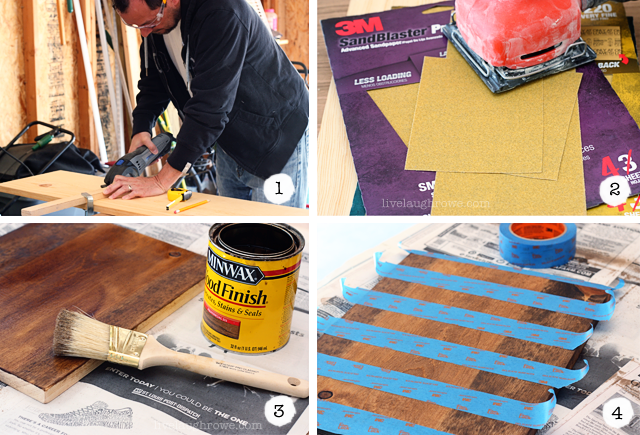
 Steps 1-4
Step One:
Cut your 1×12 cut into 14″ length pieces, we were able to get three out of this board; however, I only used two.
Step Two:
Using sander, round all edges and corners of the board. I also ran it on both side of the board as well.
Step Three:
Brush on your stain and wipe off with a rag. I stained my entire board (front and back).
Step Four:
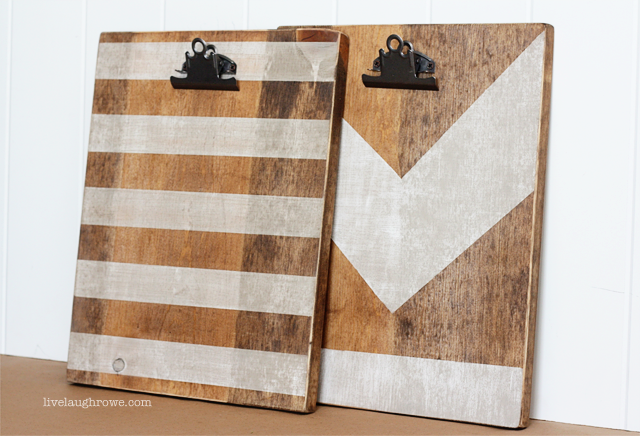
Determine your design. Here I decided on stripes, I did a second one with an arrow and a strip (see below).
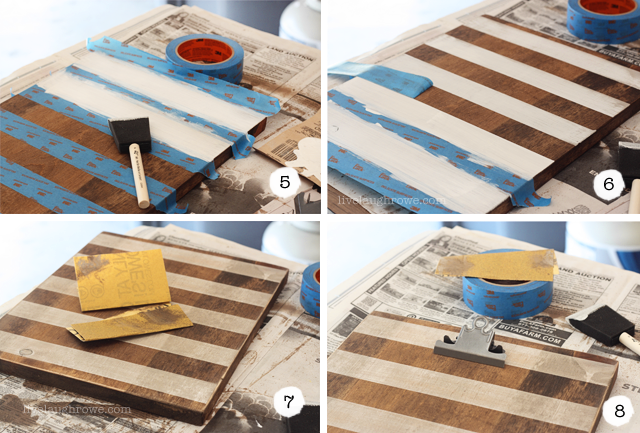
 Steps 5-8
Step Five:
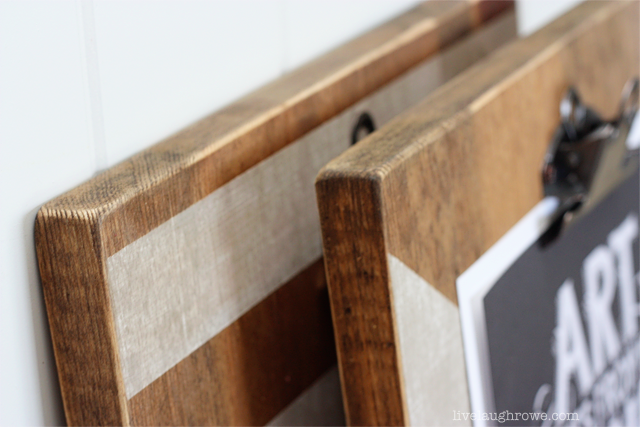
Paint on your stripes. One my boards, I chose not to allow my stain to dry completely sot that my white wasn’t a bright white. In doing this, the stain soaked through the paint a bit, giving it a vintage look. If you look at the pictures above closely, you can see the bright white going on and how it dried below. The stripes were NOT sanded at all. Pretty great, right?
Allow your stain to dry completely before stenciling on your design if you’re wanting the paint to bright white.
Step Six:
Remove the painters tape
Step Seven:
And then I sanded around all of the edges and corners again to add a little extra character.
Step Eight:
Attach clipboard (or hardware of choice).
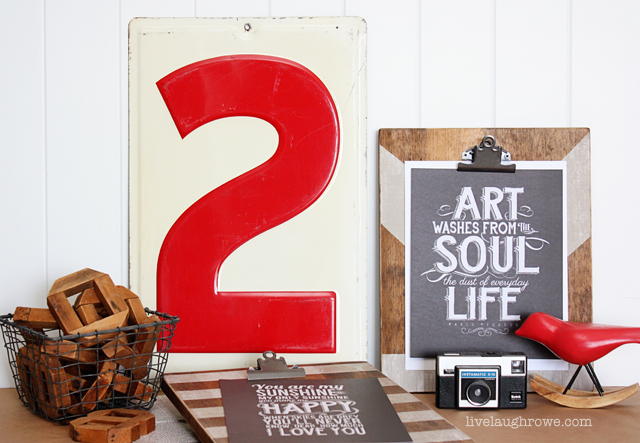
UPDATE! So many of you asked about the “You Are My Sunshine Printable”.
Guess what? I created one just for YOU! Grab your printable today!
Aaaand in honor of National Safety Month, enjoy:

Facebook | Instagram | Pinterest | Twitter | Google+
 DIY Photo Clipboard
 Steps 1-4
 Steps 5-8



Amy W says
These turned out FABULOUS! Pinning like crazy right now.
Kelly Rowe says
Aw…thanks so much Amy! Appreciate it. Enjoy the rest of your week. xo.
TidyMom says
these are so fun Kelly!!
Kelly Rowe says
Thanks so much! 🙂 HUGS!
Alyssa says
These are so cute!! I am in especially in love with the printables! Did you make them yourself? I would love the link!
Alyssa
Kelly Rowe says
Hi Alyssa! Thanks so much for your kind words. Unfortunately, I did not make the printables; however, I’m thinking I might need to. They seem to be a big hit 🙂
Alyssa says
Thanks for the reply!:) Gotcha, sounds like they were from Michaels, can’t believe I never saw them, the Sunshine quote is my all time favorite. You have great taste! :p
Alyssa
Kelly Rowe says
Guess what Alyssa? I made a similar “You Are My Sunshine” printable since so many asked about the one styled in the photos. You can find it here: https://livelaughrowe.com/you-are-my-sunshine-printable/
keri @ shaken together says
These are FANTASTIC, Kelly – LOVE Them!
Kelly Rowe says
Thanks so much Keri! Appreciate it. xo.
Vanessa says
WHERE did you get the “You Are My Sunshine” print?? I’ve been looking for a good one in gray and white for a long time!! Completely adorable project!
Kelly Rowe says
Hi Vanessa! Thanks so much for your kind words. I got that print in a pack of chalkboard prints from Michaels awhile ago. I guess I need to create one — that print seems to be a BIG hit 😉
Vanessa says
Aw I should go poke around to see if they still carry something similar! Love it!
Vanessa says
Ahhhh!!! You just made my day!! Thank you SO much!!
Kelly Rowe says
Aw, thanks Vanessa! Appreciate it. 🙂 Have a wonderful weekend! xo.
Kelly Rowe says
Hi Vanessa! Since so many followers inquired about the “You Are My Sunshine” printable, I went ahead and made one 🙂 You can find it here: https://livelaughrowe.com/you-are-my-sunshine-printable/ Cheers!
Claire @ A Little Claireification says
These are just fabulous, Kelly! Pinned as always. xo
Kelly Rowe says
Thanks Claire! HUGS!
Ashley @ Cherished Bliss says
I LOVE these Kelly! : ) Pinning!
Stacy Risnemay says
I adore these! So vintage industrial chic!
Tania // Run to Radiance says
LOVE this!! I made some chalkboard clipboards but I love, love, love these!! I think even more than the chalkboard ones! 🙂 Pinning!!
sharon garofalow says
These are so great! I love how you styled them. It would be an awesome way to showcase my kid’s art work!
Amy Anderson says
I love that look Kelly – these are beautiful!!
Kelly Rowe says
Thanks so much, Amy! Hugs.
Carrie says
Love this! The stripes are so chic and I am so impressed that built the whole clipboard yourself!
Vanessa says
These are absolutely beautiful!
Sara | Simply Happenstance says
This whole project is simply amazing! Can’t get over your creativity! Thanks for sharing! 🙂
Kelly Rowe says
You’re so sweet Sara! Thank you. 🙂 Happy July 4th!
Emily @ Two Purple Couches says
These are awesome! I love the added touch & functionality of the clipboard. So cool!
Kelly Rowe says
Thanks Emily! Appreciate your kind words. Enjoy your holiday weekend. xo.
Jen @beautyandbedlam.com says
Kelly – these are just adorable!! What a GREAT project! Love them.
Kelly Rowe says
Thanks Jen! Appreciate your kind words. 🙂 xo.
Havalah Turner says
I just made some of these but have yet to add the clips. I love the adding of designs to it!
Kelly Rowe says
Aren’t they great Havalah? I’m sure they look great! Thanks for stopping by. 🙂
Rebecca Cooper says
This is AMAZING!! Love, love, love!
Kelly Rowe says
Thanks so much Rebecca! 🙂 Enjoy the rest of your weekend. HUGS.
Ashley @ 3 Little Greenwoods says
Oh! I’ve got wood in the garage that would make awesome clipboards! Thanks so much for the inspiration!
Pinning and hopefully making soon! 😉
~ Ashley
Kelly Rowe says
Thanks Ashley! Appreciate the Pin as well. Have fun making some of your own. 🙂 You will LOVE them. HUGS!
Gwen says
Hi Kelly! I just wanted to let you know that I LOVE your DIY Photo Clipboard, and I’m featuring you as one of my Rockstars this week from Creativity Unleashed!
As a Rockstar you’re in the running for this week’s MEGA Rockstar! Grab your friends and come vote at http://www.theboldabode.com/2014/07/rockstars-creativity-unleashed-week-28.html
The MEGA Rockstar gets loads of love including:
1. Shout outs on all my social media houses.
2. A bucket full of Pins to my biggest group boards
3. A big sidebar ad proclaiming them the MEGA Rockstar of the week
4. And a feature in my weekly newsletter!
5. A secret bonus to continue the fun… Yay!
Congratulations and Good Luck!!!
Kelly Rowe says
Thanks Gwen! Appreciate your kind words and the feature! Always honored. 🙂 Have a great weekend. xo.
Jocie@OPC says
love that kelly!! and beautiful staging. Thanks so much for linking up last week at creativity unleashed. featuring you tomorrow and hope to see you back.
stephanie says
I love this!! Excellent job!
Kimberlee says
How long did you let the stain set before applying the acrylic white paint? I like the vintage look that you have with allowing the stain to still be a bit wet, I was just curious how wet it was… I am sure it is a fine line of too wet (especially since you don’t want the painter’s tape to remove the stain) to just wet enough for the vintage look. Any tips would be appreciated 🙂
Kelly Rowe says
Hi Kimberlee. The wood absorbs the stain very quickly, so the painters tape won’t remove the stain. Let it set for 10-15 minutes and you should be good to go. Waiting too long won’t allow the stain to absorb some of the paint, which is what give it the vintage look 🙂 Happy creating!
Joanna says
This photo clipboard looks gorgeous. Awesome project. Add to my diy list now. Thanks for posting.