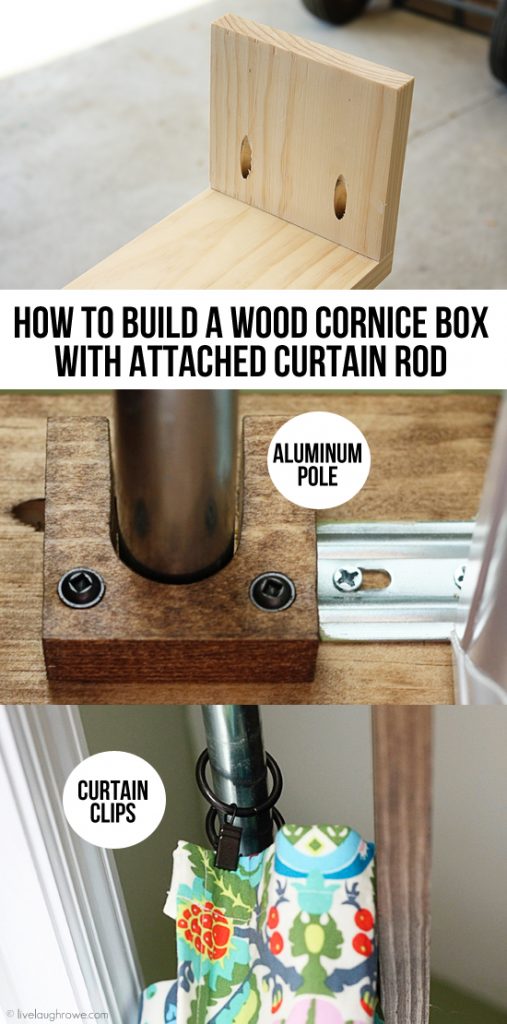
Yesterday I shared my new (and fabulous) curtains in my breakfast room. Today I’m back to share how to build a wood cornice with attached curtain rod — on a dime! This project had a lot of trial and error. I’ll share a little more about that later… let’s get started!
 Supplies:
Pine Wood
Aluminum Pole
L-brackets
Wood Glue
Screws
Drill
Kreg
First things first, you have to measure your window/doors/etc.
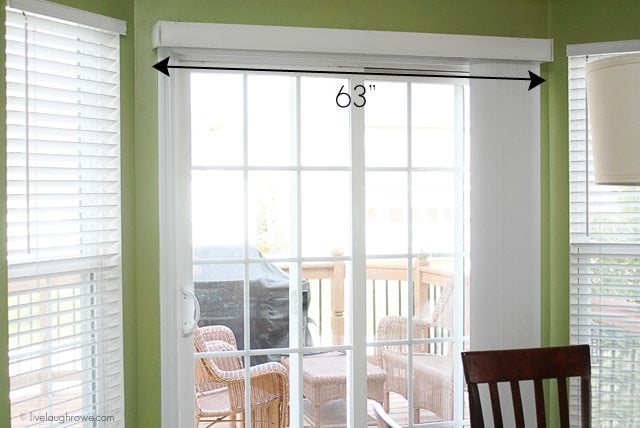 Our sliding glass doors measured 63″ side to side. So we had to take into consideration the sides of the cornice and decided on the front board measuring in at 65″ x 5-1/2″ and the side pieces were 5″ x 5-1/2″.
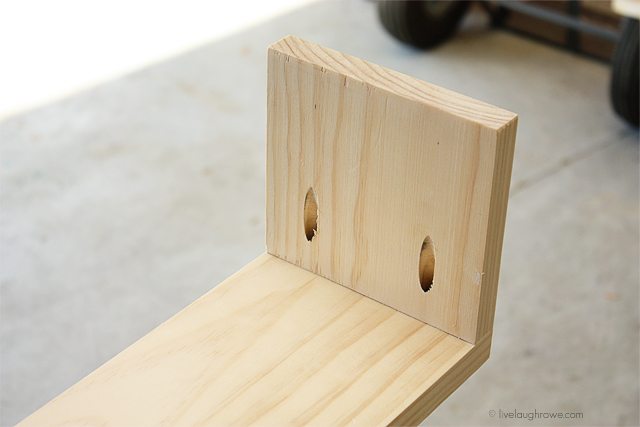
You’ll then want to cut your wood down to size and attach the side boards to your front board. We used our Kreg for a nice clean look. Those pockets make me ooh and aww every. single. time. However, if you don’t own a Kreg — no worries, you could also use L-brackets. You should always try add some wood glue for a little extra support too. Here is a picture of ours assembled.
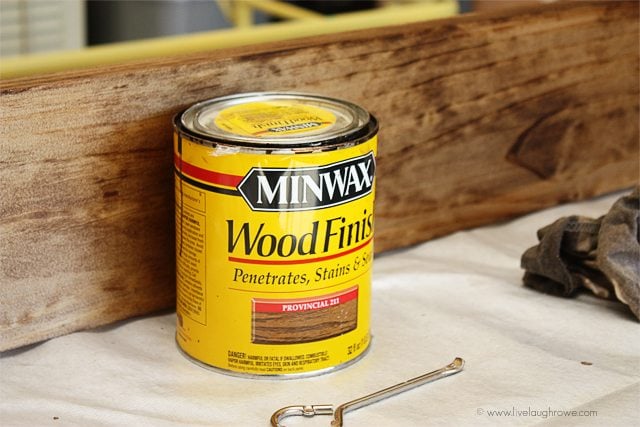
 Now that the wooden cornice box is assembled, it’s time to stain! I used the Minwax Provincial stain for this project.
 At this point we attached the wooden cornice box to the wall with L-brackets. See, our original plan was to use a single adjustable curtain rod and take advantage of the middle brace. Ahem, these curtain were a little too heavy and we didn’t have stud at the center to keep the brace stable and curtains from drooping. Plus, we wanted to keep our dry wall in place (hee-hee). We tried a couple of other things before we finally had the genius idea to create our own curtain hardware and attach it to the cornice box.
The hubs cut out two squares of wood to fit within the side boards of the cornice. He then cut a U shape the diameter of the aluminum pole and prepped two pilot holes. (I apologize that we didn’t get a picture before assembly).
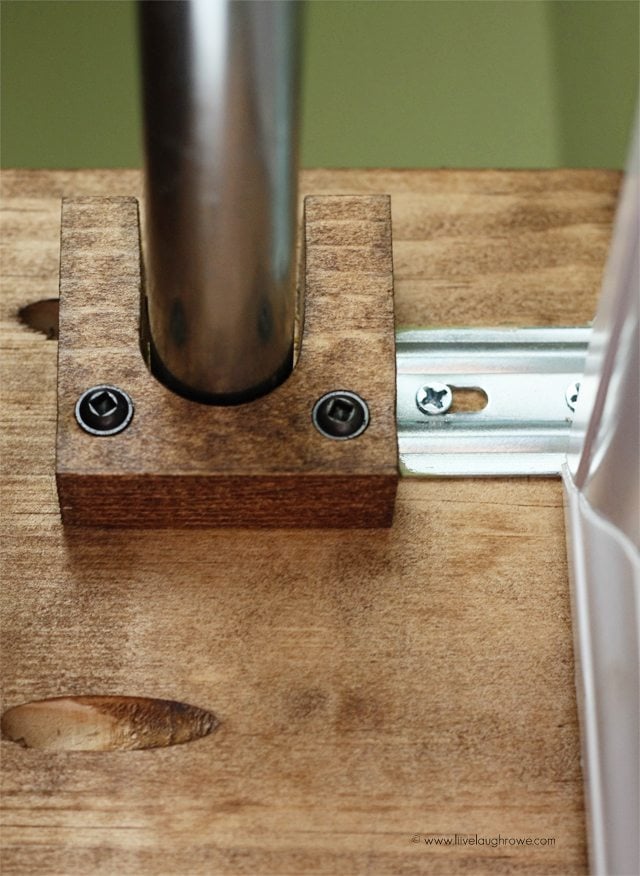 In order to mount the curtain rod holder, we inserted the aluminum pole (with curtains attached) and place at your desired height. Mount to the side of cornice box, using wood glue once again. Finish attachment with screws and you’re done!
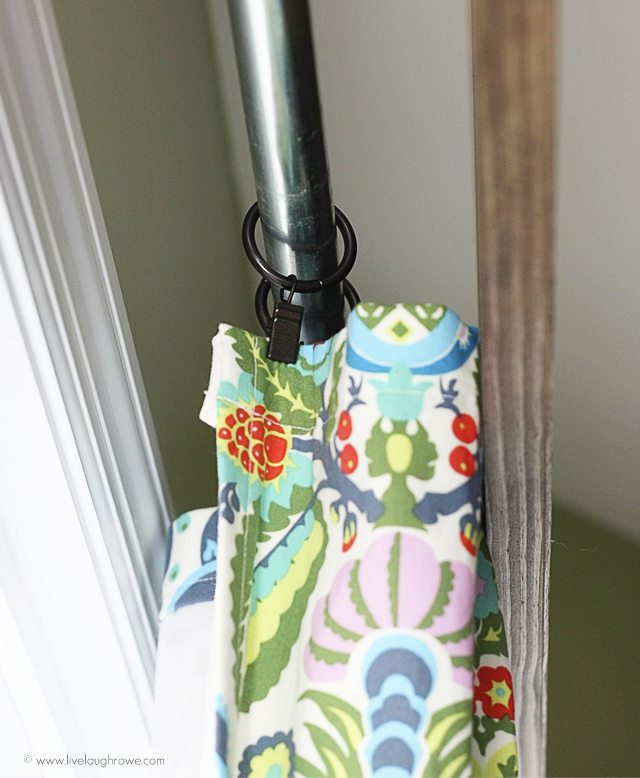
Here’s a look at the curtains hung with curtain clips on the aluminum pole! Now, here is what I love-love-love about this curtain rod. There is NO CENTER bracket, so I can keep all of the panels to one side or the other and sliding them open and closed is easy breezy! The aluminum pole cost $3-4, keeping the cornice box and curtain rod to a reasonable $20-25. Score.
 And here’s a picture of the completed sliding glass doors with the cornice box!
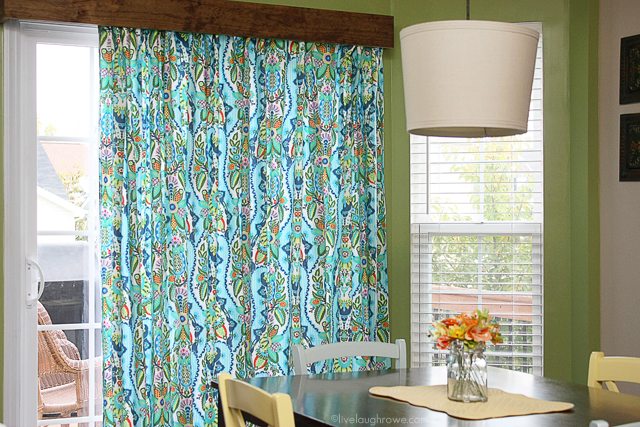 This was a great DIY on a dime — and I love the rustic simplicity of this cornice box! I hope you’re feeling inspired, friends.
Care to stay in the loop? I’d love to have you!
Catch me snapping + sharing pictures over on Instagram.
Subscribe to Updates | Like on Facebook | Follow on Pinterest


krys says
Good Morning Kelly~ That was a great suggestion and it looks fantastic on your sliding glass door. The curtains
really pop with color. Smart job and thank you for sharing this.
Kelly Rowe says
Thanks Krys! Appreciate it. 🙂 Enjoy the rest of your evening. HUGS.
Liz says
Looks really good Kelly. Have a good day!
Kelly Rowe says
Thanks Liz. 🙂 Trust you are having a great week. HUGS!
Christine says
That turned out great! Super clever!
Kelly Rowe says
Thanks so much Christine! I appreciate it. Have a great weekend. xo.
Eva says
where do you get the aluminum pole?
Kelly Rowe says
Hi Eva! We got the aluminum pole at Lowe’s in the Electrical Dept 🙂 Hope that helps!! Have a lovely weekend.
Michelle Johnson says
I love love love this! You have a talented hubby! Where did you find the aluminum pole for 3 to 4$?
Kelly Rowe says
Hi Michelle 🙂 Thanks so much. We purchased the aluminum pole at Lowe’s in the electrical department. Happy creating! xo
Vee says
Thank you for the idea ! Great job!
Theresa says
I have been trying, to find a solution for this exact problem! Mine is in the living room. I have panels on the rod and absolutely hate the brackets that break up the panels. I’m so excited to have found this! It looks great!
Kelly Rowe says
Awesome sauce! Thanks so much for your kind words. It’s a pretty fabulous solution… I’m still in love with ours. HUGS!
Jerre Miller says
I used a shower curtain rod spring rod which was a costly ordeal. I like your electrical conduit idea. I also like the rod holder you put inside the cornice box. Great idea on that.
Jerre Miller
Weatherford, TX
Kristin Caulfield says
Beautiful job! How did you attach the cornice? Did you leave room on the sides ft he window to fit the l-bracket? Could you provide a picture of the cornice where it attaches to the wall?
Thanks, Kris VA
Kelli says
GENIUS with the rod fixed into the cornice! I’ve been searching for a fix for my sliding glass doors which measure about 80 inches wide! Nothing really looks right. I’m definitely going to give this a shot!
Kelly Rowe says
Thanks!! We absolutely love how it all came together. Be sure to share a pic with me via FB when yours is done. 🙂
CrisDee says
Found this via Pinterest, Kelly, great job! One question – did you use any kind of center support? My slider is wider than yours, 76″ (including the trim around the doors, I’d want my cornice on the outside of that). Do you think it’d work if I made a similar cornice and put on a top piece, to use both as support and as a shelf to display pretties? Or would it end up sagging?
Morgan says
I want to replace the blinds underneath my current cornices with curtains. These end block pieces are exactly what I need to install a curtain rod and I can’t seem to find any to buy. I’m thinking it’s time to try and make them myself. How thick a piece of wood did you use and how did your husband cut the U shape out of them (what tool)? Thanks.
Naiara says
Do you know a cheap place to buy pine wood in New York? I’ll try to make this curtain box in my living room. Looks gorgeous.
Bruce Petrov says
Thanks! Nice little project. We are going to make several for a customer.
Leslie Laskin says
This is a fantasic idea! I have several long windows and have been frustrated by mounting curtain brackets on the wall, looking for studs, and still get sagging. The aluminum conduit is such a great idea! And mounting it to the cornice is perfect, hiding the clips! I assume the U shape was cut with a jig saw or sawzall?