
There’s just something magical about the holiday season… the way December light feels softer, how the house smells like cinnamon and evergreens, and how even the simplest moments feel cozy. Every year, I find myself making at least one craft that brings me right back to childhood — something small, sweet, and nostalgic enough to make me smile every time I walk past it. These Fence Ornaments made with Popsicle Sticks are exactly the kind of craft: a small, handmade treasure that captures the charm of simple holidays and warm memories.
I’ve made so many handmade ornaments over the years, all leaving a lasting memory. Such sweet memories made with my mom and sister. We did a lot of crafting together.
Whether you’re sipping a peppermint mocha, watching your favorite Christmas movie, or winding down after a long week, this is the perfect little DIY to enjoy in the quiet moments.
A Little Holiday Moment Before We Begin
Before we jump into the details, let’s talk about the spirit behind this project.
The holidays can get… busy. The lists get long, the calendar gets full, and suddenly we blink and the season has flown by. That’s why I love having one or two small, no-pressure crafts ready to go. Something peaceful, easy, and that can be spread out on the kitchen table while the tree glows in the background.

These Fence Ornaments using Popsicle Sticks are simple and perfect for an afternoon of creative calm. I saw an inspirational picture on Pinterest, but with no tutorial and decided to give it a go. Yay.
Picture this: soft Christmas music, the smell of fresh coffee, popsicle sticks lined up in tidy rows, and the gentle rhythm of paint brushing across wood. Frosted wreaths, tiny bows, and twine… it’s pure holiday joy.
And the best part? It’s one of those crafts that looks like boutique-made ornaments but requires almost no special tools or fancy skills. Truly the best kind of holiday project.
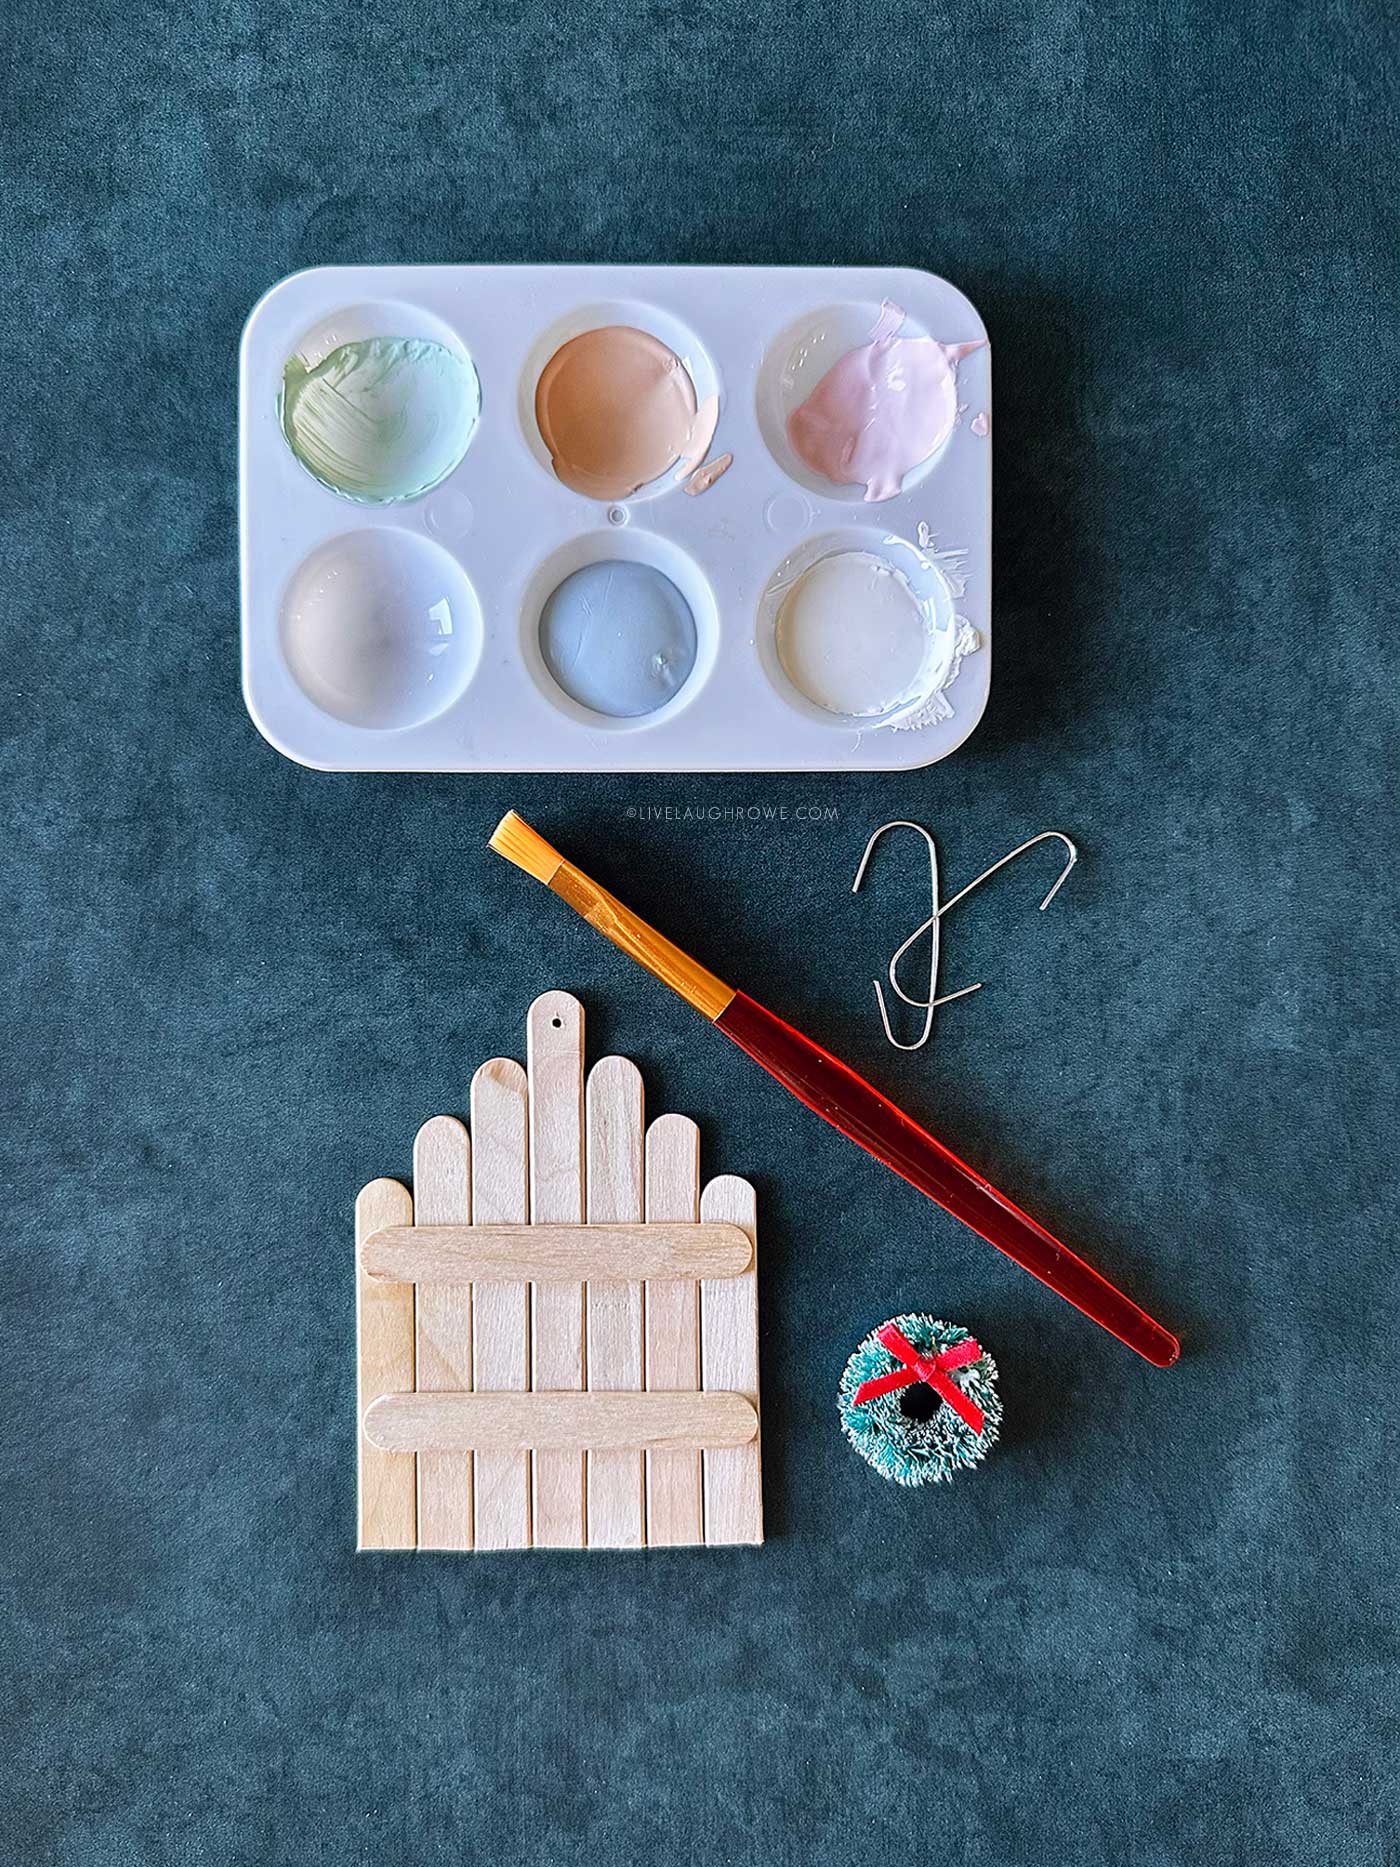
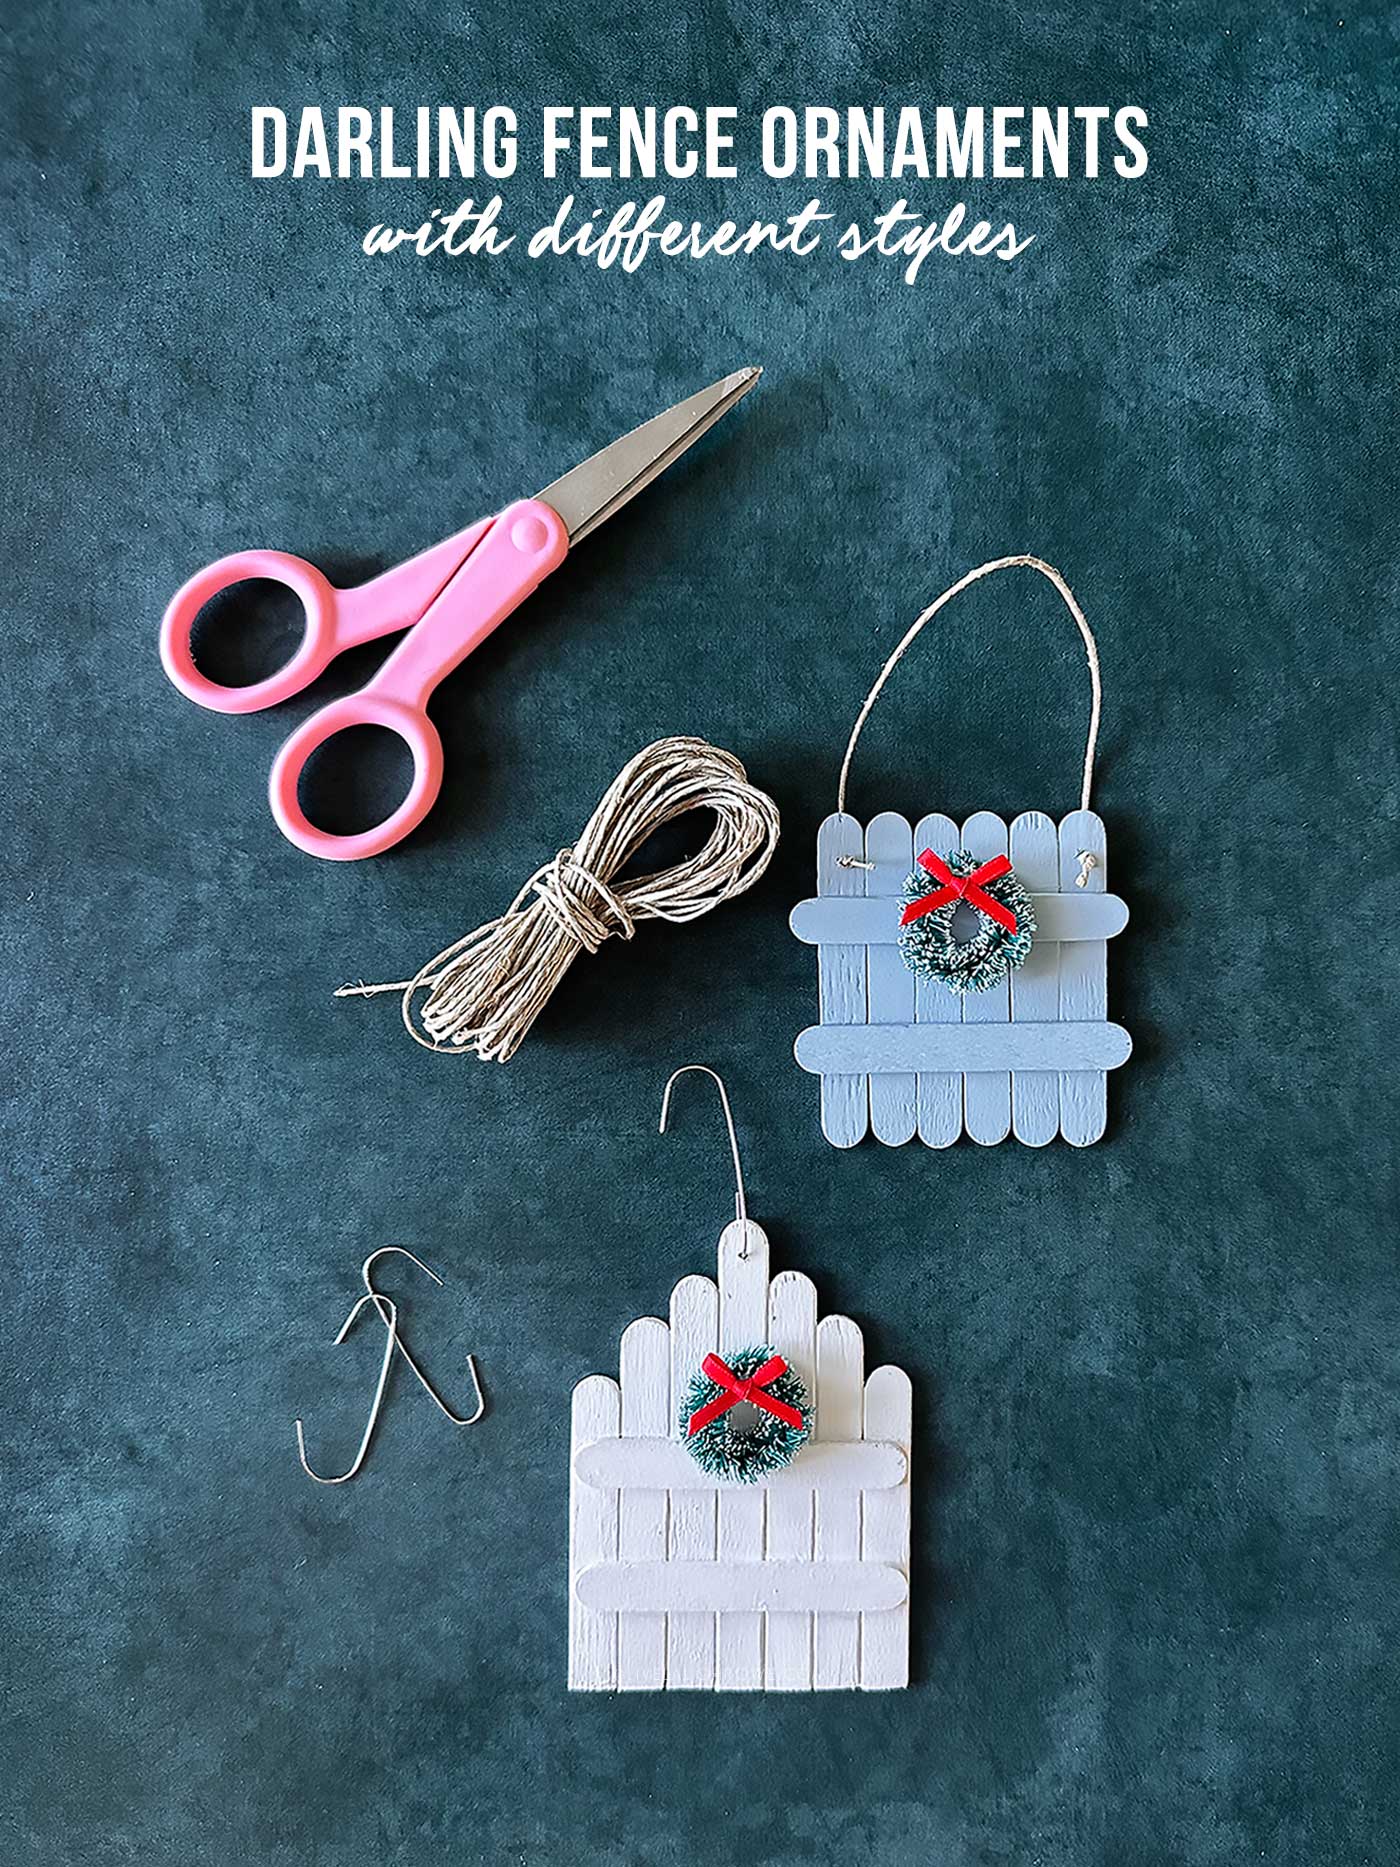
Supplies for Your Fence Ornaments
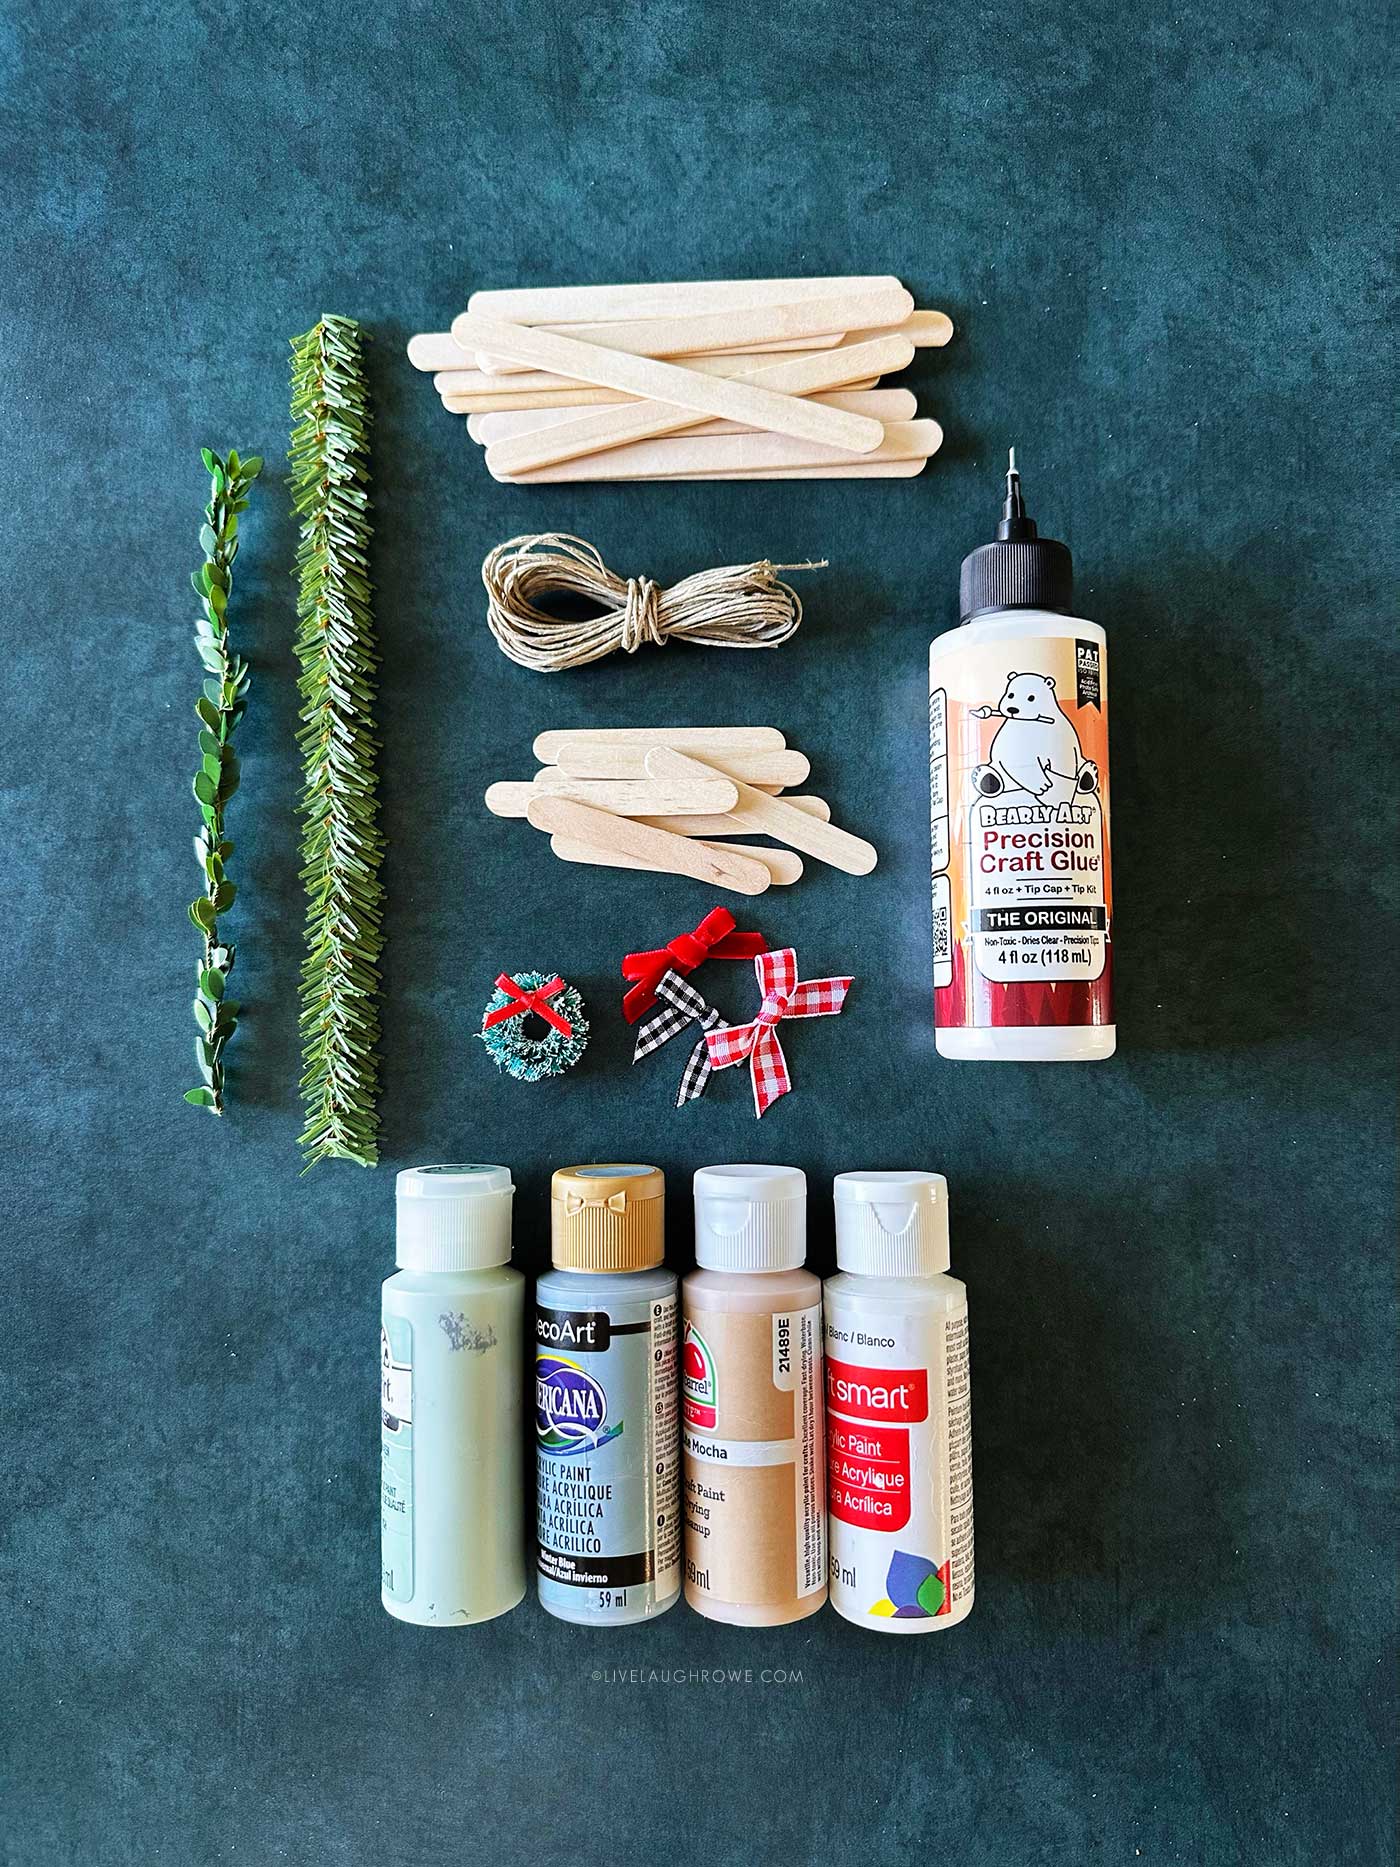
Standard wooden popsicle sticks (8–10 per ornament)
Mini craft sticks or short sticks (for horizontal/diagonal support)
Small wreaths, mini faux greenery, or bottle-brush wreaths
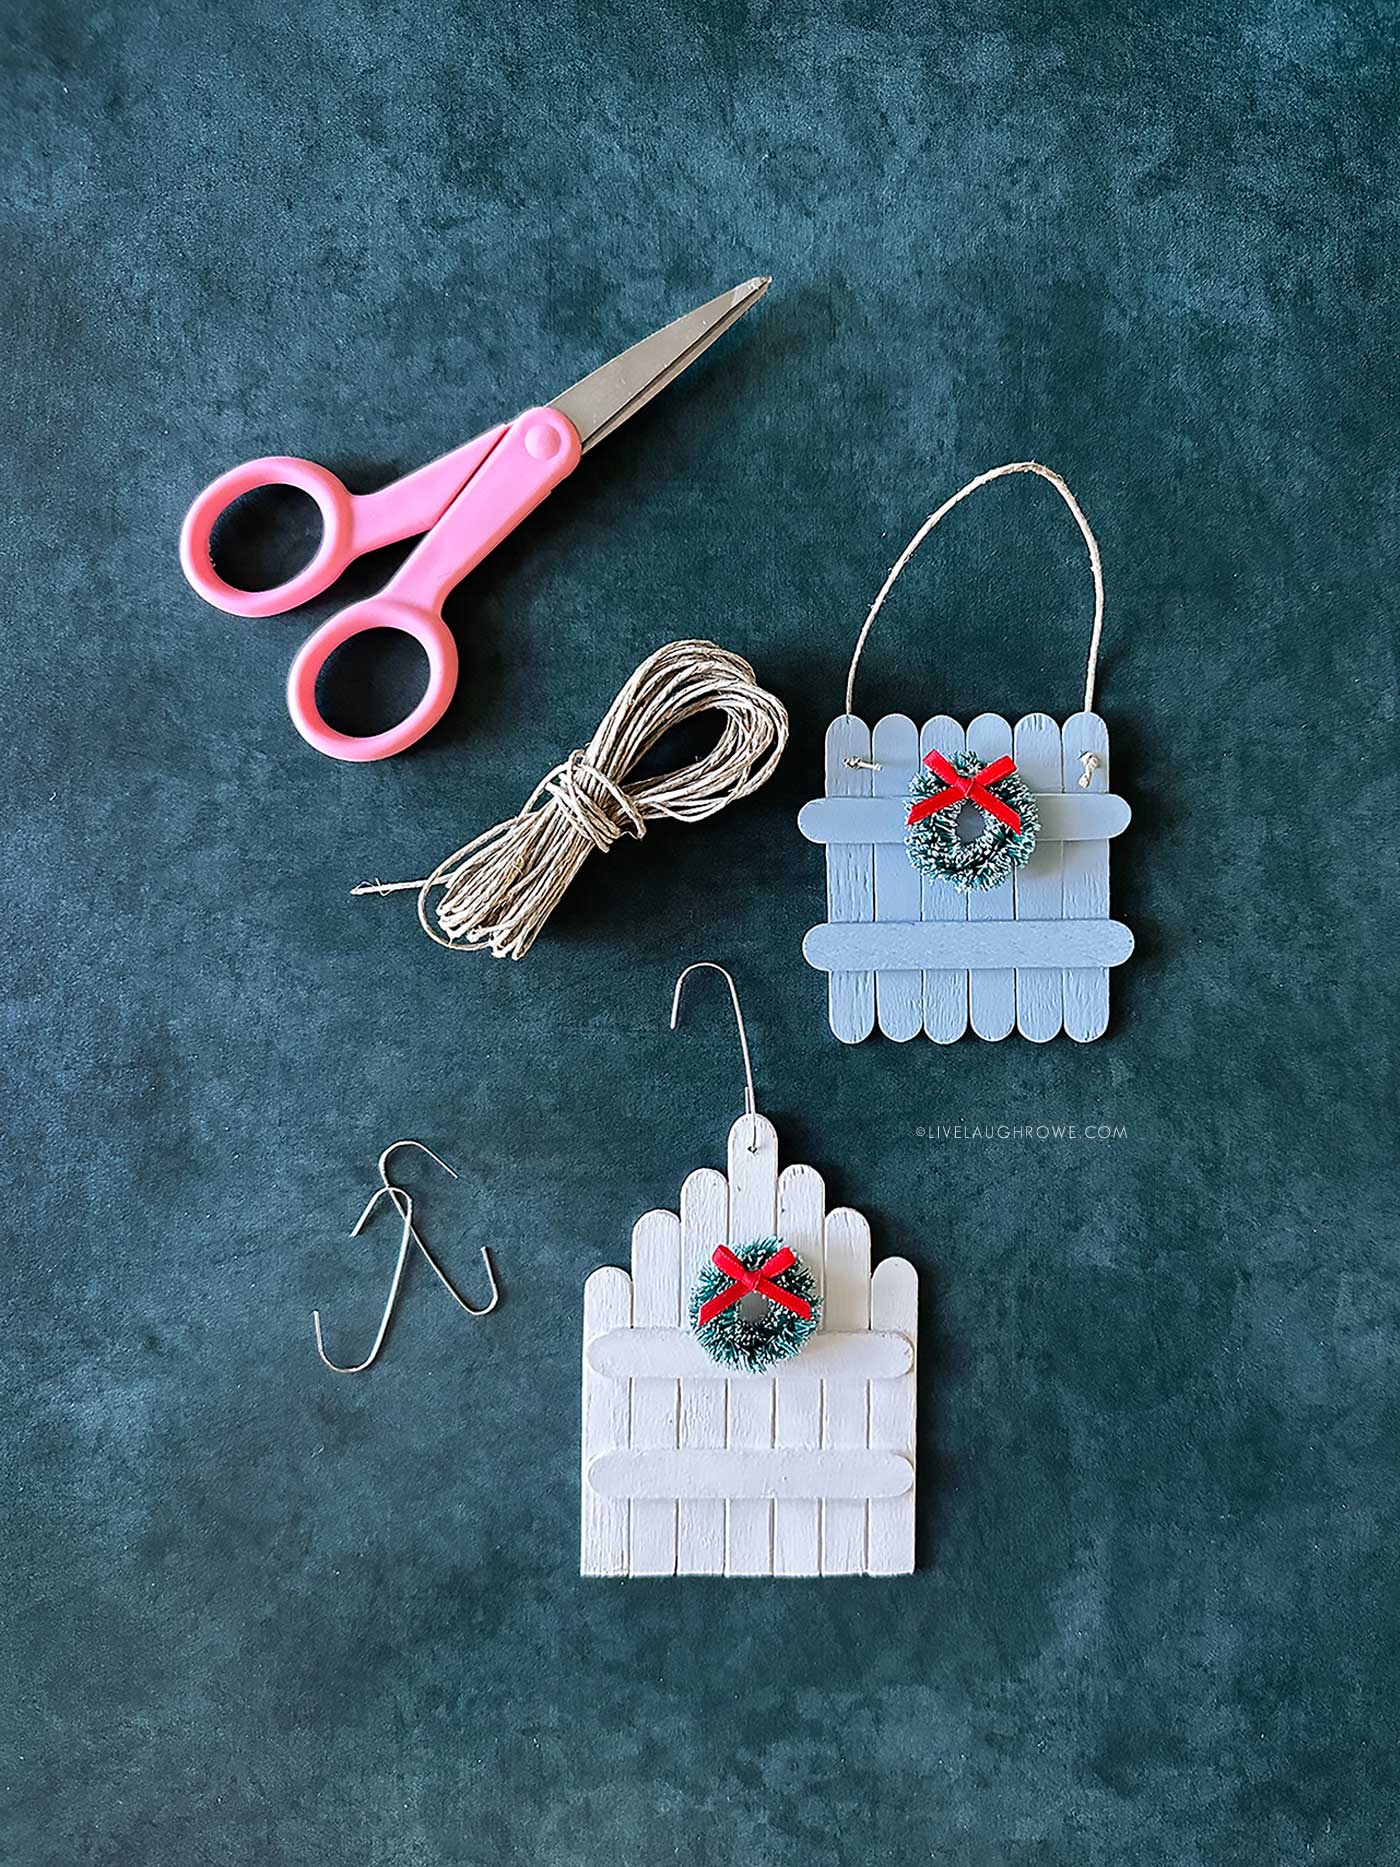
Twine or jute for hanging
Craft glue or hot glue (favorite craft glue)
Paint brushes
Acrylic paint in your favorite colors
Small bows or ribbon scraps
Scissors, hole punch, drill
Optional: craft knife, pencil, wire cutters, sanding block, Mod Podge, ruler.
Why This Fence Ornament Craft Is So Easy
One of the reasons this project has quickly become a favorite is that it’s simple enough for beginners but still looks polished and intentionally handcrafted. It checks all the boxes:
- Affordable — most supplies come from the dollar store or your craft stash
- Fast drying — acrylic paint dries quickly
- Minimal cutting — straight, simple pieces
- Beginner-friendly assembly — even kids can help
- Customizable — endless color and wreath combinations
If you’ve ever thought, “I want to make something cute but I’m not sure where to start,” this is the perfect project. No special tools, no fuss, and definitely no perfection required.
Why You’ll Love This Fence Ornaments
Let’s be honest — the holidays can feel overwhelming, which makes finishing something small (and adorable!) feel like a little victory. Here’s why this craft brings so much joy:
- Nostalgia. Popsicle sticks feel like childhood in the best way.
- Charming. These look like miniature farmhouse fences or cottage gates.
- Relaxing. Paint, glue, greenery — it’s a slow, calming rhythm.
- Giftable. Teachers, neighbors, coworkers — everyone loves a handmade ornament.
- Display-ready. Hang on the tree, clip to a garland, or tie on a package.
- Customizable. Color palettes, wreaths, bows — each one has its own personality.
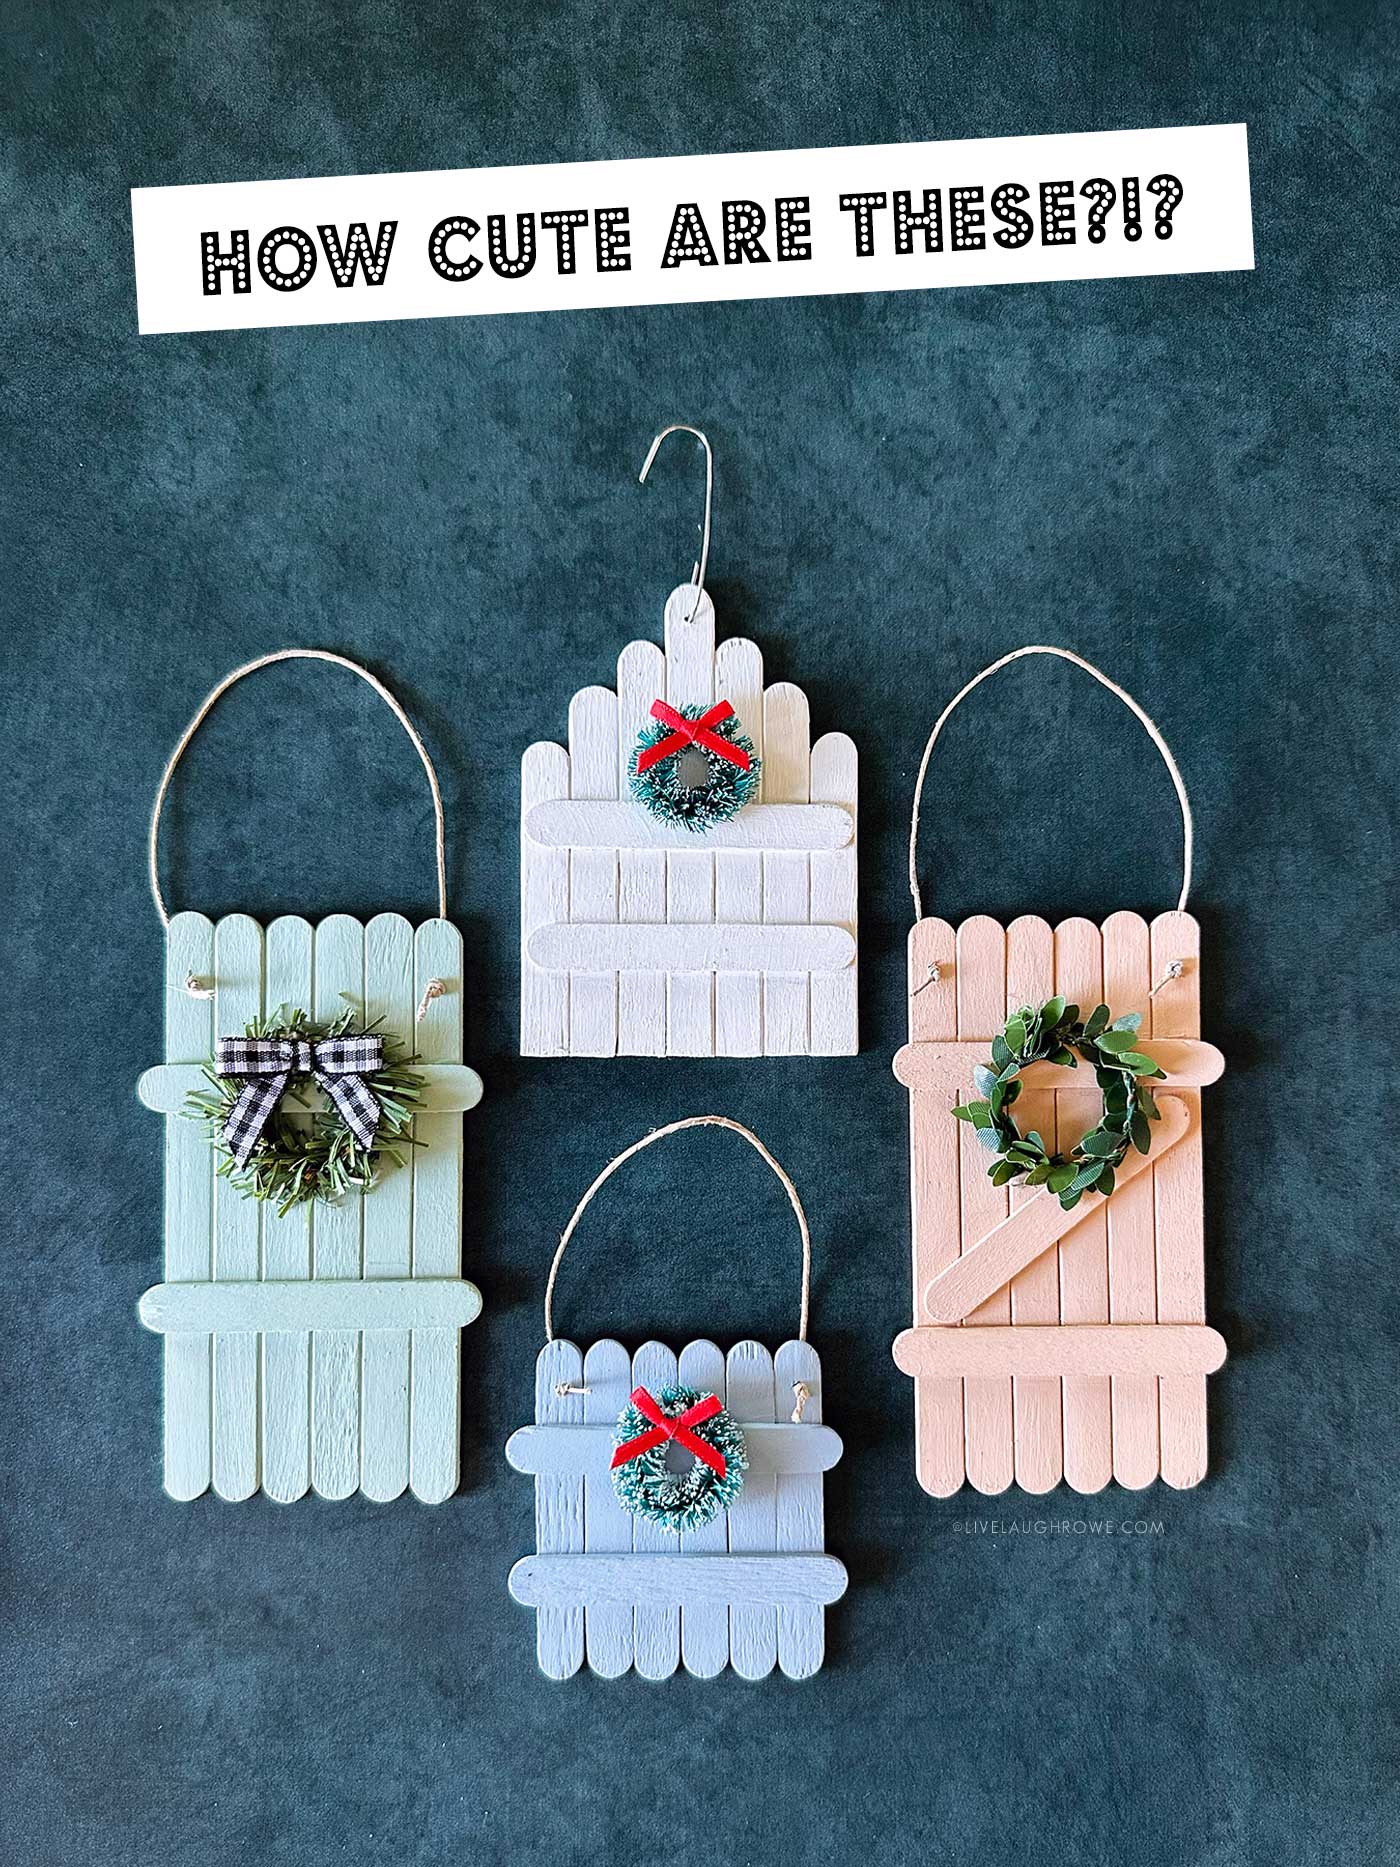
You can make a whole set for a “mini fence village” look, or create one special ornament for a personal keepsake. Either way, they turn out adorable every single time.
Other Christmas Ornaments to check out:
DIY Rusty Metal Ornaments
Vintage Map Ornament
Yarn Wrapped Stars
Simple and Rustic Holiday Ornament
How to Make a Fence Ornament
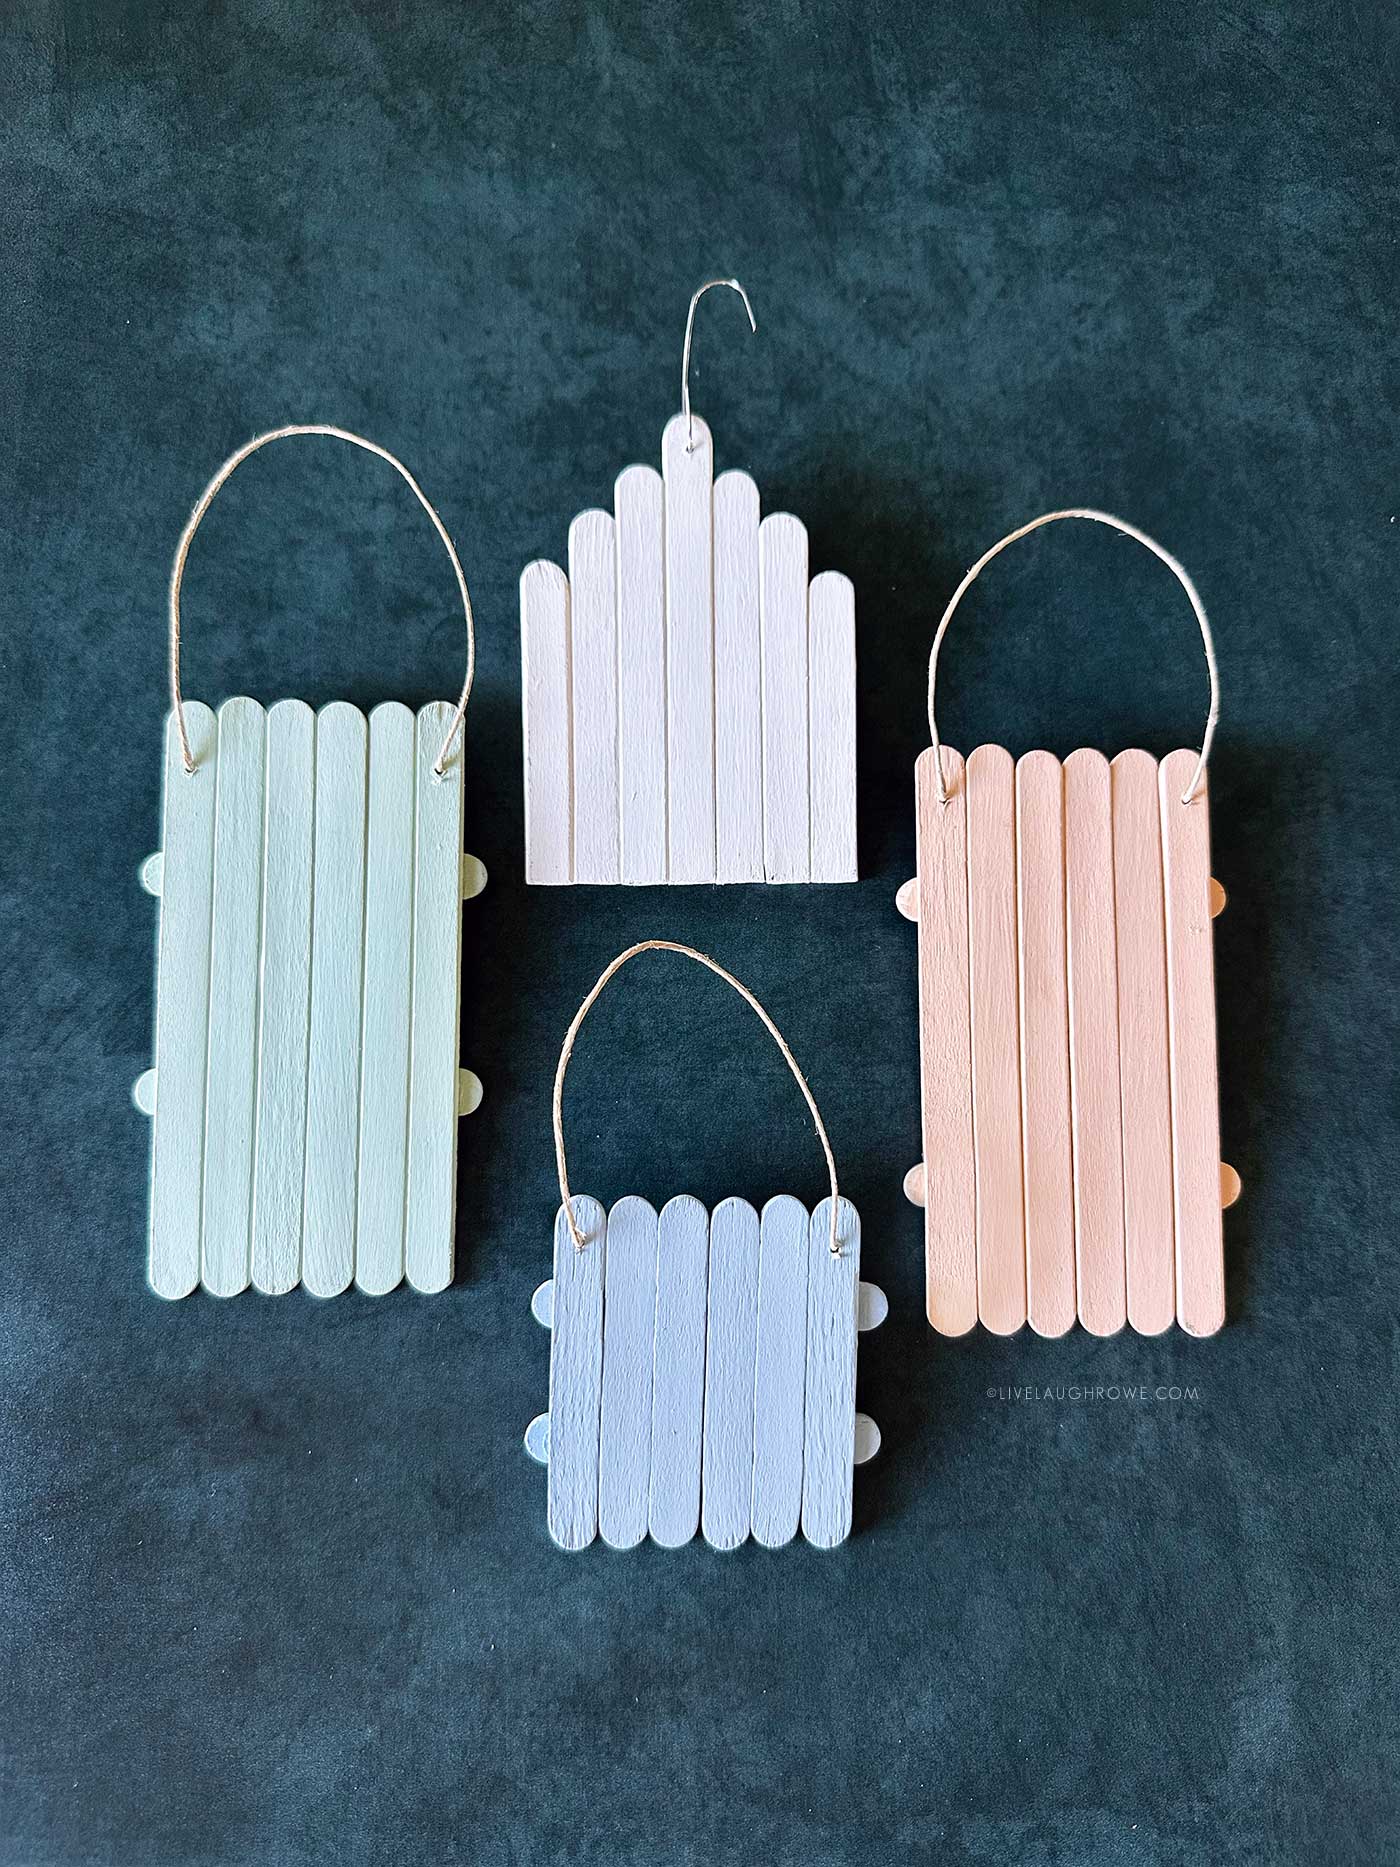
1. Plan your fence shape.
Decide between a simple rectangle or a more decorative scalloped top. The rectangular fences use six to eight vertical sticks, while the scalloped fence requires seven to nine.
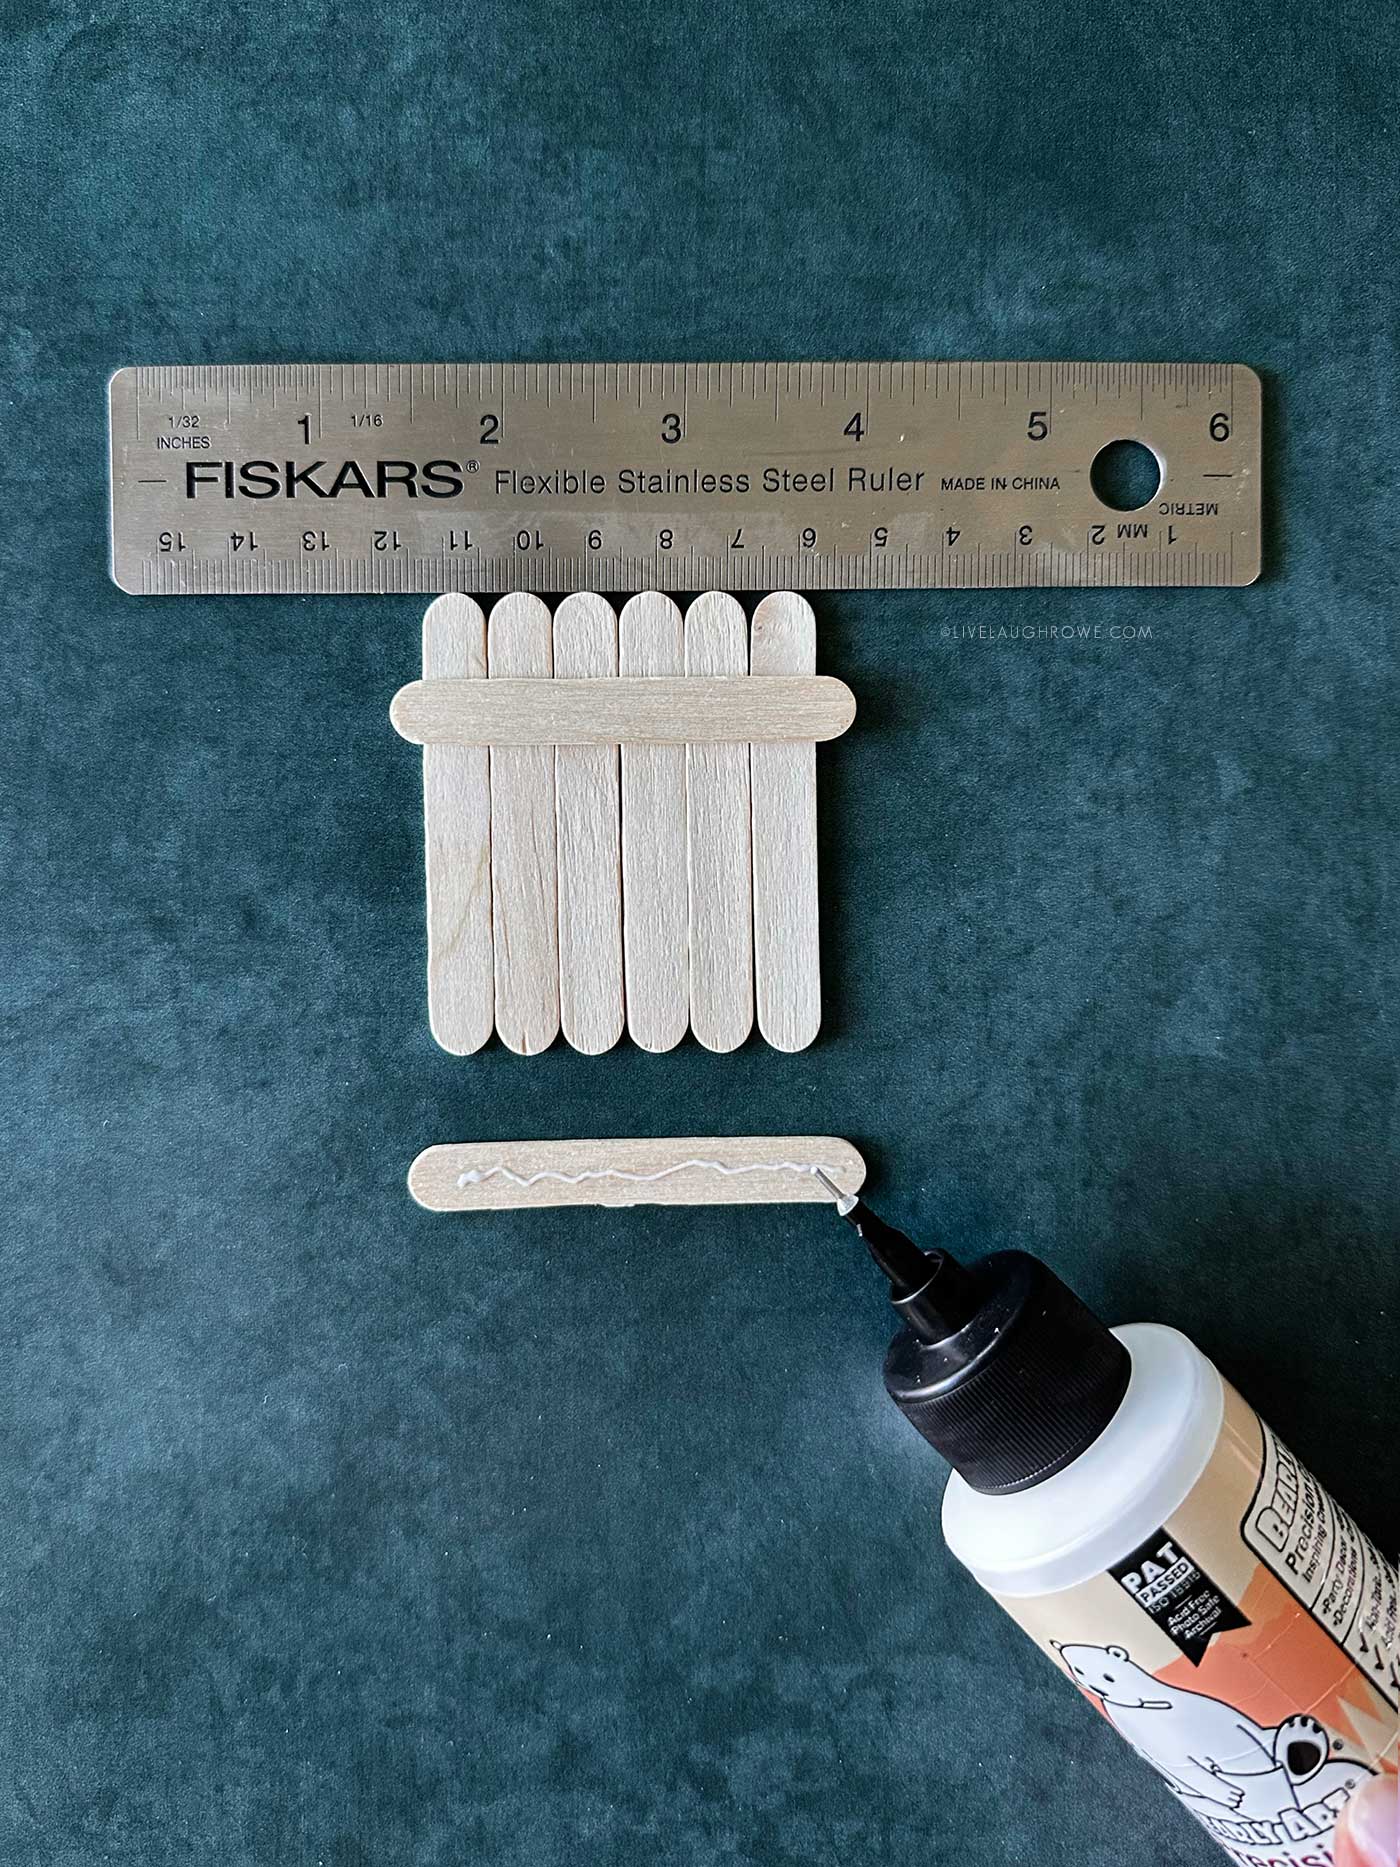
2. Layout the fence slats.
Arrange your vertical sticks side by side with the tops aligned. These will form the base.
TIP: Use a ruler to line the sticks up evenly and as straight as you can.
3. Add the horizontal and/or diagonal rails.
Use two horizontal rails—one near the top and one near the bottom. Press gently to secure with glue. You can also add an additional diagonal stick between the two horizontal sticks.
Note: The horizontal and diagonal sticks will serve as support pieces that hold the fence ornaments together.
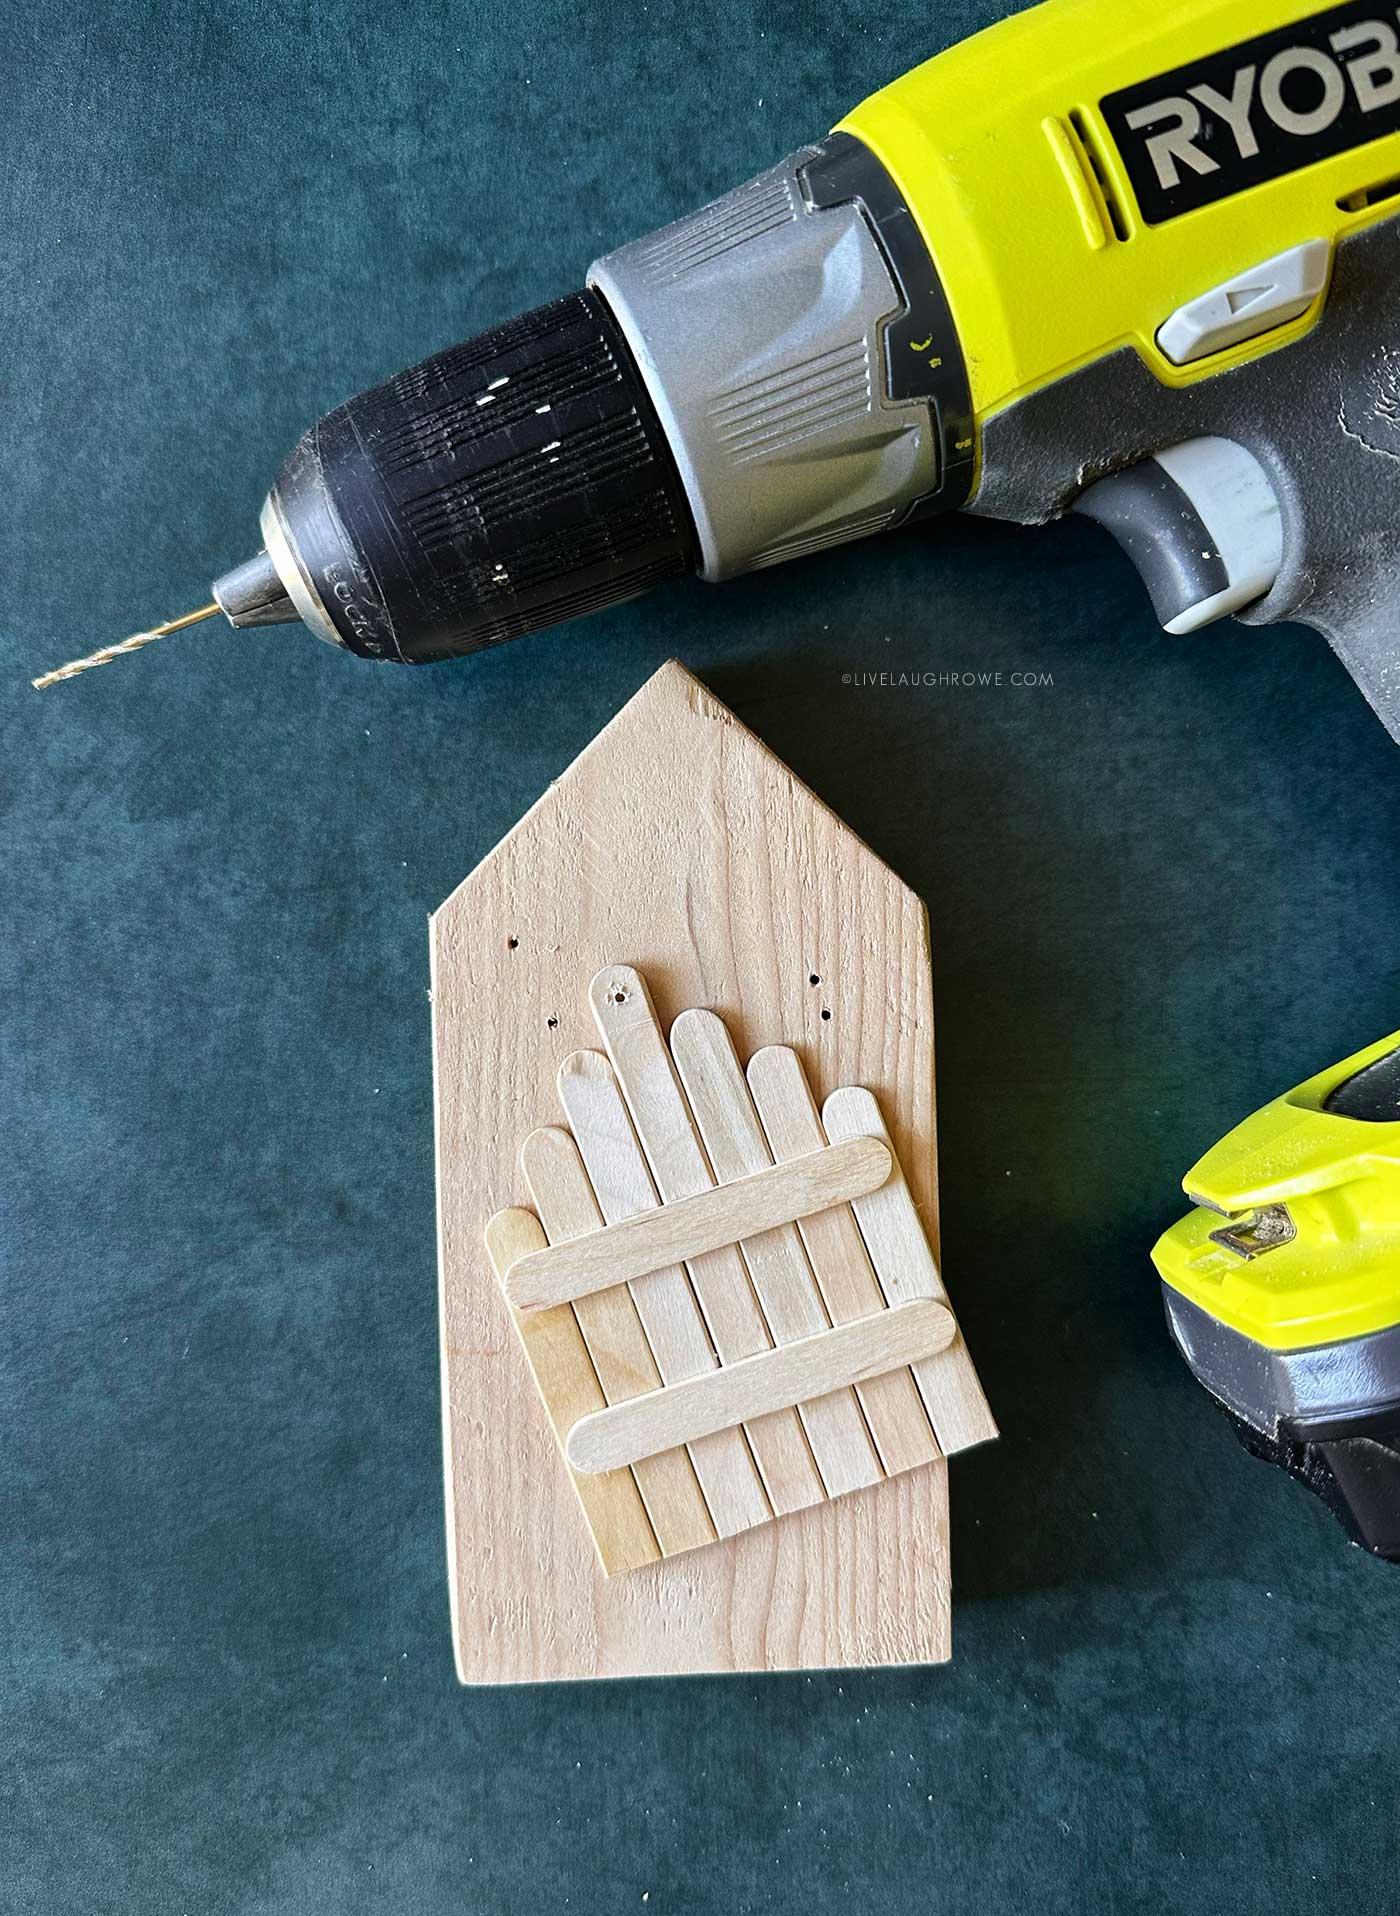
4. Create the scalloped or picket top (optional).
Line up the sticks with the middle one being the tallest. Trim the bottom of the popsicle sticks with scissors.
5. Punch or drill holes.
Prepare one for the scalloped version and two for the rectangular fences.
You could also use a small hole punch, craft knife, or hammer and nail to create the holes. Be sure to test it on a single popsicle stick before doing it on your assembled ornament.
6. Paint your fences.
Lay them out on scrap paper and paint each one. Pastels like sage, blush, and powder blue feel soft and seasonal; white is classic; neutrals are warm and rustic. Apply 1–2 coats and let dry.
Here are the colors I used: DecoArt Americana Winter Blue, FolkArt in Villa Green, Apple Barrel in Lite Mocha, and Craft Smart White — all in matte.
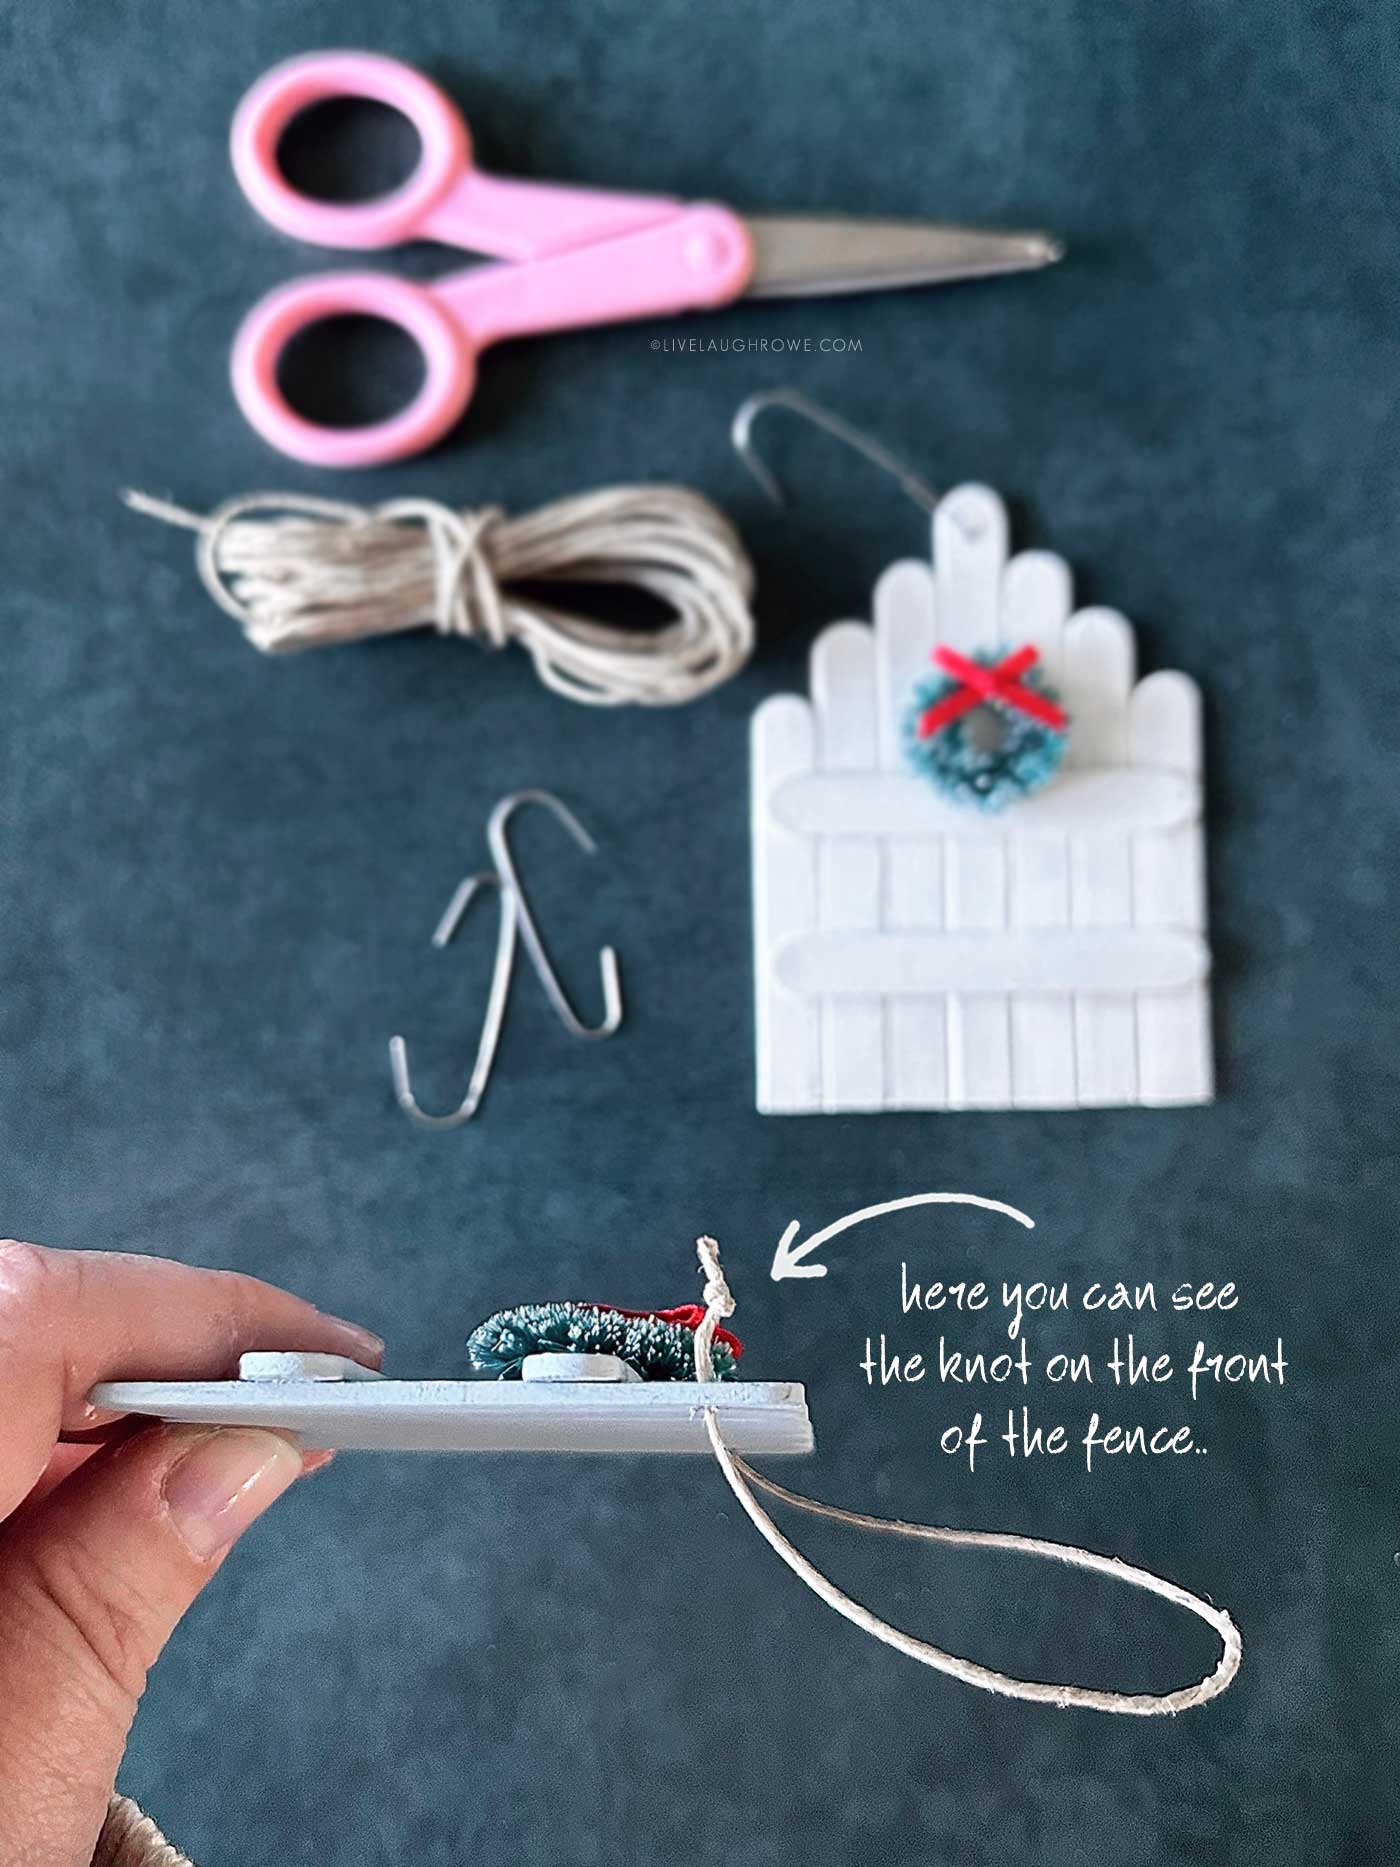
7. String the twine or use an ornament hook.
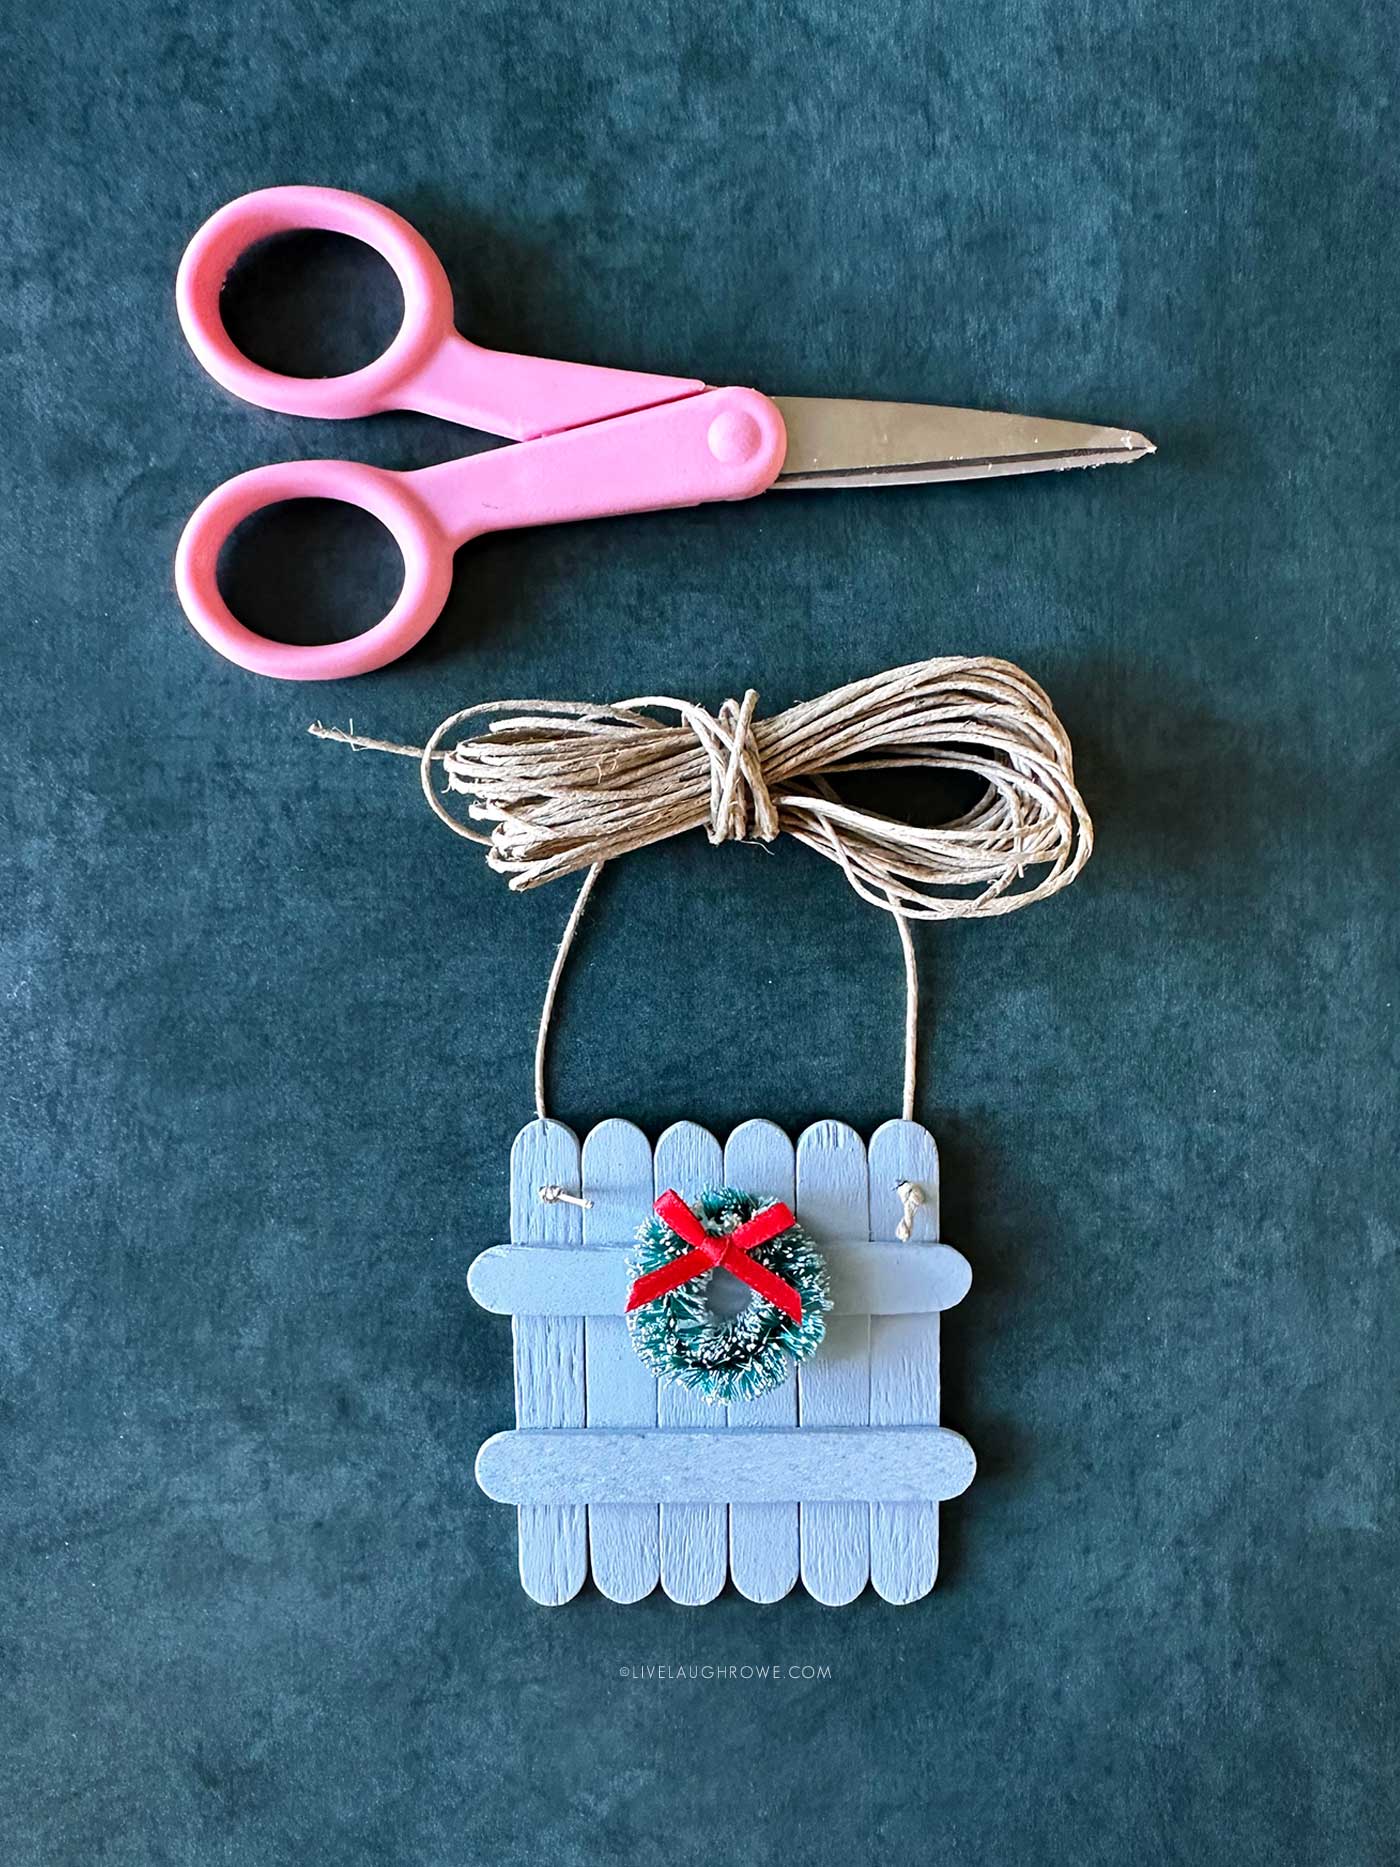
Thread twine or jute through and knot the ends on the front.
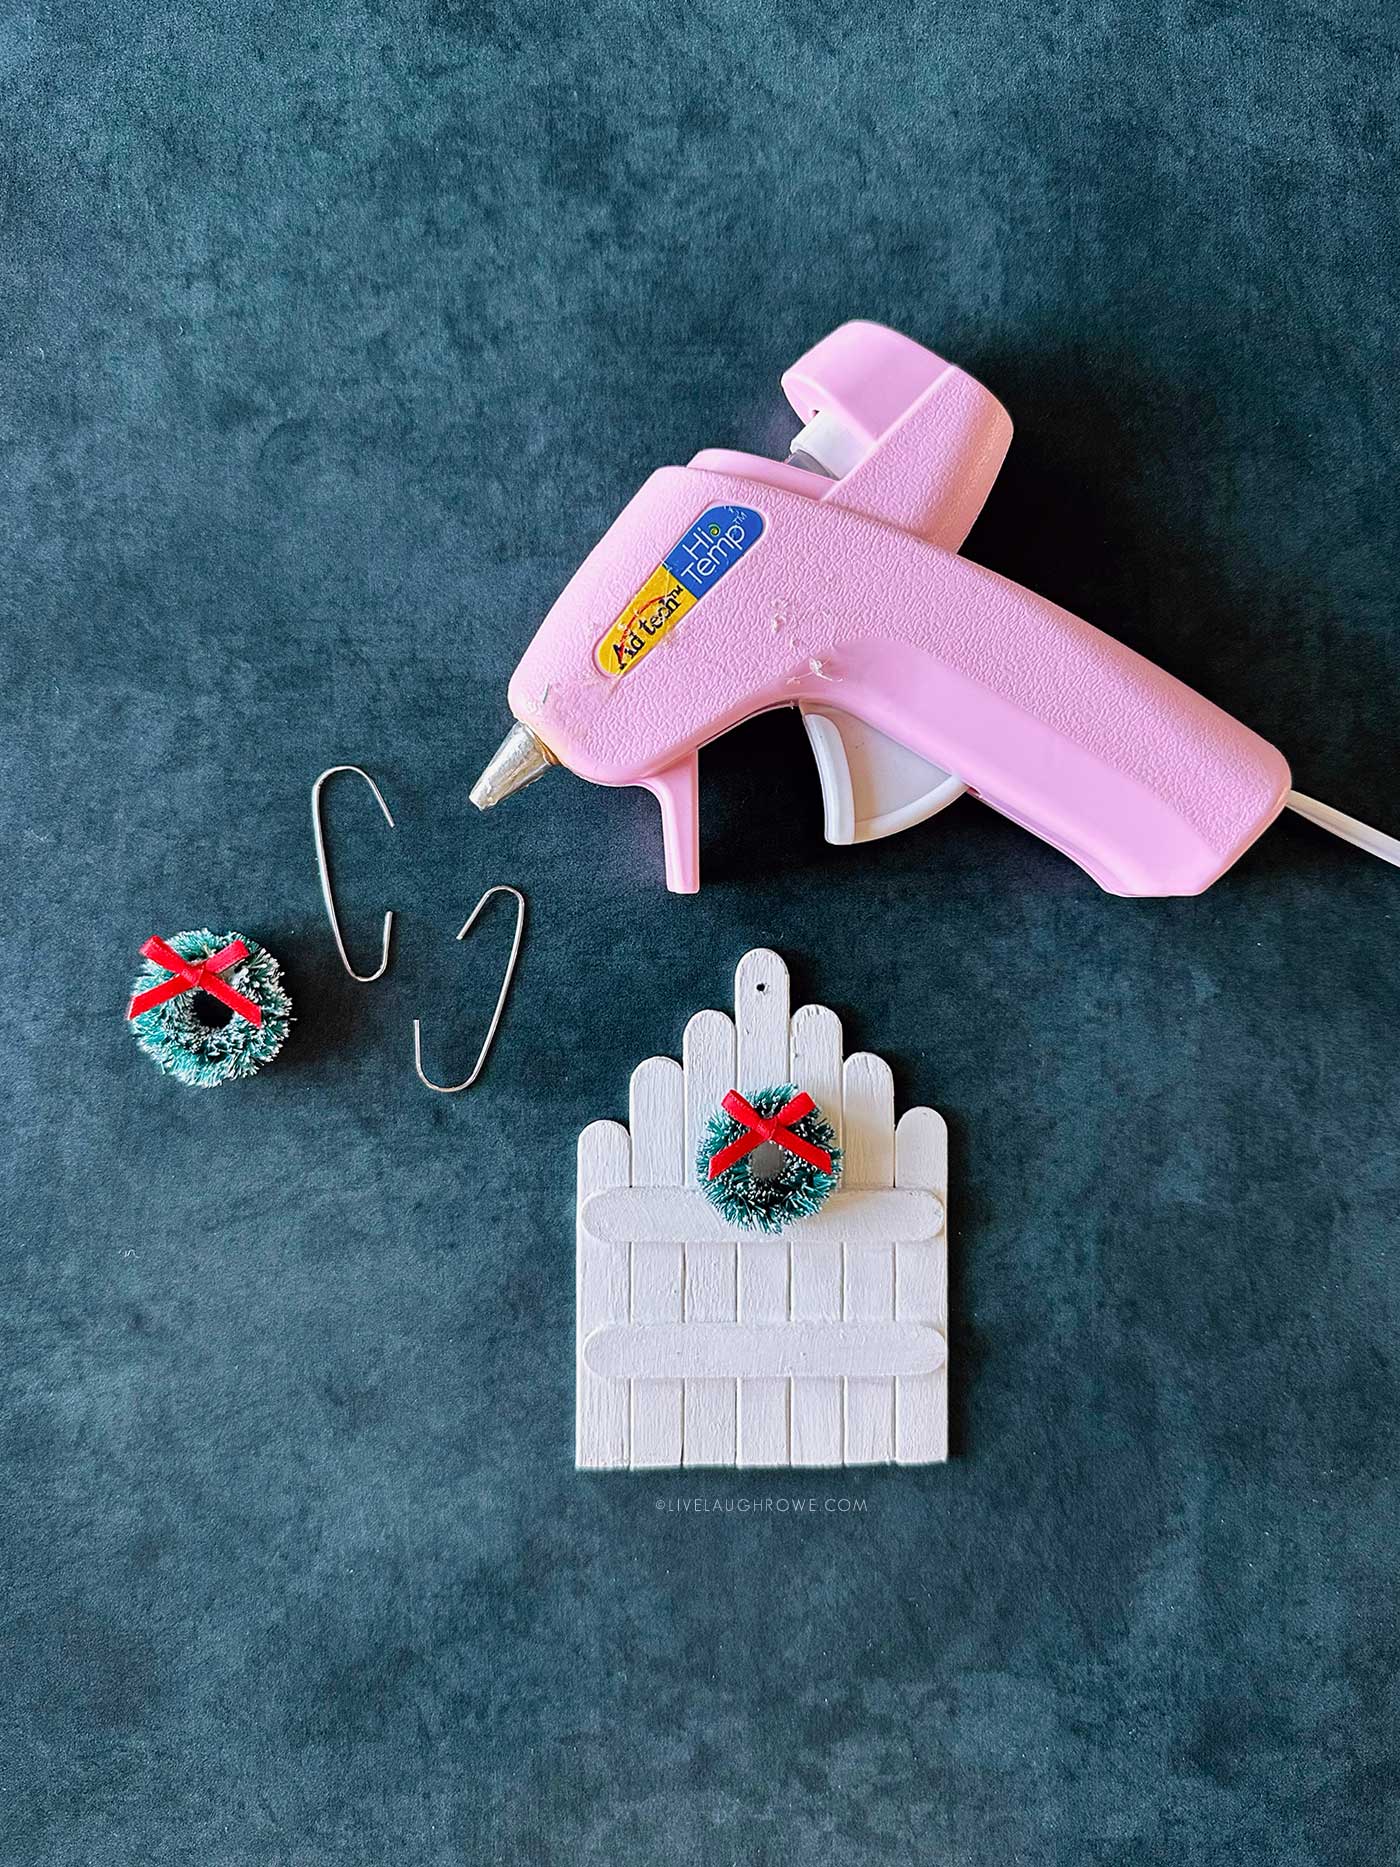
8. Add greenery or a wreath.
This is where the charm really shines! Glue a tiny wreath or piece of greenery to the front center. Depending on your wreath, add a bow for extra cuteness.
Use your preferred glue, but I used a Hi-Temp glue gun.
Optional Details:
- Want a rustic touch? Lightly sand edges after painting.
- Seal It: A thin layer of matte Mod Podge adds a finished look and protects the paint.
Here’s a look at the backs. Perfectly boring. Haha.
Holiday-Inspired Ways to Use These Fence Ornaments
- Tree ornaments: Perfect for farmhouse, cottage, pastel, or neutral trees.
- Gift toppers: Tie onto presents for a handmade, reusable embellishment.
- Stocking stuffers: Small enough to tuck in but meaningful enough to save.
- Table place cards: Add names to the fence — adorable for a holiday dinner.

Fence Ornament Variations and Styling Ideas
- Icy winter theme: Frosted wreaths, snow-dusted paint, white bows.
- Farmhouse style: Eucalyptus wreaths and black/white buffalo check.
- Rustic cabin: Warm browns, jute accents, tiny pine sprigs.
- Bright + playful: Candy-colored pastels or bold holiday colors.
- Vintage look: Sanded edges, muted greens, faded red bows.
Kid-Friendly Tips and Troubleshooting
- Use school glue instead of hot glue for younger makers.
- Paint first, assemble second — it reduces mess.
- If sticks warp, press them under books once dry.
- If holes splinter, reinforce twine with a dab of glue.
A Sweet Little Wrap-Up for This Holiday Craft
Crafting during the holidays should feel joyful — never stressful — and this project checks all the boxes. It’s sweet, simple, budget-friendly, and full of charm. Whether you make one or twenty, these little fence ornaments bring warmth and whimsy to your home.
So brew something warm, turn on the twinkly lights, and enjoy a quiet moment making something handmade this season. I hope these Fence Ornaments using Popsicle Sticks bring you the same joy they bring me!


Leave a Reply