With a piece of wood, coffee grinds and some mineral oil — here’s a DIY wood cutting board (or serving tray) that can be whipped up for some last minute holiday entertaining or to gift to your friends over the holidays!
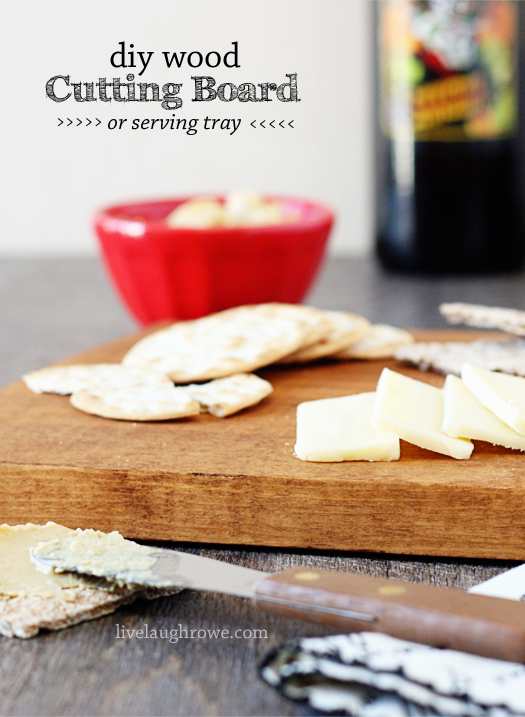 I know this is yet another old tutorial that has probably been around the world wide web forever; however, I was inspired to do this project after watching an episode of Dean & Tori’s Backyard Bash recently. Tori made some serving trays/planks using a plank of wood from the local hardware store using coffee grinds and mineral oil. I was intrigued with the idea — and what a fantastic and inexpensive way to make extra serving pieces for a dinner party or for food props (when you’re a blogger, these inexpensive props save on the budget).
I don’t have a step by step picture tutorial, but it really is that simple. We had some extra wood left from a recent project, so we cut a 10-1/2″ board from a 12′ long 1×10. Once you have your cut of wood, you’ll proceed with the following steps.
Stain the Wood
I took a scoop of coffee grinds (I used Folgers) and added a little water and rubbed, rubbed and rubbed some more. Once I had a color that I was happy with, I let it dry completely. I did let it set a bit between coats/rubs to see how it was looking. When you’ve achieved a stain color that you like, you’ll oil the wood.
Oil the Wood
Rub a food safe mineral oil (mine was purchased at Bed Bath and Beyond) onto the board with a clean rag or paper towel. Allow it to completely absorb into the wood. If you use the board for cutting, this will prevent rancid odors and bacteria from lingering.
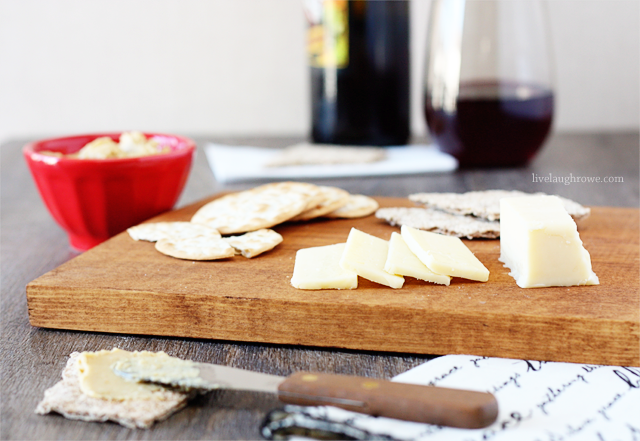
Note that this board is not intended to be soaked in water. The stain will wash off and should it dull, you can always refresh it with additional stain by rubbing more coffee grinds on it. I have only used mine for serving cheese and crackers! It’s perfect to grab when heading to the bring-your-own-food wineries or a date night by the fire with the hubs!
The possibilities are endless as you could cut them out in an oval or round shape as well. Round the edges with sand paper before staining, then wrap a couple up with a big red bow and gift to your friends with bottle of wine! Doesn’t that sound spectacular?
To simplify the process even more, buy a piece of oak and simply apply the mineral oil! Easy peasy.
Sharing here: Between Naps on the Front Porch
Subscribe to Updates | Like on Facebook | Follow on Pinterest




Lana @ Never Enough Thyme says
Love it! You know, of course, the first thing I thought of was food photo props 😉 Hubby is a woodworker in his spare time, so there’s plenty (and I mean, PLENTY) of wood lying about in the garage. I’m going to have some new boards soon!!
Kelly Rowe says
Thanks Lana! I’m sure that you will love them and they will definitely come in handy as props. 🙂 Enjoy the rest of your weekend. xo.
Mique says
I looove this Kelly. You make it look easy enough that I can do. 😉
Kelly Rowe says
Thanks Mique! Your always so kind. 🙂 Give it a try….I’m sure you’ll love it! xo.
kleinworthco says
Perfect!!! I have a few lying around here I could do this with. 🙂
Kelly Rowe says
Thanks so much for stopping by. I’m sure once you try it for yourself…you’ll love it and maybe even make more. 🙂 HUGS.
Claire @ A Little Claireification says
Wow, that is pretty amazing – I had never heard of the coffee grounds technique. Awesome! Pinning, of course. 🙂
Kelly Rowe says
It is a pretty amazing idea, isn’t it? Thanks for the pin love. 🙂 Have a FABULOUS weekend! xo.
mrs. hines class says
this photo is making me hungry. 🙂 love the idea of using the board as a serving tray…. I have a tray like this.
Kelly Rowe says
Thanks so much for stopping by! Enjoy the rest of your weekend. HUGS.
Molly - Craft Ideas Weekly says
Love this! We got a cutting board from a friend made from an oak stair from the hardware store. He cut it and stained it and sealed with beeswax. I use it all the time!
Kelly Rowe says
Thanks so much Molly! Sounds like you have a fun “homemade” cutting board too. 🙂 Enjoy the rest of your weekend. xo.
Angie | Big Bear's Wife says
Greta gift idea!!
Kelly Rowe says
Thanks so much for stopping by Angie! Enjoy the rest of your weekend. xo.
Loribeth says
I use this method to freshen up the look of my wooden cutting boards.
twopeasandtheirpod says
Love this idea! And I want cheese and crackers now:)