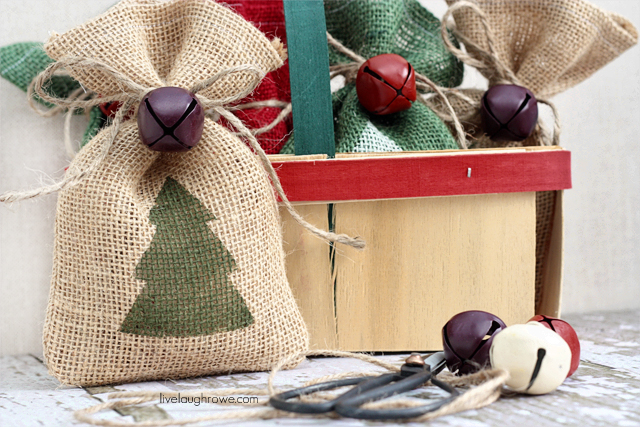
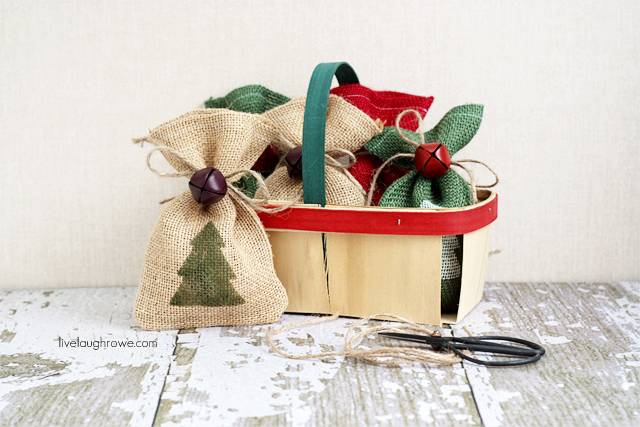
Oh happy day! Can you believe we’re already in the sixth day of the 10 Days of Merry series? So far, I’ve shared gift tags, Peppermint Cookie Bark, a Retro Christmas Wreath and chalkboard printables! Today I’m tickled silly to share with you a festive gift bag idea! DIY Burlap Gift Bags, perfect for a Christmas surprise under the tree!
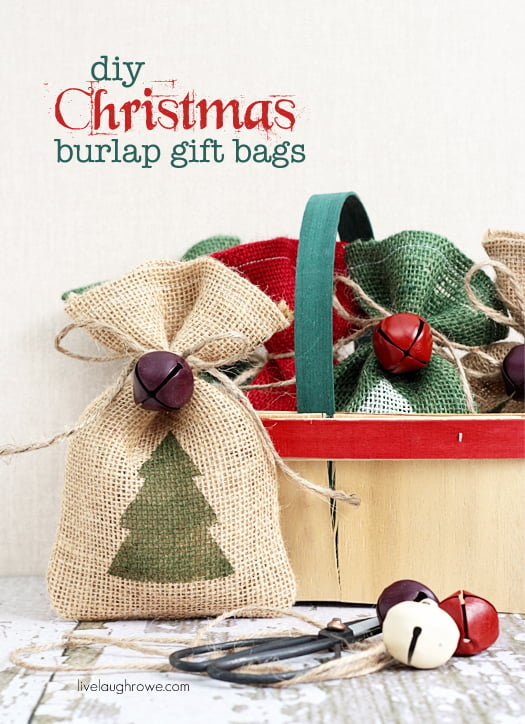 Simple Burlap Gift Bags

Be sure to check out my DIY Halloween Treat Bags too. I had so much fun making them that I knew I would be sure to put some crafty goodness into making some burlap Christmas gift bags together and share them here with you!
Supplies:
Natural Burlap and Green Burlap
Acrylic Paint (I used a shade of Ivory and Forest Green)
Cosmetic Sponges
Tree Stencil (I cut mine from my Silhouette Cameo)
Sewing Machine (or needle + thread)
First things first — let’s make the burlap bags. They will come together in four easy steps.
Step One:
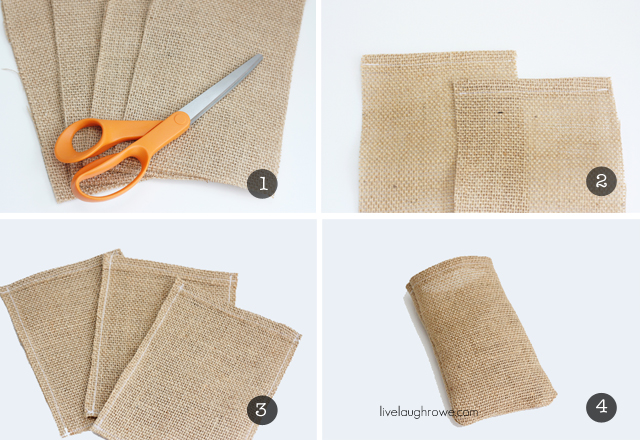
Let’s start by cutting the burlap to the appropriate size. I cut mine into sheets of 8-1/2″ x 5-1/2″.
Step Two:
Start by sewing the top edges of the burlap bag. Now, I have to confess, I’m not a hobby sewer. I am by no means a seamstress {hee-hee}. I tend to wing it and it seems to work for me… that’s not necessarily my recommendation, I’m just keeping it real. If you like to be a little more formalized, feel free to pin and iron your hem. My hem was about 1/4″.
Step Three:
Now we’re going to sew both sides and the bottom of the bag. Remember to sew the bag inside out. I strongly sugges that you sew your stitch twice for a little extra support on the hem. Burlap can be a little tricky and fray very easily. (I can assure you that I’m sharing that tip from experience.)
Step Four:
Once we’ve stitched the three sides, we’re going to turn the bags right side out and iron them flat. As you can see, it’s a little puffy {hee-hee}. Here is where you’re going to want to pull out the handy dandy iron and flatten the bag out.
If you have no desire to stencil on your bags, you’re done! I, on the other hand, am going to add a little Christmas cheer to my bags with little Christmas trees. Of course the possibilities are endless!
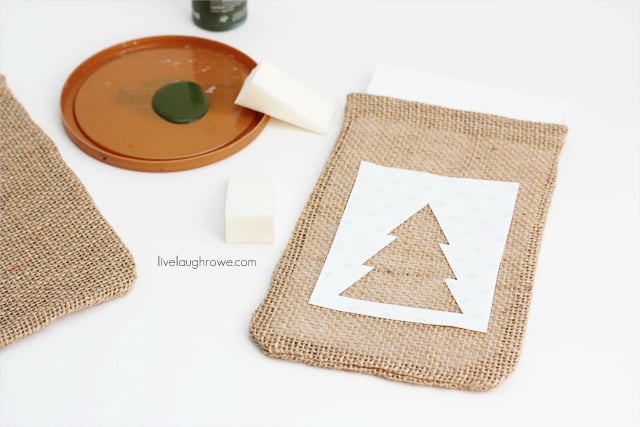
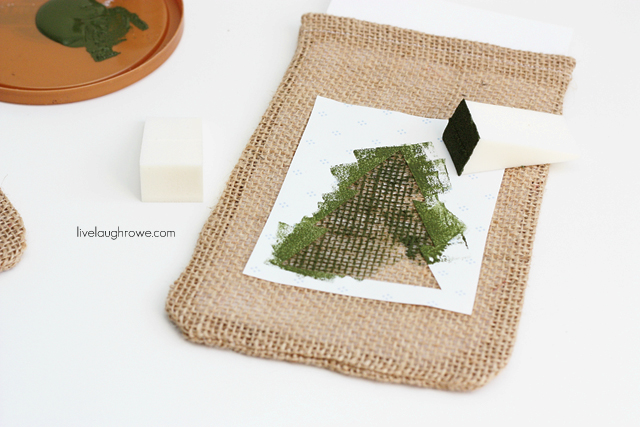
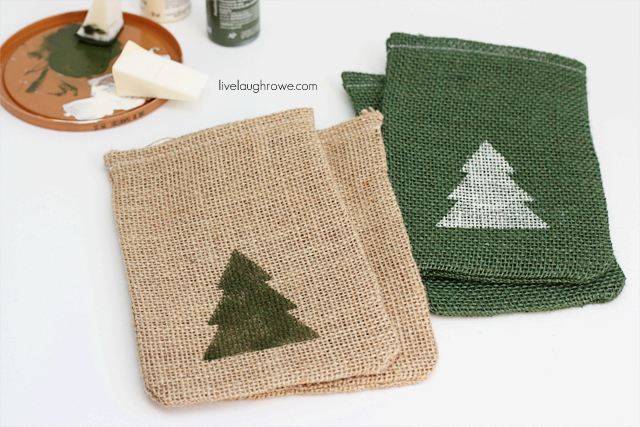
Happy Holidays, sweet friends!
Psssst, be sure to catch up on the 10 days of Merry series:

Facebook | Instagram | Pinterest | Twitter | Google+




Shaina says
These turned out so cute! I actually have some burlap lying around from a different project, and I can’t wait to make a few of these for gifts.
Kelly Rowe says
Thanks Shaina! Have a great week! 🙂 xo.
Marie says
These are soooooooo darling! I love them!
Kelly Rowe says
Thanks so much Marie! Appreciate you stopping by. HUGS.
madetobeamomma says
These are the cutest! Love burlap! The bell is the perfect touch! Pinned 🙂
Kelly Rowe says
Thanks so much for stopping by! Burlap is definitely too fun! 🙂 xo.
Nicole Lindstrom says
Love this Kelly! I went to a favorite things party last night and was lacking cute little bags…these would have made the gift! Great idea!
Kelly Rowe says
Thanks so much Kelly! Appreciate the love. xo.
JaneEllen says
Oh come on, you made your little bags look so great, you must be somewhat of a sewer. I admit sometimes I hurry making things and they look like it, ugh and shame on me. I’ll have to see if I can get some green and red burlap. Due to finances we’ll be giving all hand made gifts this year. By the end of the year the 5 week months have really caught up with us, too many weeks, not enough money, boo hiss.
Trying to decide what to make for everybody. Usually I make paper ornaments but wanted to do something else this year. Hmmm, wonder if that’s a good idea.
Your little favor bags are so great, love how they look. When I sew burlap I do a zigzag stitch first then go back with straight stitches. Took me awhile to get my machine adjusted correctly to sew burlap, machine kept eating it and what a mess in my machine. I love the little trees you stenciled. I luckily have gobs of great stencils so will use those. Great post Kelly, glad you shared these adorable little bags. Happy weekend
Kelly Rowe says
Thanks so much Jane Ellen! I’m sure everyone will LOVE their home made gifts! 🙂 Hope your weekend was great! xo.
Marti says
Too cute! It looks so easy. I wanted to let you know the email address I received for the Christmas gift exchange came back an undeliverable.
Cindy Eikenberg says
Kelly, I absolutely love these darling little gift bags! Thank you so much for joining the party and sharing them at Best of the Weekend. Pinning and sharing! Hope you have a merry and happy Sunday and a wonderful week! Hugs!
Kelly Rowe says
Thanks so much Cindy! …and your welcome! You have a wonderful week as well. xo.
DJ Remington says
So cute! Thanks for sharing!
Kelly Rowe says
Thanks for stopping by! 🙂 xo.
Glory/ Glorious Treats says
LOVE these!! Simply perfect!
Kelly Rowe says
Thanks so much Glory! Have a wonderful weekend. HUGS.
janemaynard (twfd) (@janemaynard) says
super duper cute!
Kelly Rowe says
Thanks so much! Appreciate you stopping by. xo.
Karen says
i think i will follow this template to make my 150 favor bags for a party in may. It looks simple enough
Kelly Rowe says
So glad to hear that, Karen! Thanks so much for stopping by. Happy crafting Hugs!!
Joanne says
Hello, this is a great idea!!!!!! I will be purchasing burlap immediately to start early on my Christmas decor lol I would like to know what paint you used or what type of paint should be used for burlap. Thank you kindly
Kelly Rowe says
Hi Joanne! I just used a basic acrylic paint 🙂 Happy crafting!
elizabeth gottfried says
LOOOOVE these… and I thought I was all original when I thought of making Burlap Wine Bags… I love the idea of reusable gift bags that eliminate paper from landfills and deforestation to MAKE wrapping paper… but seriously these are just SCREAMIN’ cute. All kinds of bottles can be gifted, from craft beers to vinegars to herbed oils, and of course WINE. I think 5″ by 16″ would be a good size for wine/bottle bags… fyi.
Marilyn Clark says
What gorgeous gift bags…I love the rustic look of the burlap
Lindsey Smith says
Love the bags. Such classic wrapping that can be used again and again! Love!
Susan says
These are adorable! I love the simplicity of them and anything to do with burlap!
Gloria // Simply Gloria says
Kelly, these are absolutely adorable! Such a great idea… doing these for the neighbor gifts!
Terry says
What is inside these bags to make them stand up?
Janet says
Oh I just loved this project you shared with us. I am making gifts for xmas this year as well.. Can you tell me where you got those little rustic bells & the size for this burlap bag?? I seem to only see the shiny ones and would love the rustic looking bells.. Thank you…..
It’s hot in California today… 103
Kelly Rowe says
Hi Janet. We’ve been in the 90’s, but the humidity takes it to another level. Phew. The size of the bag is actually under Step One. And the bells are 1″ I believe. I got a bag of those bells years ago at a Hobby Lobby or Micheal’s, so I’m not sure where you might find them now. Check Amazon — they always have a lot of options too. Hope that helps. Cheers!