
There’s just something magical about handmade Christmas ornaments. Maybe it’s the tiny details, the personalized touches, or the way each little piece tells its own story. Whatever the reason, homemade ornaments always feel extra special hanging on the tree — a little cozier, a little more nostalgic, and a whole lot more meaningful.
I might be fully obsessed with this one. It’s quick, customizable, and such a fun little project — total win-win!
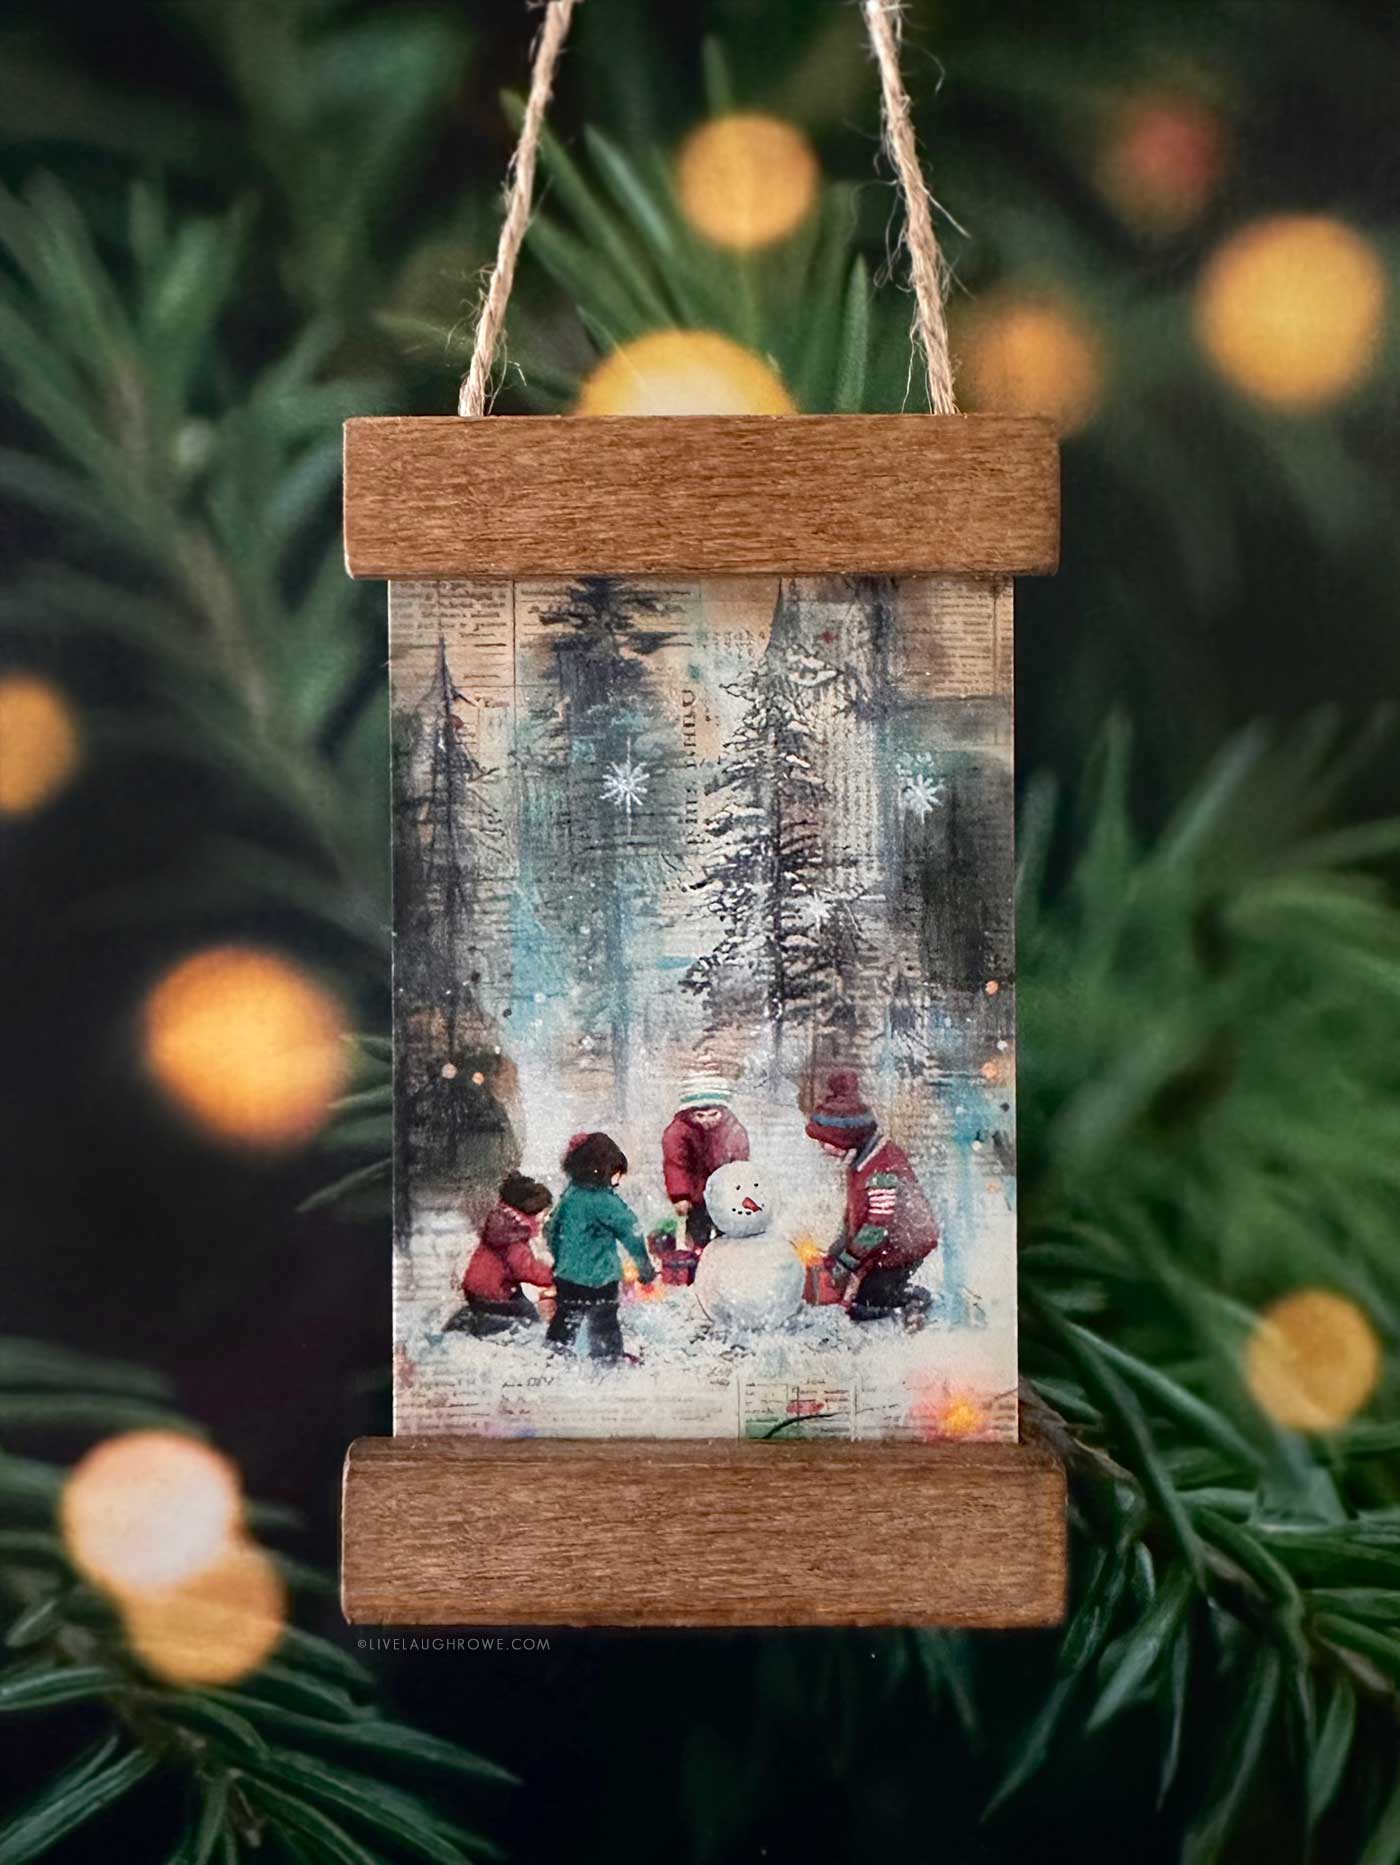
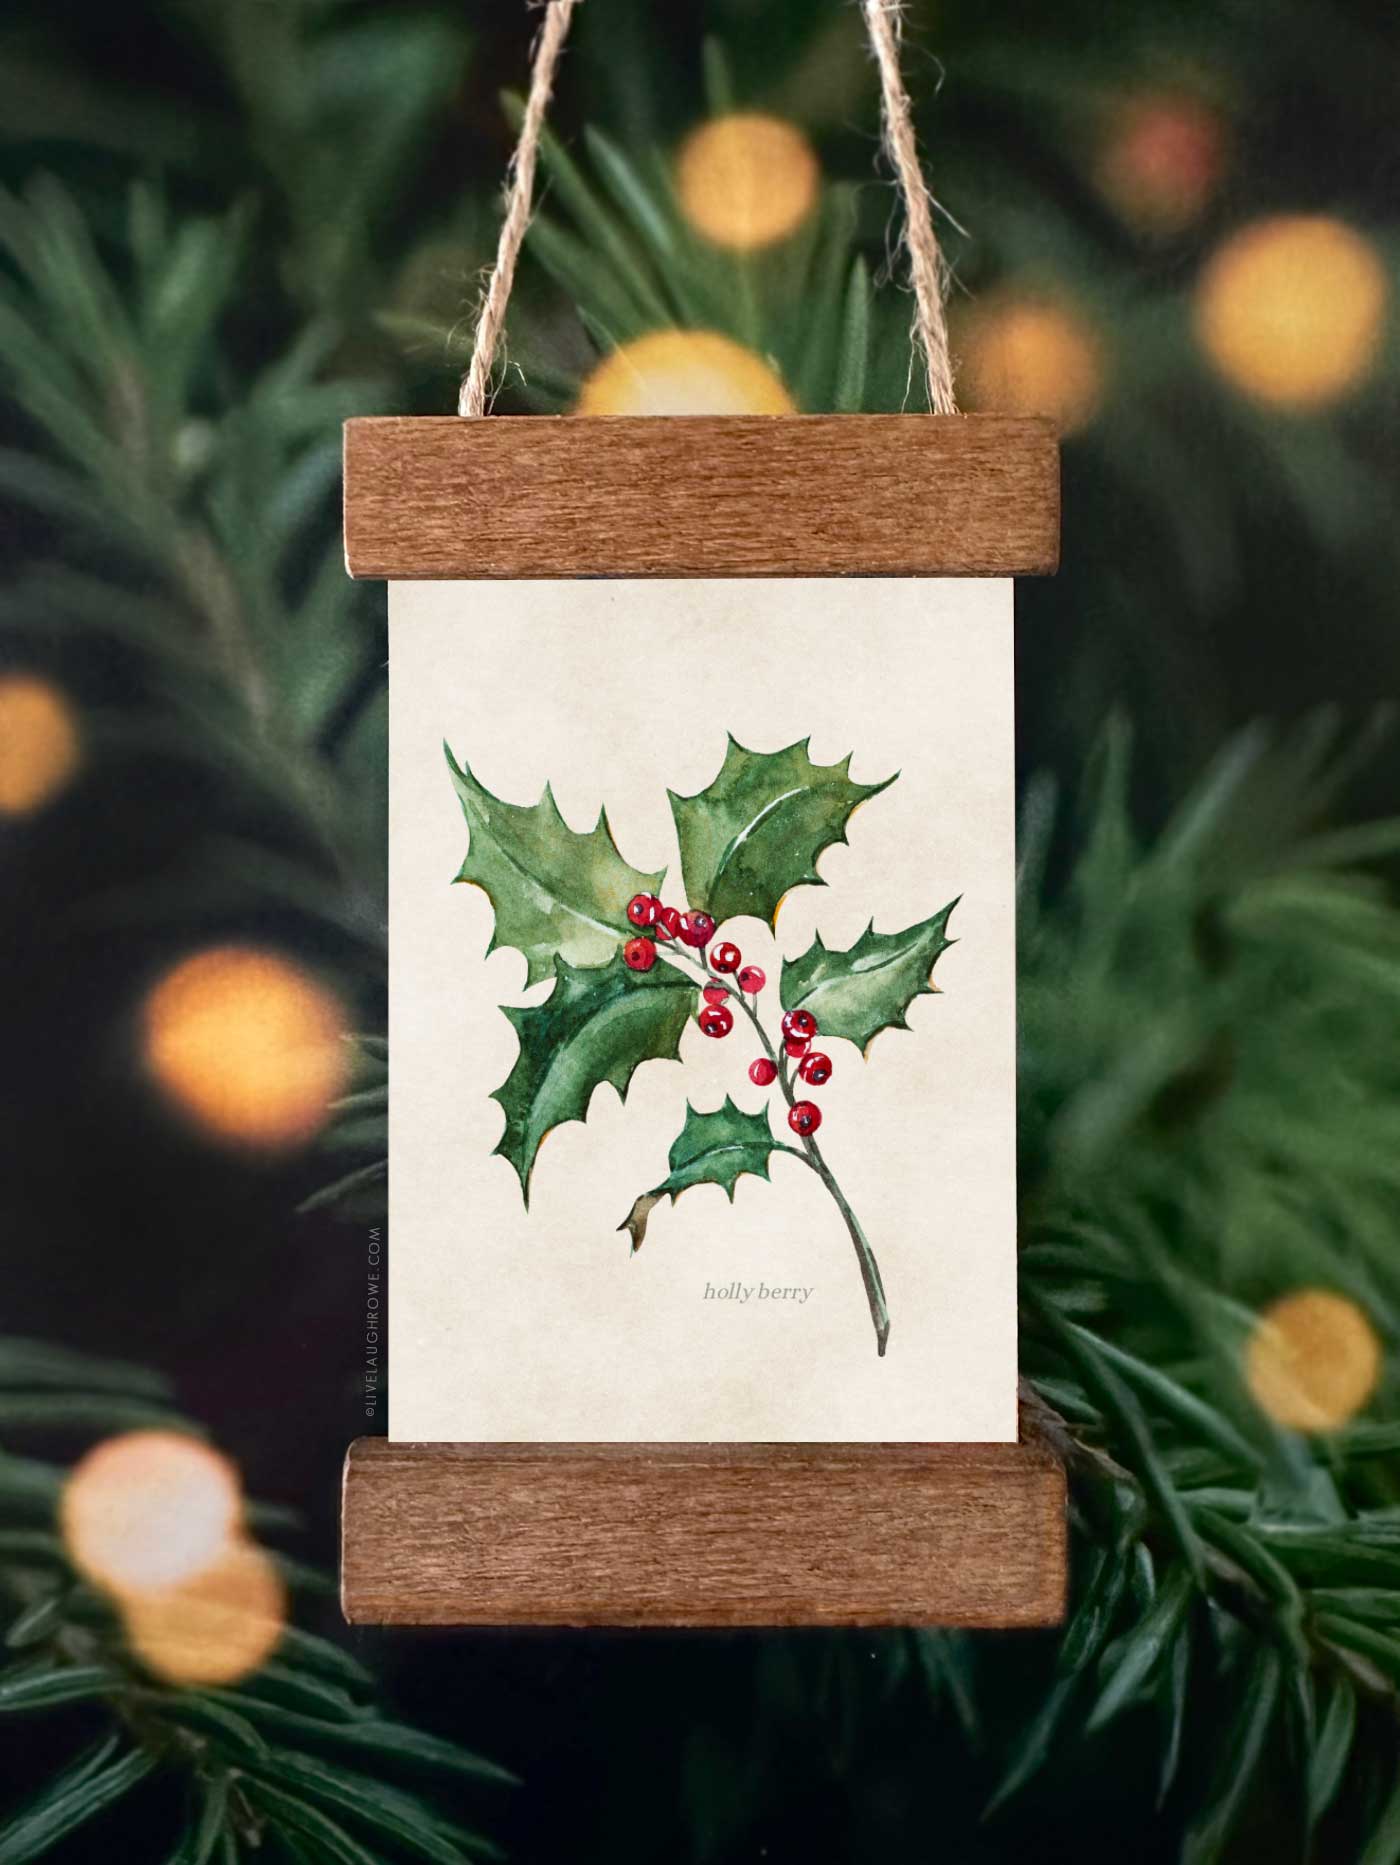
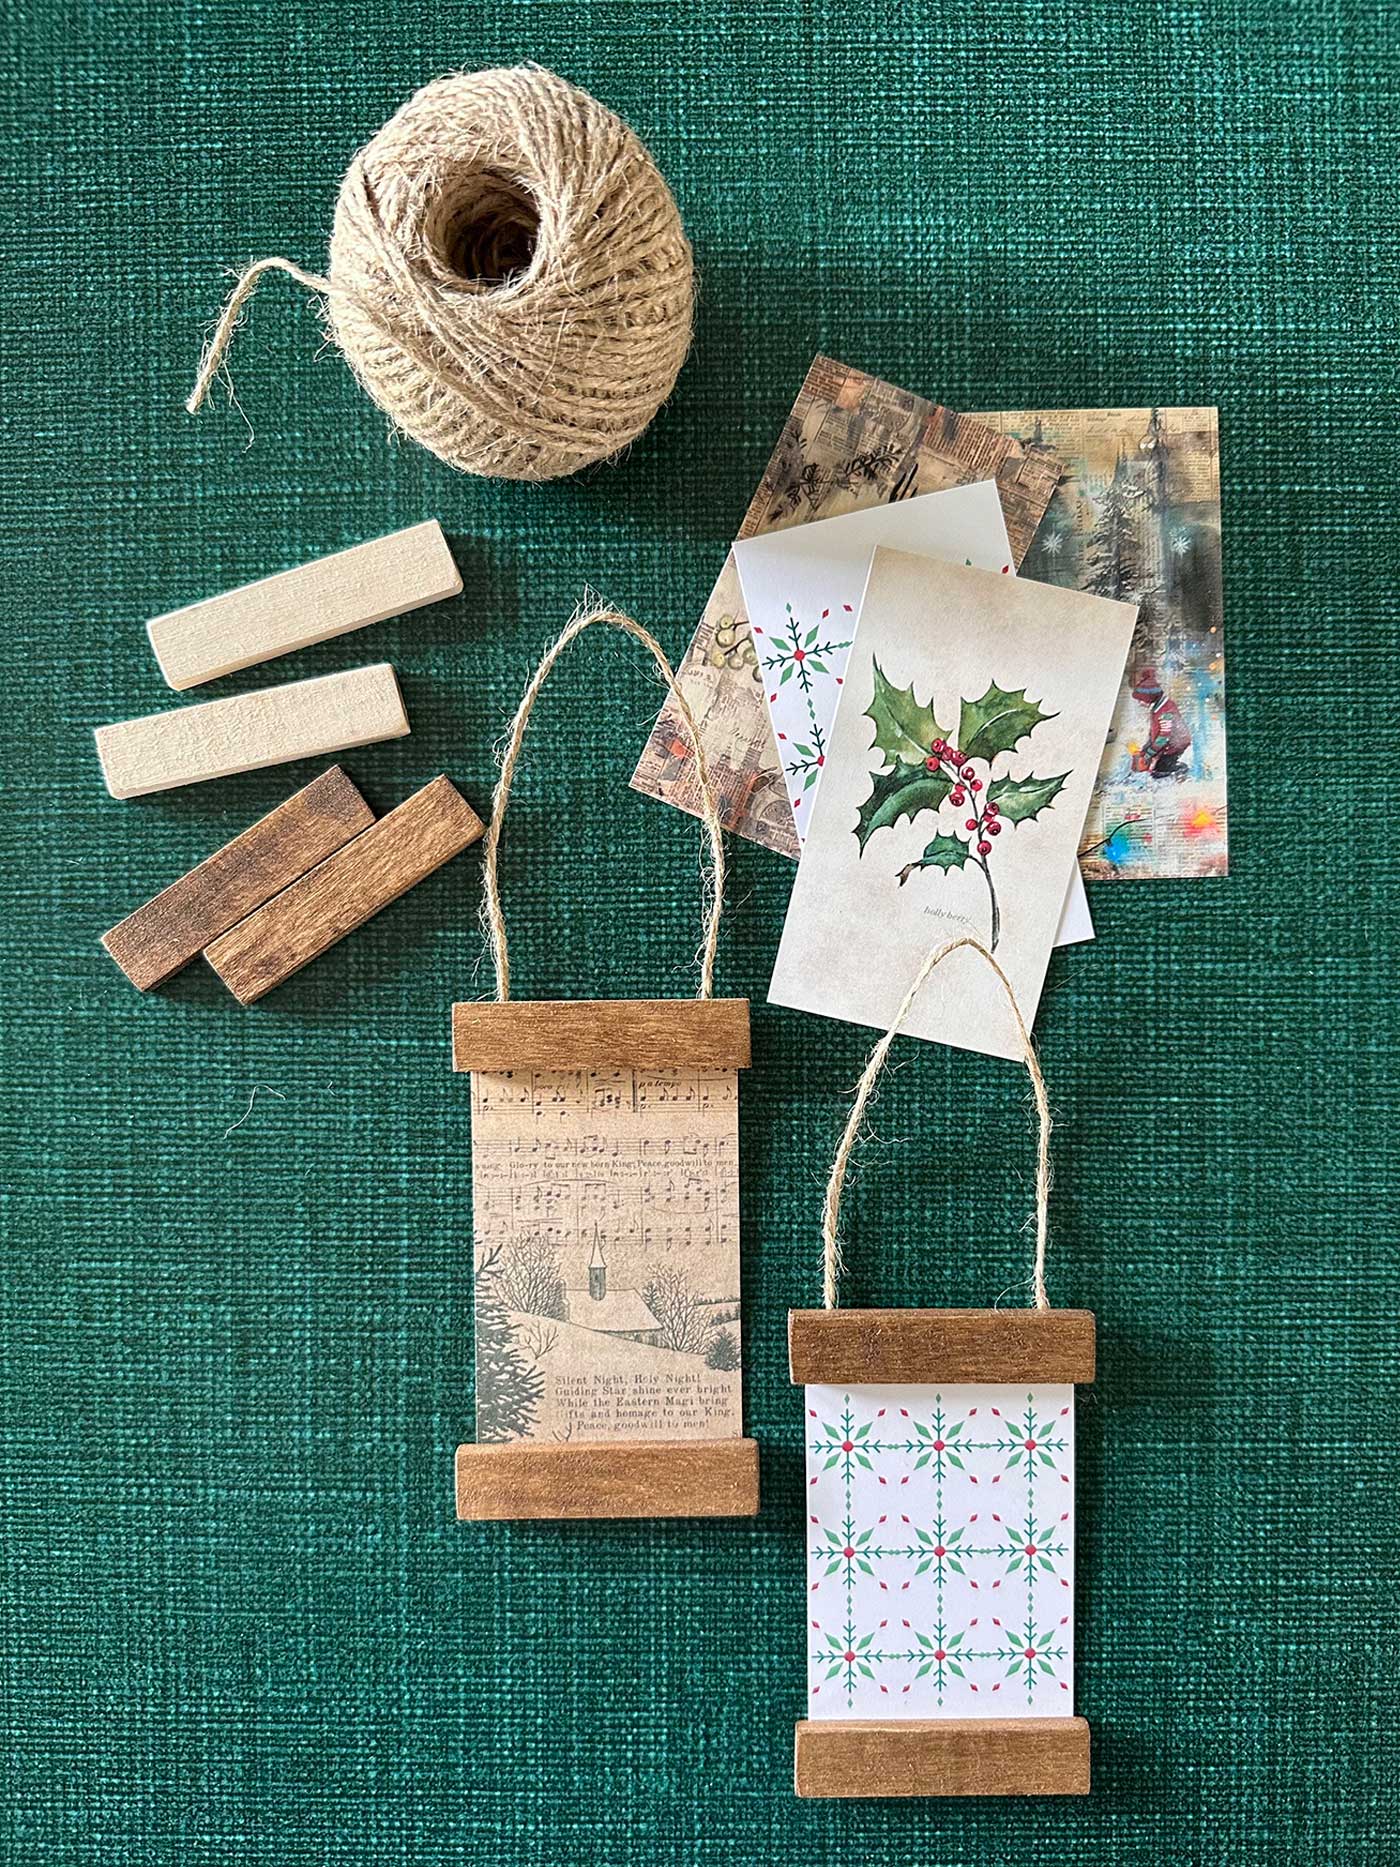
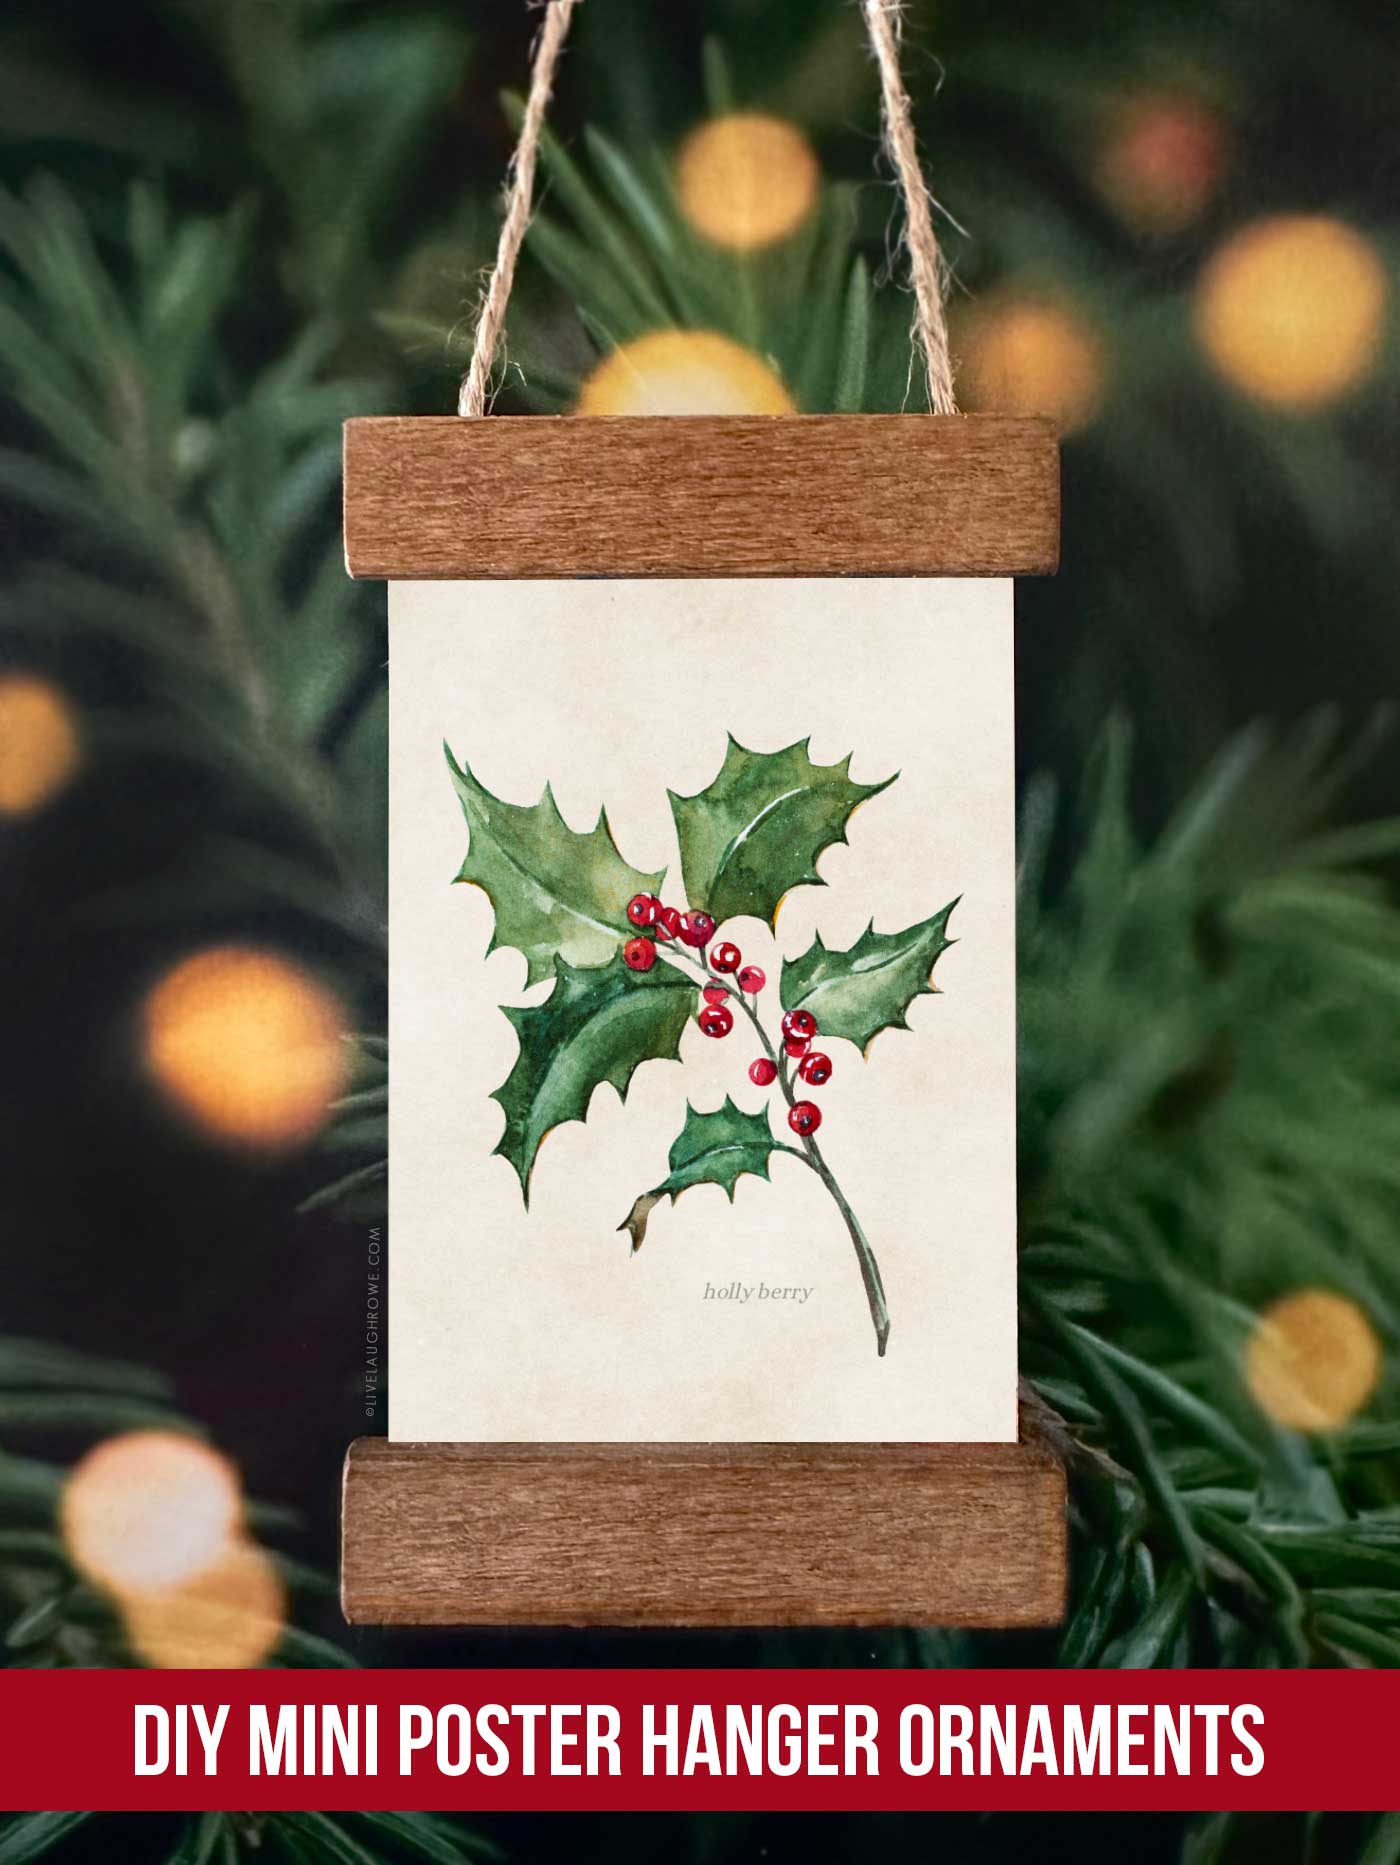
This year, I decided to create these Mini Poster Hanger Ornaments. If you’ve seen those trendy wooden poster hangers used for large prints, imagine them teeny-tiny — like the adorably small ornament version you never knew you needed. They’re a little rustic, easy to customize, and simple enough to make in an afternoon.
Whether you use the business-card-size printables I’m sharing or create your own mini artwork (kids’ drawings, vintage images, scrapbook papers, old Christmas cards… so many possibilities!), these little ornaments add such charming personality to your holiday décor.
Why You’ll Love These Handmade Christmas Ornaments
These Mini Poster Hanger Ornaments check so many of the boxes we all crave during the holiday crafting season:
• They’re incredibly easy to make. Seriously — just a few supplies, a little glue, and you’re on your way.
• They have that warm, rustic, handmade look. The stained wood strips paired with twine and vintage-style prints feel cozy and nostalgic.
• They’re perfect for gifting. Tuck one into a stocking, tie one onto a wrapped gift, or use them as small hostess gifts. Handmade ornaments are always a win.
• They’re customizable. Use my printables, or replace them with photos, patterns, or personalized art. You can even create themed sets!
• They’re lightweight. Perfect for trees, garlands, wreaths, and even gift bags.
These may be small, but they pack a whole lot of charm.
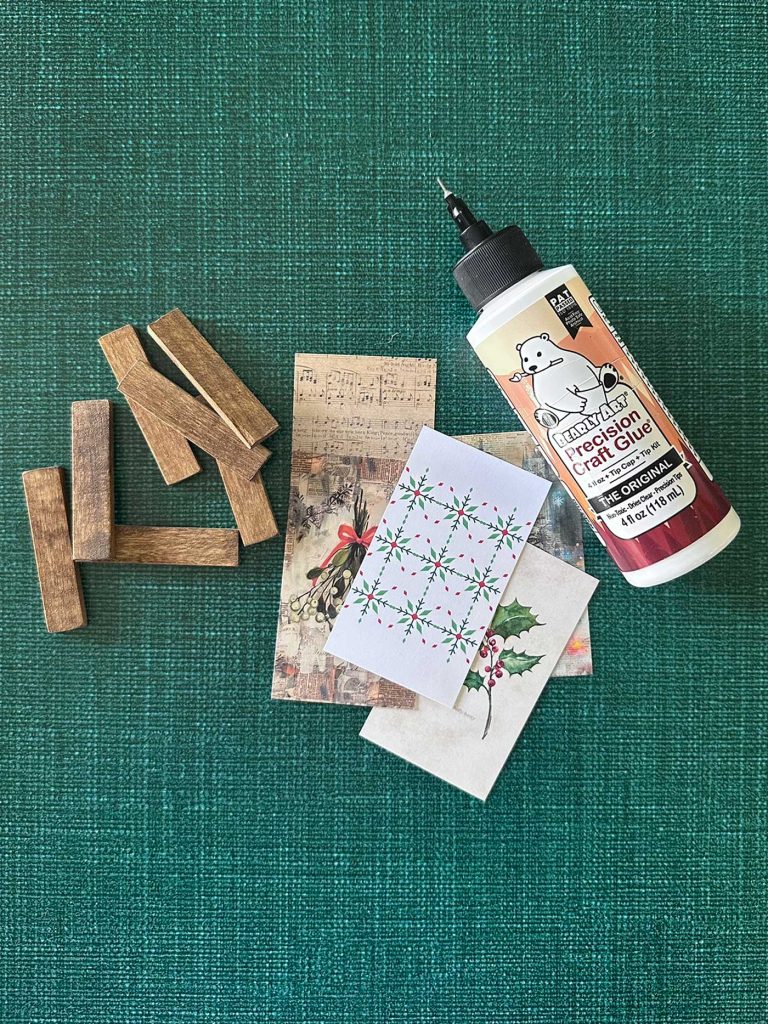
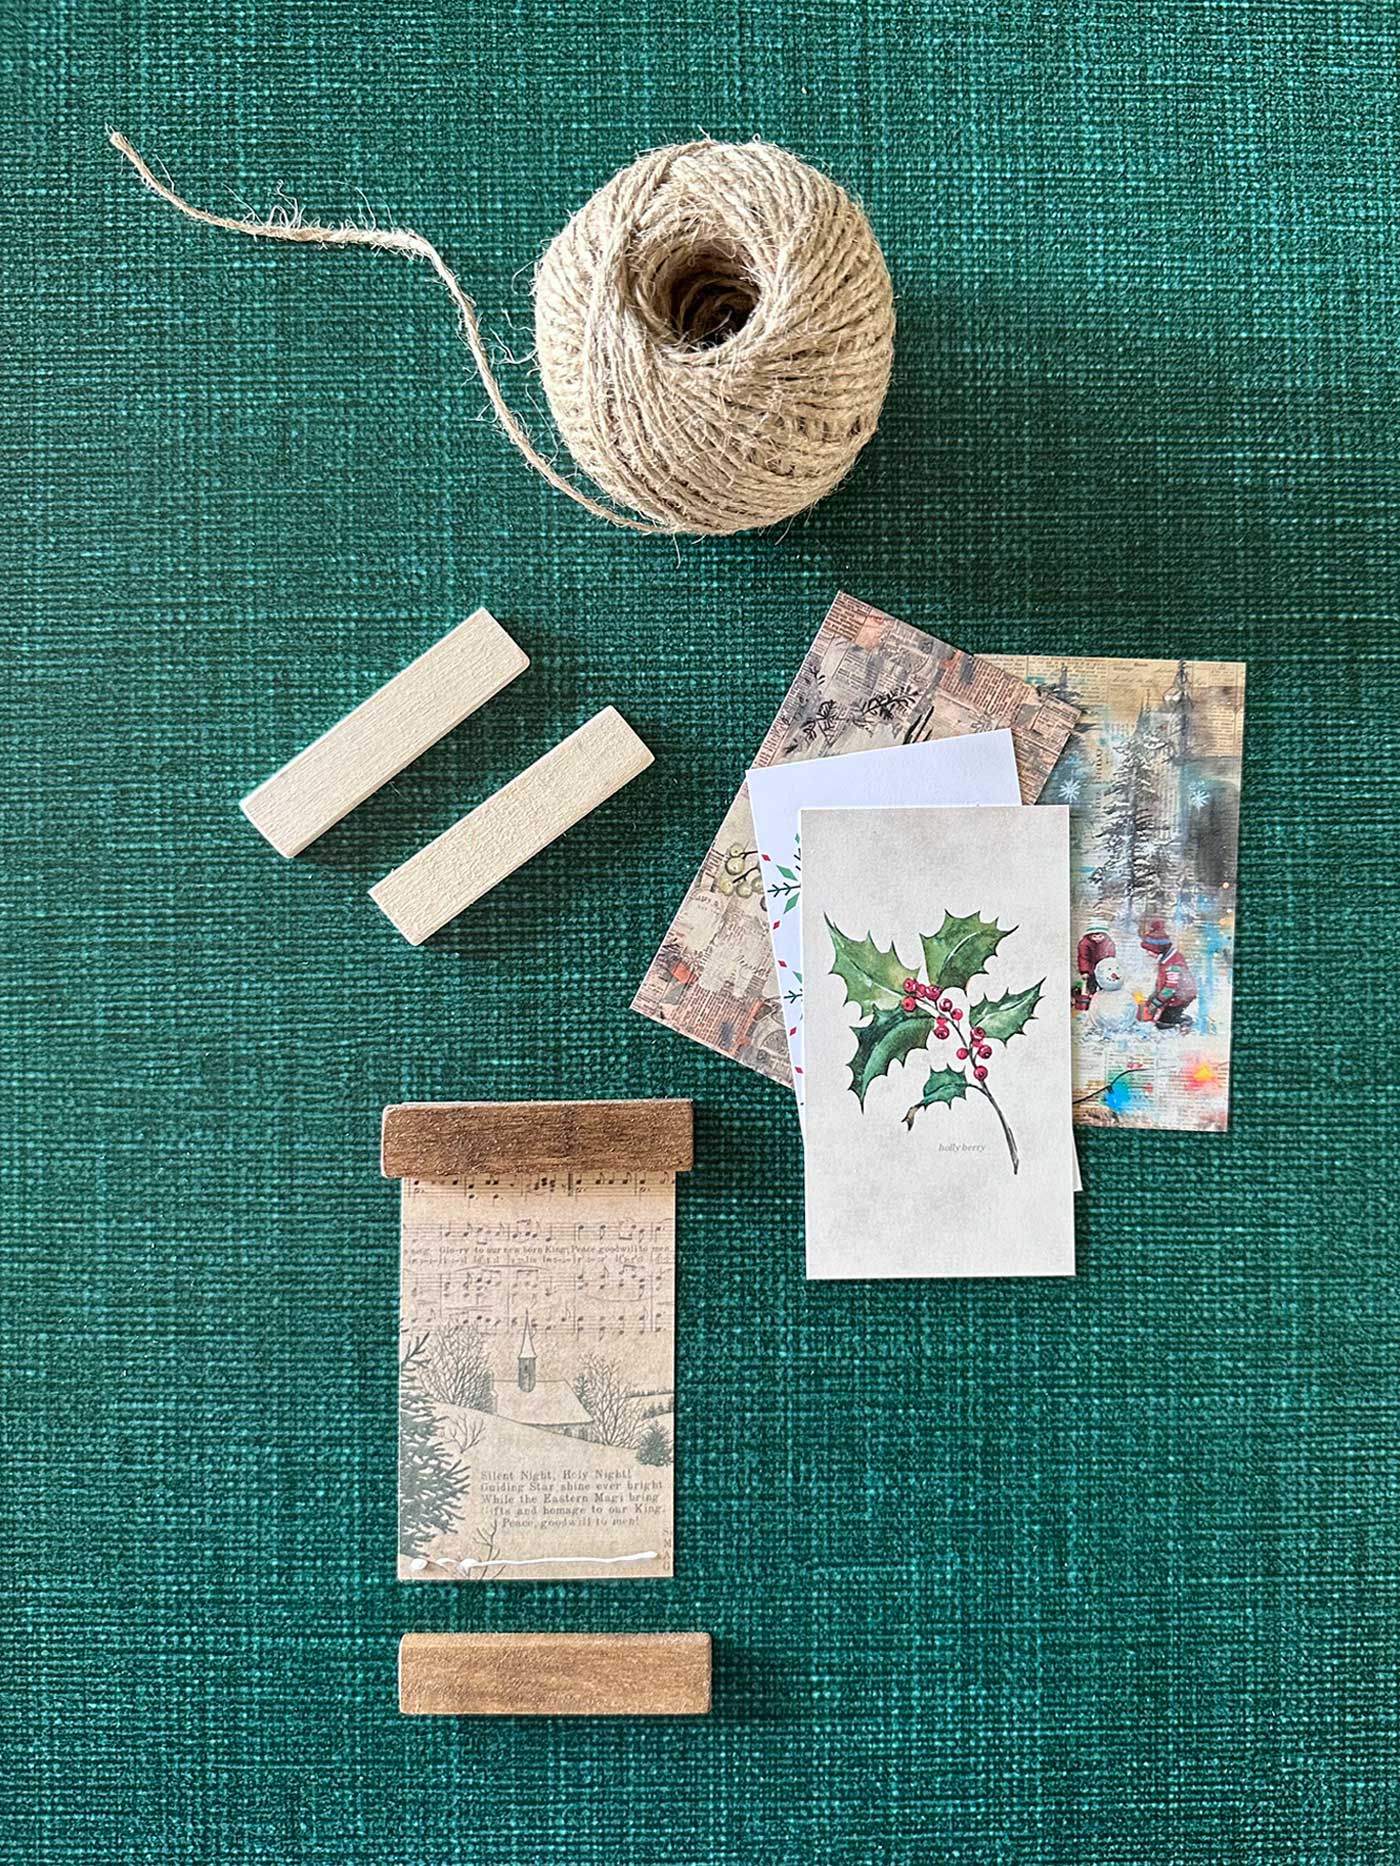
Supplies You’ll Need to Make Mini Poster Hanger Ornaments
Here’s what you’ll need to bring your handmade Christmas ornaments to life:
- Wood Craft Sticks or Strips (cut to approximately 2–3 inches; craft wood works beautifully). Spruce Wood or Wood Sticks
- Stain or acrylic paint (optional, but gives the wood a pretty finished look)
- Printables (mine are sized as business cards, but any small artwork works)
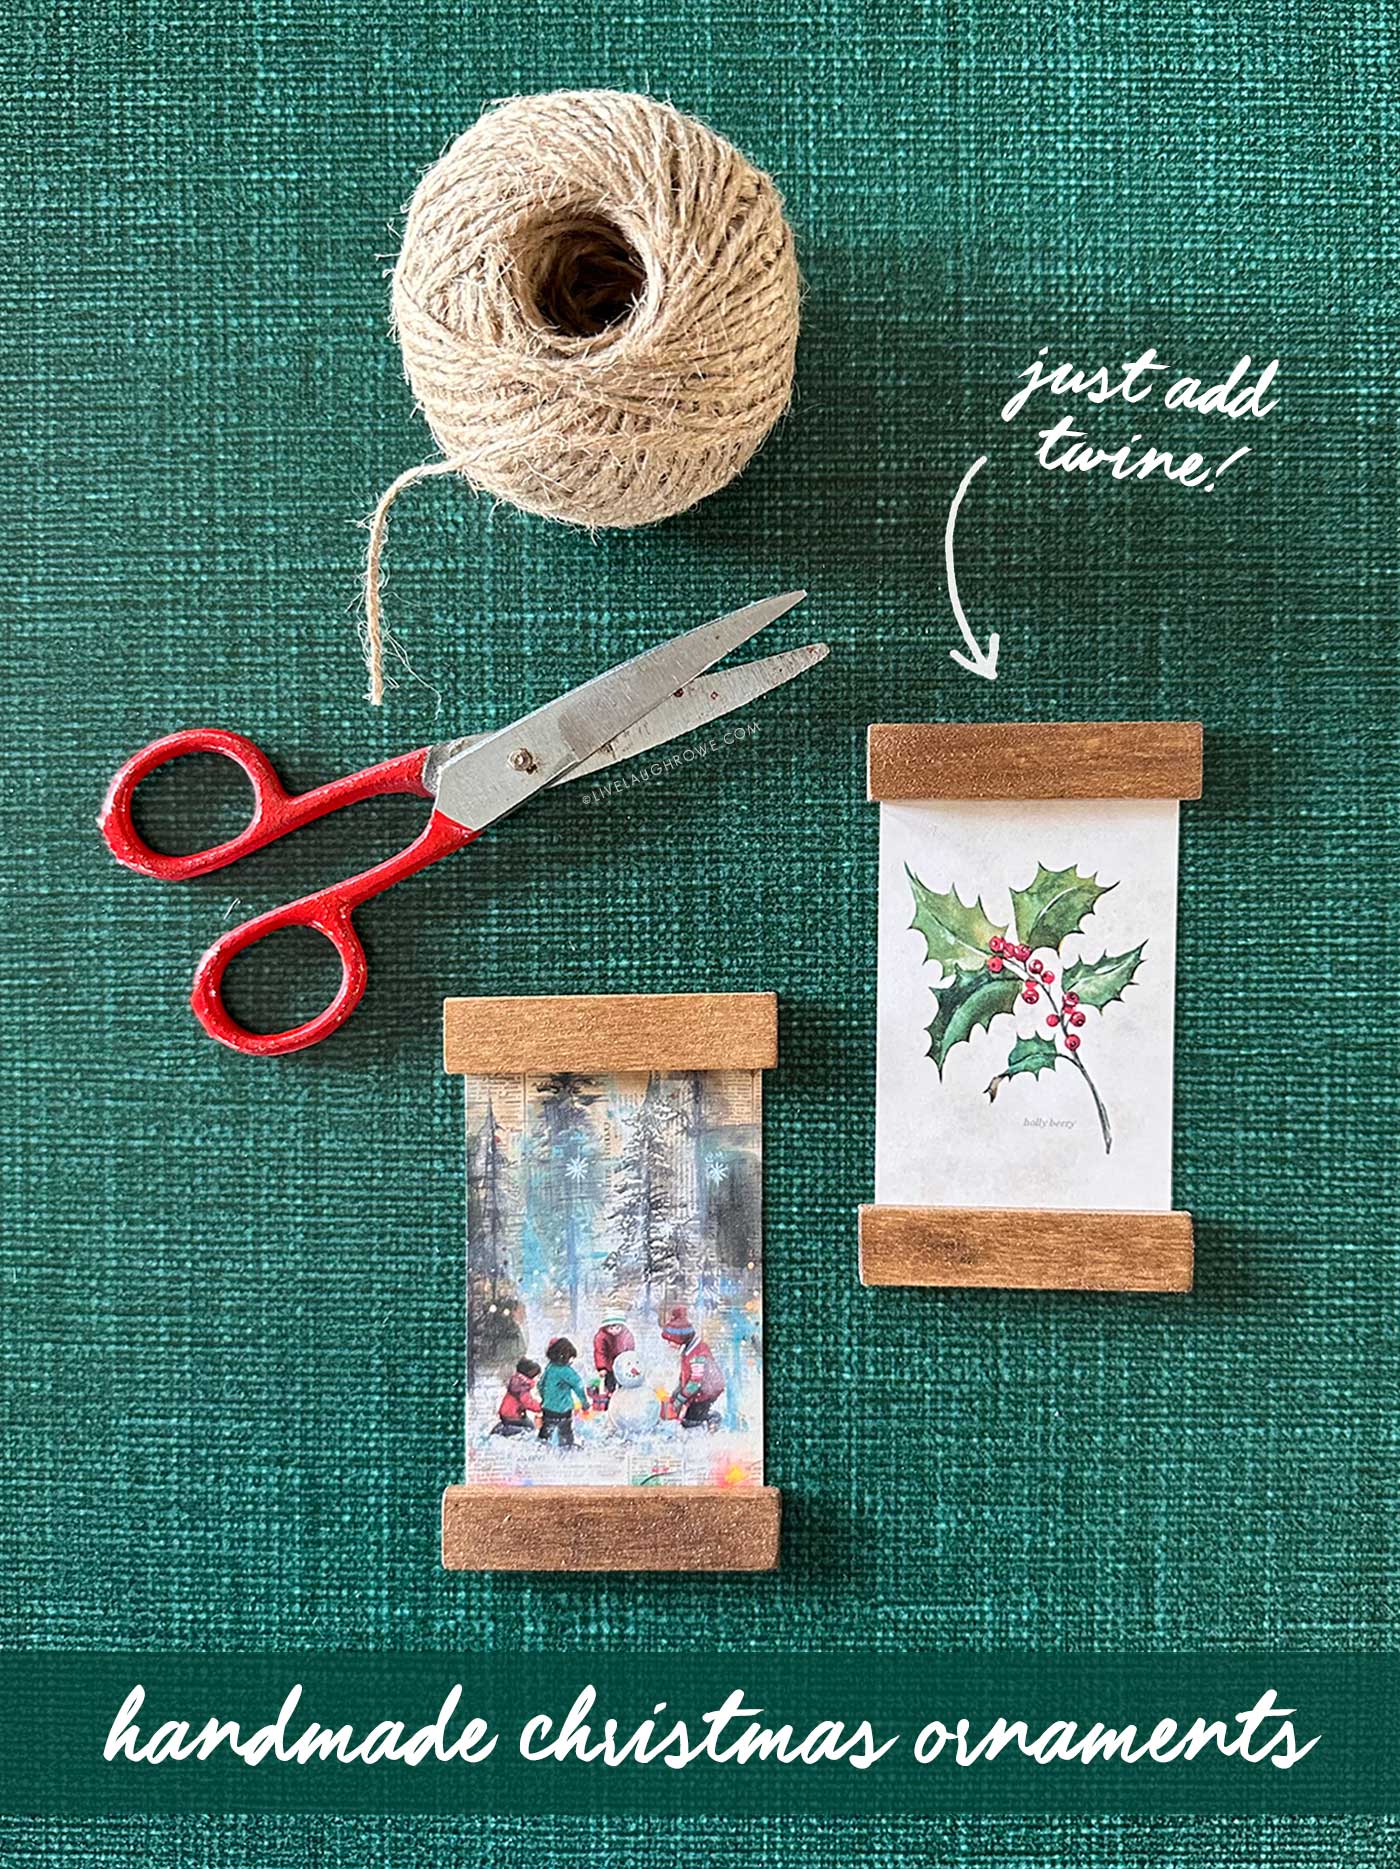
- Twine or jute for hanging
- Craft Glue. This is my favorite craft glue.
- Scissors
- Paper Cutter (optional)
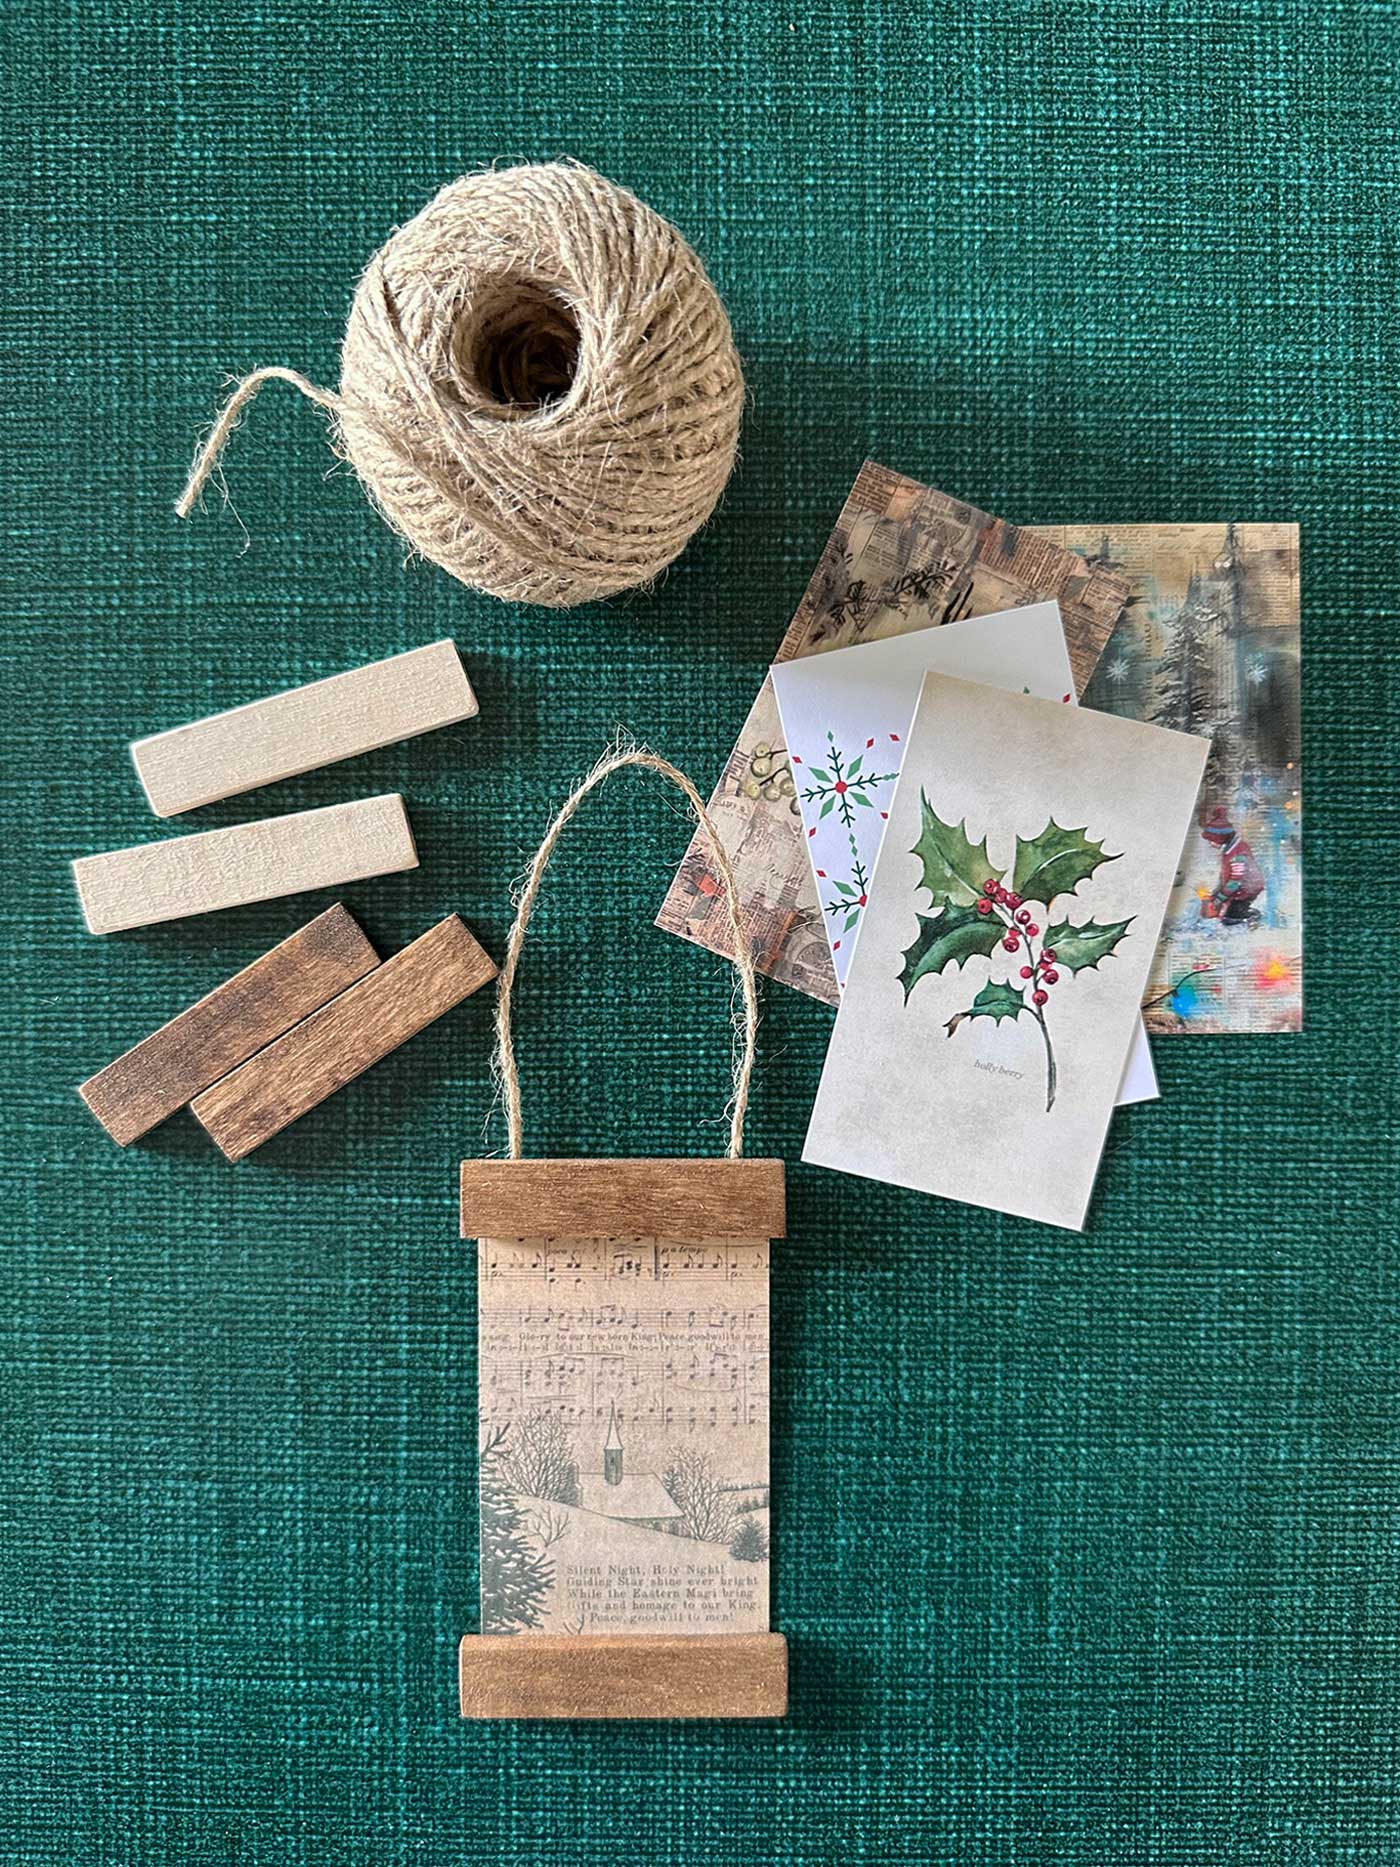
Getting Started: Preparing Your Wood Pieces
Before assembly, prepare your wood. I purchased a 3/16″ x 1/2″ x 24″ (2-pack) bass strip from Hobby Lobby.
You’ll need two pieces per ornament: one for the top and one for the bottom, just like a miniature hanging poster.
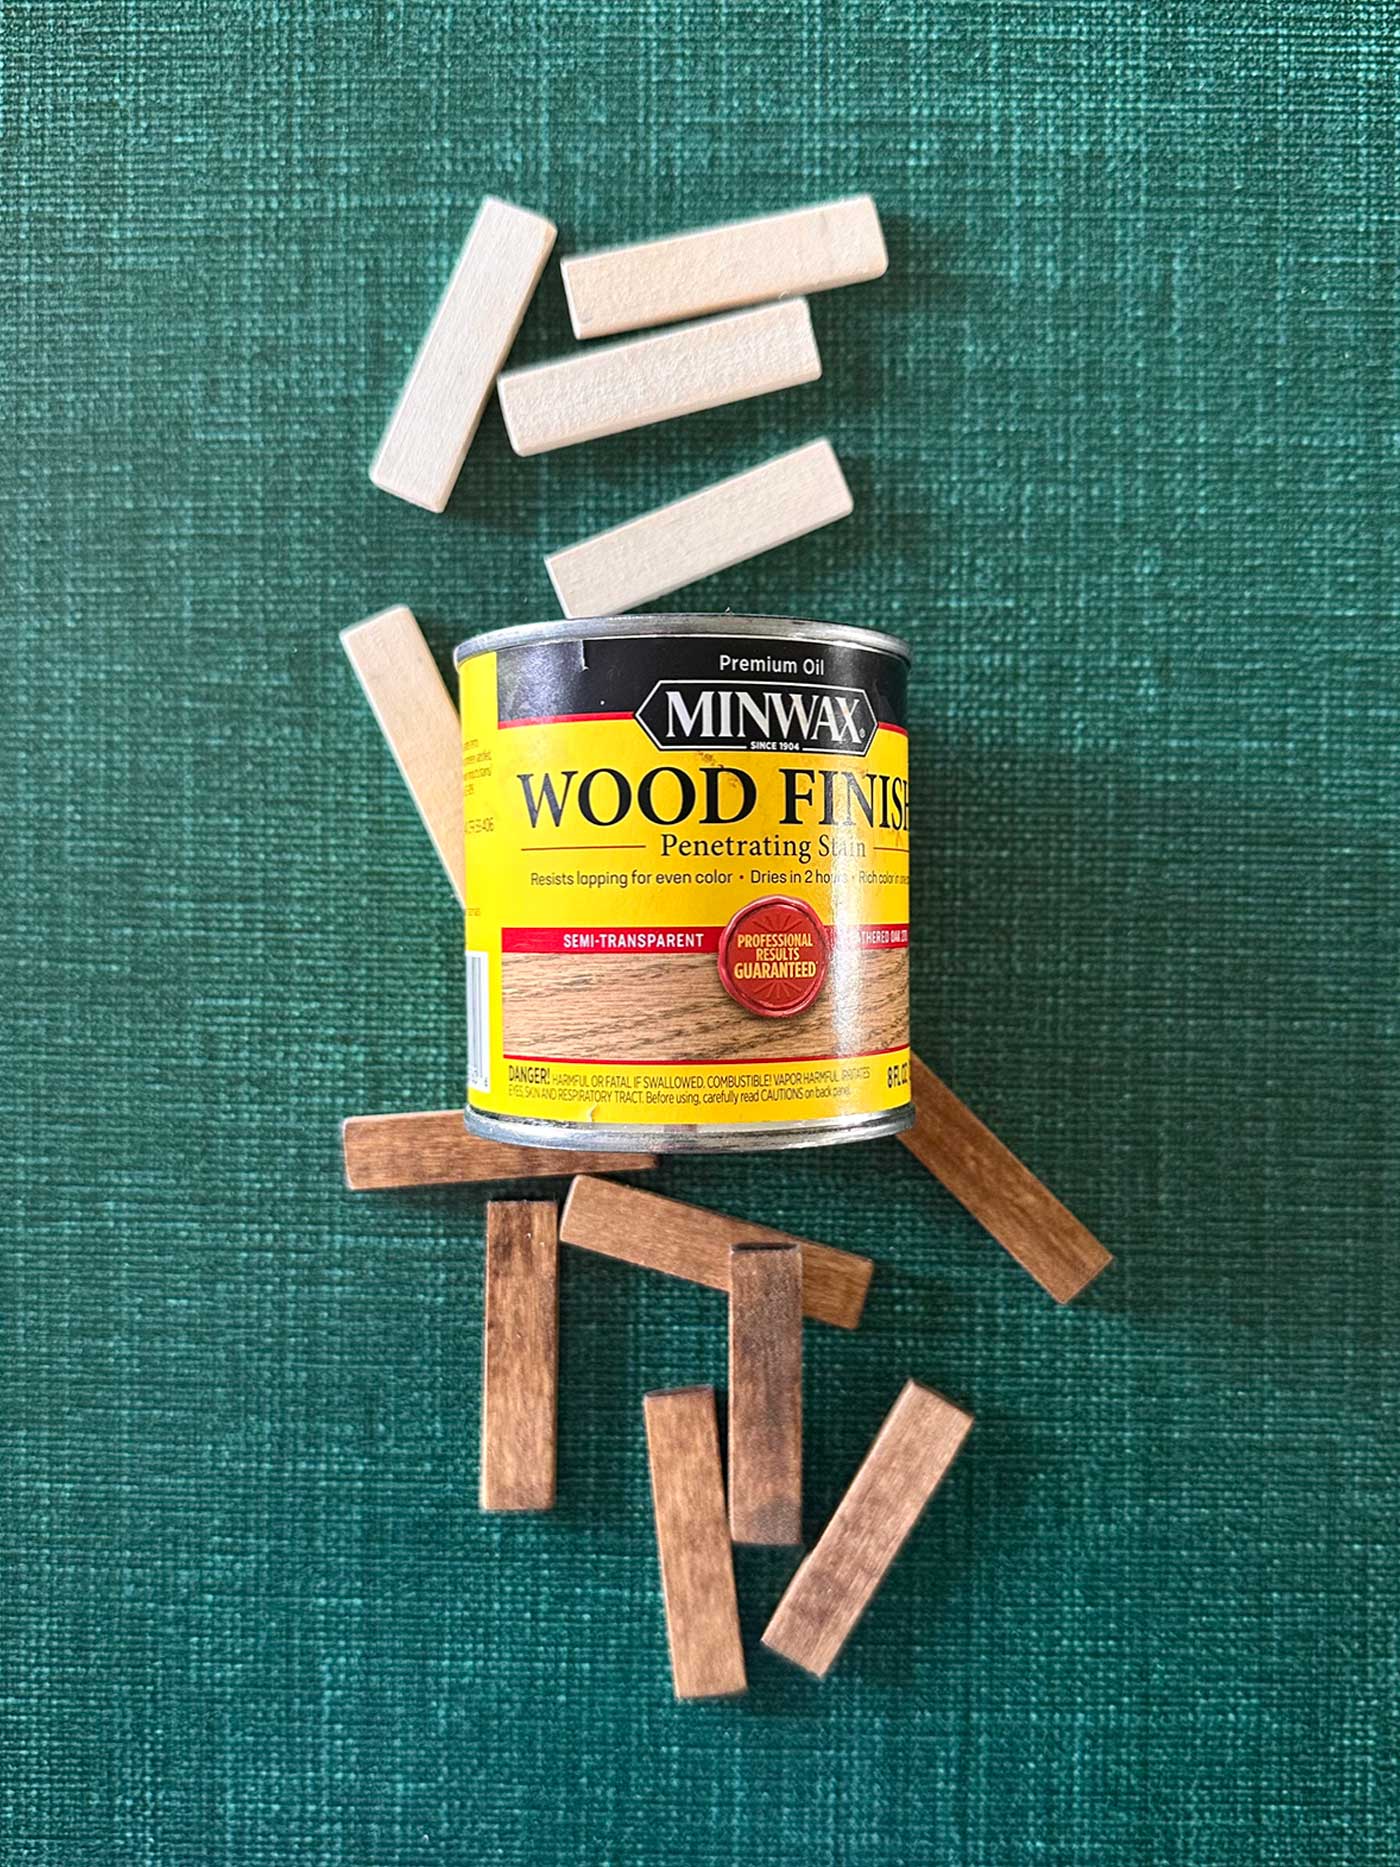
- Cut your wood strips if you haven’t already. We used a Dremel to cut them down into 2-1/8″ pieces. However, a hand saw would probably work too.
- Apply Stain or Paint, if desired. A warm medium-brown stain gives them that rich, rustic touch. Acrylic paint works too if you’re going for a more playful or colorful look. I used Minwas Provincial Wood Stain for mine.
Let them dry fully before moving on — your future self will thank you!
How to Assemble These Handmade Christmas Ornaments
These Mini Poster Hanger Ornaments come together quickly. Follow these simple steps:
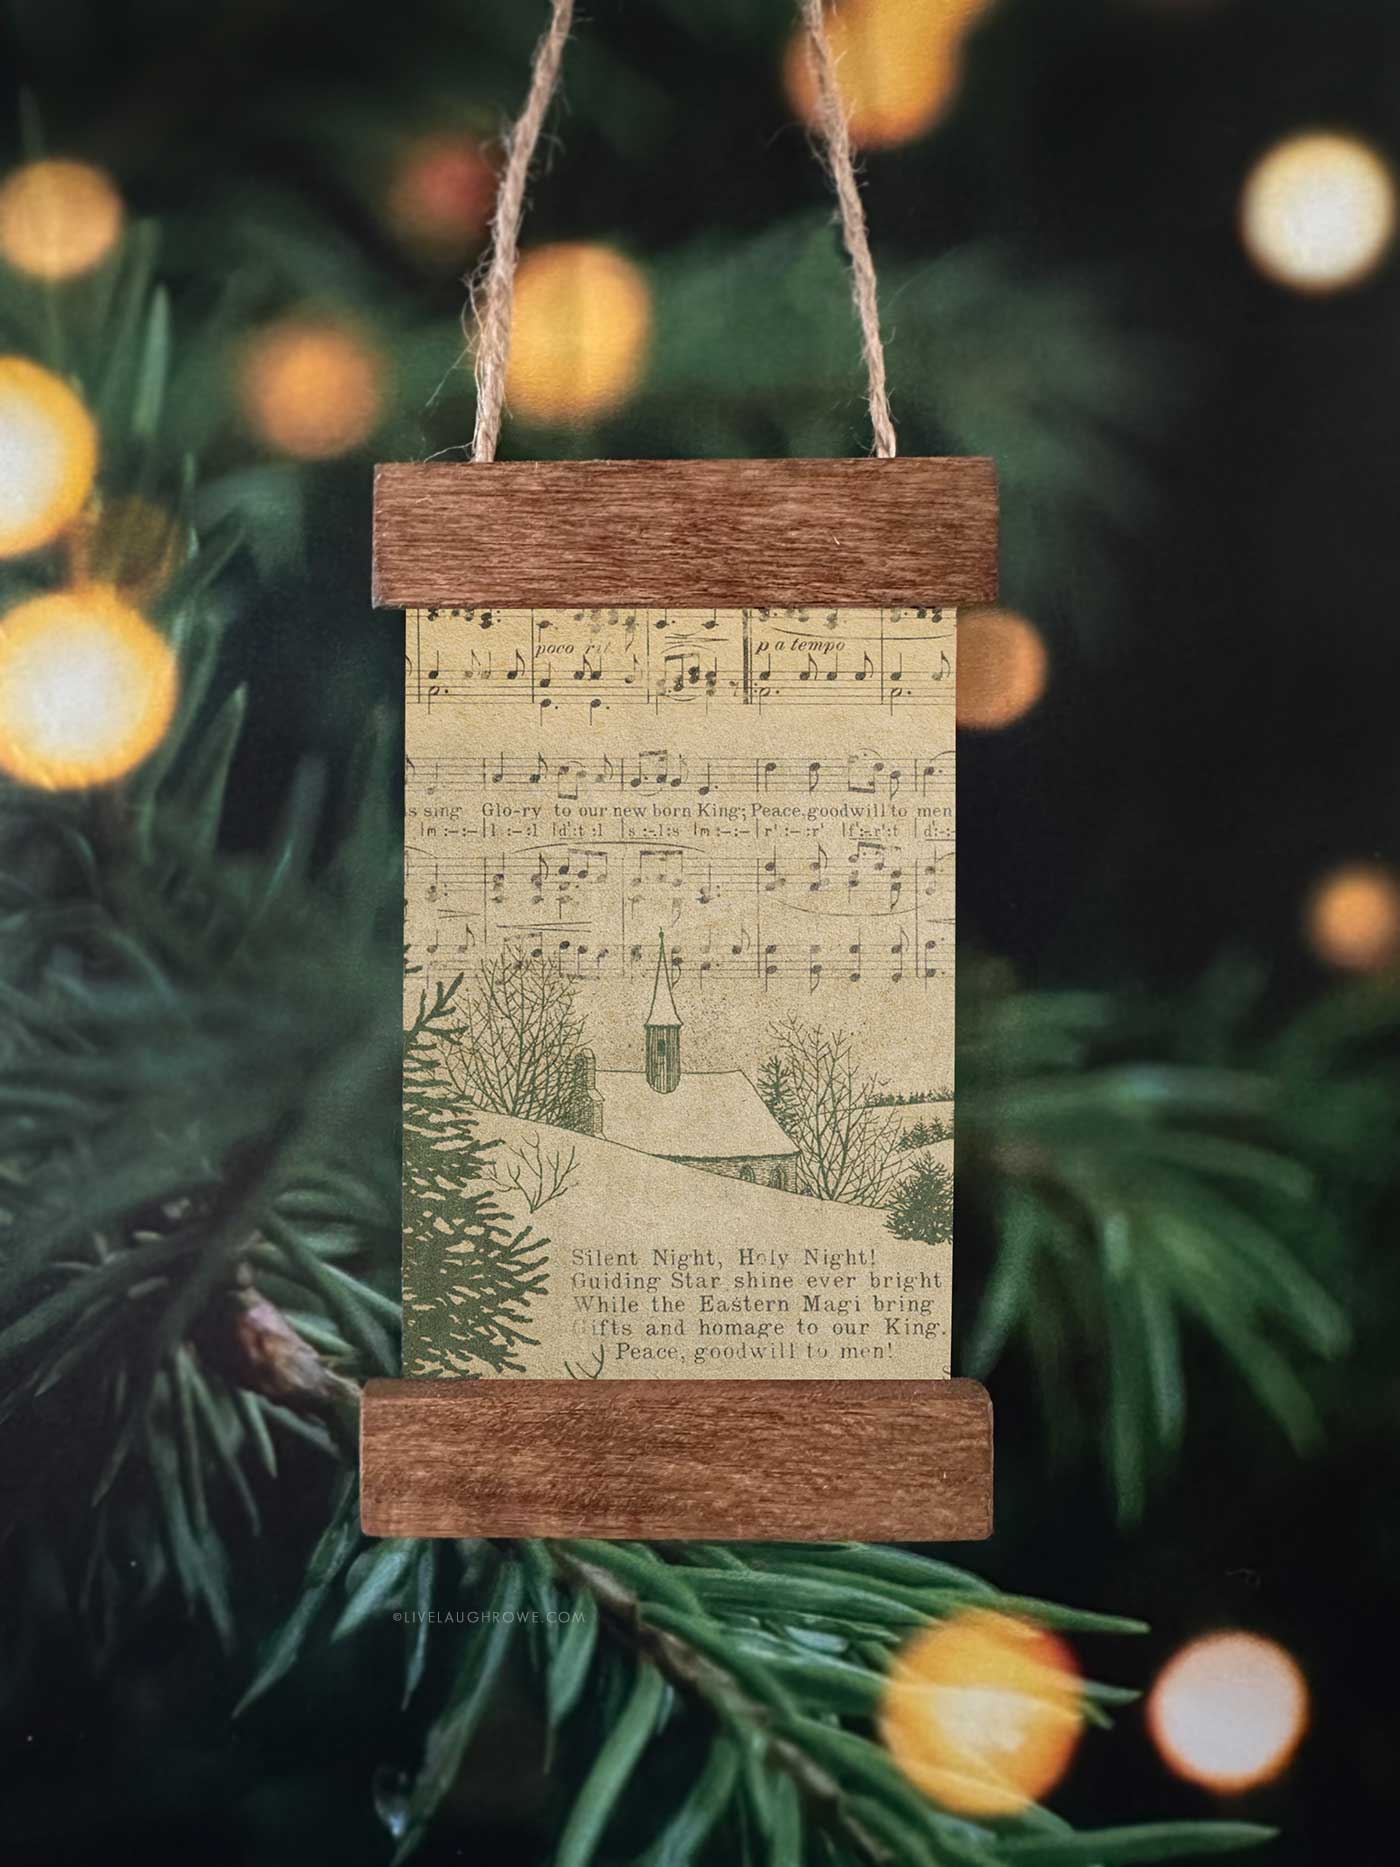
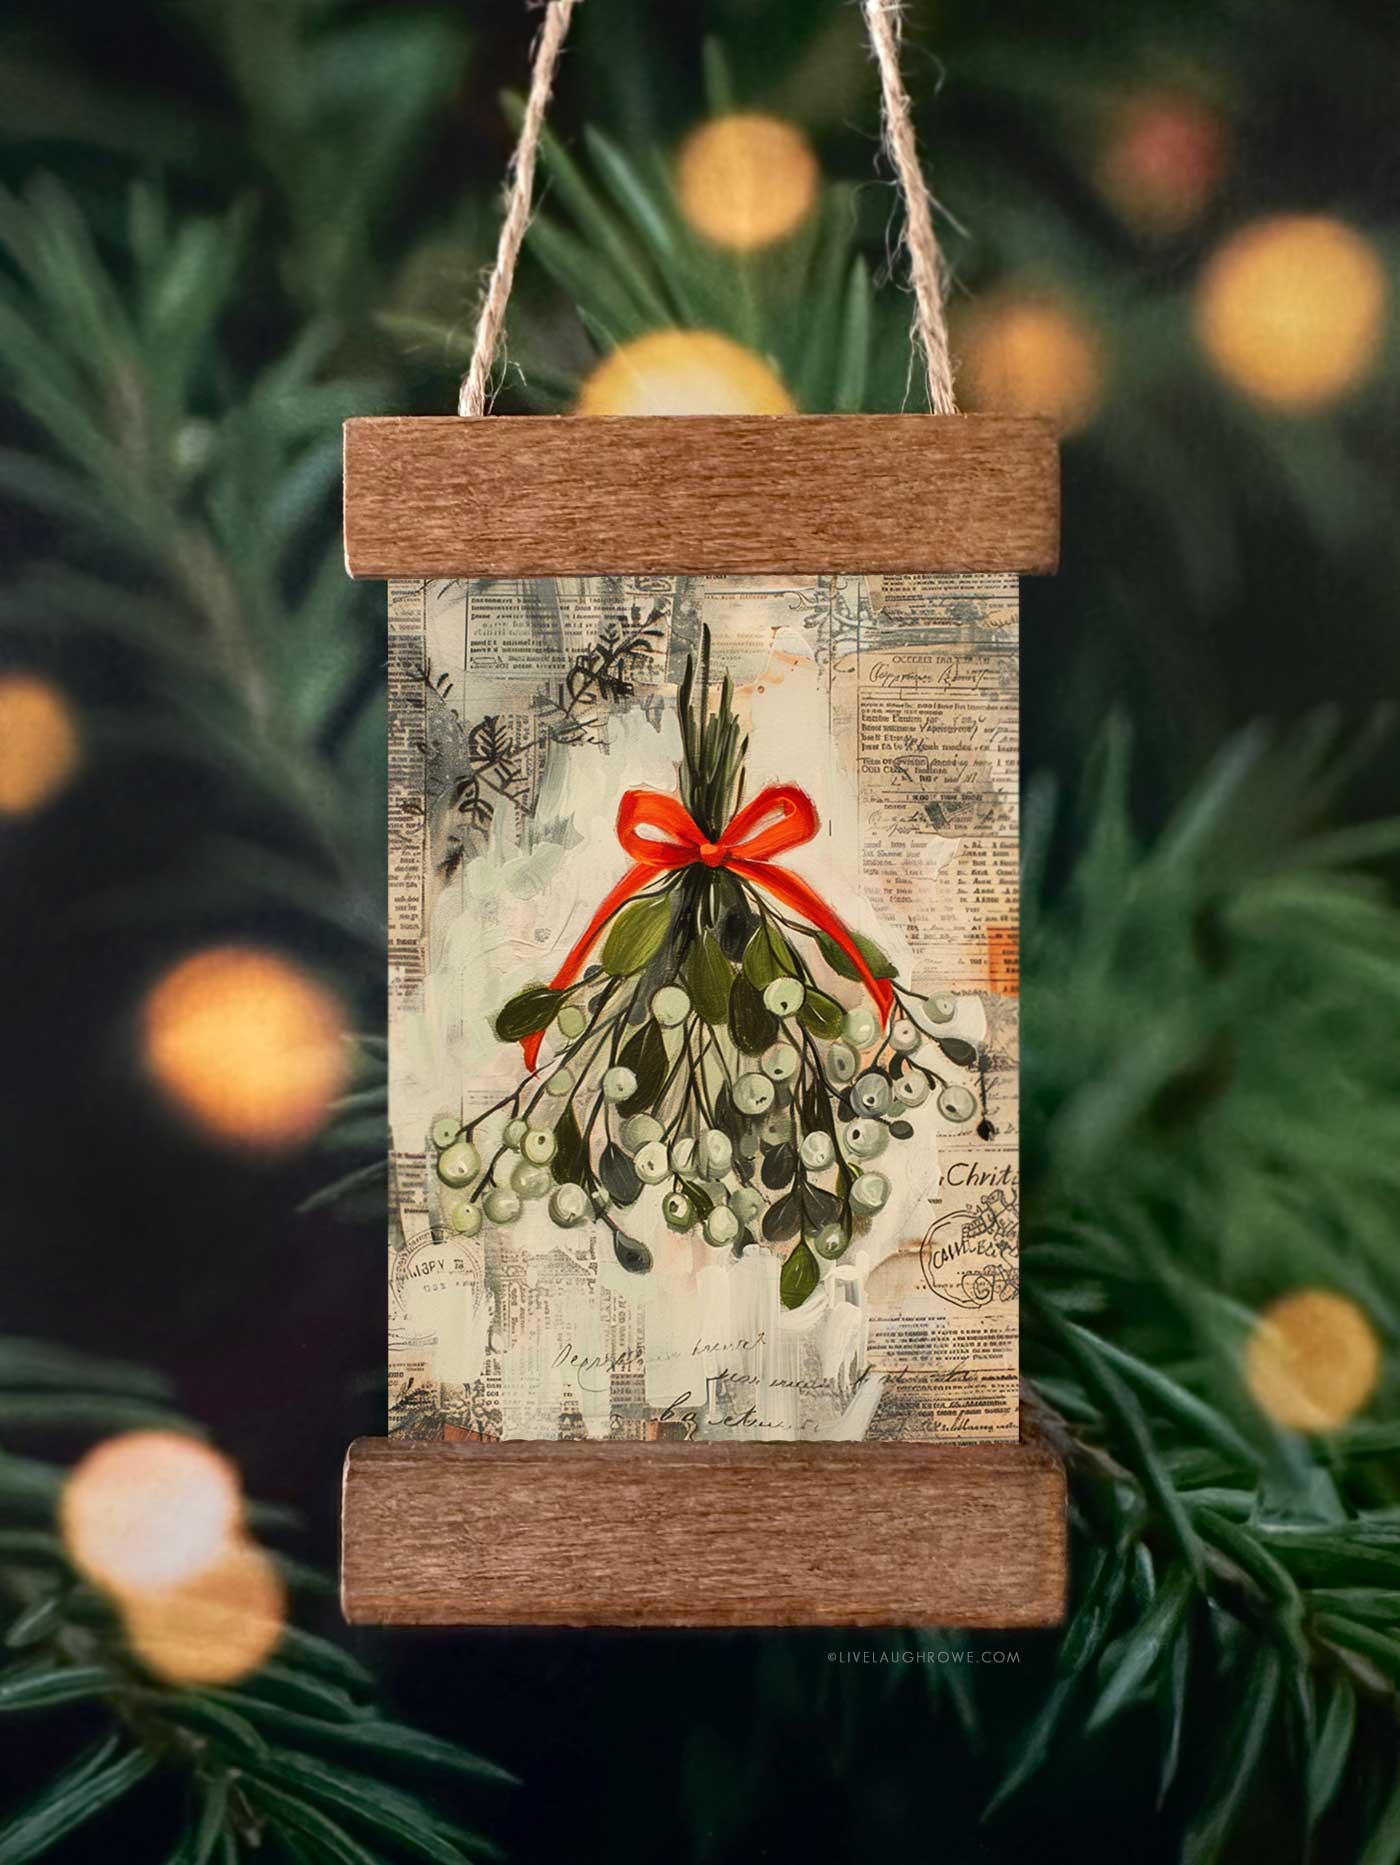
Step 1: Choose Your Artwork
Select one of the business-card-size printables (or your own artwork). Trim it as needed to keep the edges neat and clean.
Step 2: Attach the Top Wood Strip
Add a thin bead of glue to the top of the artwork.
Press the top edge of your wood into the glued area.
Hold for a few seconds, then let it sit to cure.
(Clothespins work wonders here if you’re not using a fast-drying glue!)
Step 3: Add the Bottom Wood Strip
Repeat the process with the bottom edge of your artwork.
Glue, press, hold, and let it dry.
You’ll start to see your tiny poster hanger taking shape — and it’s ridiculously cute.
Step 4: Add Your Twine Hanger
Cut a short length of twine (about 8 inches). I tied a small know on each end, then glued each end to the back of the top wood strip to form a loop. For this step, I did use a high-temp glue gun.
Hold in place or clamp lightly until dry.
Step 5: Let Everything Dry Completely
Once your ornament is fully dry, it’s ready to hang or gift.
That’s it! Easy peasy (lemon squeezy), yet so charming.
Ideas for Personalizing Your Mini Poster Hanger Ornaments
These handmade Christmas ornaments are fun as-is, but personalization takes them to the next level. Here are some sweet ways to make them your own:
- Use old family photos for a nostalgic touch.
- Create kids’ artwork versions—grandparents love these.
- Print vintage Christmas illustrations (so many free public-domain options!).
- Use scrapbook paper to make patterned ornaments.
- Add a date on the back to make it a keepsake.
- Try themed sets: winter scenes, holly, snowflakes, Santas, or woodland animals.
This is also a wonderful project for a craft night or a fun holiday activity with friends.
Displaying Your Handmade Ornaments
Mini Poster Hanger Ornaments look adorable in so many places:
- On your Christmas tree
- Attached to wrapped gifts
- As part of a holiday garland
- Hung on a wreath
- Styled in a bowl for festive décor
- Tucked into place settings for a Christmas dinner
Their small size makes them easy to integrate into any holiday decorating style you already love—rustic, vintage, modern, minimalist, or whimsical. They just work.
A Few Tips for Best Results
A couple of extra notes to help your miniature poster hangers turn out beautifully:
- Cardstock paper works better for stability.
- Don’t over-glue — a little goes a long way.
- If your wood pieces shift, use clothespins to keep everything aligned.
- Allow the stain to dry completely before gluing anything to prevent smudging or warping.
- Make several at once — these ornaments are quick, and batch-making is satisfying!

Download the Mini Poster Prints
Ready to get crafty? Download the mini poster printables below and print as many as you’d like for this DIY. They’re perfectly sized for these mini poster hanger ornaments, but making your own little designs is such a fun way to personalize them, too. I did include one black one if youre feeling extra artsy or you want your kids/grands to make something for you.
- Format: PDF
- Size: 2″x3.5”
- Free for personal use only (please don’t resell or redistribute)
A quick reminder — all printables and downloads from Live Laugh Rowe are for personal use only. Please don’t edit, sell, or share them as your own, whether in digital or printed form.
Download Mini Poster Printables
Wrapping Up Your Handmade Christmas Ornaments
There’s something truly special about slowing down and making a few handmade Christmas ornaments for the season. These Mini Poster Hanger Ornaments are simple, sweet, and wonderfully customizable — a craft you can enjoy alone with a cup of cocoa or turn into a fun activity with family or friends.
And once they’re on your tree? Instant charm, nostalgia, and cheer.
I can’t wait to see what you create with these! 🎄💛
Feel free to tag me if you share them — your creativity always inspires me.


Gina says
I can’t remember if I already commented about these, but they are adorable!