
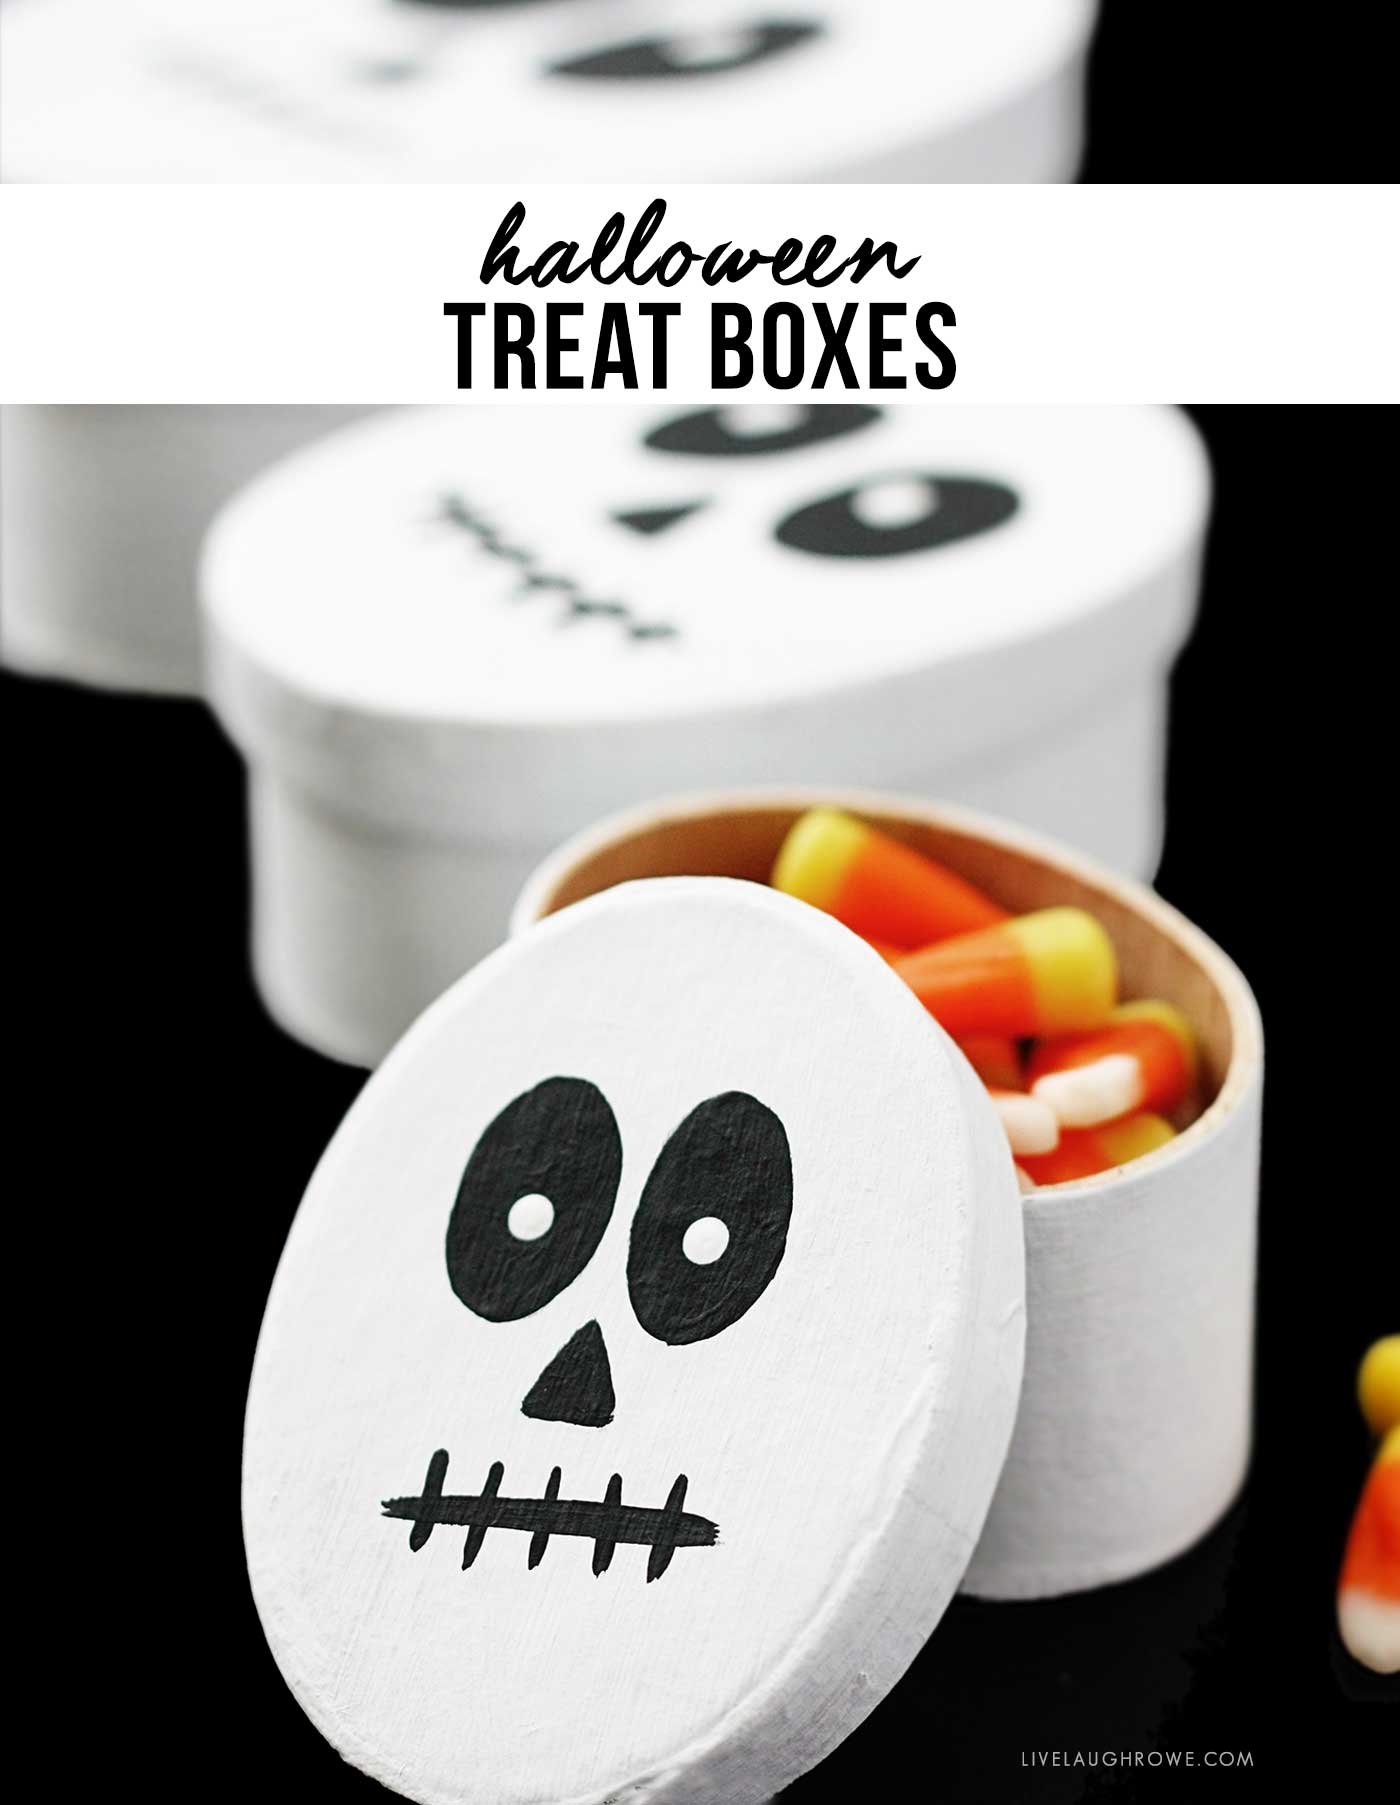
Create a DIY Halloween Treat Box with a cute skeleton design! Perfect for candy, party favors, or gifts for neighbors. These treat boxes are easy, fun, and spooktacular.
Halloween is creeping around the corner, and while I’ll admit right up front that I’m not the biggest Halloween fan, I do understand the excitement that surrounds the holiday. From costumes and candy to pumpkin patches and haunted houses, some people really live for this spooky season. Me? Well, let’s say my personal aesthetic tends to lean a little more toward cozy fall neutrals than cobwebs and skeletons.

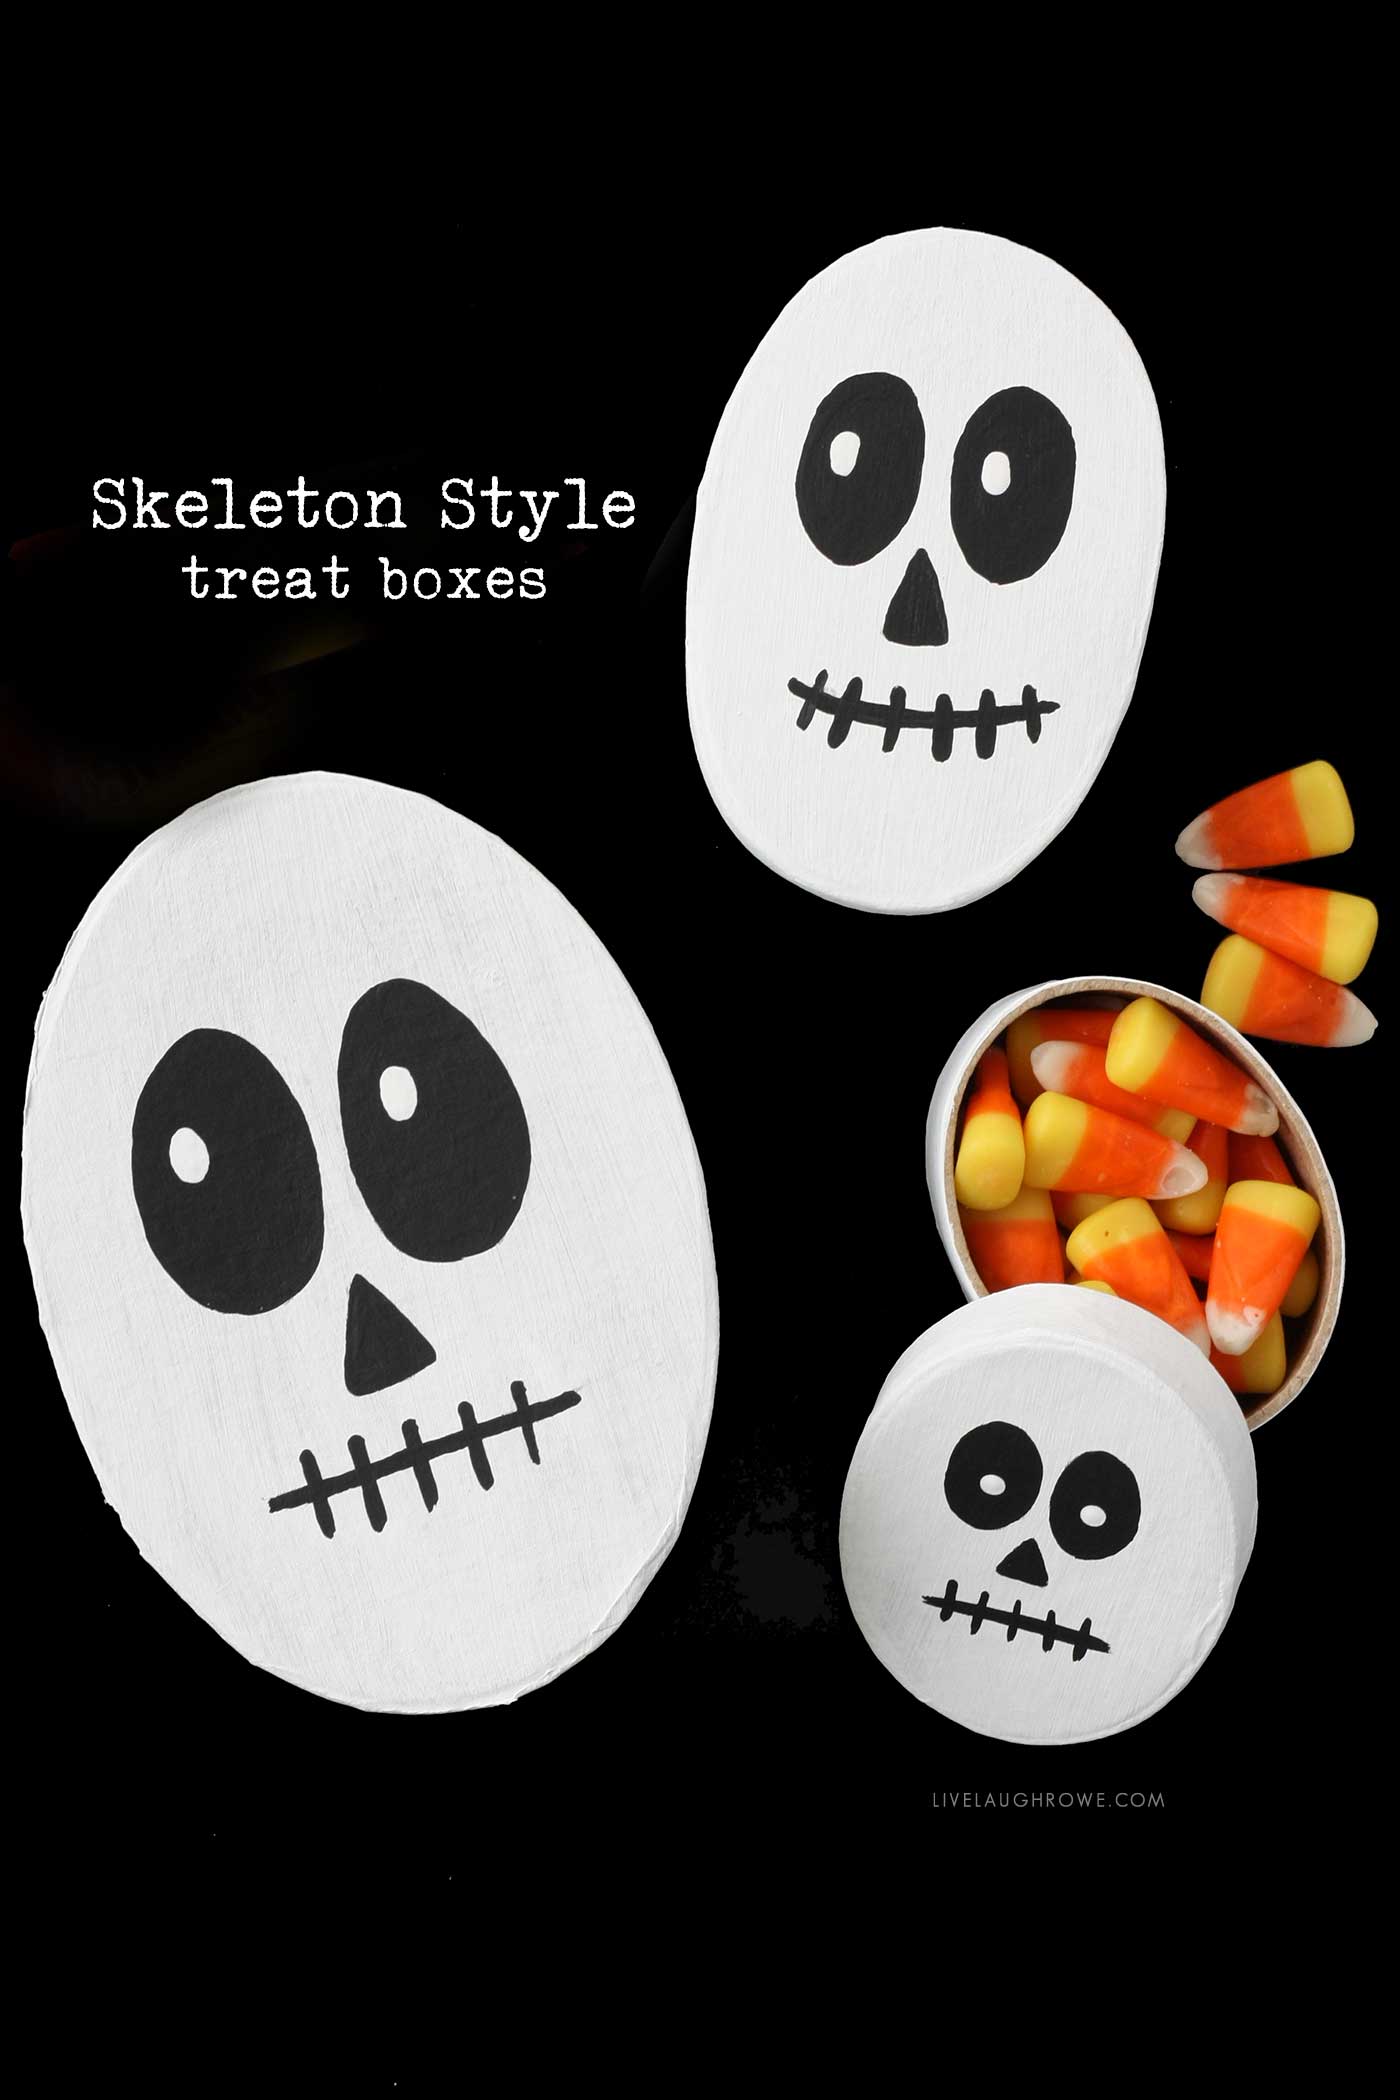
However, even I can’t deny how adorable these DIY Skeleton Halloween Treat Boxes turned out. They’re cute, quirky, and surprisingly simple to make. Plus, they make the perfect little gifts for friends, neighbors, co-workers, or classmates. So, if you’re a Halloween fanatic—or if you’re like me and just looking to dabble in a fun and festive project without going full-on spooky—this one’s for you.
Why Make a Halloween Treat Box?
Halloween is one of those holidays that practically begs for creativity. Candy exchanges, trunk-or-treat events, and classroom parties all offer opportunities to share something memorable. A handmade Halloween treat box adds a personal touch that a store-bought bag can’t match.
These Skeleton Treat Boxes are:
- Reusable – Reuse the boxes year after year.
- Customizable – Play with different skeleton faces, silly or scary.
- Giftable – Perfect for handing out treats in a thoughtful way.
- Budget-Friendly – Supplies are minimal and inexpensive.
Even if Halloween isn’t exactly your favorite holiday, these little creations make spreading joy during the season easy and fun.
Supplies You’ll Need for Your Halloween Treat Box
To get started, gather just a handful of supplies. Most of these can be found at your local craft store or ordered online (I’ve linked a few with affiliate links to make things even easier).
- Oval Paper Mache Boxes (various sizes)
- White Acrylic Paint
- Black Acrylic Paint
- Pencil
- Paint Brushes
- Sweet Treats (because what’s a treat box without candy?)
You don’t need fancy tools or professional skills—just a little patience and a dash of creativity.
Step 1: Paint the Box
The first step is simple: cover your paper mache box with a base coat of white acrylic paint. I recommend two coats for a nice, even finish. The white creates the perfect background for your skeleton design to really pop.
Pro tip: Let each coat dry thoroughly before applying the next. If you’re crafting with kids, this is a great opportunity for a snack or dance break while waiting for the paint to dry.
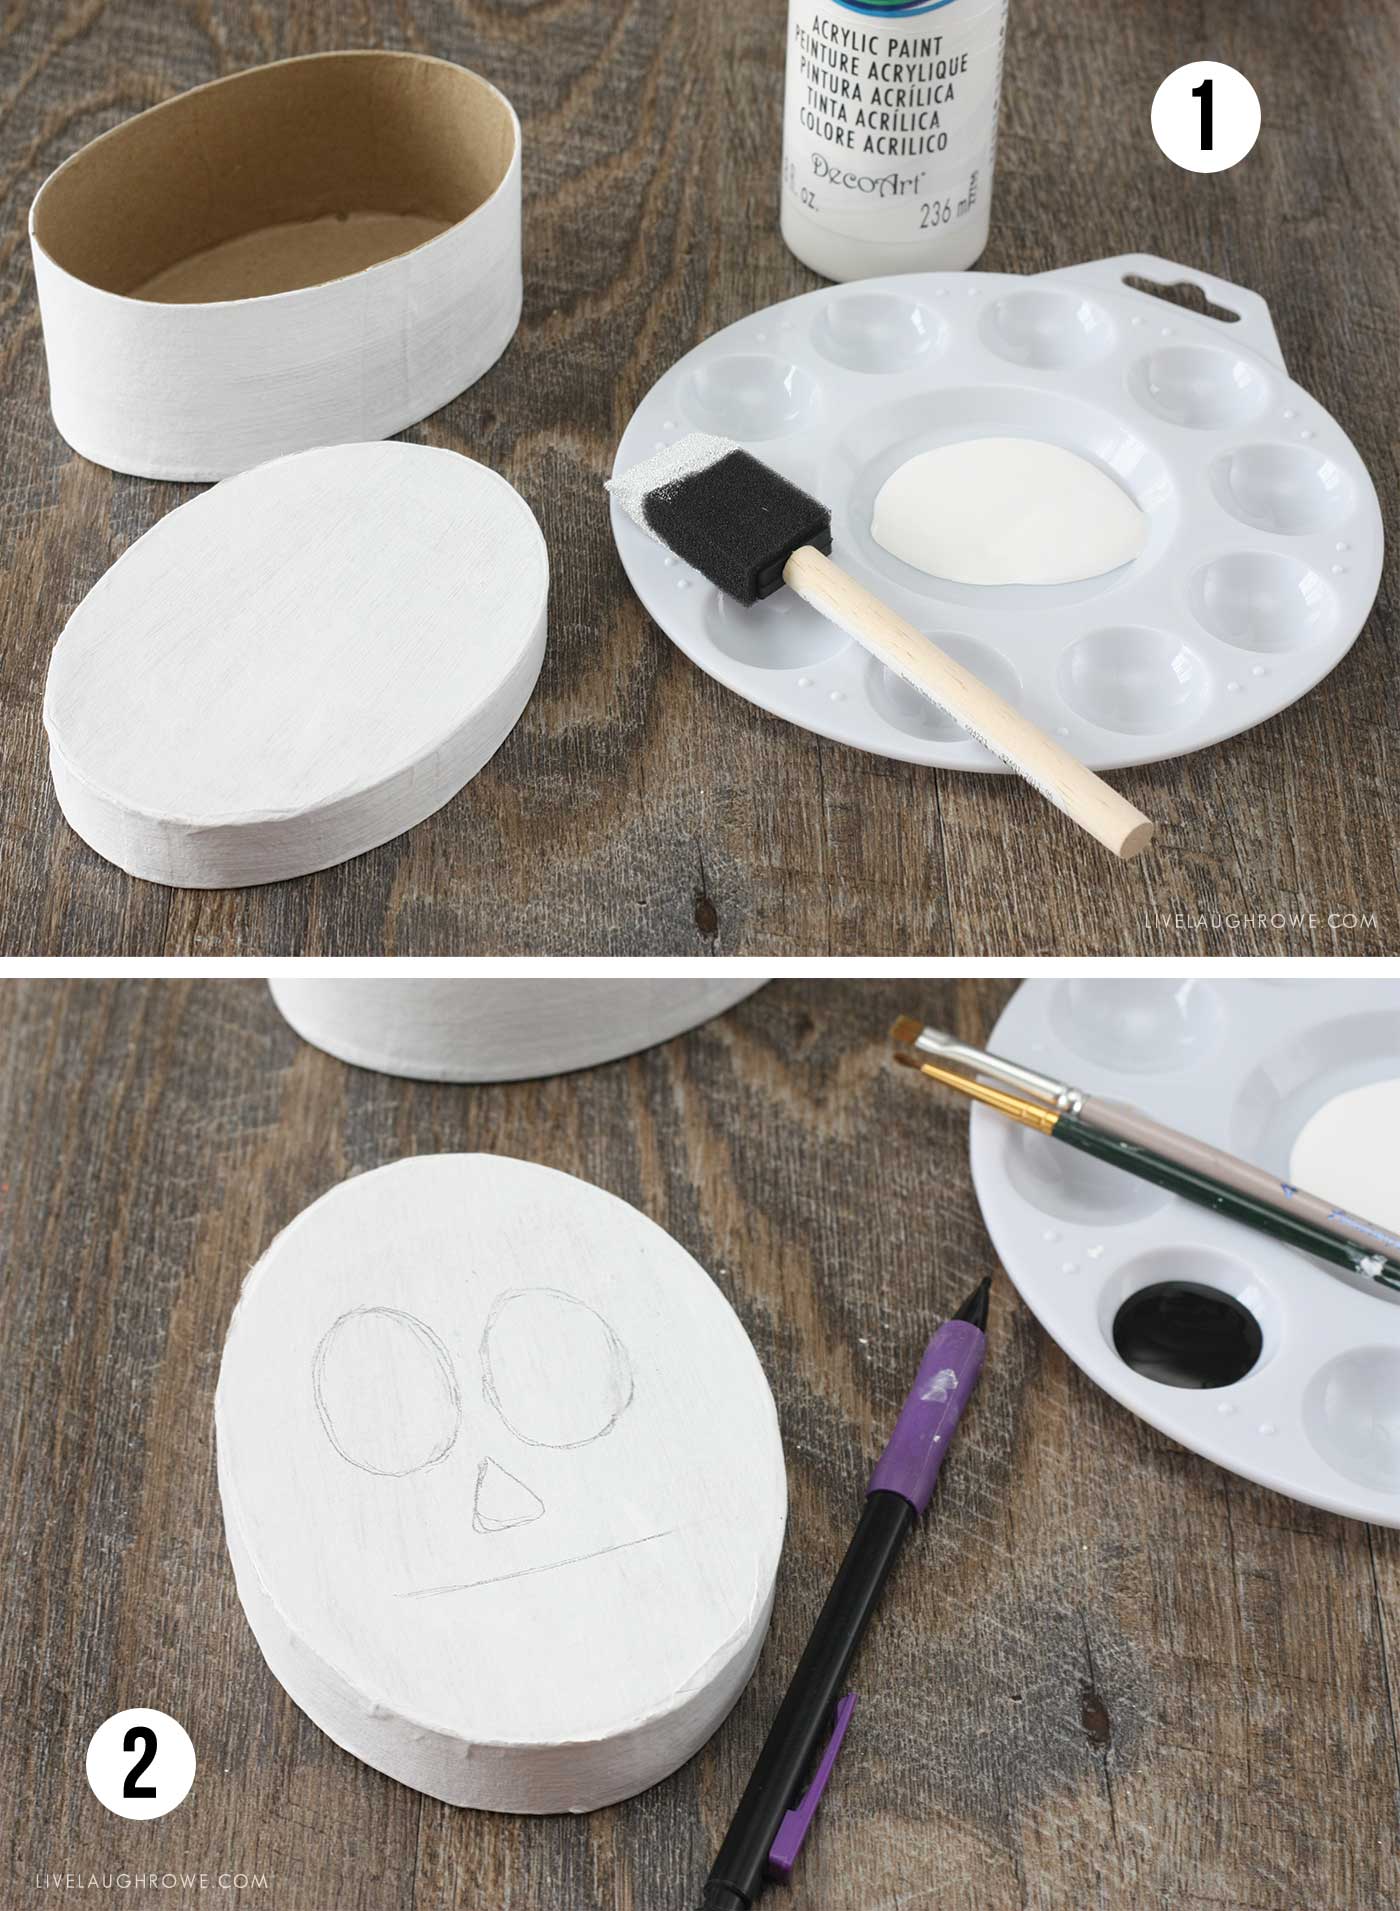
Step 2: Sketch the Skeleton Face
Once your base coat is dry, grab a pencil and lightly sketch your skeleton face. This step allows you to experiment with different designs before committing to painting. Want your skeleton to look silly? Add big goofy eyes. Prefer a spookier vibe? Try sharp cheekbones or a stitched smile.
Think of it as your “painting by numbers” moment—only without the numbers.
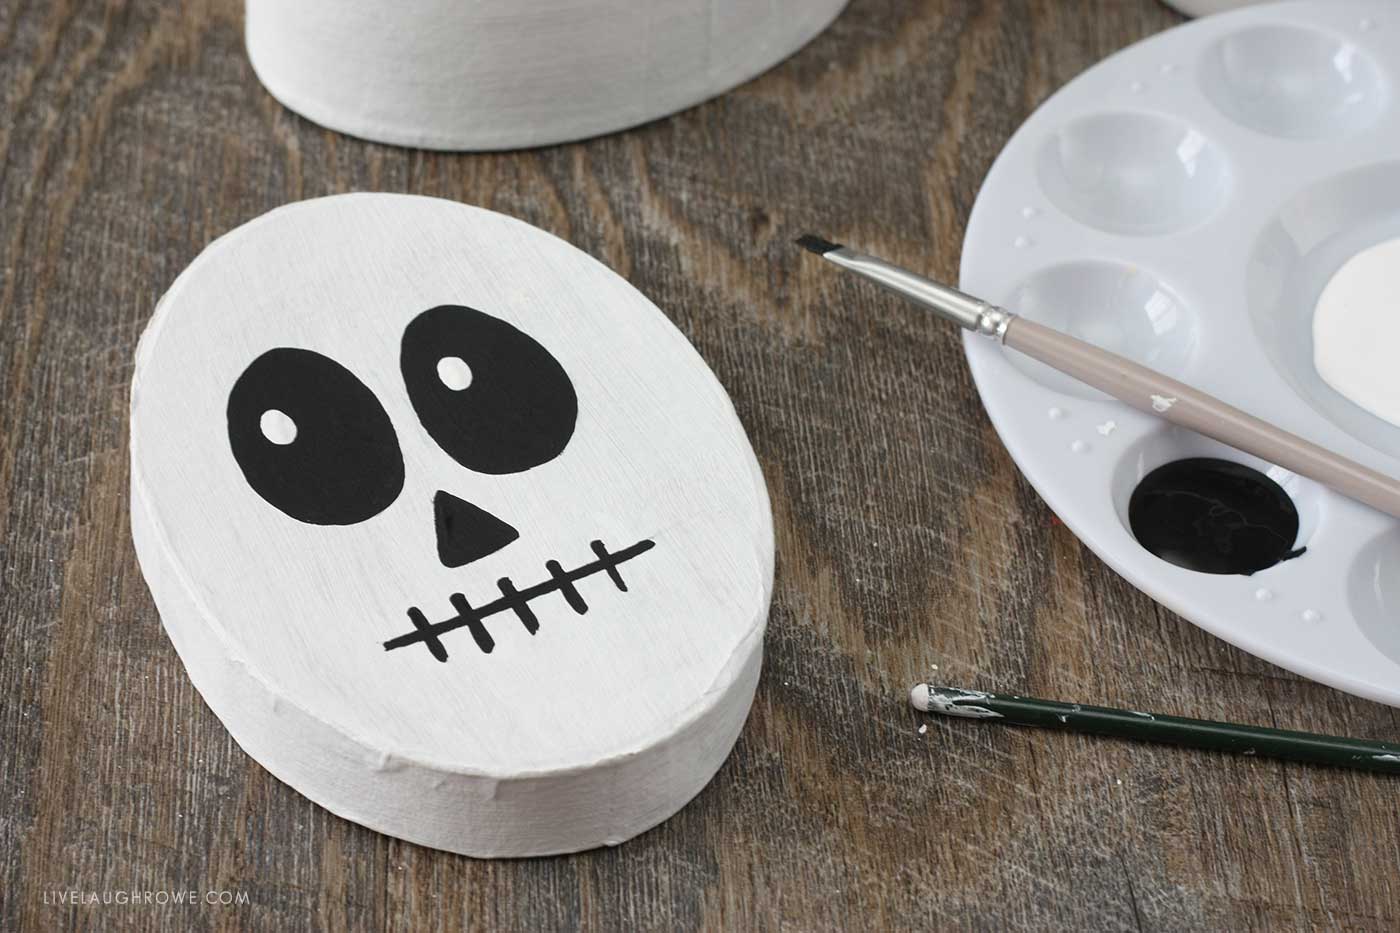
Step 3: Paint the Details
With your pencil sketch as a guide, start painting in the details with black acrylic paint. I suggest beginning with the eyes, as they typically require layering (black circles first, then white dots for pupils later). By the time you’re finished with the rest of the face, the eyes will be dry enough for the final step.

Step 4: Add the Pupils
For the finishing touch, flip your paintbrush around and use the rounded end to dip into white paint. Carefully dot the pupils onto your skeleton’s eyes. It’s a small detail that makes a big difference, adding some personality and charm to your skeleton.
The skeleton face is now officially complete.
Step 5: Fill Your Halloween Treat Box
Once the paint is completely dry, the real fun begins—filling your box with goodies! Candy is the obvious choice, but you could also include:
- Small toys or trinkets
- Stickers or temporary tattoos
- Homemade cookies or fudge wrapped in parchment
- A tiny note or joke for a personal touch
Close the lid, and voilà—you’ve got yourself a DIY Halloween Treat Box that’s both festive and functional.
Creative Ways to Use Skeleton Halloween Treat Boxes
These little boxes are versatile, making them great for all sorts of Halloween festivities. Here are just a few ideas:
Halloween Party Favors
Hosting a party? Set one of these at each place setting. Guests will love the surprise of opening a spooky little box.
Neighborly Boo Gifts
Ever heard of the “You’ve Been Booed” tradition? It’s where neighbors leave a Halloween surprise on someone’s porch. These Skeleton Treat Boxes are perfect for that.
Teacher or Co-Worker Gifts
Brighten someone’s day with a box filled with treats or even something practical like tea bags or lip balm.
Family Movie Night Treats
Planning a Halloween movie marathon? Fill a box with popcorn, candy, and maybe even a glow stick to keep the vibe fun.

A Note from a Non-Halloween Enthusiast
I’ll be honest: Halloween has never been my holiday of choice. While some people start decorating in early September with spider webs and skeletons, I’m more likely to be arranging pumpkins on the porch and sipping cider. But here’s the thing—sometimes it’s good to step outside your comfort zone.
This project reminded me that even if Halloween isn’t my favorite, I can still appreciate the creativity, joy, and fun it brings to others. And honestly? These little treat boxes really are adorable. It’s proof that sometimes cute outweighs spooky.
Tips for Customizing Your Halloween Treat Box
Want to take things up a notch? Here are some fun variations you might try:
- Glitter Bones – Add a layer of glitter paint to give your skeleton a touch of sparkle.
- Colorful Skeletons – Who says skeletons have to be black and white? Try neon green, purple, or orange.
- Mini Tags – Tie a tag with a Halloween pun like “Bone Appétit!” or “Have a Spooktacular Day.”
- Themed Fillings – Fill with candy corns, gummy worms, or other spooky-themed treats.
Why Handmade Still Matters
In a world where everything can be bought pre-packaged, taking the time to create something by hand feels extra special. Crafting a Halloween Treat Box isn’t just about the end product—it’s about slowing down, building, and adding a personal touch.
Whether you’re giving them to kids, co-workers, or friends, people notice when something has been handmade with care. It’s a small gesture that can leave a significant impact.
Sweet, Simple & Spooky
Even if Halloween isn’t at the top of my holiday list, I have to say these Skeleton Halloween Treat Boxes won me over. They’re cute, practical, and a little unexpected—which makes them the perfect project for the season.
So whether you’re a die-hard Halloween lover or simply a seasonal dabbler like me, give this craft a try. You might be surprised by how much fun you have creating your own little army of skeleton treat boxes.
And who knows? They might even convert a Halloween skeptic or two.

Originally posted on Eighteen25 in September 2014.


Charlotte says
Kelly,
You always have the most fun and easy DIY ideas! I have gotten many great craft ideas from you and I truly appreciate it. This little skeleton box is adorbs! Thank you!
Kelly Rowe says
Hi Charlotte! You made my day. Thanks so much for your kind words. I’m so happy you love these boxes too. Have a blessed week!