
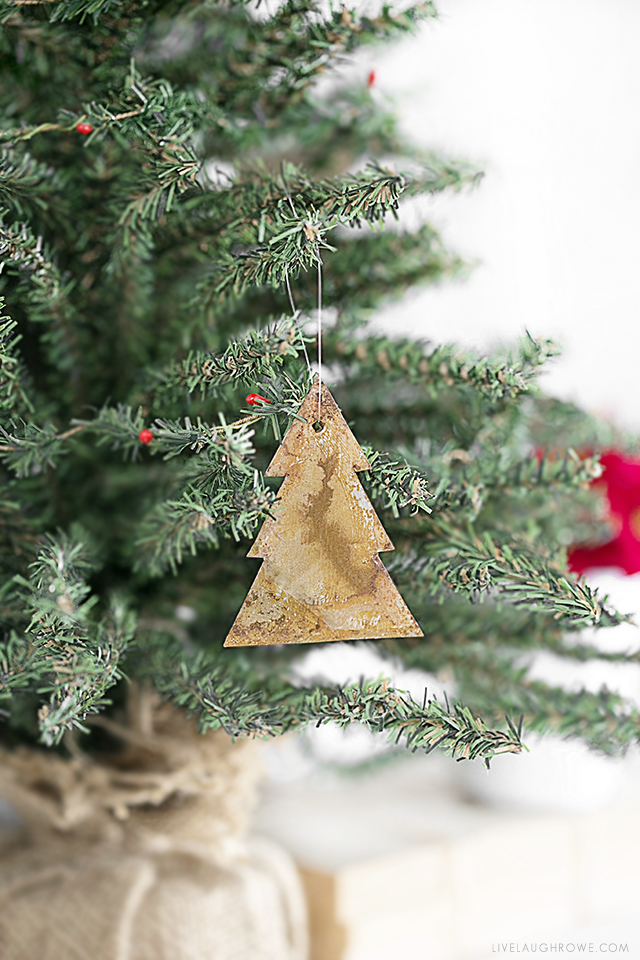
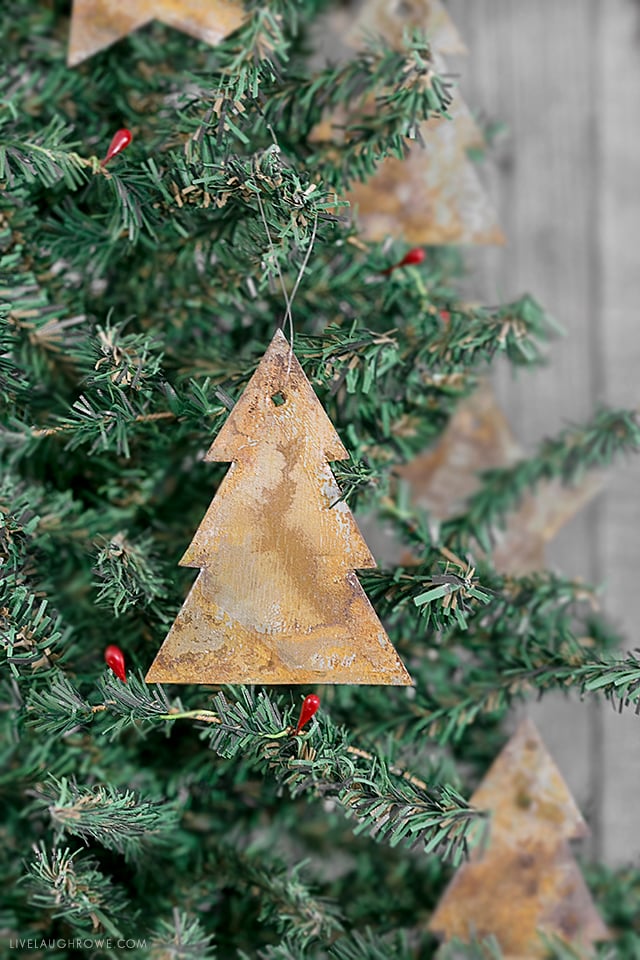
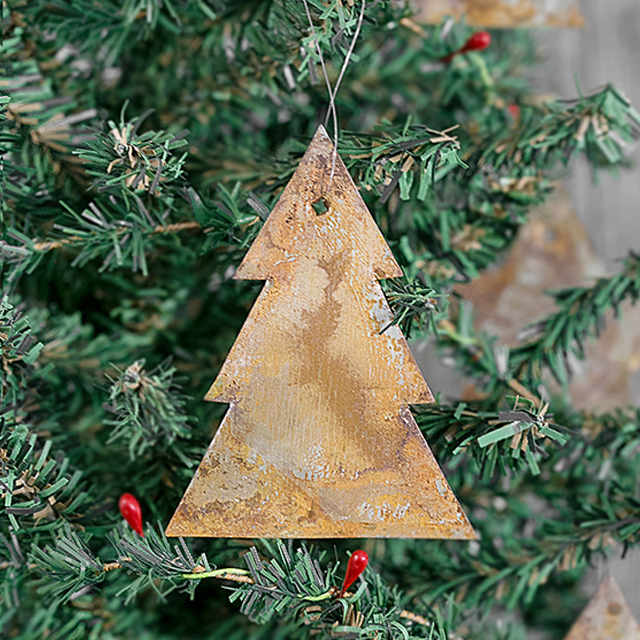
These Rusty Metal Ornaments are a new all-time favorite. It feels like forever since I “created” something new. These are simple to make and add a rustic flare to trimming the tree — or gift packaging. Eeek, Christmas is coming, friends!
Today, I also happen to be Day 11 in the 12 Days of Handmade Ornaments blog hop… soooo, be sure to stick around to find some other fabulous ornament ideas!
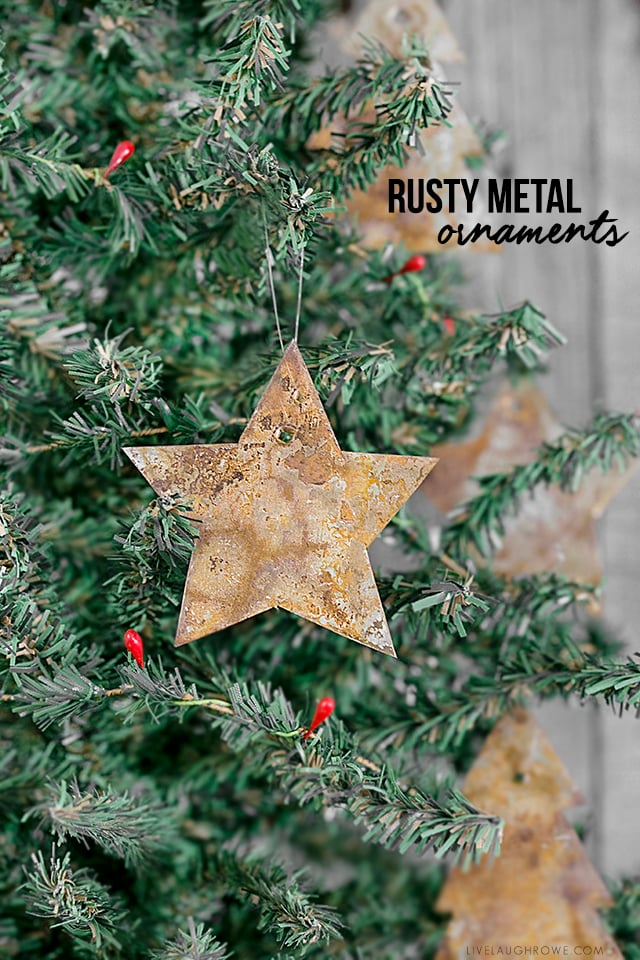 DIY Rusty Metal Ornaments

I had a totally different plan in mind when I started on this project — something with more of a punched tin look after our trip to New Mexico earlier this year. However, I learned that there is quite an art to that and I have a much greater appreciation for the pieces I purchased while there.
 Plan number one failing was a blessing in disguise — this rusty metal ornament ended up being a much cheaper option and I’m 99% sure most of these supplies are in your husbands, dad, brother or neighbors tool box/garage. Score!
So, without further adieu, I say we get started on these ornaments. Let’s grab a few supplies and get to to work! Woo-hoo.
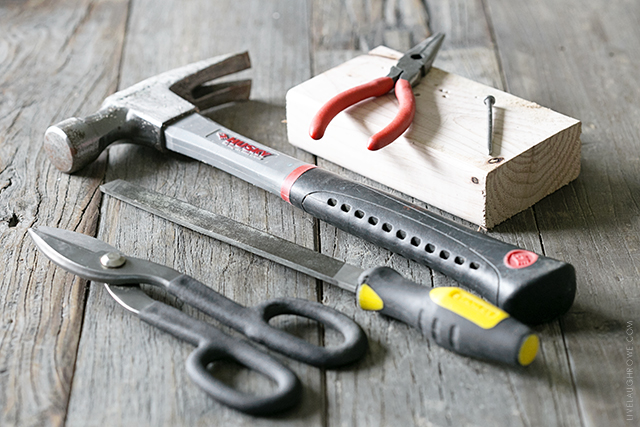
Supplies for Rusty Metal Ornaments:
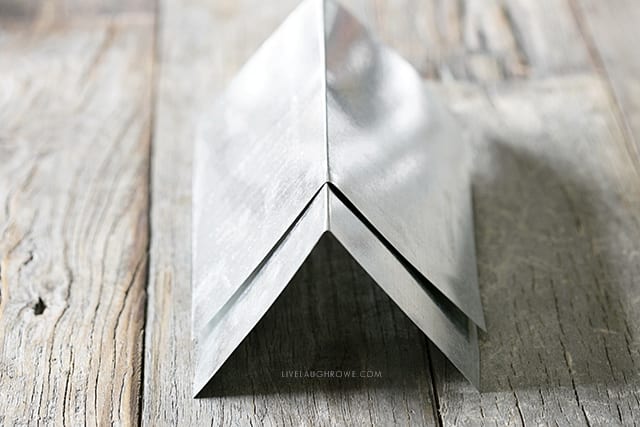
Galvanized Steel Step Flashing
Templates (provided below)
Marker
Tin Snips
Flat Nosed Pliers, optional
Large Nail
Hammer
Metal File
Muriatic Acid
Water
Plastic Spray Bottle
Fish Line (8 pound)
Step-by-Step Instructions:
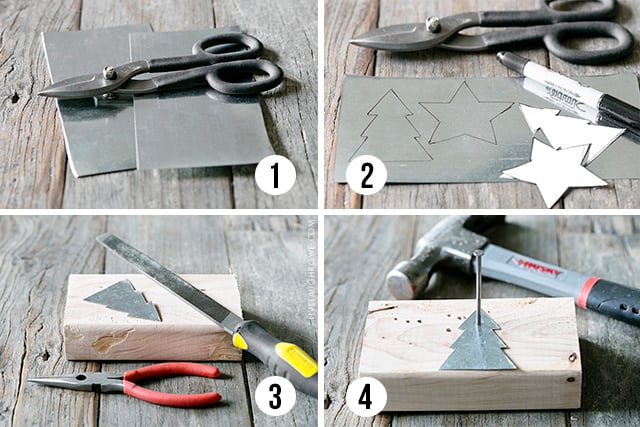
Step One:
Cut your flashing in half using the tin snips, this will make your tracing and cutting of the ornaments much easier.
 Step Two:
Trace your designs (using these templates) onto the flashing using a marker.
Step Three:
Once the ornaments are cut, place the ornaments on a flat surface to smooth out any sharp, ridged edges.
Step Four:
Using your large nail and hammer, place a hole in the ornament for stringing your fish line or twine.
Step Five:
Now it’s time for FUN part. Distressing the flashing to create the rusty metal.
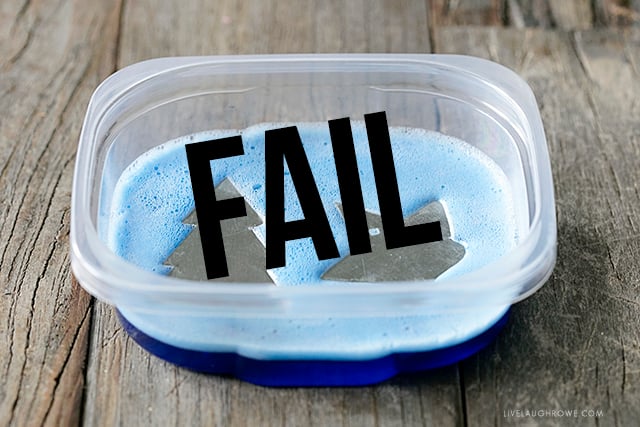
 Full disclosure here… I did try to distress using toilet bowl cleaner (as I’ve seen it used on other metals and works perfectly). However, it was an epic fail and I did have a slight panic attack thinking this project was going to be a flop.
 Toilet Bowl Cleaner Fail…
 Toilet Bowl Cleaner Fail…
I let them sit overnight in the cleaner and it only removed the shine from the flashing/ornaments. Womp womp womp.
Sooooo, I went with using muriatic acid. I had used it before, but I had to reacquaint myself with the process. I combined three parts muriatic acid to one part water in a spray bottle. In my spray bottle, I mixed 12 ounces of muriatic acid to 4 ounces of water.
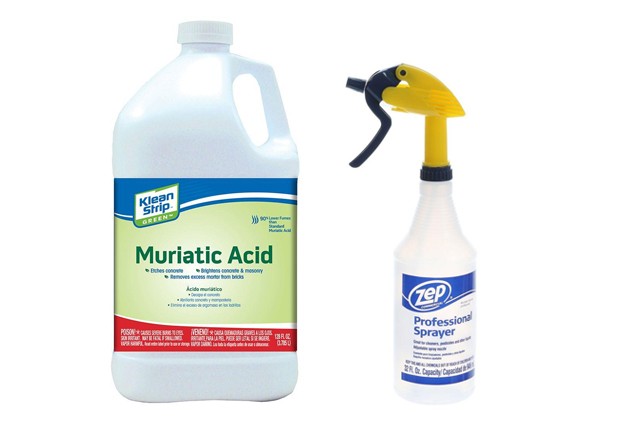
Place the ornaments on wood or cardboard in a well ventilated area. Be sure to wear safety goggles and gloves before beginning to use the mixture. Mist them until they are fully covered. With gloves on, flip the ornaments over and mist the other side as well. I misted mine a second time after a few hours. Allow them to set and dry overnight.
If the ornaments are dried and distressed to your liking, dip them in water to halt the acid from further rusting the metal.
6. String the ornaments using fish line, twine or string of choice. I cut a six inch piece of fish line and that was a perfect length.
 Now for some more fun! Below you’ll find the list of participating bloggers in the 12 Handmade Christmas Ornaments blog hop. Be sure to click around and check some of them out… hope you’re inspired!

An Extraordinary Day | The How to Home | Celebrating Everyday Life
Atta Girl Says | Hunt and Host | Lovely Etc. | Pet Scribbles
Virginia Sweet Pea | I Should Be Mopping the Floor
RemodelaCasa |Live Laugh Rowe (ME!!!) | The Crafting Nook
 Be sure to visit with me here too:
Facebook | Instagram | Pinterest | Twitter | Google+


Paula says
These are lovely and will look wonderful on a rustic themed tree. I know you panicked when the toilet bowl cleaner didn’t age the metal. Thank goodness that muriatic acid rusted them beautifully.
Diane says
Kelly, these are fantastic!! Sorry, you had two heart dropping experiences, but your final outcome… FAB.U.LOUS!!!
Thank for the great tutorial. I HAVE to make these now!!
And thanks for joining us again… I LOVE having you hop with us! xo
Cami @ The Crafting Nook says
I absolutely love this new method to make Ornaments. I had no idea I could do myself that rusting effect. I LOVE how it looks. If I can find that acid where I live you can be sure I’ll try this soon! Looks AMAZING!
Thanks for the inspiration!
Hugs
Cami
Carrie says
These are wonderful! I always feel like the times I have to go with plan b turn out being some of my favorite projects! Thanks for sharing.
Kim says
LOVE the rusty look of these ornaments!
Kristi Dominguez says
These turned out so well, Kelly. Loving the fun texture and age it adds to your holiday decor.
Cristina says
What a nice patina the acid gave them! Love them. And now my head’s spinning thinking on ways I could use this technique!
Atta Girl Amy says
Love the rustic look of these! Definitely pinning this post so I can use your rusting technique!
Ella says
How cute! I have fallen in love with it! I’m an avid DIYer and always try to be busy with some new projects. Was searching for a unique idea to start. The Faux Rusted Metal State Ornaments made me stop and crazy to make them asap! In a hurry to start