
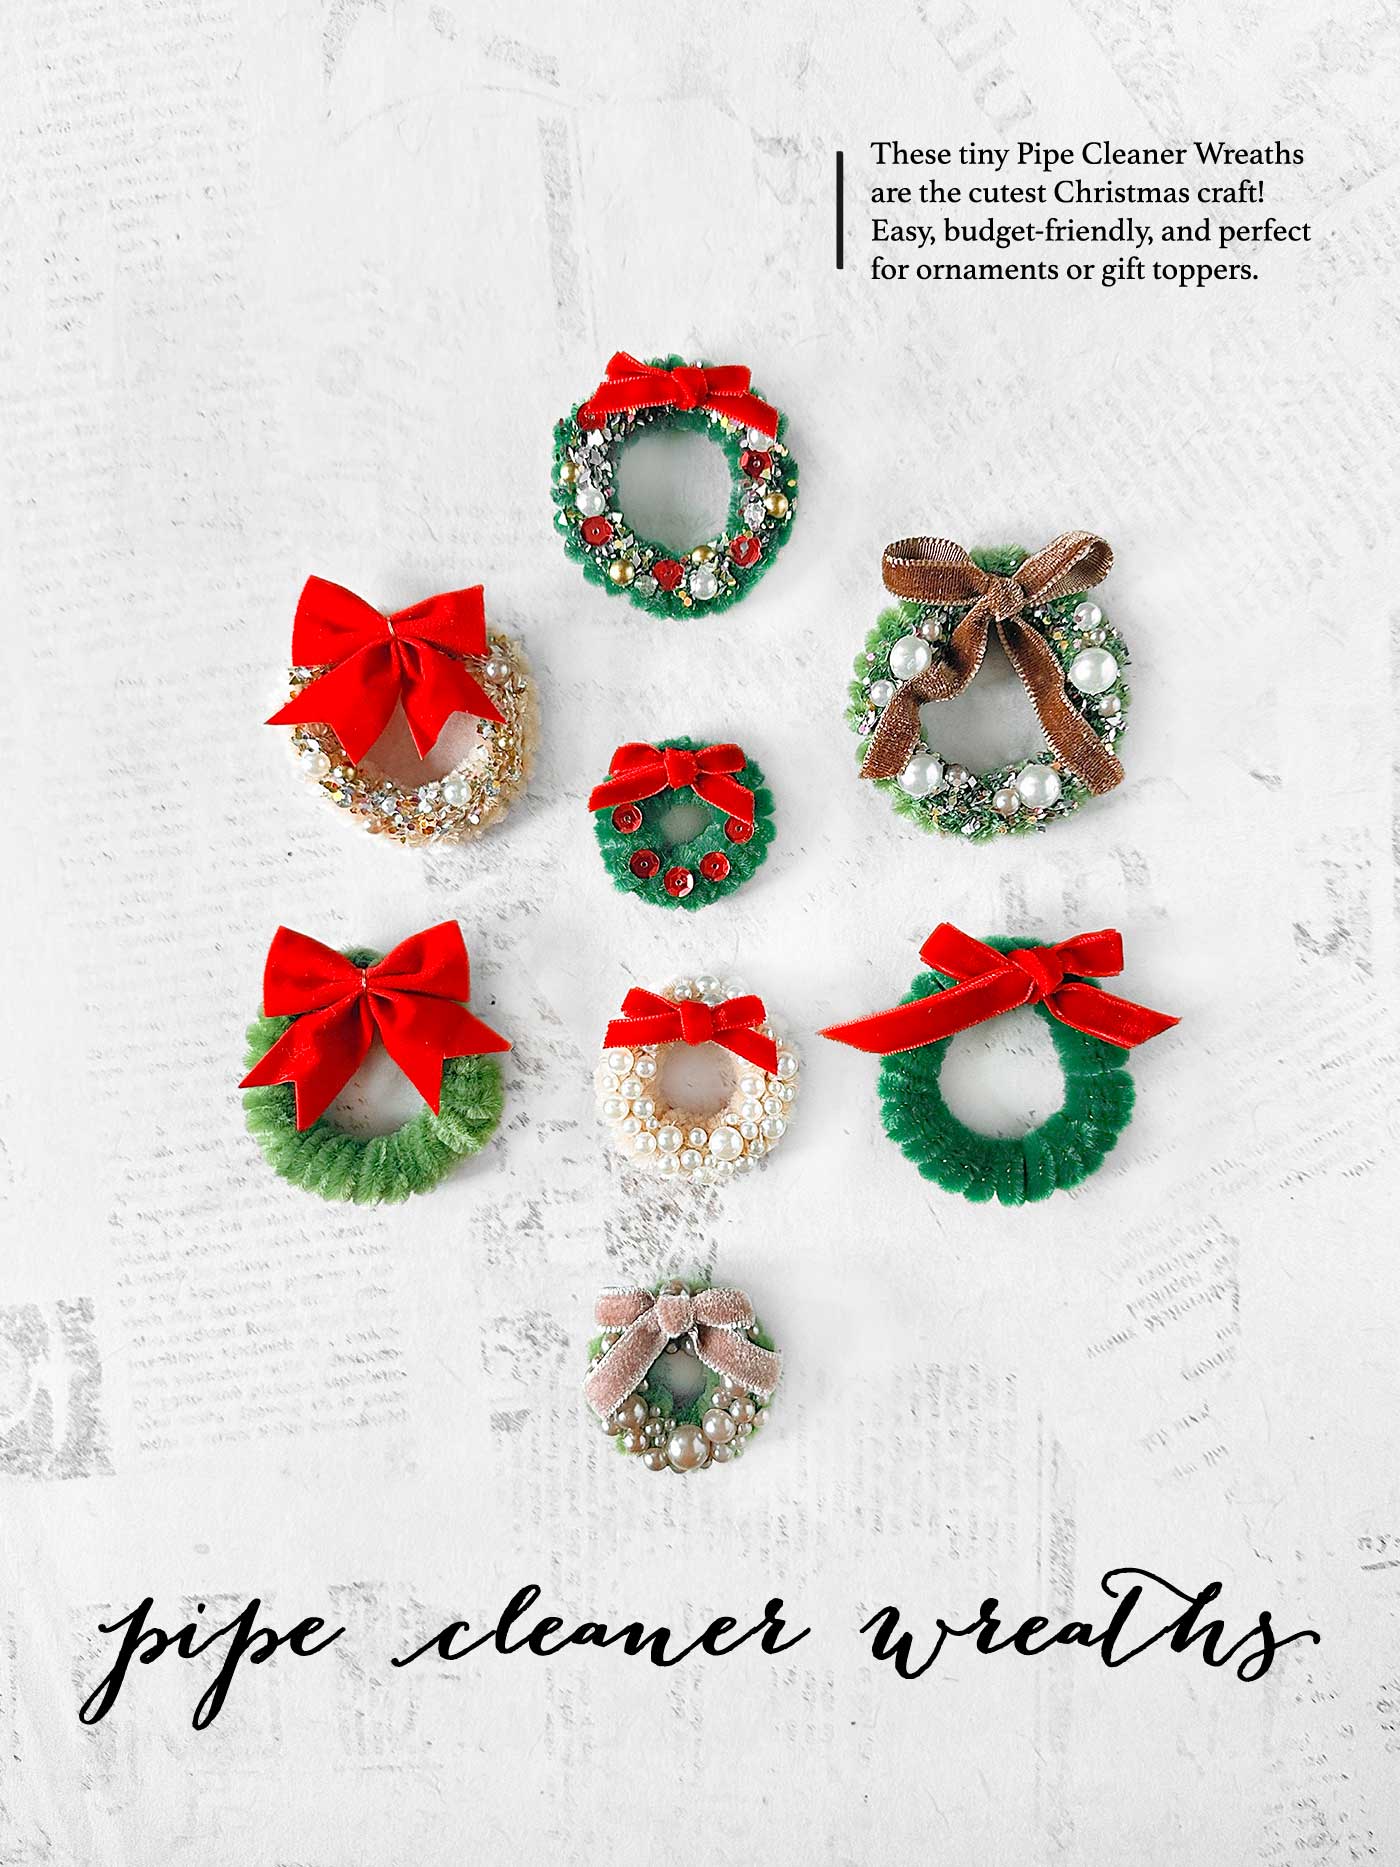
There’s something extra magical about tiny Christmas crafts — the kind that make you smile before you even realize it. These Pipe Cleaner Wreaths check every one of those joyful boxes. They’re fuzzy, festive, simple to make, and downright adorable. And the best part? They come together with a few pipe cleaners, a pencil, and a sprinkle of holiday creativity.
Crafting inspiration seems to pop up everywhere now, especially in all those fun, fast-moving Reels. I stumbled across this sweet idea on Instagram and instantly knew I had to make it — and then share it with you! It may not be my original creation, but it’s just too darling not to pass along.
So, if you’re looking for a quick and cozy project to get you in the Christmas spirit — one you can do while watching movies, listening to Christmas music, or sipping a peppermint mocha — this is it. They’re the perfect craft for kids, teens, adults, or anyone who loves a simple handmade touch during the holidays.
Let’s dive in and make some magic, shall we?
Why You’ll Love These Pipe Cleaner Wreaths
Before we jump into the tutorial, here’s why this craft may become a new holiday favorite:
- Fast & beginner-friendly — even non-crafters can master this one.
- Budget-friendly — pipe cleaners stretch a long way.
- Customizable — choose your colors, embellishments, and bow styles.
- Two sizes! A tiny version and a slightly larger version.
- Endless uses — ornaments, gift toppers, garlands, napkin rings, and more.
- Relaxing — wrapping and twisting the pipe cleaners is surprisingly soothing.
This is one of those projects you’ll want to make in batches — and honestly? You should. They look absolutely adorable grouped together.
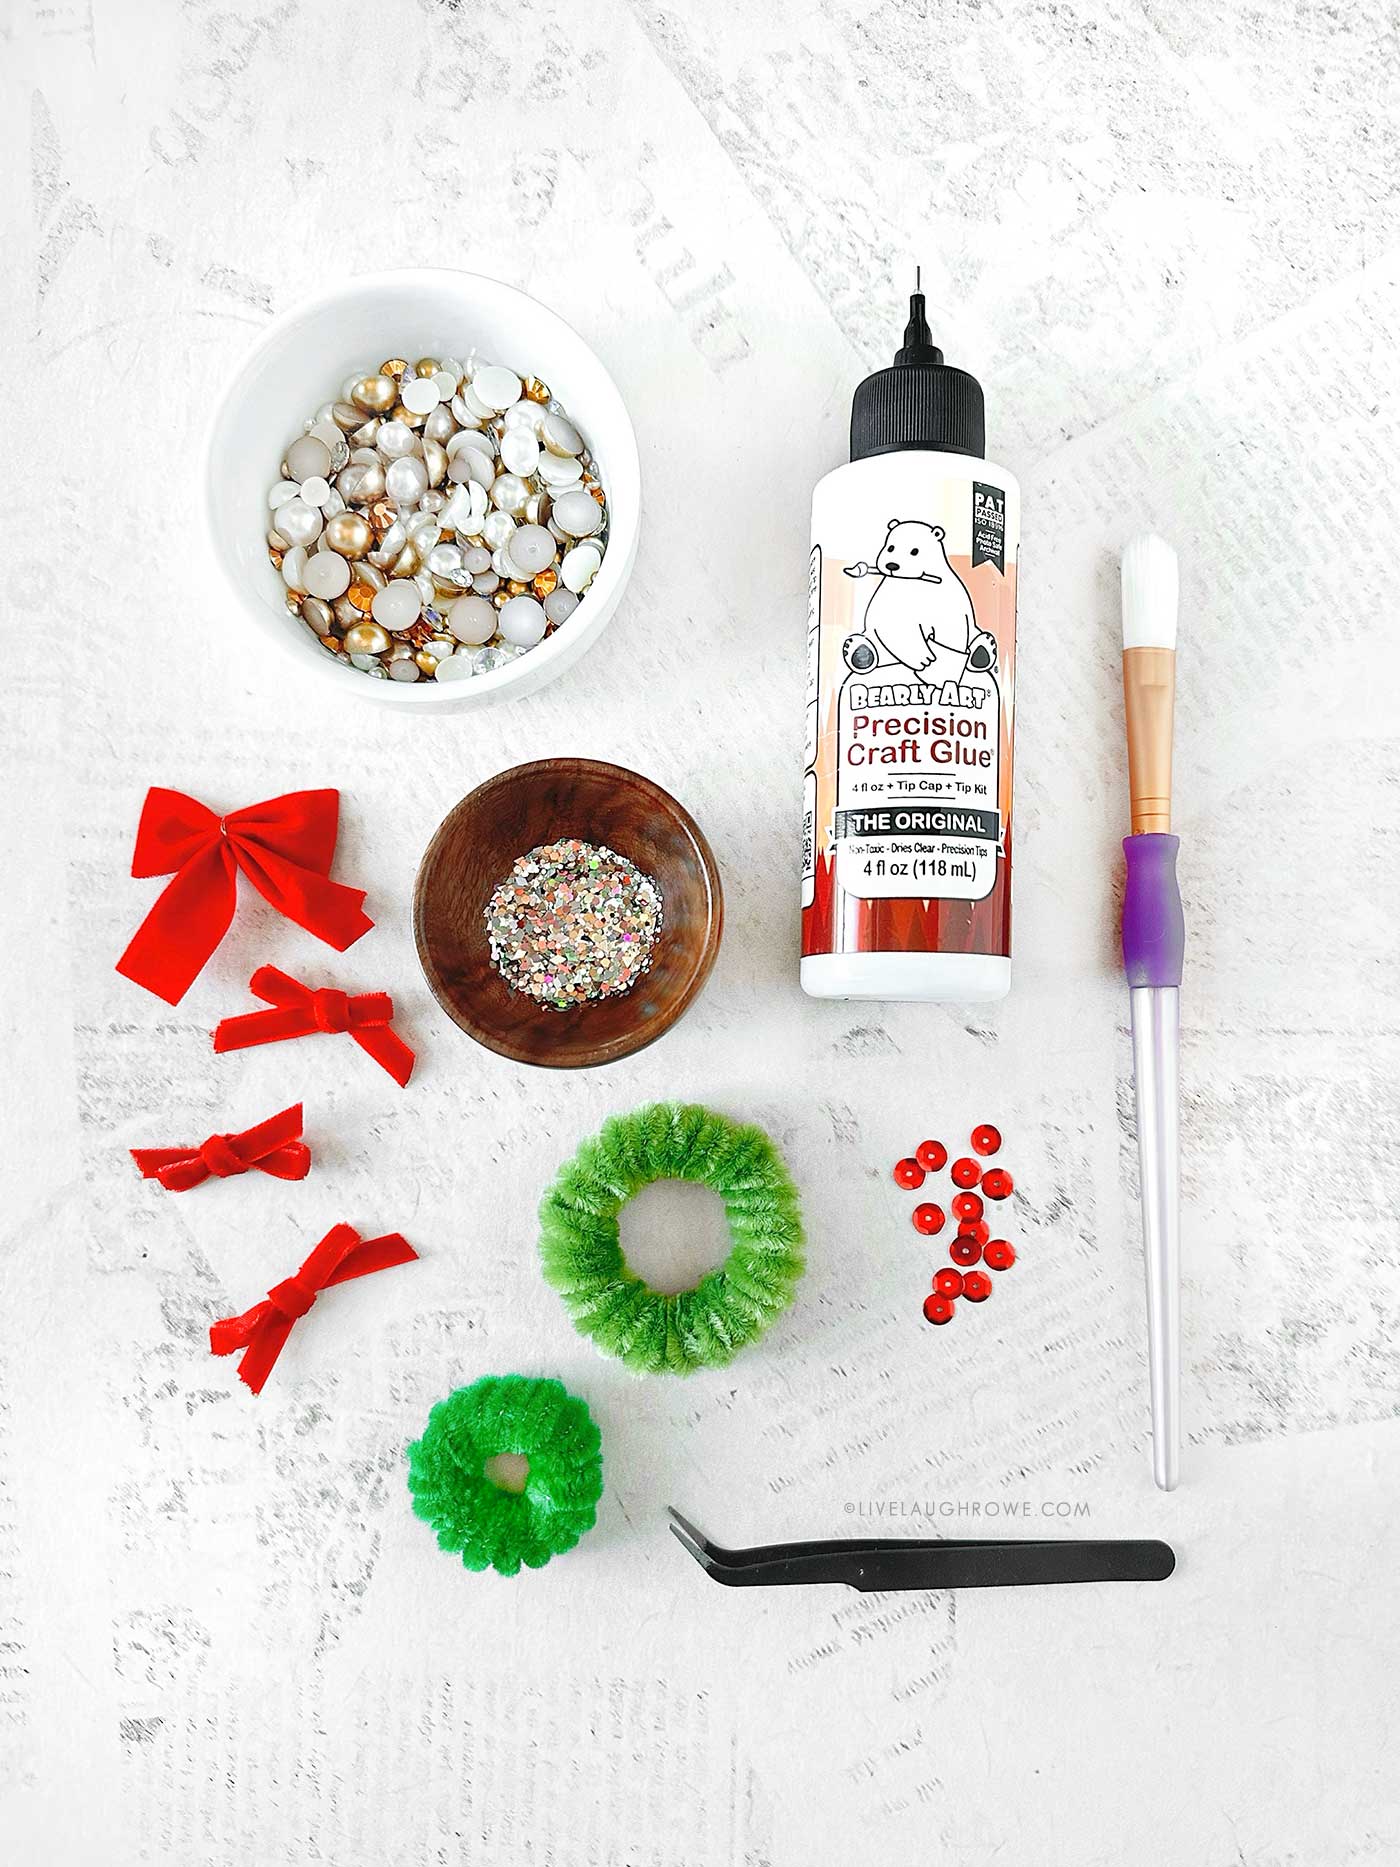
Supplies You’ll Need
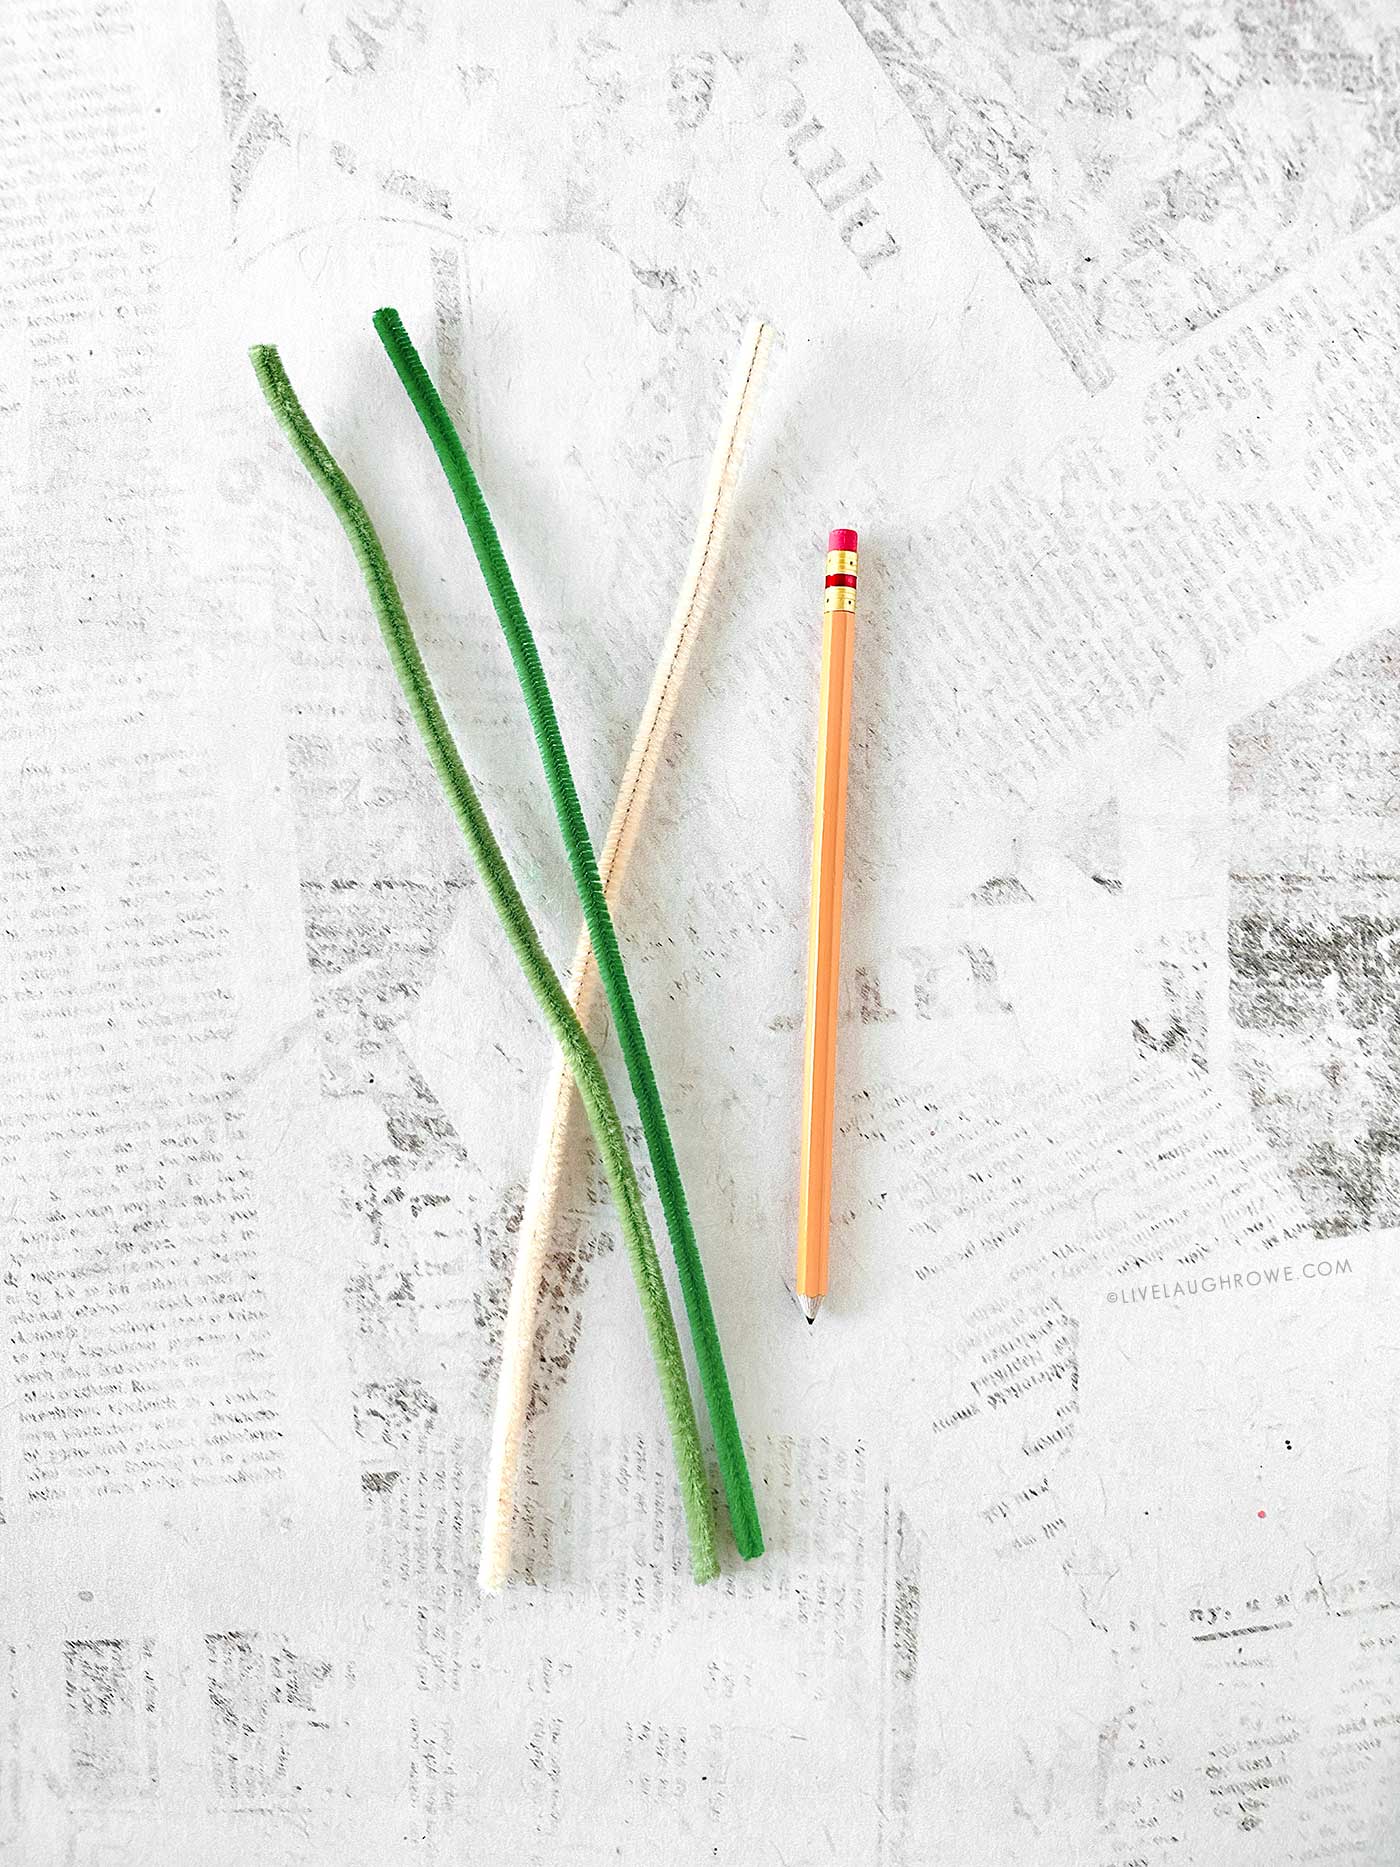
A handful of simple supplies is all it takes:
- Standard pipe cleaners (chenille stems)
- Pencil (or thin marker) for coil wrapping
- Wire cutters or sharp craft scissors
- Hot glue gun + glue sticks
- Craft Glue (my go-to craft glue)
- Small pre-tied bows (velvet, satin, or any mini holiday bow you love)
- Optional embellishments: Flatback pearls (I used these), Rhinestones, Tiny jingle bells, Sequins, Chunky Glitter, Small beads.
You don’t need fancy supplies — just basic craft materials and a little imagination.
How to Make Pipe Cleaner Wreaths
These Pipe Cleaner Wreaths use a fun method: wrap pipe cleaners around a pencil to create coils, slide those coils onto a “base” pipe cleaner, and twist the whole thing into a wreath.
Step-by-Step Instructions
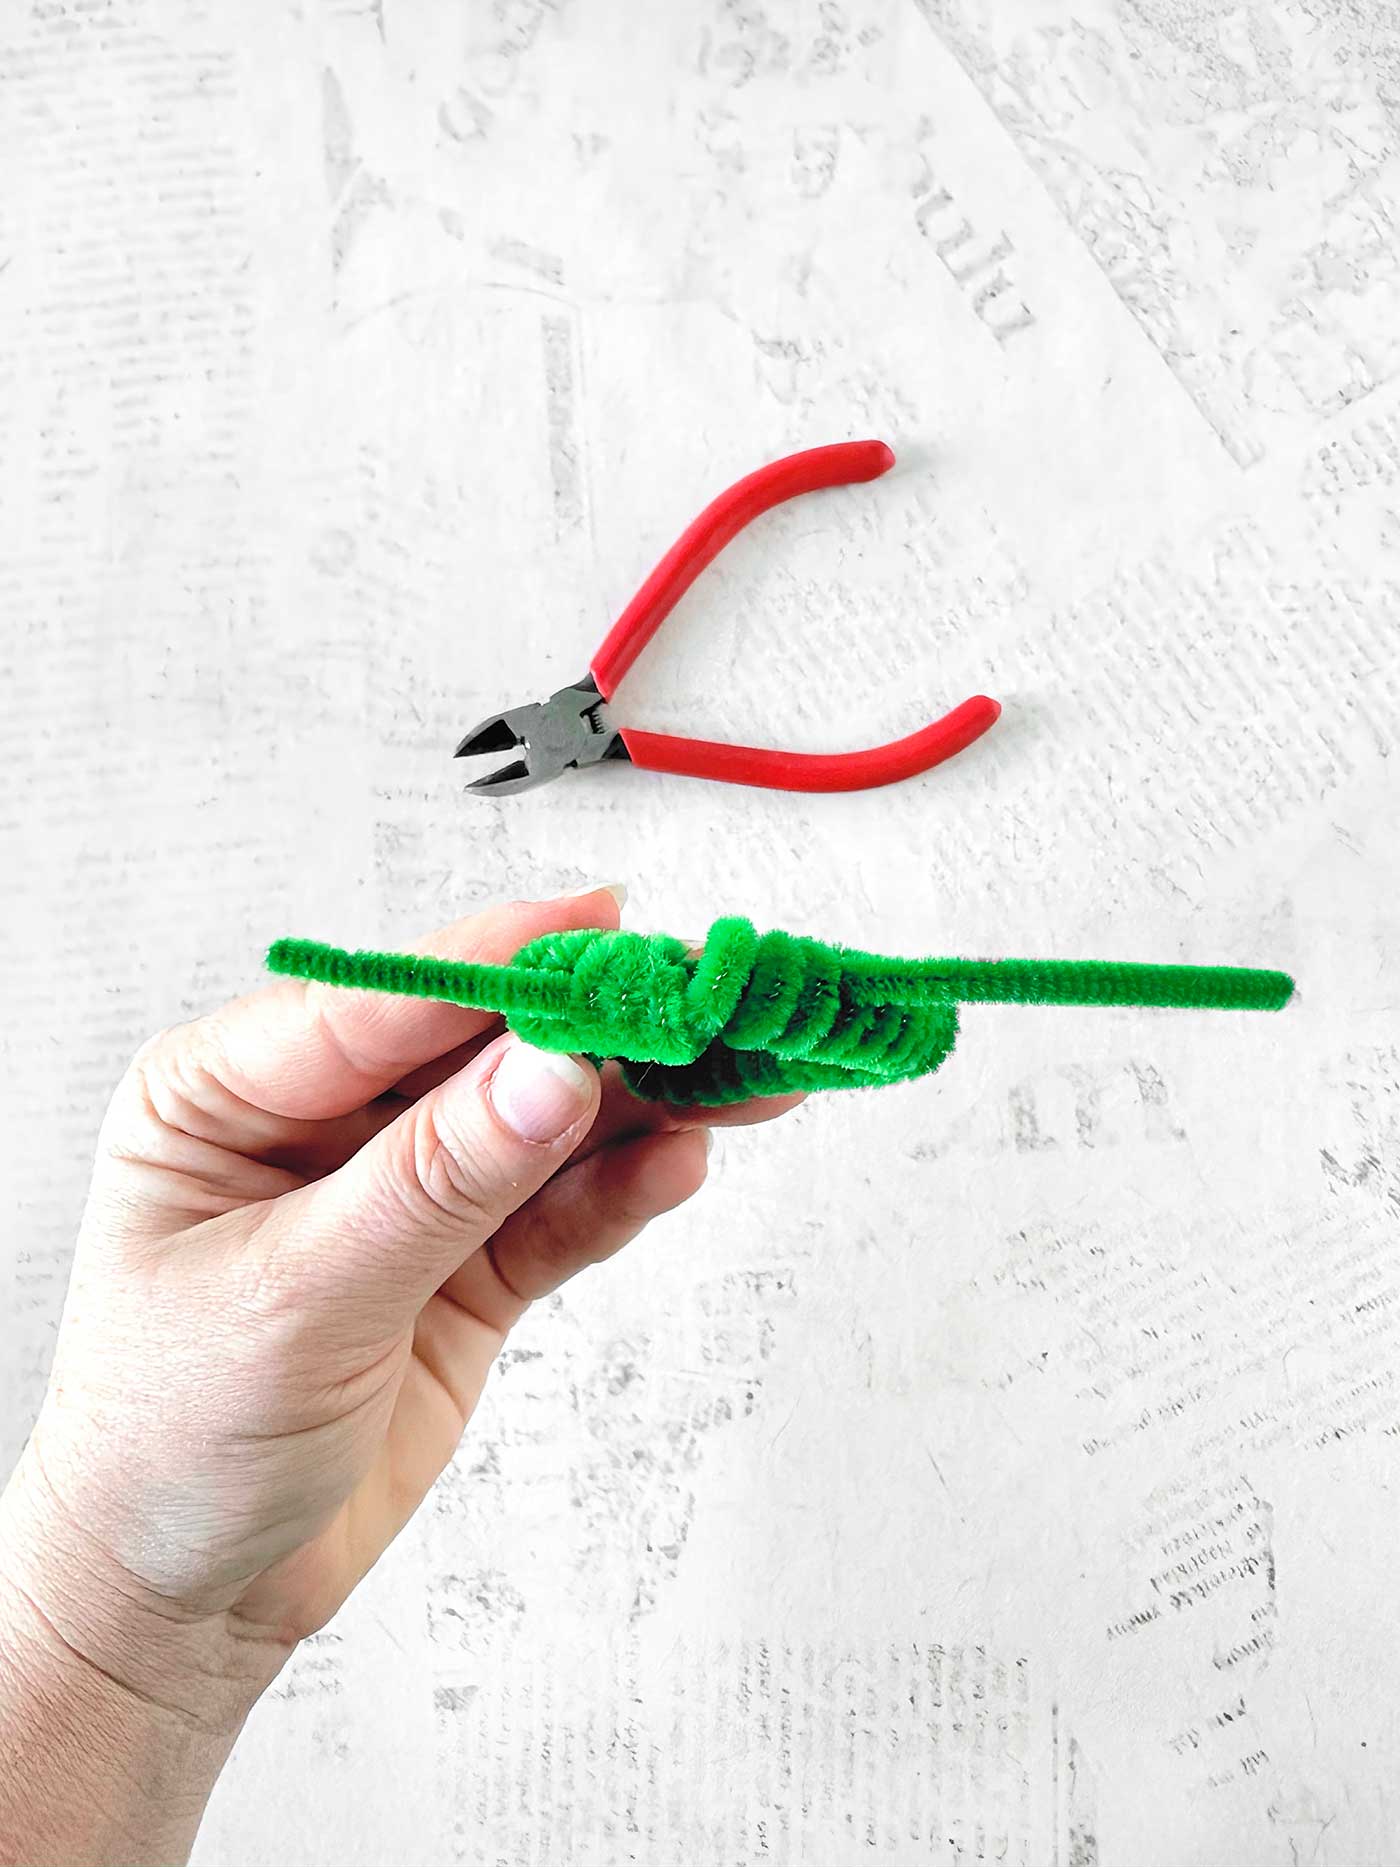
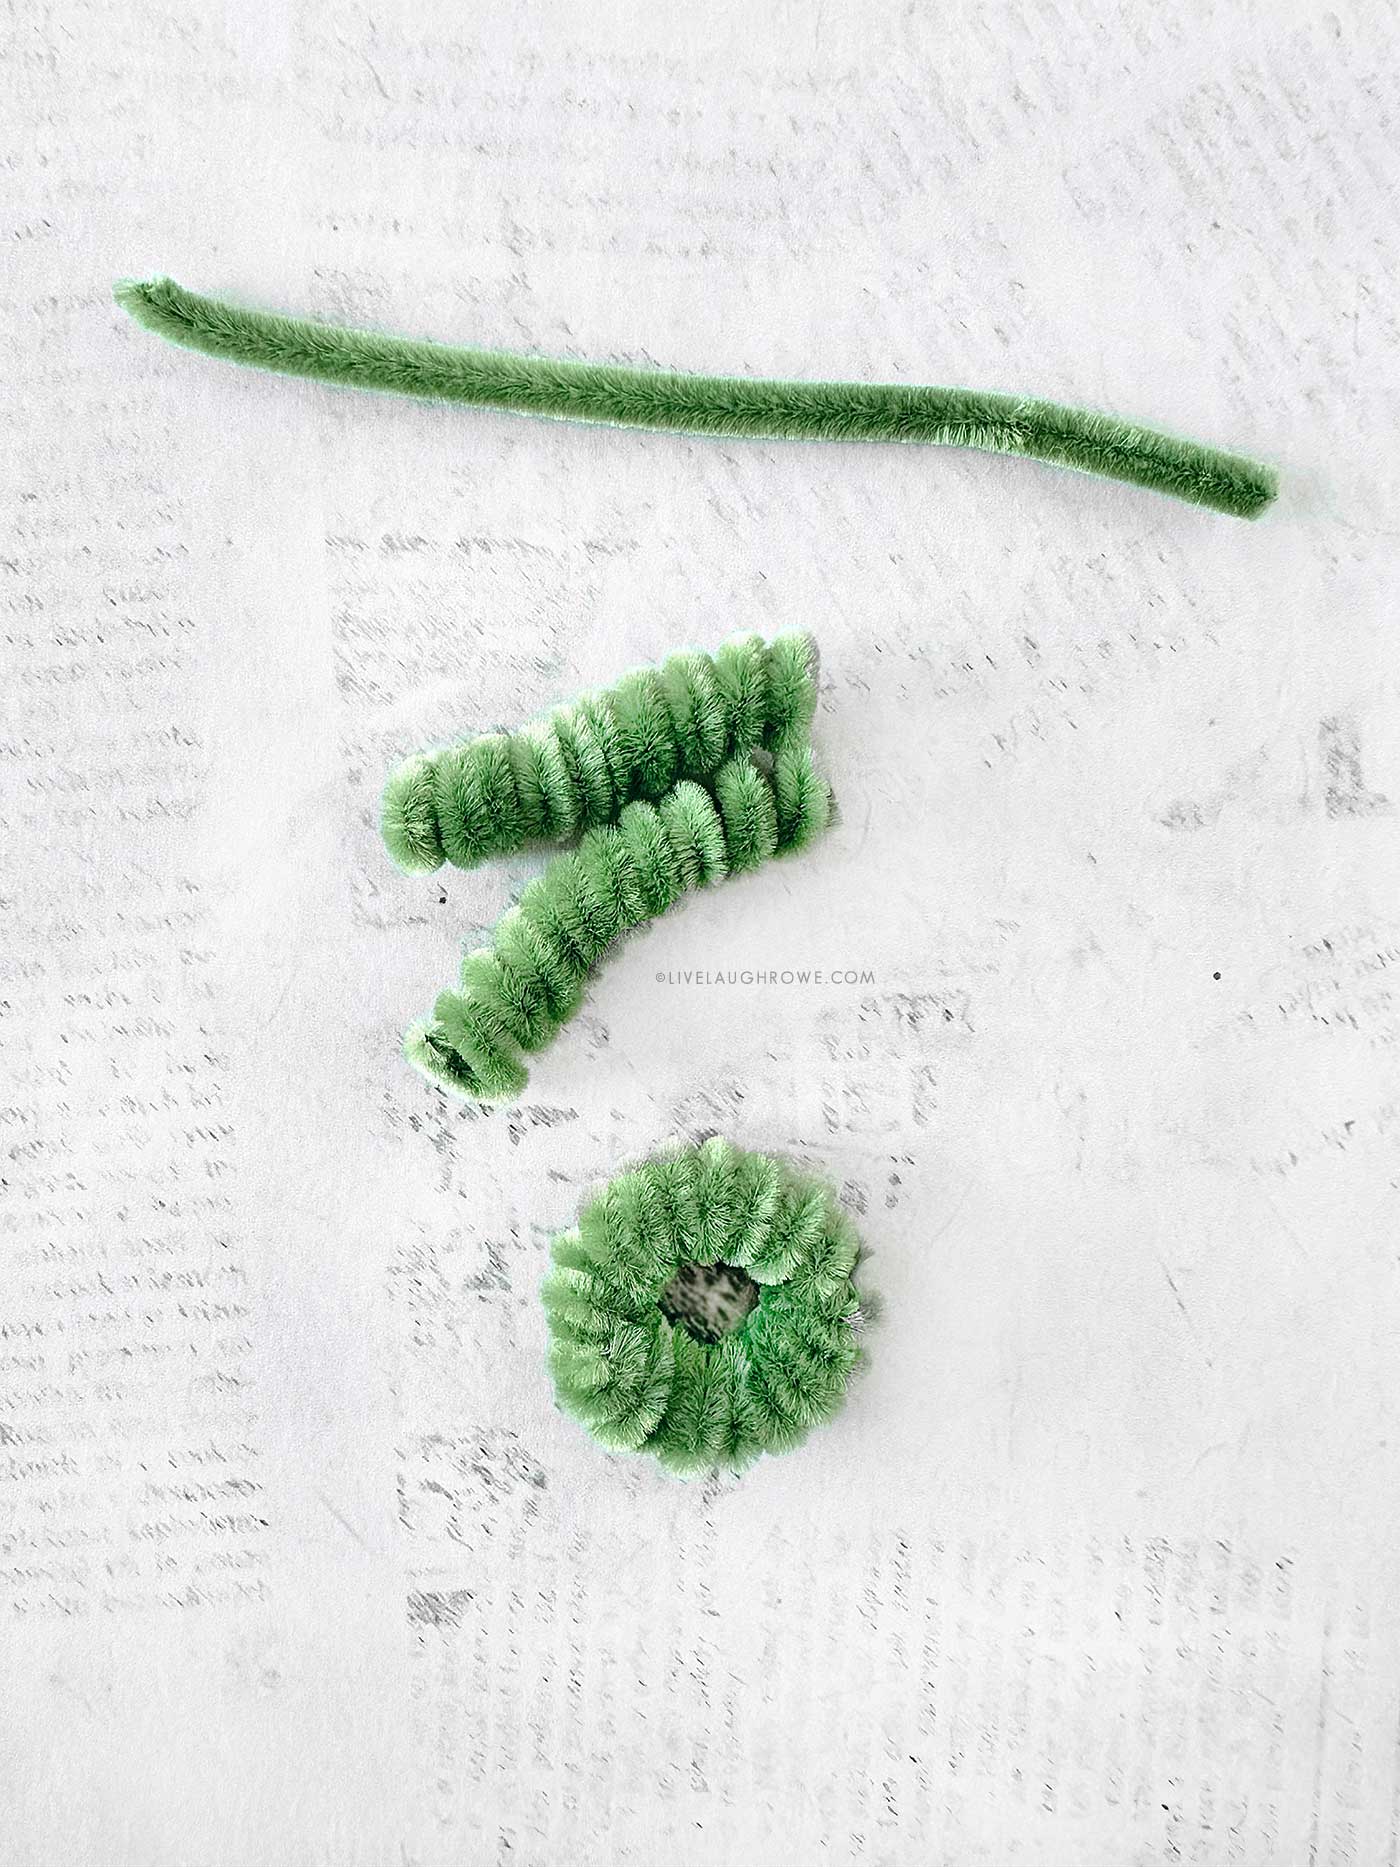
Step 1: Wrap Your Pipe Cleaner Around a Pencil
Take one pipe cleaner and wrap it tightly around a pencil — coil after coil, all the way from one end to the other. The tighter the wrap, the prettier the coil will be.
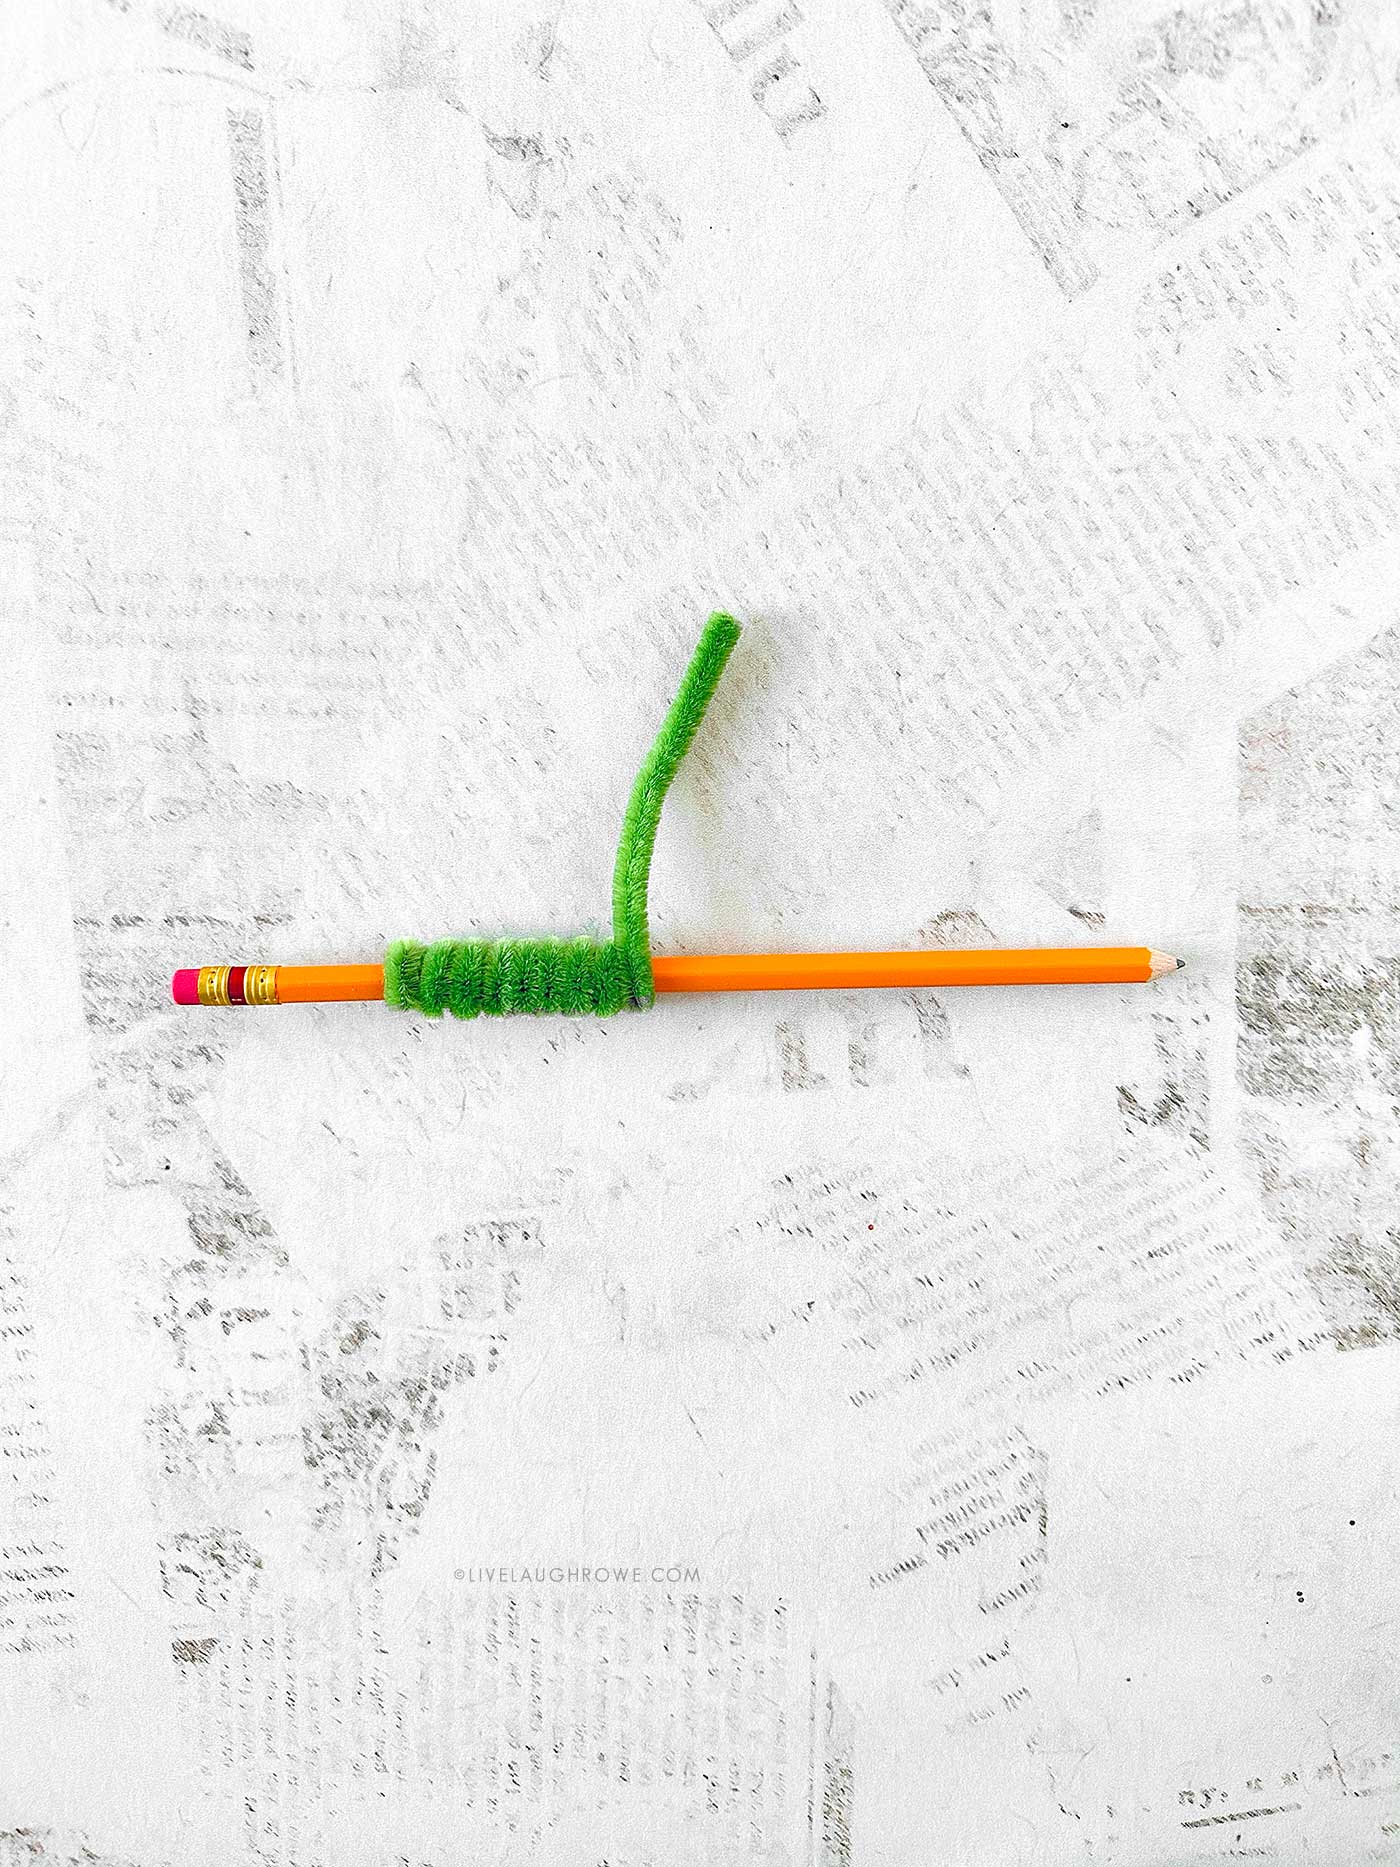
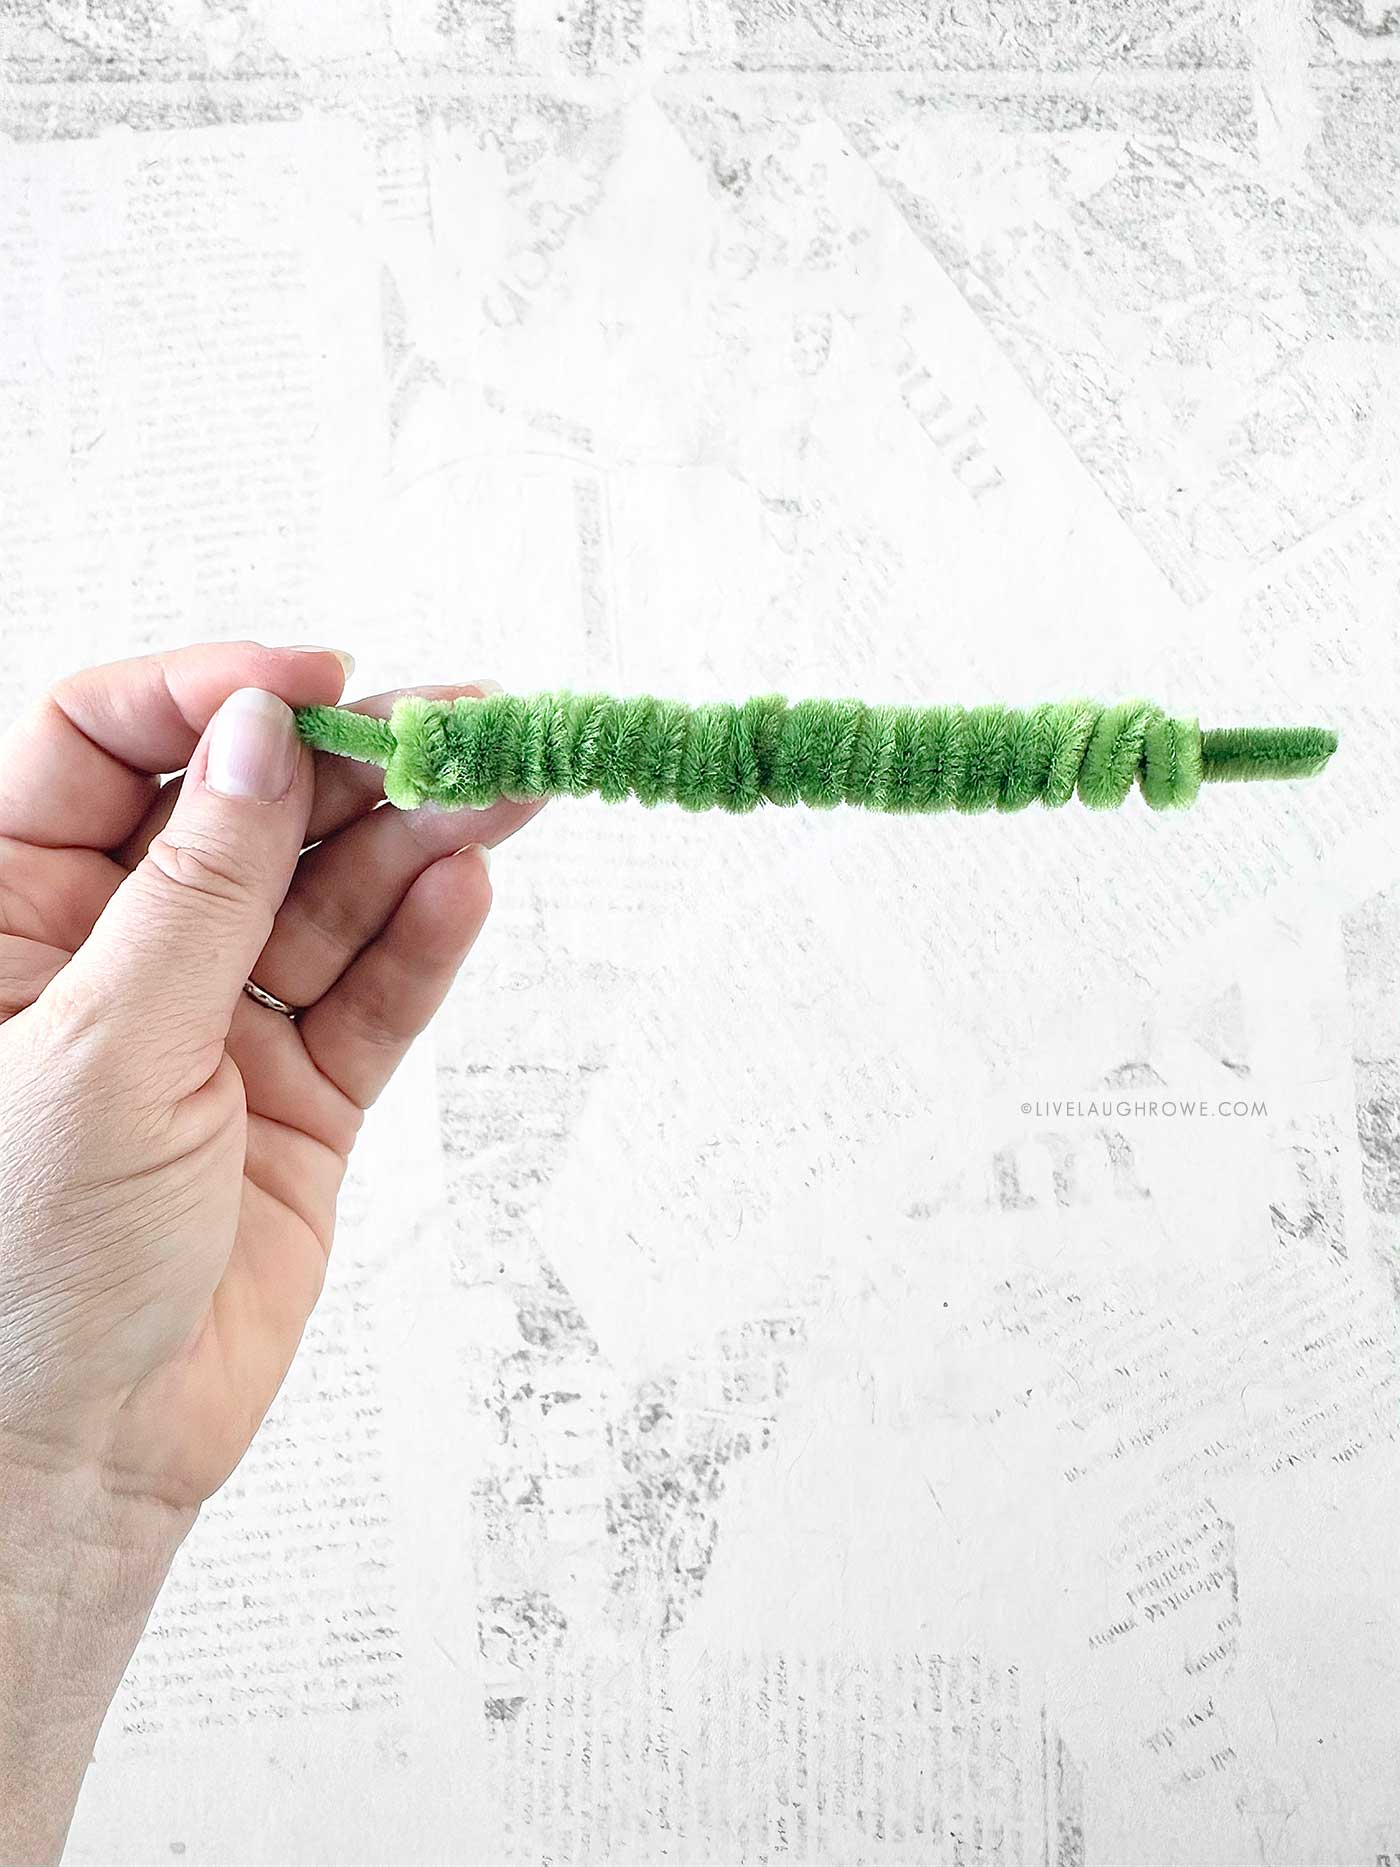
When finished, simply slide it off the pencil. You should now have a spring-like coil that looks perfectly even and uniform.
One pipe cleaner = one coil.
Step 2: Make Your Coils
You’ll need:
- 2 coils for the tiny wreath
- 3 coils for the larger wreath
Repeat the pencil-wrapping step until you have the desired number of coils.
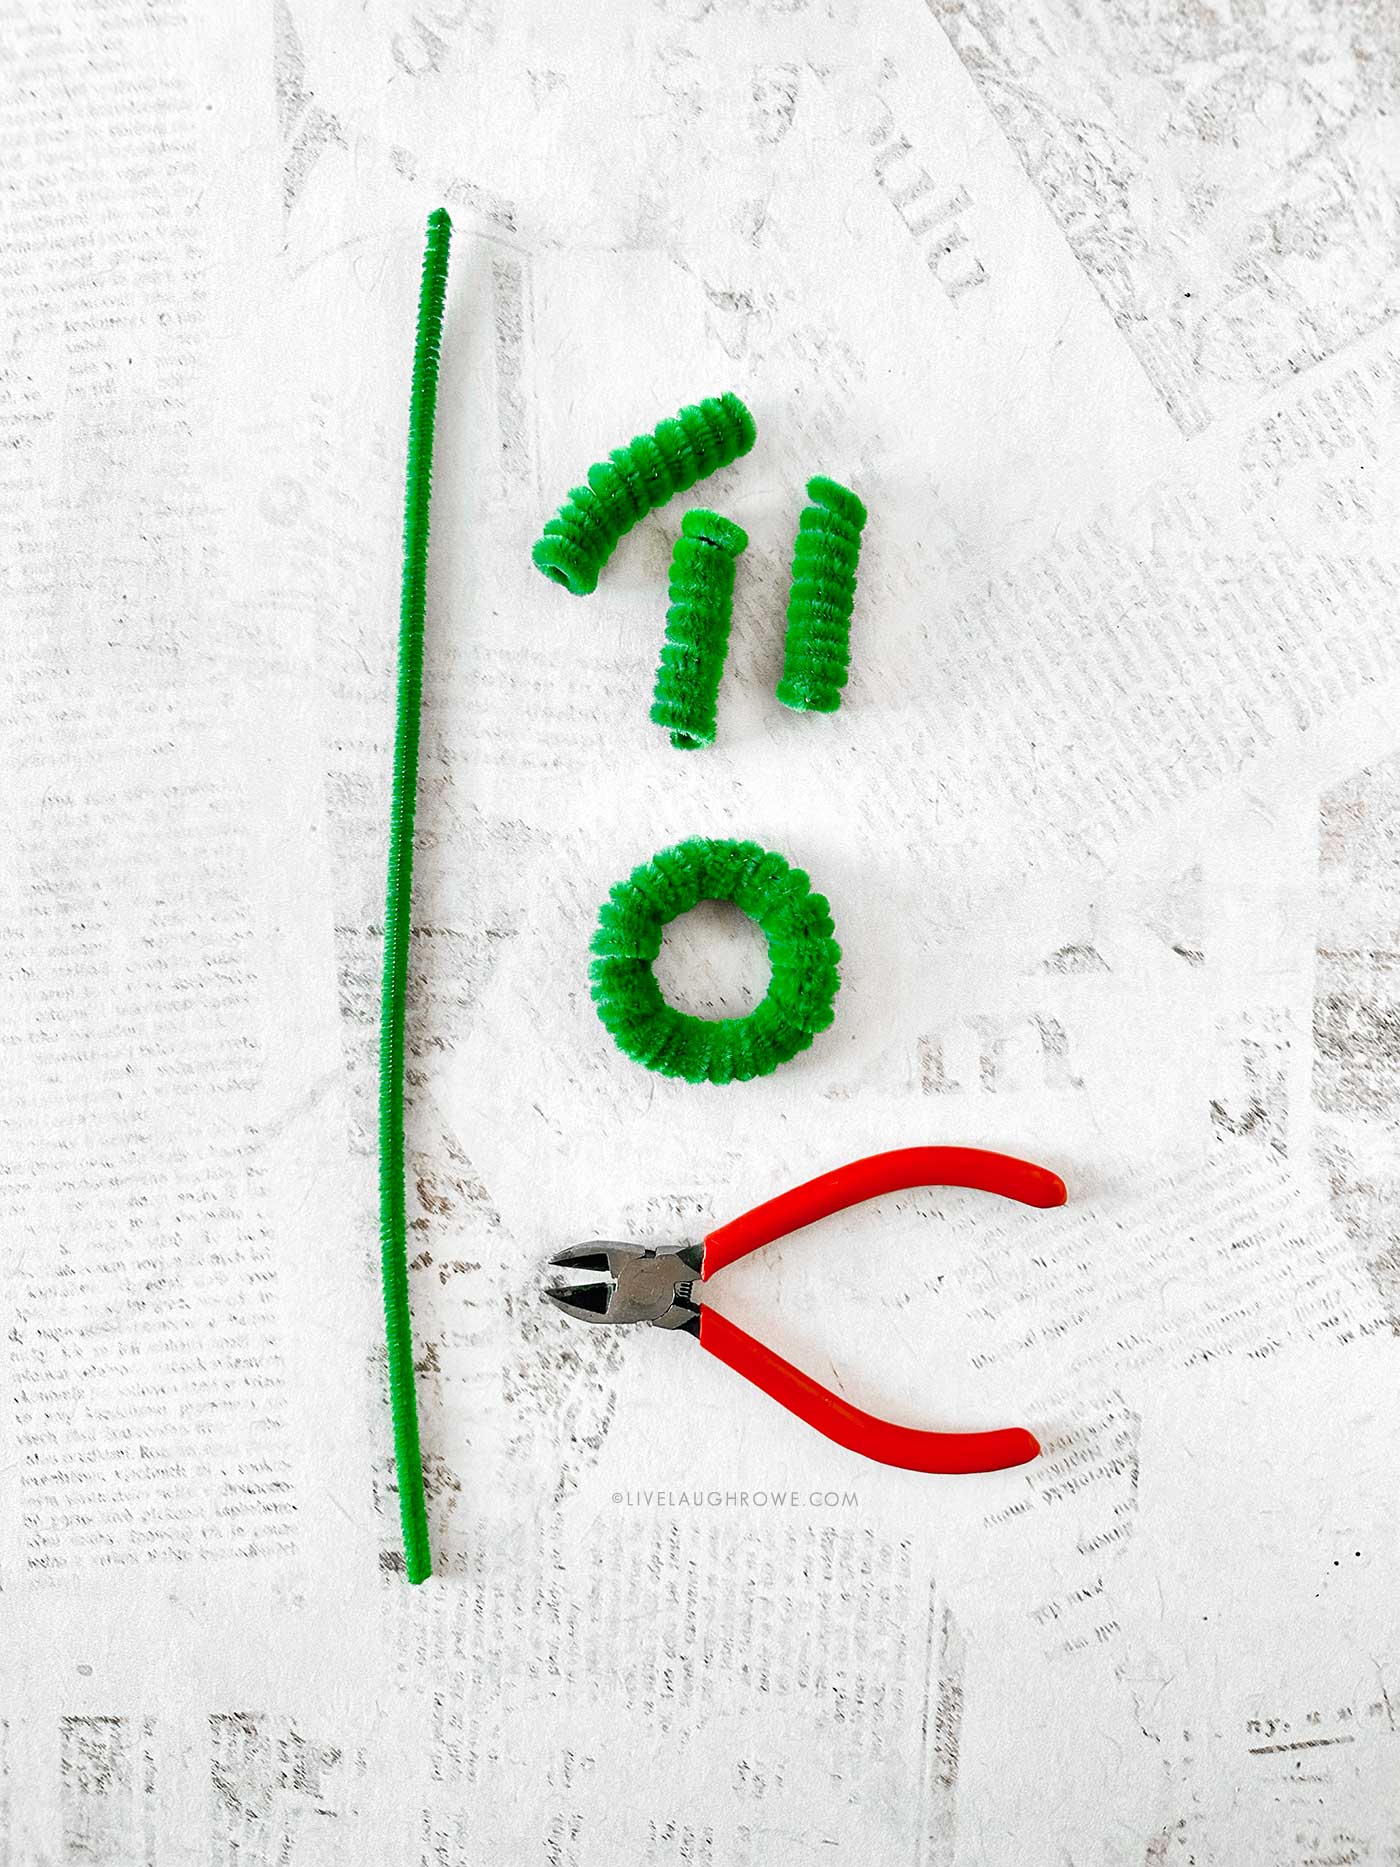
Step 3: Slide the Coils Onto a Base Pipe Cleaner
Use a pipe cleaner of the same color as your coil to create the base. This keeps the wreath looking uniform once the coils are added and the circle is shaped. Note: For small wreaths, you may want to cut the “support” pipe cleaner in half to have less waste.
Then, one by one, slide each coil onto the base stem:
- For the tiny wreath, slide on 2 coils.
- For the larger wreath, slide on 3 coils.
Push them together so the coils touch and look full.
This step instantly gives you that fluffy, plush texture.
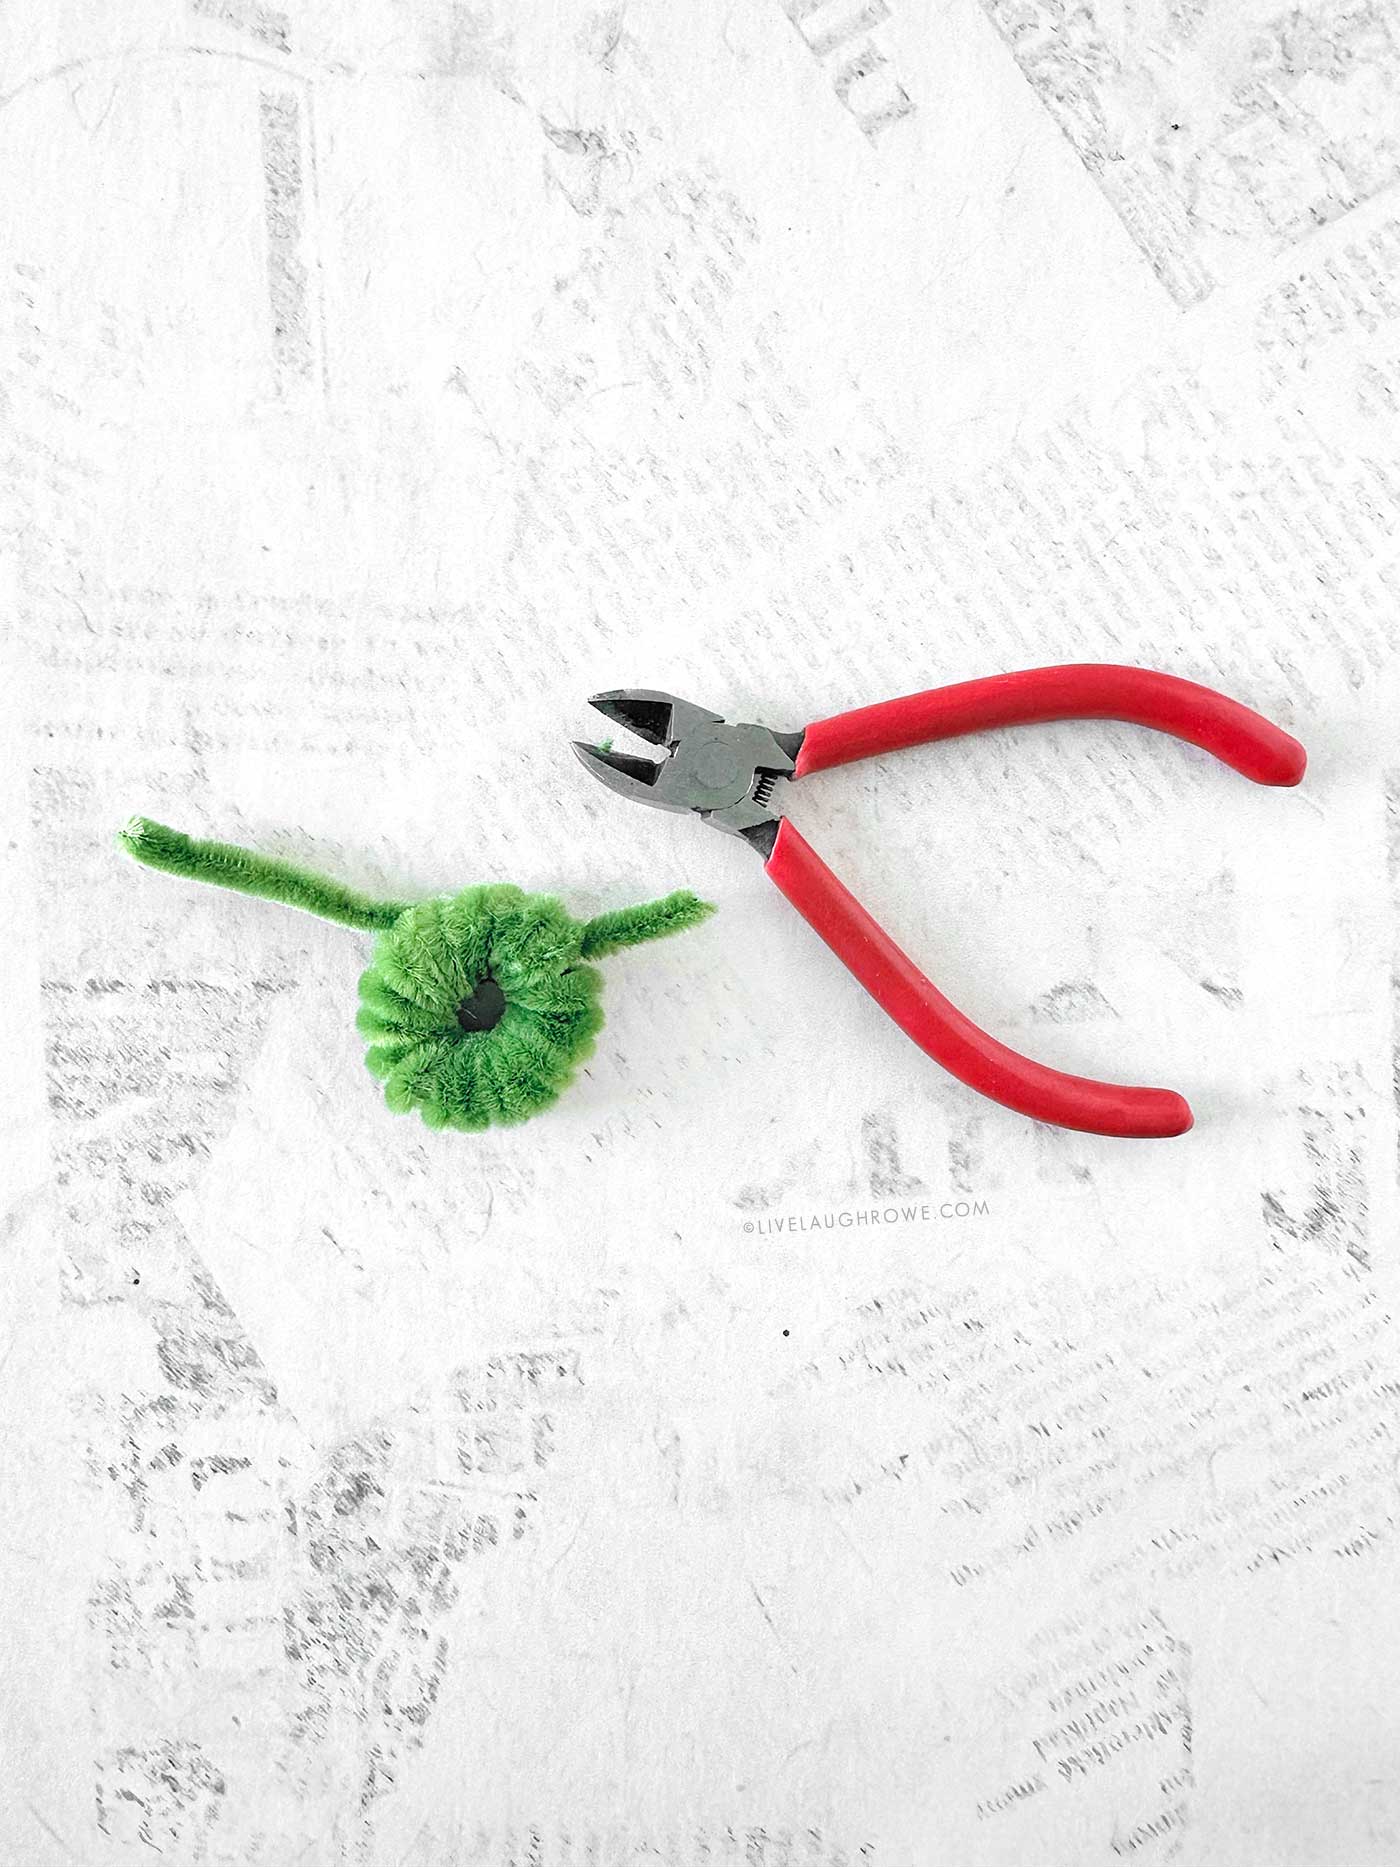
Step 4: Form the Wreath Shape
This is where the magic—and shape—happens.
Hold both ends of the base pipe cleaner and bring them together to form a circle. The coils will naturally bend with it.

The tighter you pull and twist the ends together:
- The smaller and more compact the wreath becomes
- The rounder and more structured it looks
- The stronger and more stable it stays
When the ends come together, twist them to secure the circle. If you want a tighter hold, you can also feed the ends back through a few of the coil loops before giving them a twist.
Trim excess pipe cleaner with wire cutters.
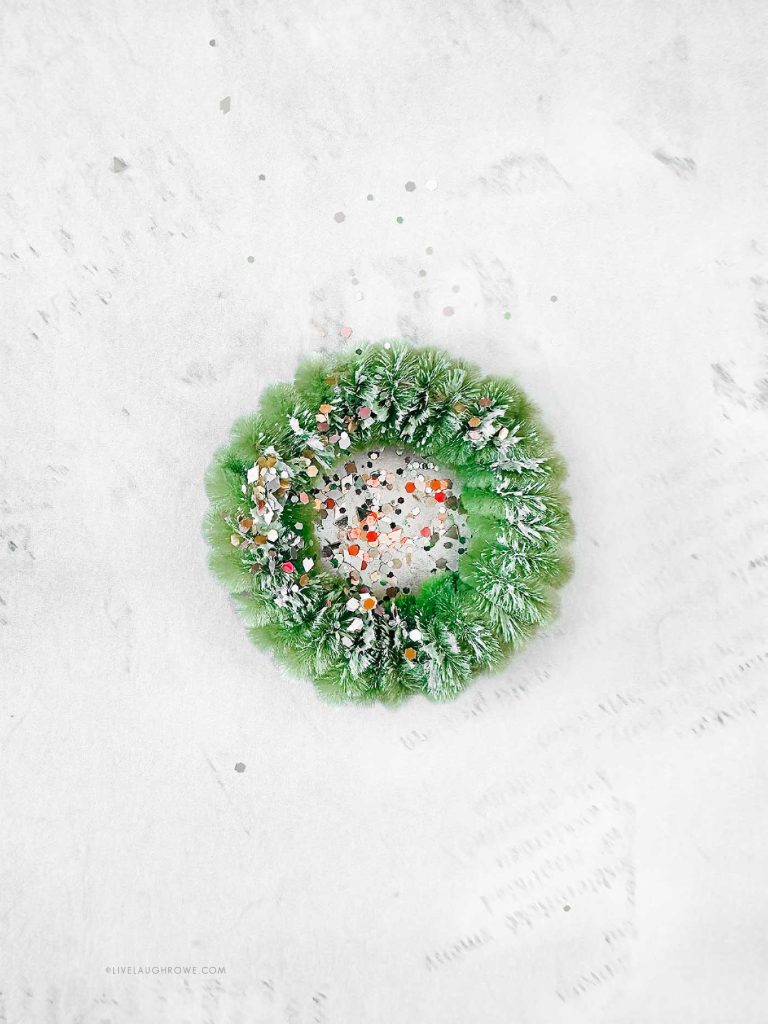
Step 5: Fluff and Perfect the Shape
Take a minute to fluff the fibers and nudge the coils into a smooth circle. You can pinch or gently tug the pipe cleaners until the wreath looks symmetrical.
This step only takes a few seconds, but it makes a big difference — especially if you want your mini wreaths to look polished and professional.
Now it’s time for the cutest part: the bow!
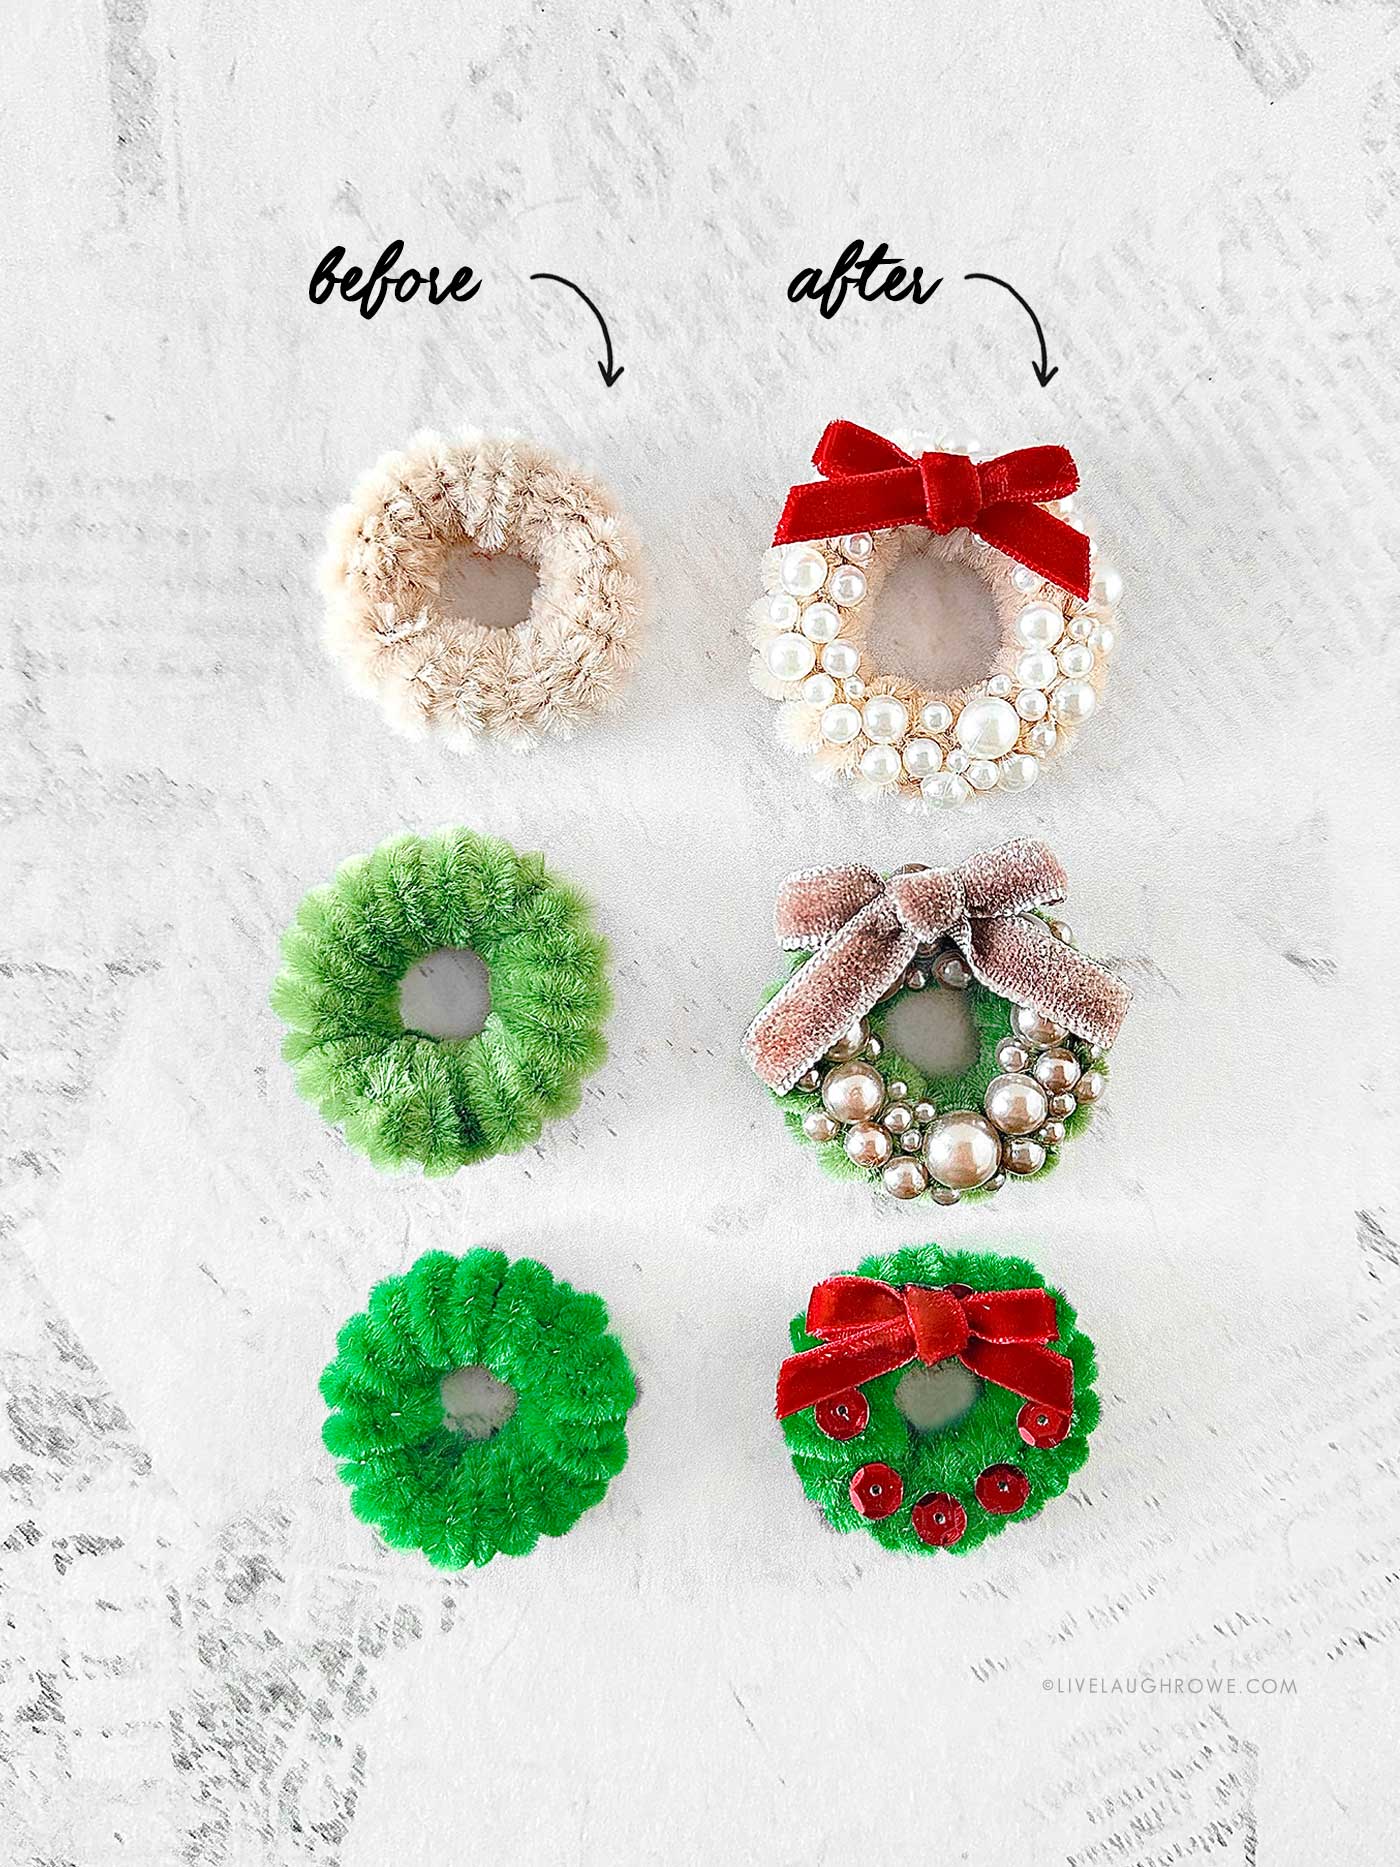
Step 7: Add Embellishments
Choose a mini bow (velvet is so charming) and glue it to the top or bottom of your wreath using a dot of hot glue.
Think:
- Red velvet bows for a classic Christmas look
- Neutral brown or cream bows for a rustic vibe
- Metallic bows for glam, sparkly wreaths
The bow instantly transforms the wreath into the sweetest little ornament.
This is where your creativity shines. Using your craft glue, attach small embellishments around the wreath:
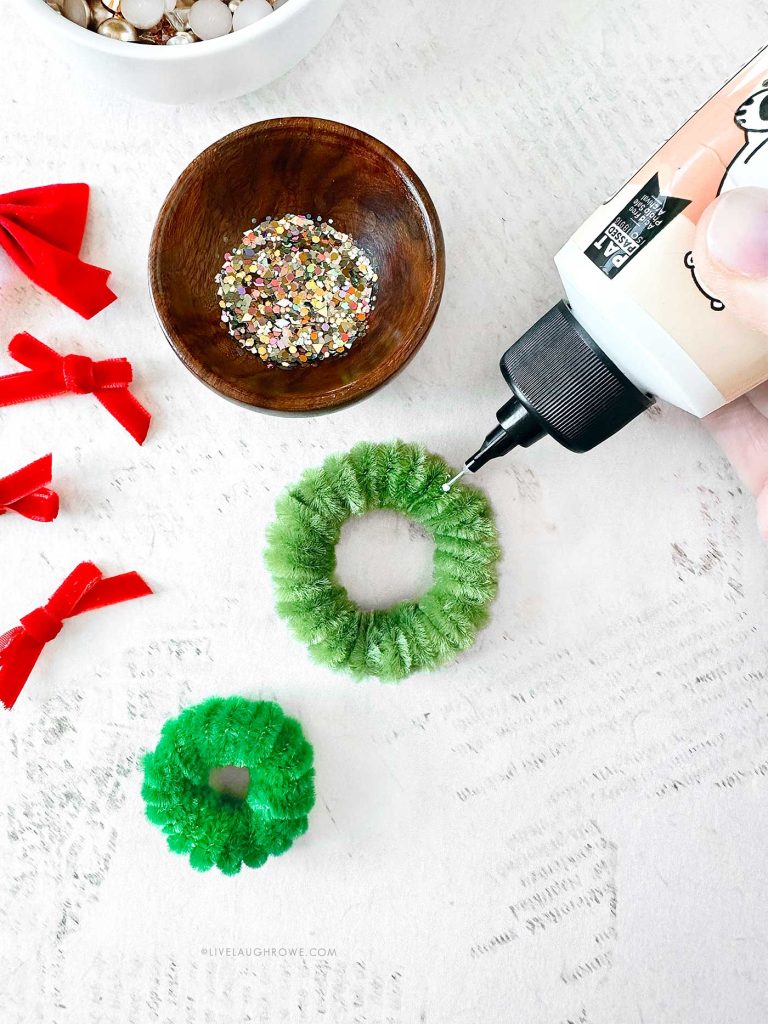
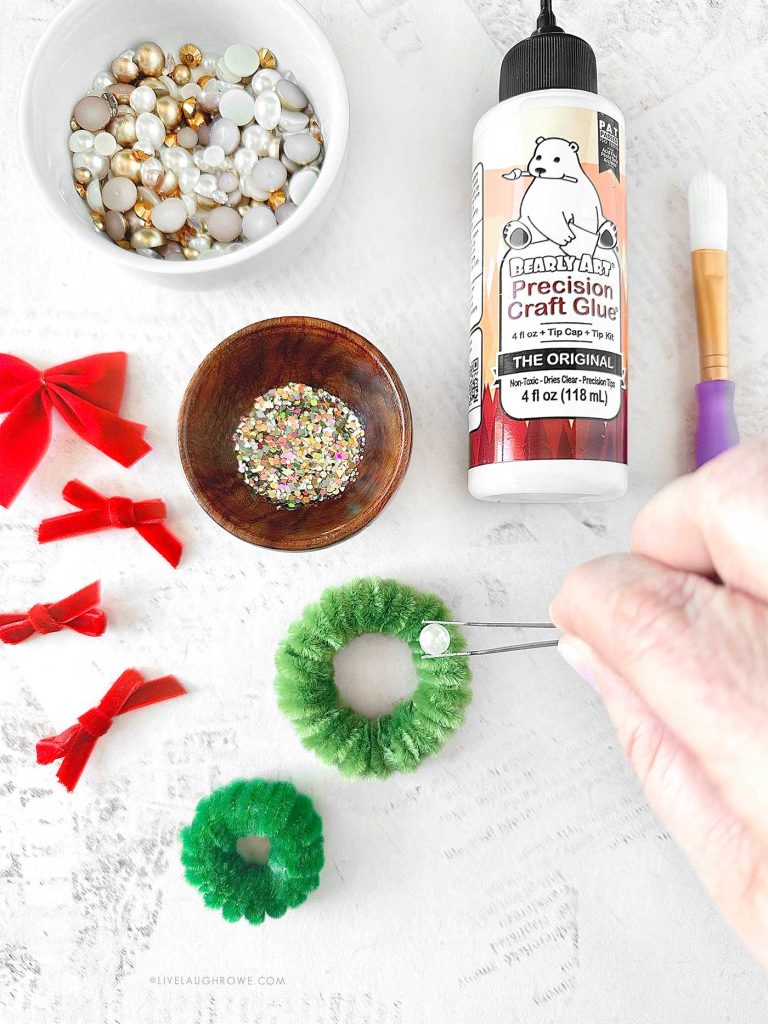
- Flatback pearls for a soft, elegant look
- Rhinestones for sparkle
- Sequins for a playful pop of color
- Little beads or chunky glitter for a touch of texture
- Mini bells for whimsy
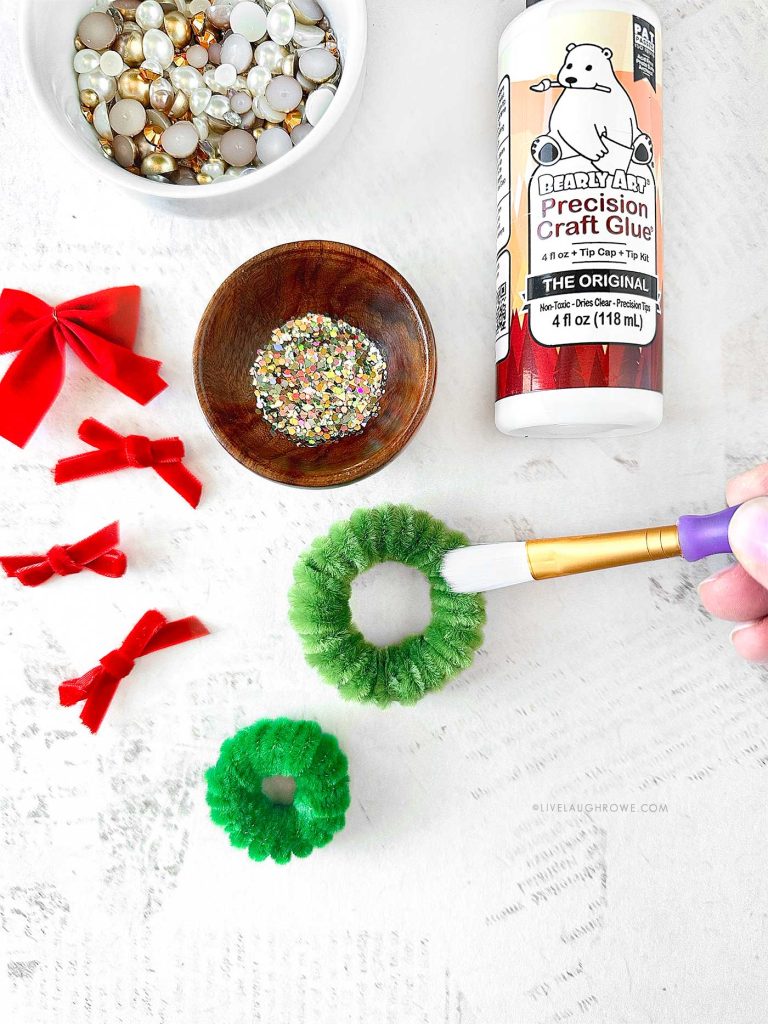
Cluster them together or space them evenly — there’s truly no wrong way to decorate these little cuties.
Step 7: Add a String or Hook for Hanging
If you’re planning to use your Pipe Cleaner Wreaths as ornaments (which I highly recommend!), now’s the perfect time to add a simple way to hang them. You can use ornament hooks, baker’s twine, ribbon, or even a little loop made from leftover pipe cleaner.
To do this, thread a small piece of string or ribbon through the top of your wreath — right behind the bow works perfectly. Tie a tiny knot to form a loop, making sure it’s secure but not bulky. If you prefer something more minimal, you can also slip a classic ornament hook through the coils.
Either option works beautifully and gives your little wreath a polished, ready-to-hang finish. Once the loop is in place, your sweet mini wreath is officially ready for the tree, a garland, a gift topper… or anywhere you want to add a cheerful touch of holiday charm.
These finished wreaths show three gorgeous styles:
- A classic green with red sequins and a satin bow
- A neutral cream wreath with iridescent beads
- A rich forest green wreath with a brown velvet bow
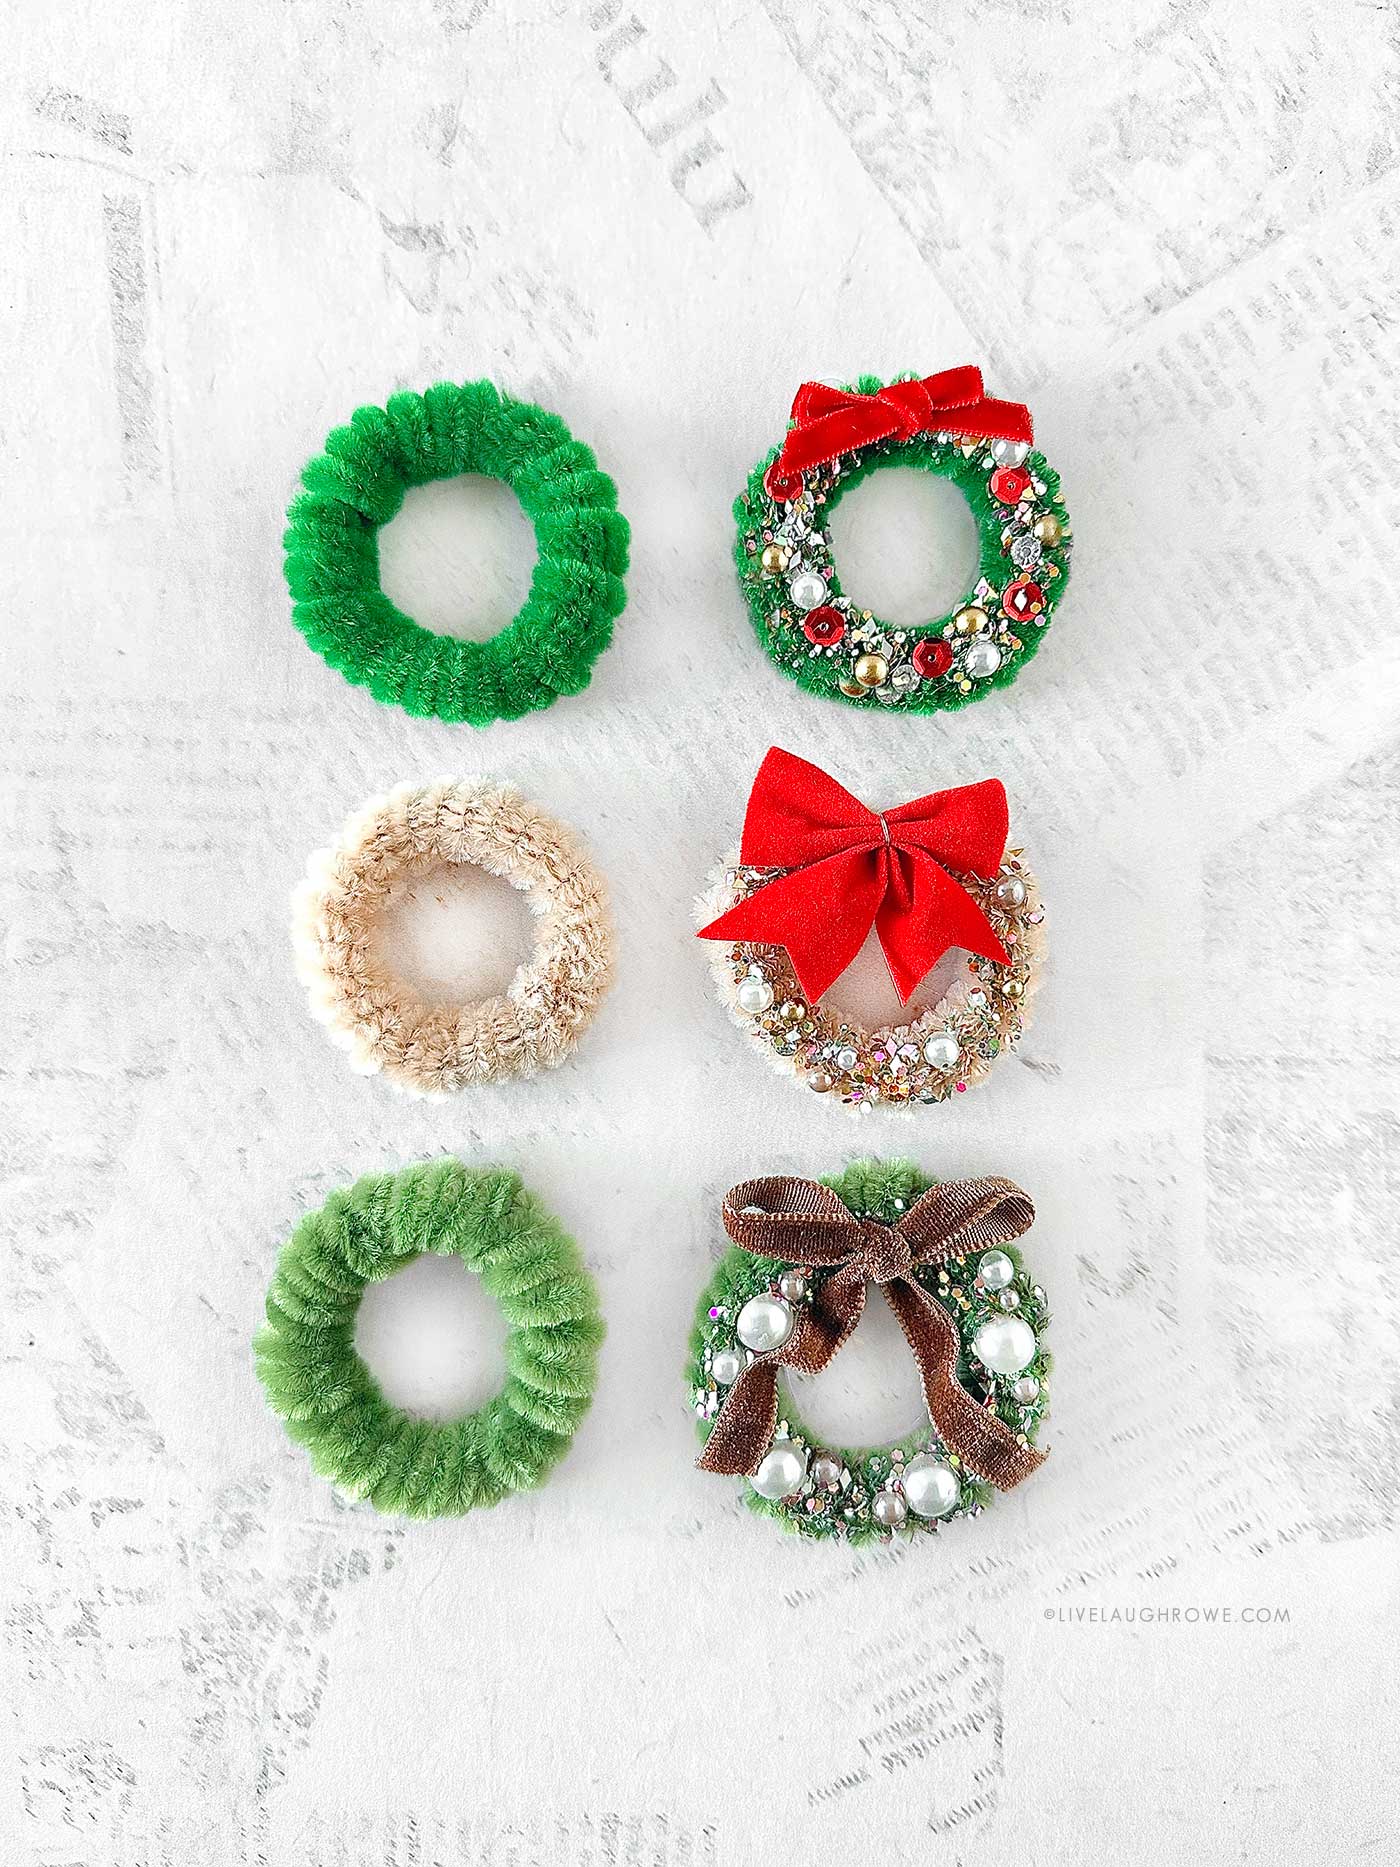
Each one feels distinct and festive, right? Absolutely adorable.
Two Wreath Sizes: A Quick Breakdown
Tiny Wreath (2 Coils)
- Sweet, small, perfect for gift toppers and mini décor
- Requires trimming the base pipe cleaner
- Holds its shape beautifully when twisted tightly
Larger Wreath (3 Coils)
- A little fuller and fluffier
- No trimming required
- Ideal for Christmas tree ornaments
Both sizes look darling — and mixing them creates the prettiest display.
Creative Ways to Use Your Pipe Cleaner Wreaths
These mini wreaths are endlessly versatile. Here are some of my favorite ways to use them:
1. Christmas Tree Ornaments. Simply add some string/twine or an ornament hook — done!
2. Gift Toppers. Attach one to a box or bag for an instant festive upgrade.
3. Table Decor. Use them as napkin rings or scatter them along your holiday table.
4. Mini Garland. String several together for a playful mantel or doorway garland.
5. Dollhouse Decorations. Tiny wreaths for tiny doors? Yes, please.
6. Wine Bottle Charms. Slide one over the neck of a bottle for a cute hostess gift detail.
7. Cards & Tags. Glue them onto handmade cards or gift tags for a dimensional touch.
Tips for Best Results
- Wrap your pencil coils tightly for the cleanest look.
- Twist the base pipe cleaner firmly to form a sturdy circle.
- Match bow size to wreath size — teeny bows for teeny wreaths!
- Group embellishments in odd numbers for a balanced design.
- Try different pipe cleaners — fluffy, metallic, or striped.
These little details help make your wreaths look polished and intentional.
Why This Project Just Feels Good
The holidays can bring so much joy… and so much hustle. It’s easy to feel like we’re juggling a million things at once. This craft gives you a moment to slow down — to wrap, twist, decorate, and just be. There’s something wonderfully calming about creating small, beautiful things with your hands.
Plus, when you’re finished, you don’t just have a cute craft — you have a tiny keepsake you’ll pull out year after year.
Simple. Sweet. Heartwarming.
Just the way the holidays should feel.

Wrapping Up Your Pipe Cleaner Wreath Craft
Whether you’re crafting with kids, hosting a girls’ night, or simply looking for something festive to make during a cozy afternoon at home, these Pipe Cleaner Wreaths are a total delight. They’re charming, budget-friendly, customizable, and easy enough for anyone to make.
Make one… or twenty. Create sets in different colors. Keep some neutral and dress the others up in sparkle. With two sizes and endless embellishment options, the possibilities are wide open — and that’s half the fun.
If you end up making these little wreaths, I’d love to see them! Tag me or send me a photo — it always makes my day to see your creativity come to life.


Kristi says
What a fabulous idea! Thank you for the how to and pictures! You’re so talented. 🥰
Kelly Rowe says
Thank you for your kind words, Kristi! I’m so glad you like them. Have a blessed day!